This tute just happens to be based around a Tobacco burst that I'm employing on my current build but the same principles can be applied to a two or three tone sunburst also.
First a bit of a preamble about the two main types of stains that are readily available and my observations of both.
I've used both water based and alcohol based stains over the years, and these can be purchased as an aniline powder from several different suppliers, there is also the "colortone" which comes in liquid form and can be used to perform the same as either (mixed with any medium). I don't strongly favour one over the other, they both have their strong points but the more I've done, the more I go for the liquid stain each time. The advantage I see in the liquid form over the powder based is that it can be mixed readily with alcohol to apply directly to the wood, added to the clear finish to provide a tinted finish or added directly to water. When added to water or alcohol it can be used pretty much immediately whereas the powder has to be mixed the day before with the liquid base, well stirred and left to sit overnight for the powder to fully dissolve. Also the strength of colour can be 'tinkered' with more readily, it only involves adding a few more drops and giving it a stir as opposed to adding more powder either seperately and adding to original stain or just to the existing stain, mixing well & letting it sit for a period of time once again.
Next is stain in the wood against mixing into in the clear coat or over the wood. If you have a plain looking timber such as Alder, Basswood or Poplar then stain in the finish is the way to go as it will go over the grain so that you are looking through the colour, thereby hiding some of that plain figure/grain. If you have a nicely figured bit of wood that you want the grain to be enhanced/shown off then stain in the wood is the best way to go.
You can use Alcohol based stains for this and apply to the wood if you intened on having the wood all one colour but for tobacco or two tone bursting I've never done it this way, as the Alcohol based stain seemed harder to merge/blend to that nice burst fade once its dried or even in it's wet form, the colours tend to get muddied. The one time I would use Alcohol stains direct onto wood with a burst, would be in the case of where I'm looking for a clear definition between the colours (such as a 3 colour Sunburst) and I would apply the stain through an airbrush or small spray gun (I know them as a door jamb gun). But having said that, as a general rule, if I have figured timber it would be water based all the way and I'd use the spray gun to get definition if it's required.
For stain into the wood and a nice progressive burst nothing beats water based in my opinion! This will be the method I hope to show you in this tute where there is a subtle change between colours as opposed to the more 'harder' defined line.
So to business
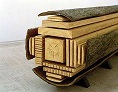
For the following Tobacco burst I will only need to use two colours, Tobacco Brown & Vintage Amber.
- Stains used.jpg (84.24 KiB) Viewed 123783 times
I want to grain enhance my water stained (
For anybody that isn't familiar with grain enhancement, what happens is that by applying an intial dark colour, the end grains (the thing that gives the wood it's figure) absorb more of the stain than the normal grain. By sanding back we are removing the stain from the 'normal' sections (where it hasn't absorbed as deeply) and leaving the darker stain in the end grain thereby 'showing up' or enhancing these grain features.
For the darker stains such as a blue or red topped instrument (can be other colours but these are the main two), the grain enhancement stain can be just straight black but for the tobacco burst, whilst I wanted to be able to see the quilt figure I didn't want it too dark and dominant, I only want to enhance it not make it the main feature!
So to apply the stain on this job I need rag, my scrap (to get my recipe right) and the mixed stain and Latex or Vinyl gloves. The stain is a shit of a stuff to remove from your skin, it ain't called stain for nothing!
- Materials.jpg (112.17 KiB) Viewed 123783 times
First we'll try a 2:1 mix of Amber against the Tobacco, twenty drops (the bottles come with a blank spout that you can cut the end off, I don't! I pierce the end with a 1.5mm drillbit to give me repeat results with all colours, one drop of one colour will be the same amount as one from another) of Amber and ten of Tobacco into about 100mls of warm water and with a clean rag I just simply wipe it onto my surface, no particular direction i.e you dont have to wipe with the grain, infact circular motions are better for blending & stopping from getting dark lines of stain forming on the surface. If you do get dark lines of stain on the surface you can counteract this easily but more on that later...
One application of the 2:1 mix
- 2 to 1 mix.jpg (85.16 KiB) Viewed 123783 times
Lets up the mix by adding another ten drops of the Tobacco to the brew so now we have a 1:1 ratio.
- 1 to 1 mix.jpg (109.77 KiB) Viewed 123783 times
The next step in the process is wait until this dries and then sand it all off back to 'bare' wood, for this I use some 240 grit, this will also sand off any of those grain hairs that have been raised by the water.
A bit of a note on the amount of stain (and water) we want to put on the surface of our nicely dried wood (especially if we are doing this to a thin, dry bit of spruce on an acoustic). We just want enough stain in our rag to be wet in the rag, we aren't looking at 'soaking' the wood's surface such that stain is running off it! A wet/soaked surface doesn't equate to more penetration or amount of stain in the wood. Plus you risk ruining your nicely dried and stable timber that you've tried so hard to keep at a stable RH level during the whole build.
Here we can see a side by side of what it, the stained surface (on the left), will look like under finish as opposed to the untreated grain (on the right).
- Wetted comparison coat 2.jpg (114.15 KiB) Viewed 123783 times
Because I've done two coats (one at 2:1 & another at 1:1) on my practice piece, If I applied one application on my top with my current mix it wouldn't come out dark enough and if I did two (as I've effectively done on my scrap), it would be too dark so I need to weaken this a bit.
I like to have a colour a little on the weak side so that I can come "up" to the final colour I'm after by doing more applications rather than applying just one coat and overdoing it! So I added another 25mls, not much but enough that I can do my top in more than one application. It's easier to bring it up to the colour you want rather than take it back to the colour (which would involve applying more water to our wood, which we want to keep to a minimum if we can!).
So I've applied 2 coats to the top, at this stage these need to be sometime apart otherwise you don't really add to the depth of colour, you are just moving the colour around on the top. You could apply one, let it dry completely, then another, I do it before the first is completely dry, this is just a personal method for working. The stain is applied using circular motions with the rag, this avoids getting streaks of darker stain and evens out the application.
- Body grain enhanced coats.jpg (146.61 KiB) Viewed 123783 times
This now should be left to dry completely which can vary depending on your environment, I personally, leave it overnight just "to be sure". Once you are happy that the previous applications have dried out fully it's time to sand off what you just spent time applying!
Using 240grit, I sand with the grain until it looks like I've removed all the stain from the surface of the wood. I want the Maple to look evenly white across the surface, here you can see a slightly darker patch (circled), this needs further sanding or it will mix with subsequent applications & I'll end up with an uneven colour in my Amber base coat.
- Body rubbed back- blotchy.jpg (115.44 KiB) Viewed 123783 times
- Body rubbed back.jpg (108.1 KiB) Viewed 123783 times
A quick note about the use of plastic bindings! If you scrape your bindings you will end up with a smooth surface that won't "take" any stain and any bleeding of stain onto the bindings can be easily removed by a light scraping or wiping with clean water afterwards. If you've sanded the bindings, you've introduced numerous scratches that stain just loves to sit in and so you have to scrape a fair bit of binding to remove the stain lines ( I found this little tip out the hard way when I first started using stain!
I've mixed up a batch that is about 25 drops to a 100mls of water, this can be tweaked to suit (as I did) and while the application is still wet it gives you a good indication of what it will look like under finish so you can adjust as you go if need be. I apply one coat by usuing a new piece of rag and again a circular motion, blending in any streaks or dark lines as I go, what we are after is an eveness of colour. It wasn't quite the depth of colour I wanted so I added another 10 drops to the brew and let the first application partially dry off. This only takes a matter of minutes for the surface to appear 'dry'. This is a good gauge of how wet you are getting the surface, if it takes an age then you are applying too much stain & therefore water!
Another application and I have the look I'm after
- Vintage Amber 2 coats.jpg (143.24 KiB) Viewed 123783 times
The first three applications of my tobacco I used the tobacco/amber mix previously used at the grain enhancing stage, this gives me a colour that is slightly darker than than the vintage amber but blends in well with it where I want the 'fade' or blend to start, in otherwords it's not too much of a contrast, I want that further out near the edge!
First application and I take it toward the centre leaving the traditional 'patch' of amber in the centre. This first application I'll take it in to about 2/3rds the width of the top. It's a very subtle application but will help with the transition from the Amber to Tobacco, don't be tempted to overdo the application at this stage! we can play around with it further down the line if we want
- Tobacco brown first coat.jpg (131.39 KiB) Viewed 123783 times
- Tobacco brown build second application.jpg (155.39 KiB) Viewed 123783 times
- Tobacco brown build third application.jpg (141.7 KiB) Viewed 123783 times
Time to let all this dry out again and mix up some 'pure' tobacco for the edge. I mixed up a batch similar to the Amber i.e 25 drops to 100mls of water, I can always add to it if it's too weak or dilute it if it's too strong.
Ok, with my now dry body (
First coat applied using a straight wipe this time as we want to focuss on getting the right width of dark around the edge, this will leave a hard line as you can see, but this will be blended in in the next step.
- First perimeter tobacco coat.jpg (128.35 KiB) Viewed 123783 times
The rag I use for the clean water I will rinse out if I used it in the previous applications so it's clean once again and squeeze it out so it's not too wet then using a small circular motion, I'll rub around the line between my tobacco/amber and pure tobacco applications. Blending in the darker edge in with the not so darker tobacco/amber mix. Don't let the rag get too dry during this stage we want it about as wet as if we are applying stain otherwise the blending doesn't work out so well.
Keep going until you are happy with the merge, again it's a personal preference.
- Tobacco line blend.jpg (132.62 KiB) Viewed 123783 times
- Darn near complete.jpg (142.84 KiB) Viewed 123783 times
Ok, I forgot to mention that because I'm using a maple headstock I burst this at the same time in order to get things all looking the same.
- What you do to the body you do to the headstock!.jpg (132.67 KiB) Viewed 123783 times
Now we to move onto the back & sides. First I need to pore fill, for this I use a neutral water based pore filler. For this job I will be colouring the filler once it's on the wood and sanded ready for staining, there is nothing to stop you adding stain to the filler prior to filling though, should you want to.
For the pore fill I will be using the "colortone" water based filler but from everything I've researched about it, it is identical to locally (Australian) made "Timbermate" wood filler (I'm even wondering if Stewmac get it from Timbermate's manufacturers and sell it under their own colortone label?).
Anywho, which ever brand you use, it will need thinning with approx 10% water to get it to the consistency of bottled cream (not whipped!)
- pore filler.jpg (93.12 KiB) Viewed 123783 times
- in the white.jpg (108.16 KiB) Viewed 123783 times
I want a nice dark tobacco colour for this so I up the ratio of my Tobacco stain by adding another 25 drops to the mix.
Even though,as I said, it's easy to remove stain from plastic bindings I'm all for making life a little easy for myself & still mask the bindings just to reduce the amount of cleaning up I'll need to carry out. I usually like to use 3M's 471 blue vinyl tape on the bindings. This comes in several different widths starting at 1/8th and goes up from there. It's flexible enough to wrap around the tightest of bends and adheres well to the binding, it'll even stick to the curves on the front face too.

But for this one I got hold of some 218 fineline Vinyl tape that I thought I would try, according to the shop where I got it, it's supposedly the same stuff all bar the colour. Plus you got twice as much on a roll.
- New Tape.jpg (124.25 KiB) Viewed 123783 times
- Bindings masked.jpg (135.7 KiB) Viewed 123783 times
- First two coats.jpg (141.22 KiB) Viewed 123783 times
- Colour Match.jpg (119.2 KiB) Viewed 123783 times
There were a couple of problems I ran into, but they both highlight the ease of using water based stain! One was that after it had all dried off & I'd removed the masking tape, I noticed a small area on the neck that I'd missed
- Missed colour.jpg (58.59 KiB) Viewed 123783 times
- Binding bleed.jpg (77.96 KiB) Viewed 123783 times
- Binding cleaned.jpg (68.83 KiB) Viewed 123783 times
That is pretty much it for the staining now except I felt, even though the binding is already a creamy colour, against the darkness of the brown it showed up as being quite stark and almost white. I decanted a small amount of my Vintage Amber and mixed more water with it so that I ended up with a really weak mix and whiped the bindings with that, just to 'age' it up a bit and take some of the whiteness out of it.
- Binding Tinted.jpg (70.45 KiB) Viewed 123783 times
- PrePaint.jpg (104.81 KiB) Viewed 123783 times
- PrePaint 2.jpg (117.84 KiB) Viewed 123783 times
- PrePaint 3.jpg (130.48 KiB) Viewed 123783 times
Hope somebody gets something useful out of this tute