its hard enough to add binding to archtop instrument.. how can I carve a binding channel on the upper horn
I looked everywhere I can find information about it, do you have any tricks that u want to share/pics...
HOW DO YOU DO THAT?
Thanks
F5/Kentucky Madolin binding???
F5/Kentucky Madolin binding???
- Attachments
-
- TopScroll1.jpg (71.32 KiB) Viewed 6930 times
Ruben Garcia, Miami Florida US

Re: F5/Kentucky Madolin binding???
Ruben, this link may help: http://dudenbostel.leanside.com/6.html
Martin
Re: F5/Kentucky Madolin binding???
Thank you Martin I think, that is the only one on the web showing that Tricky process!
Ruben Garcia, Miami Florida US

Re: F5/Kentucky Madolin binding???
There a few different ways to do this, depending of the order of building steps, among other things. I assume that Kentucky top in your picture is straight from their CNC machine, the Dudenbostel link shows how he used to do it (I believe ha also has a CNC now), which is probably closer to how Gibson did it back in the day. I learned how to build from Siminoff's book, so I attach the neck to the body before binding, and cut most of the scroll binding channel by hand.
Here's an excerpt from a thread I did over on TLC forum, showing the binding steps
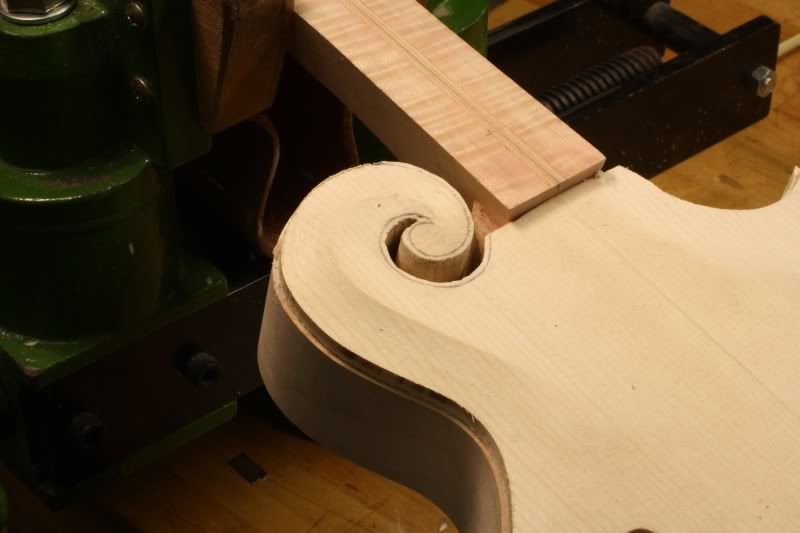
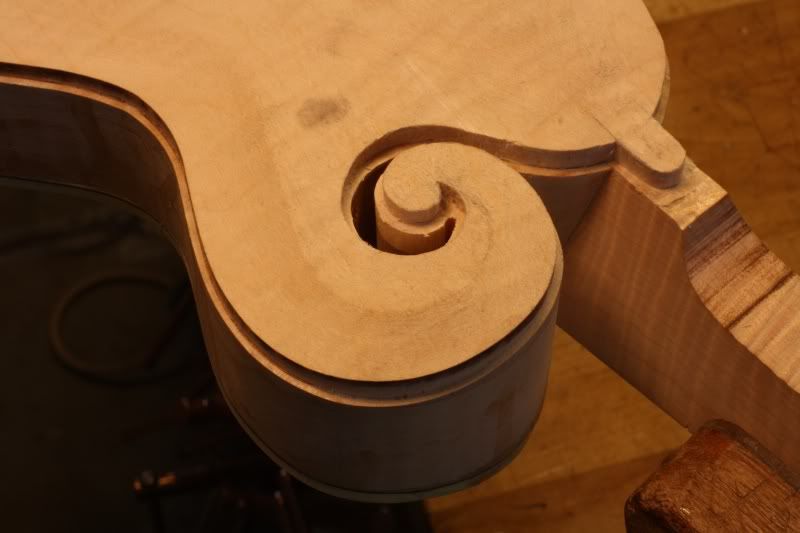
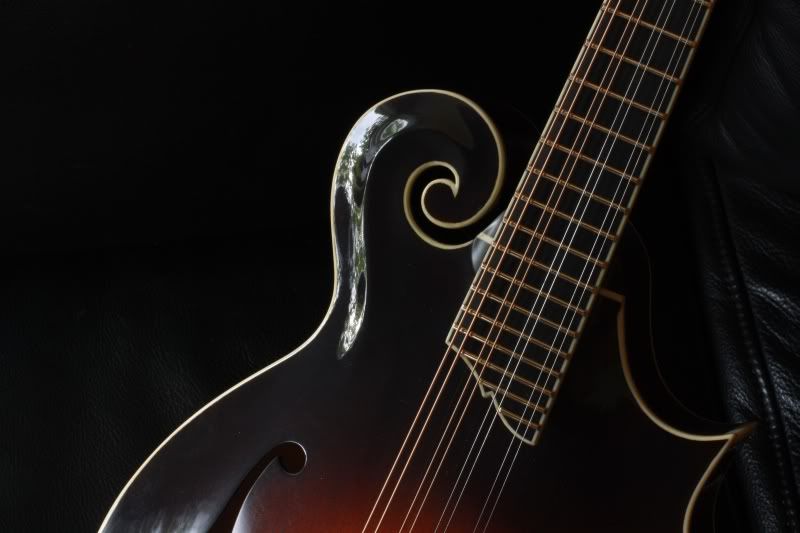
The inside of the scroll, or the parts of the plates that overhang the rim in this area, are trimmed after the box is closed. I do this step with a coping saw, files, pieces of curved, flexible aluminum sheet with stick-on sandpaper etc, and it does take time (better put on some relaxing music and grab a cuppa...). If there’s a faster way, short of cnc, I’d love to hear about it! I also keep some extra wood on top of the scroll, so I can do the shaping of the ridge and sloping areas between it and the rim, after the perimeter is defined. The final shaping of the scroll (and recurve areas in general) is done after the binding is on. I will also string it up in white, and adjust things if I think it is needed, as the last step before finishing; more about that later.
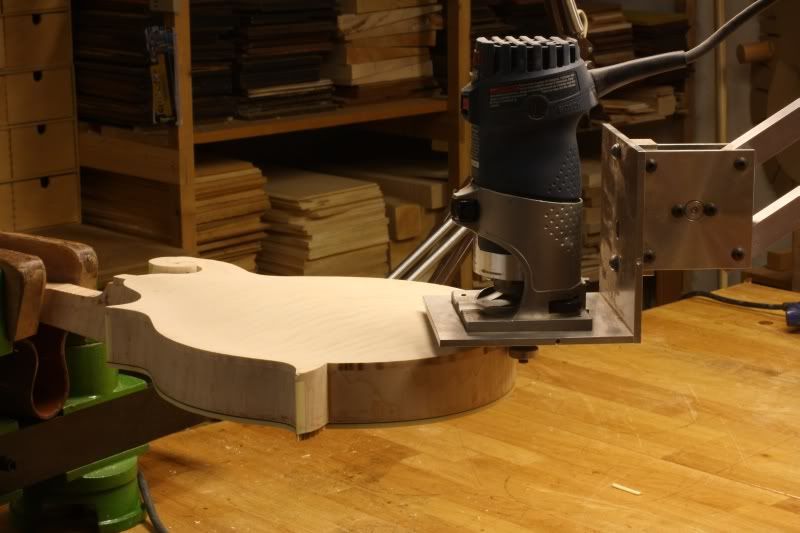
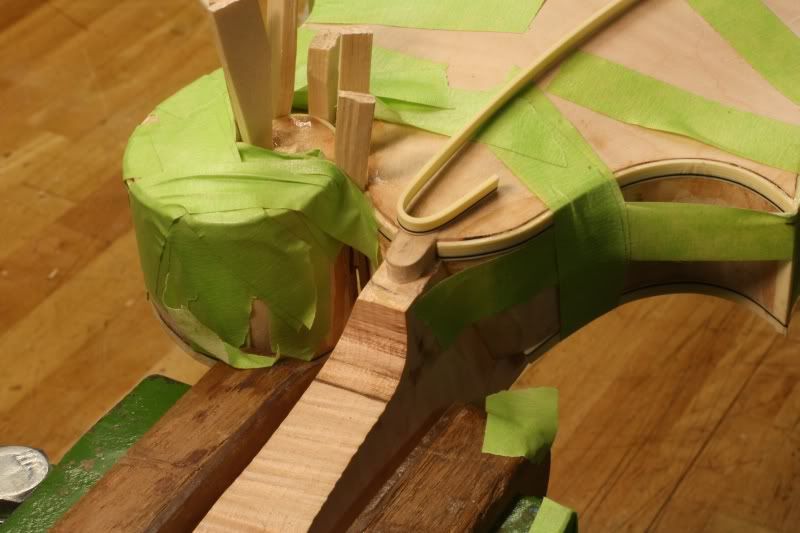
Here's a picture after most of the binding ledge has been cut. As you can see, most of the scroll has to be done by hand, and I have penciled in where to cut.
Getting there...
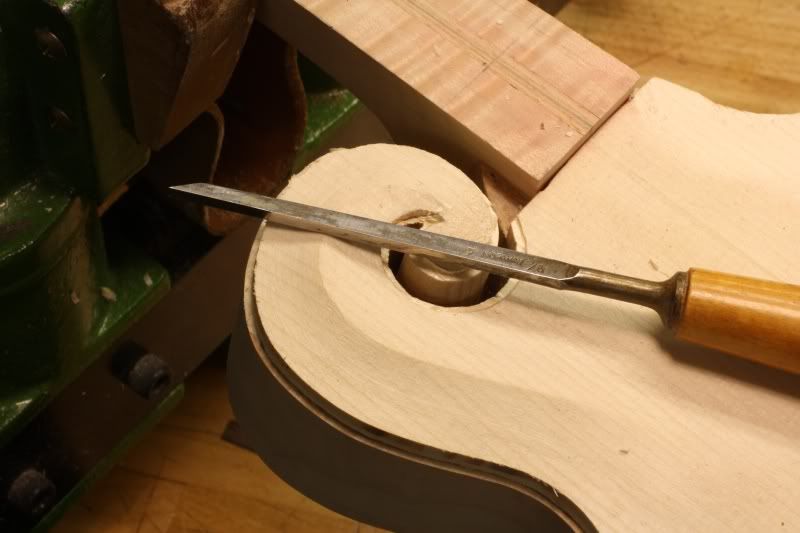
Finished binding ledge
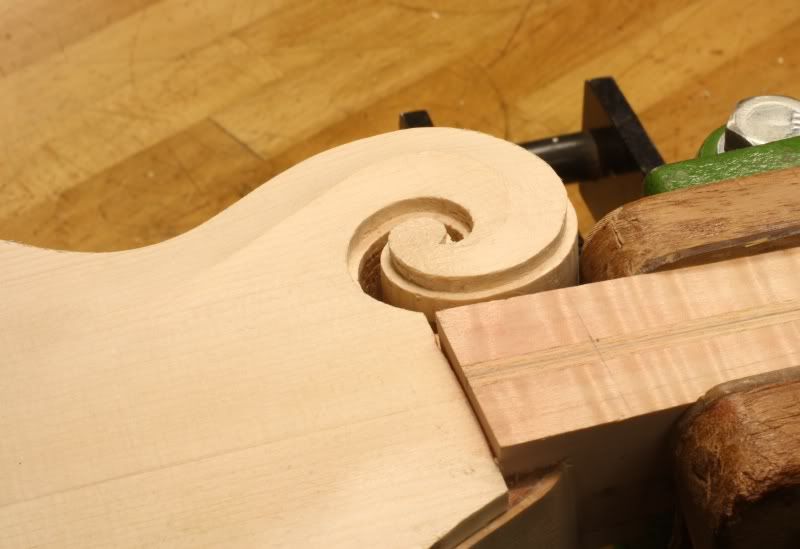
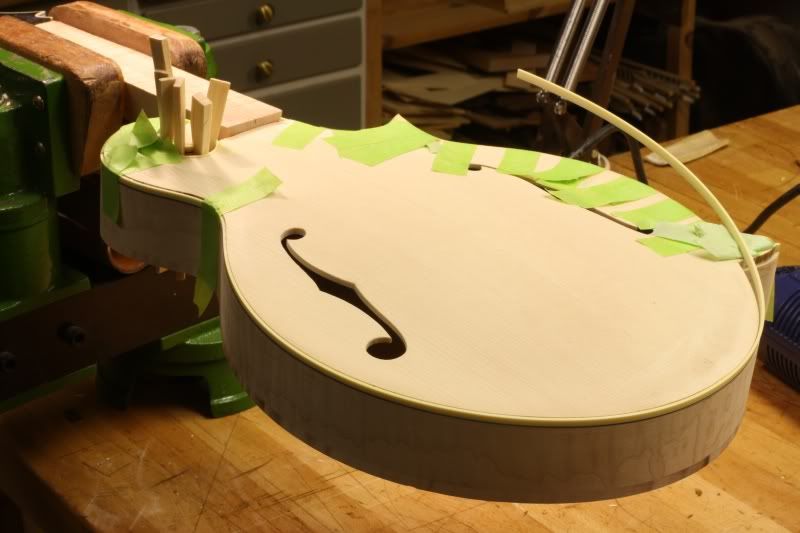
The celluloid binding is glued in with Duco, which welds the joints, if I do a good job of neat cutting. The inside parts of the scroll have to be wedged in place...
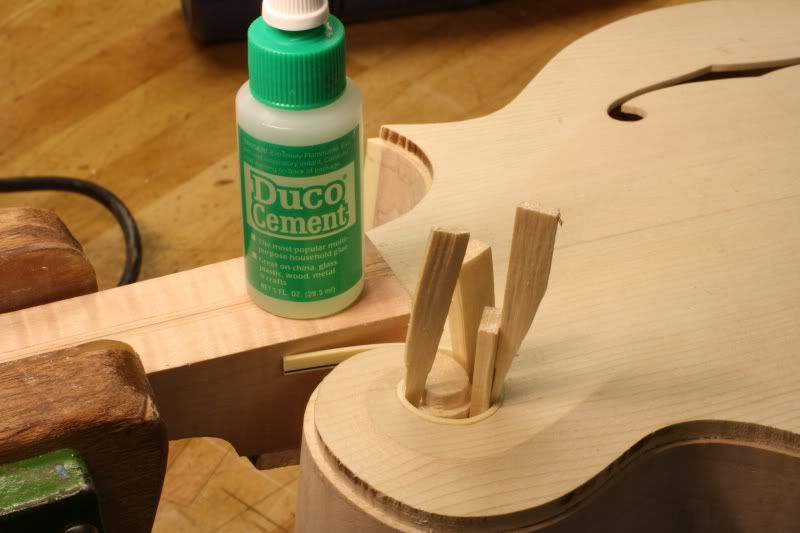
...but the rest of the body can be done more or less as usual, with tape etc. The binding ledge is exactly the same height as the plates, except in the scroll area.
The back. Routing most of the binding ledge here the same way as the front...
..but, there’s even more chisel work. Maple is easier to carve precisely than spruce, though, so its not that tedious (everything is relative, of course...)
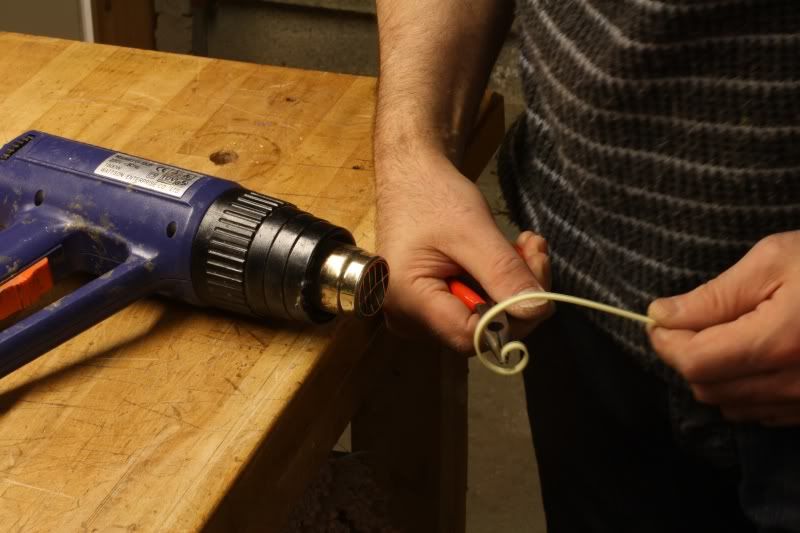
The celluiloid bindings are easily bent with some hot air and a pair of pliers. I’d hate to have to do this with ebony!
Binding the heel button is somewhat tricky, as its not that easy to hold it in place once the glue is appiled. Thankfully, the celluloid becomes rather soft and sticky from the Duco, so it doesn’t take much force to convince it stay put.
Back
Front
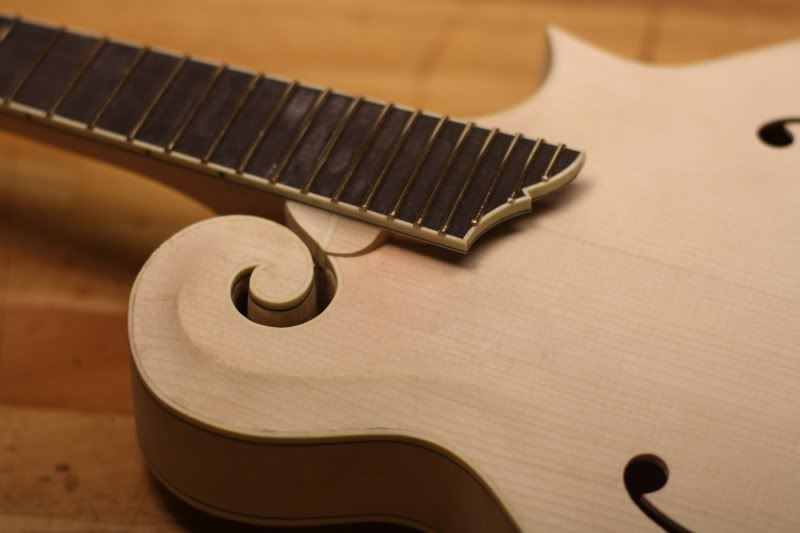
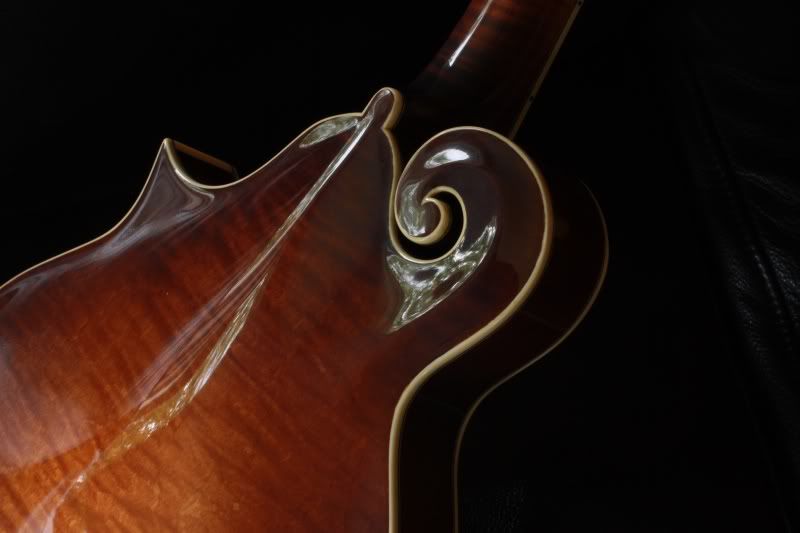
Scroll, front
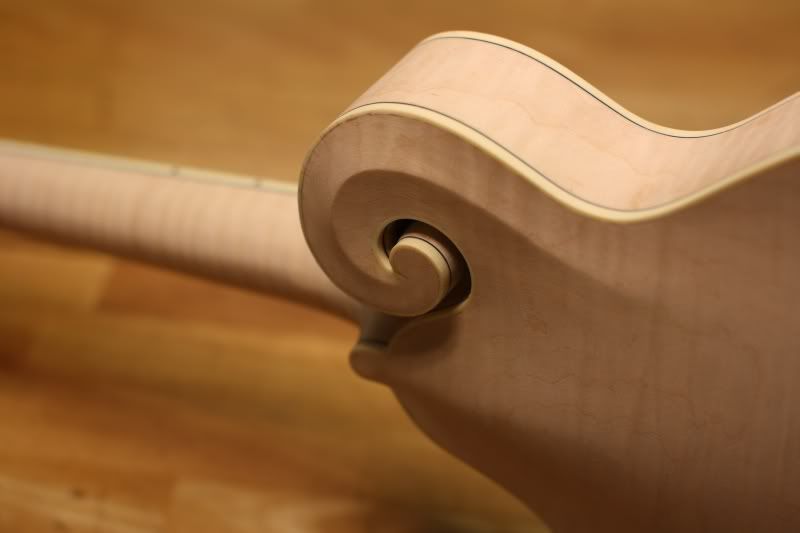
Scroll, back
Here's an excerpt from a thread I did over on TLC forum, showing the binding steps
The inside of the scroll, or the parts of the plates that overhang the rim in this area, are trimmed after the box is closed. I do this step with a coping saw, files, pieces of curved, flexible aluminum sheet with stick-on sandpaper etc, and it does take time (better put on some relaxing music and grab a cuppa...). If there’s a faster way, short of cnc, I’d love to hear about it! I also keep some extra wood on top of the scroll, so I can do the shaping of the ridge and sloping areas between it and the rim, after the perimeter is defined. The final shaping of the scroll (and recurve areas in general) is done after the binding is on. I will also string it up in white, and adjust things if I think it is needed, as the last step before finishing; more about that later.
Here's a picture after most of the binding ledge has been cut. As you can see, most of the scroll has to be done by hand, and I have penciled in where to cut.
Getting there...
Finished binding ledge
The celluloid binding is glued in with Duco, which welds the joints, if I do a good job of neat cutting. The inside parts of the scroll have to be wedged in place...
...but the rest of the body can be done more or less as usual, with tape etc. The binding ledge is exactly the same height as the plates, except in the scroll area.
The back. Routing most of the binding ledge here the same way as the front...
..but, there’s even more chisel work. Maple is easier to carve precisely than spruce, though, so its not that tedious (everything is relative, of course...)
The celluiloid bindings are easily bent with some hot air and a pair of pliers. I’d hate to have to do this with ebony!
Binding the heel button is somewhat tricky, as its not that easy to hold it in place once the glue is appiled. Thankfully, the celluloid becomes rather soft and sticky from the Duco, so it doesn’t take much force to convince it stay put.
Back
Front
Scroll, front
Scroll, back
Arnt Rian,
Norway
Norway
Who is online
Users browsing this forum: Andos and 70 guests