Bob has asked me advice on my 12 string pin and string spacing as he about to set two of his as "6 pinners".
He suggested I do a tutorial ,so that all interested folk can hopefully benefit.
This tute. will include string & pin spacing , pin hole slotting ,plus some tips on stringing up.
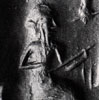
It's not a new idea. Here is a pic. of a Holzapfel , built in 1905

Both Howard Klepper and Dave White have used this method as well. Thanks goes to them both.
Stringing up may , at first glance, appear a bit tricky, but you soon get onto it , although some may find it difficult. I can now restring quite fast. I've found a couple of tips , I'll explain later.
The advantages are 6 less holes through the bridge and plate. The bridge need not be as big as a 12 pin bridge , so less weight. Less 6 pins - more weight saved !. I did , however, make mine (8mm. thick ), a little larger footprint than a six string guitar, to gain a little more glueing area.
Another advantage is that it is uncluttered. Often as not,12 pin bridges have strings nudging nieghbouring pins. These pins are often difficult to remove because of their close proximity to each other. It's a little congested . The shared pin method also allows you to customise the little gap between the octave/unisons , where as the 12 pin method dictates otherwise.
I used StewMac's oversize Ebony unslotted Ebony pins which are .235" ( 5.97mm.) diameter at their collar.
My method of string and pin spacing are my own. Some may find an easier way, or by using their computer. There are probably string spacing guages that may do the job as well. I customised mine to what I think works well , and simply used pencil and paper ! Others may prefer different gaps/spacing.
First , you must establish what string width you want at the saddle. Because my neck is 1 15/16 " at the nut(alittle more wiggl room for fingerstyle ), my saddle string width is 2 3/8 " ( 60.33 mm. ). Yours may differ , but the method remains the same.
I'll use metric from here on in :
First , make yourself A VERY SHARP PENCIL !!! thus :

On a sheet of paper, draw two parallel lines to represent the saddle string width Thus ;

NO. 1, Add up all the string widths (diameters ) in the set you are going to use. I use D'Addario lights , which take up an equivalent area of 6.39 mm. all up.
NO. 2, You must decide what CLEAR gap you want between octave/unison pairs. Thicker strings require more clearance , so I graduated these CLEAR gaps thus ;
E = 3 mm.
A = 2.8 mm.
D = 2.7 mm.
G = 2.6 mm.
B = 2.5 mm.
e = 2.4 mm.
This totals 16 mm. of CLEAR gap all up.
A neck of narrower diminsions than my own may require closing these gaps a little. Some may opt for different gaps . It's up to you . I didn't want too much string rattle. Low " E " needs a good bit !
NO. 3. Add up the total string widths and total gap widths. In my case ; 6.39 mm. plus 16 mm.
This gives me 22.39 mm. of RESERVED width.
NO.4 Subtract that figure from your original completestring width at the saddle. In my case 60.33 mm. ( 2 3/8 " ). This gives me a VACANT area on the saddle of 39.94 mm.
NO. 5. Divide that VACANT area ( 39.94 mm. ) by five, which will give you the CLEAR. equal space between string courses. In my case ; 7.588 mm.
NO. 6. Now we have the figures !
AGAIN, SHARPEN YOUR PENCIL !

Starting at the left line of your drawing, ( the bass side ) draw a line ( I'll use my figures ) of 4.88 mm. from the left line. This 4.88 mm. includes the width of the 2 E strings plus their CLEAR 3. mm. gap. I realise it's impossible to draw a line to that exact measurement.
NO. 7. For the next line ( the A strings ) , Add the 4.88 mm. plus the course spacing of 7.588 mm. , which equals 12.468 mm.
Measure that distance from the very left line ( now our reference line ). and draw a line , as close as you can ,to that distance.
NO. 8. Add a further 4.25 mm. ( width of both ' A ' strings plus their CLEAR gap) to the 12.468 mm.. this equals 16.718 mm.. Draw a line of that measurement ( or as near as you can ) . This will now show the extremities of both the 'E' and 'A' courses.
NO.9. Continue this through all the courses. The string set package figures are handy here, to add up each individual string width.
TAKE ALL MEASUREMENTS FROM THE VERY LEFT LINE !
When finished , your drawing will have equal spacing between courses and will looksomething like this ;

Excuse the pics. My camera makes the lines look a tad bent !
It wuld be impossible to draw your lines to the exact decimal points ,BUT, for CALCULATION PURPOSES , it is important you should use all decimals , so that you end up with equal spacing . Drawing lines as close as you are able will suffice.
We can now use this drawing to transfer the bridge pin spacing.
AGAIN SHARPEN YOU PENCIL !!

Measure and mark with a tiny dot , the centre of eachcourse. You can now transfer tose dots to yourbridge , by pricking the dots through with a sharp pricker or scribe. Line up centre lines of the drawing with your centre line on your bridge. In my case , I pricked through to a piece of scrapwood I used as a drilling template to drill the bridge pin holes.
Rather than have all pins in line , you can easily have a curved line for your holes by drawing the centre dots on your drawing in their respective curved position, as I did on mine.

Again these line may appear to curve because of the camera shot.
NEXT ; SLOTTING THE BRIDGE PIN HOLES.