
Hey,
I'm making laminated sides for my archtop. I have two bookmatched curly maple sides that were too thin by themselves so I have added orphan rosewood inside with black veneer between. Plus I want to add a sound port so it will strengthen the side there.
I remember Bob showing us some of his laminated sides and he was pondering whether you could bend pre-glued sides. There were some concerns with heating the glue too much and weakening it.
Bob or anyone else tried this yet?
I was thinking of fish glue because it has a long open time so would be easy to apply and put the side together and get it into the bender with heaps of time. What do you think?
Dom
Laminated sides
Laminated sides
You can bomb the world to pieces,
but you can't bomb the world to peace!
but you can't bomb the world to peace!

I would do a little experimentation Dom. I have cold laminated to form with other projects and it works very well. If the components are thin enough they don't need heat to bend, just apply glue, clamp to your form and let dry. You will probably have a little spring back but you allow for this with your form.
If your nervous about breakage, you could pre-bend the tighter areas of the side a little first.
Cheers
Kim
If your nervous about breakage, you could pre-bend the tighter areas of the side a little first.
Cheers
Kim
Dom buddy I don't know about bending sides that are already laminated but I do know that nearly everyone that I know in the states who uses double/laminated sides pre-bends each side and then glues them together in a form. Most use epoxy as well.
I was very interested in this for a while a while back and still may give it a go someday when there is nothing good on TV...
I was very interested in this for a while a while back and still may give it a go someday when there is nothing good on TV...
-
Bob Connor

- Admin
- Posts: 3126
- Joined: Mon Jul 09, 2007 9:43 pm
- Location: Geelong, Australia
- Contact:
Dominic
It's on my list of things to try.
You have a very broad surface area for glueing.
It only takes about 4 minutes to bend a side.
The glue should soften a litle then re-set.
It may lose a little of it's strength but with such a wide glueing surface I don't think it would matter.
Still it's only a theory at this stage.
Last edited by Bob Connor on Tue Sep 22, 2009 8:28 pm, edited 1 time in total.
Thanks everyone. I've already bent the 3 layers for the cutaway sides and glued them up after bending. They should be ready to take out of the mold this morning.
Hesh, I was thinking epoxy as well but this is a messy job with glue likely to go everywhere and I am a little concerned with epoxy after Kim's ordeal.
I think Bob is right, big glue surface with not a great deal of stress. I'll apply fish glue to the unbent sides, bend them in the fox bender and leave them to dry. Because I use turn buckles on my slats i can crank them down and really squash the glued sides together.
I'll do the experiment as Kim suggests and let you know how it goes.
Cheers
Dom
You can bomb the world to pieces,
but you can't bomb the world to peace!
but you can't bomb the world to peace!
I think the experiment was a success. For bending I normally use 3 SS slats with a heat blanket and put turnbuckles on each end so I can pull it all down tight so my set up is perfect for laminating.
Took the sides out this morning and everything looks great. Fish glue seems to be as hard as normal and it was much easier doing it all in one step. The cutaway side I did in two steps and I was always worried I'd crack something trying to get the bent gluey sides back between springy SS slats and into the press and lined up properly.
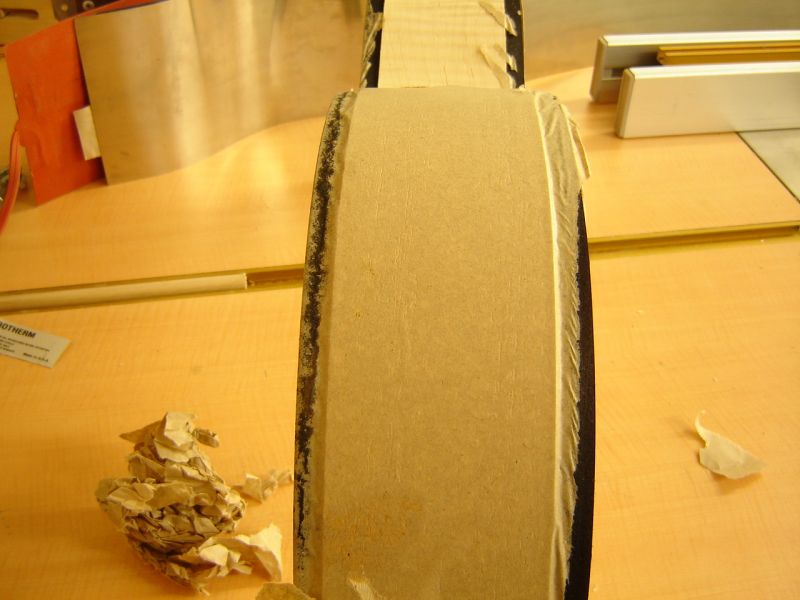
This time I added fish glue between the layers and sprayed water on the outside then wrapped in paper. Then bent as normal but turned the heat off as soon as I thought I could to avoid cooking the glue too much.
Here's some pics.
You can see how flat the paper wrap is showing everything is nice and tight when in the mold because of the turn buckles on my slats.
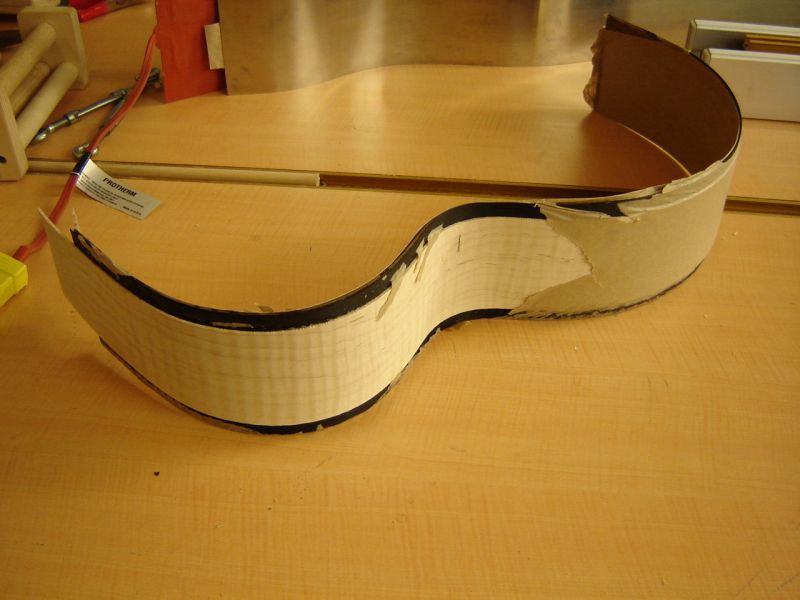
With the maple outside ...
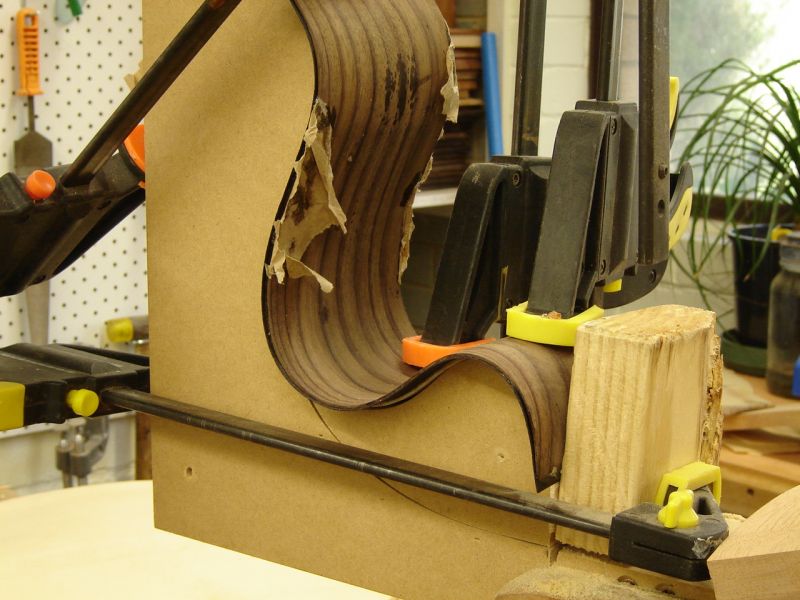
And the inside of the cutaway in the mold.
Cheers
Dom
Took the sides out this morning and everything looks great. Fish glue seems to be as hard as normal and it was much easier doing it all in one step. The cutaway side I did in two steps and I was always worried I'd crack something trying to get the bent gluey sides back between springy SS slats and into the press and lined up properly.
This time I added fish glue between the layers and sprayed water on the outside then wrapped in paper. Then bent as normal but turned the heat off as soon as I thought I could to avoid cooking the glue too much.
Here's some pics.
You can see how flat the paper wrap is showing everything is nice and tight when in the mold because of the turn buckles on my slats.
With the maple outside ...
And the inside of the cutaway in the mold.
Cheers
Dom
You can bomb the world to pieces,
but you can't bomb the world to peace!
but you can't bomb the world to peace!

Well, I've glued on the neck and tail blocks of the archtop and the body is holding its shape well and is very stiff. The side I glued up after bending had a couple of spots that had come apart slightly, I suspect because I did not get it lined up perfectly. But the side shown here was perfect. I squirted some CA in the areas where the cutaway side was de-laminated and it is now together. I like this one step process.
But first… Another benefit of using fish glue (or HHG) for this is that it will take CA glue well. Can't remember where I read this, maybe the latest GAL journal, but CA bonds really well to protein based glues like HHG and fish glue. Something to write down and remember.
My next challenge is how to attach the neck. Craig was round here talking about bridge heights, the need for wood on wood contact points and acoustics and ultimately the need for an adjustable neck in the perfect archtop. I am thinking a bolt on neck with captured bolts in the neck block and accesses through the end plug hole that while not fully adjustable, can be taken off easily for shimming and re-alignment.
Dom
You can bomb the world to pieces,
but you can't bomb the world to peace!
but you can't bomb the world to peace!

-
Bob Connor
- Admin
- Posts: 3126
- Joined: Mon Jul 09, 2007 9:43 pm
- Location: Geelong, Australia
- Contact:

Looking good Dom.
Can drive again from tomorrow so I'll have to get around and have a first hand look.
Can drive again from tomorrow so I'll have to get around and have a first hand look.
What I was referring to was using a solid wooden bridge instead of an adjustable one to improve string vibration transfer to the top, and making the neck adjustable instead. Just thoughts, haven't tried it. I have noticed how different my archtop sounds with different types of strings and bridges (plain wood or with bone saddle).Craig was round here talking about bridge heights, the need for wood on wood contact points and acoustics and ultimately the need for an adjustable neck in the perfect archtop
-
vandenboom
- Blackwood
- Posts: 414
- Joined: Sun Oct 26, 2008 2:27 pm
- Location: Melbourne (Ringwood), Australia
DominicDominic wrote:I am thinking a bolt on neck with captured bolts in the neck block and accesses through the end plug hole that while not fully adjustable, can be taken off easily for shimming and re-alignment.
Dom
If this is the first time you have done this and you are still thinking it through, there is a tutorial on OLF for a bolt-on neck on archtop just in case you are unaware of it. Frank
http://www.luthiersforum.com/forum/view ... 17&t=16049
Frank, I had not seen that thread before. Thanks. With a little bit of vertical movement built into the joint you could have some control over string height making it partially adjustable.
Craig, be good to catch up and chat.
Cheers
Dom
Craig, be good to catch up and chat.
Cheers
Dom
You can bomb the world to pieces,
but you can't bomb the world to peace!
but you can't bomb the world to peace!
Allen, How were you thinking of doing the vac molding. Would you just put your glued bent sides on the form and into a bag or do you have some other plan. What sort of vac system do you have? I recently installed a vac outlet in my shop so I have it on tap with compressed air and power.
Dom
Dom
You can bomb the world to pieces,
but you can't bomb the world to peace!
but you can't bomb the world to peace!
Got a deal happening on a vacuum pump and fittings. Looking forward to having it in the shop. Been lying awake at night thinking of all kinds of uses for it.
I had watched a few video's some time back of a custom furniture business that was using vacuum molding to do some really complex chairs. They were using a pva type glue with a roller and covering the veneers, slapping them on MDF molds as quick as they could and then into large vacuum bags. Sucked down with what looked like your standard vacuum pump. Seemed to work a treat. The chairs were a 3 man job, but I think that starting out on uke sides to get the technique right wouldn't be all that difficult.
Another use I thought that might be good is making laminated linings. Could be a lot easier than a bunch of clamps.
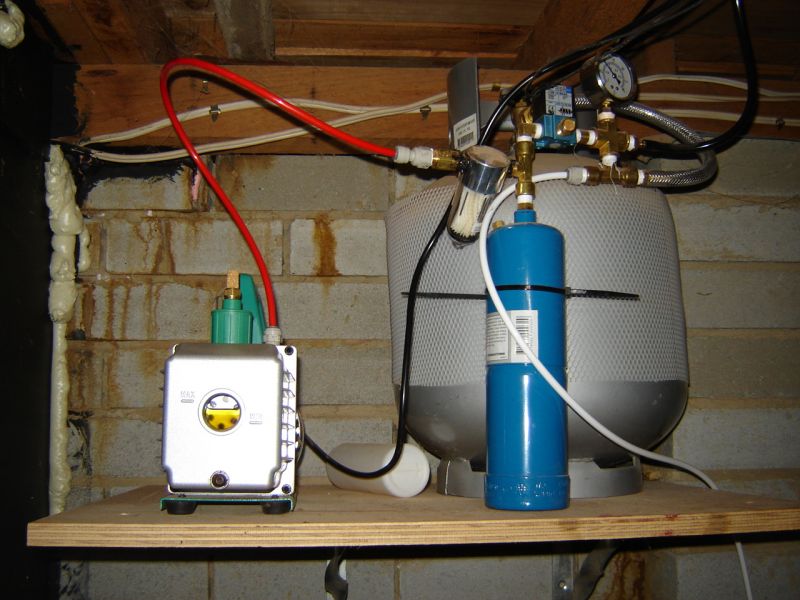
Allen, If you have not already I recommend getting the kit from Veneer supplies (Jo woodworker) to make a cycling system like an air compressor. They have lots of ideas on the web site for designing your own system. I used a 20l gas tank as the main storage and a small 2l tank for the buffer but the designs they use all are made of PVC pipe.
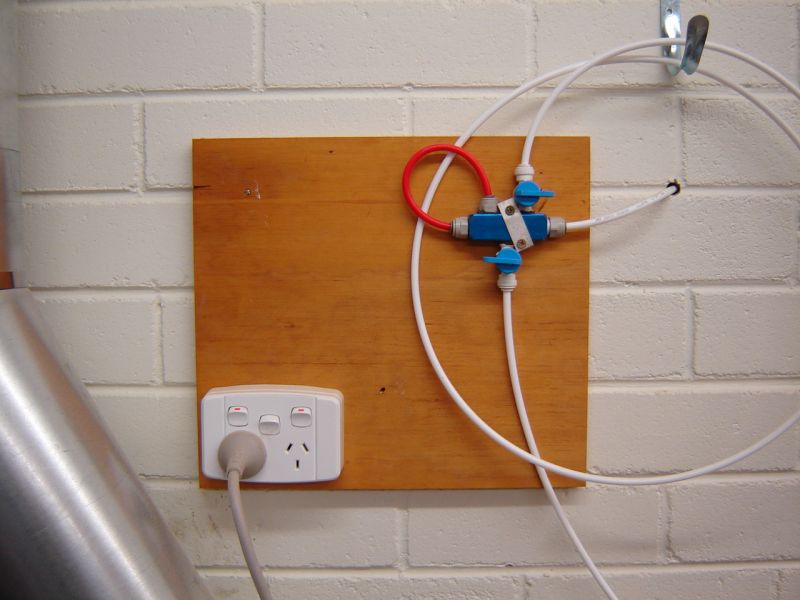
Here's a couple of pics from both sides. The switch is on the power point and I just tap a lead from one of the outlets on the manifold to what ever fixture I am using.
The pump is behind the wall where the oil mist from the pump is no problem.
Dom
Here's a couple of pics from both sides. The switch is on the power point and I just tap a lead from one of the outlets on the manifold to what ever fixture I am using.
The pump is behind the wall where the oil mist from the pump is no problem.
Dom
You can bomb the world to pieces,
but you can't bomb the world to peace!
but you can't bomb the world to peace!
Who is online
Users browsing this forum: No registered users and 44 guests