

It's a large, powerful bass in the American big band tradition. This version is made of lightweight laminates and decorative veneers and is beautifully made and set-up inside and out.
The owner - based in New Zealand - wanted to take this bass with him on tour. So he came up with a plan to ship his bass to me in Sydney in a flight case, I would do the neck conversion, and ship back to him.

The neck was removed by a local luthier and the flight case was made to fit the two pieces neatly. The cases arrived in due course with the contents intact and i started the job. The operation involves cleaning up, rebuilding and refitting the neck mortise area, installing the bolt and bolt cap, deciding what to do with the button area, then refinishing to match existing finish.

Originally, I had planned on installing the captive nut by keyhole surgery through the endpin hole, and to pin the soundpost in place through the top and back, but for a number of reasons we decided a better approach in this case was to build an escape hatch in the C bout.
A circular hatch is in my opinion a better structural approach than square, to minimise weak points and splitting if the rib is carved, but in this case it's laminated. Cutting a neat hole posed its own challenges, but it worked out very easily. I built the flange from a thin laminate bent to the shape of the rib.

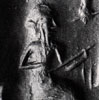
I turned a small wenge knob for the doorhandle.
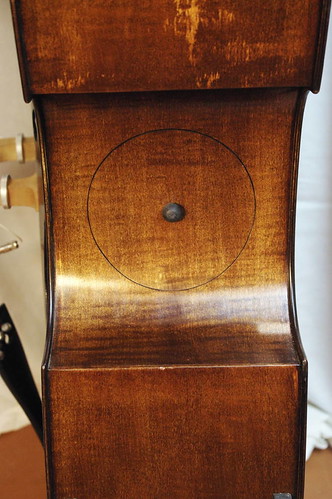
The door is a snug fit and held in place by rare earth magnets, and doesn't buzz.

We had a slight hiccup when after restoring the button to the bass after it had broken when the neck was removed, I discovered that the flight case makers hadn't allowed for the button. Eeek. But in the end we decided to neatly cut off the button and glue onto the heel with a thin black veneer between. Looks very neat and much stronger. Personally i don't like the way that some bolt-on necks involve building up the button area and shortening the heel. I feel this just looks funny, and I like the full-depth heel mortise for stability.


The brass cap for the neck bolt is also held in place with a small rare earth magnet.
It takes about 10 - 15 minutes to set up carefully. Installing the neck takes less than 5 minutes with bass in a vertical position. Slide the neck to the back of the mortise until the button is flush with the back. Push the bolt into position and tighten firmly with a 6mm allen key.


Then lie the bass on its back, protect the belly area with a towel, hook the tailpiece cord onto the endpin, and put the bridge into position. Check soundpost position (I have made some pencilmarks) Bring the strings up to pitch being careful that the bridge doesn't slip or tilt.
With gut or synthetic strings it might take a bit longer to get tuning stable.
The bass is now strung with my old spiros and plays well, and is easily the loudest bass in my workshop at the moment. The body is incredibly light and well-finished, no glue runs or cavities and the linings are all perfectly smooth. The weight is all in the neck and scroll assembly, which is very solidly and neatly built of good maple, and easy to work.

It's been a great job to work on and lovely to see one of Arnold and Wil's New Standard basses here in Sydney.