Two Om's Progress Build

Talk about musical instrument construction, setup and repair.

Moderators: kiwigeo, Jeremy D

User avatar
xray
Blackwood
Posts: 148
Joined: Sun Aug 24, 2008 5:01 pm

Two Om's Progress Build

Post by xray » Tue Jul 14, 2009 5:55 pm

Well, here it goes. As an educator and firm believer in constructive criticism i have decided to make a thread on my next two guitars being built side by side at the same time. This is your opportunity to politely let me know what you think and what you would have done differently on the exception to the timber and design (OM). The guitars are OM's and the moulds i quickly knocked up using MDF and a router template to get everything spot on. I also borrowed an electric bending iron from my friend to try out and it is alot easier/ safer than the propane gas version im used to.
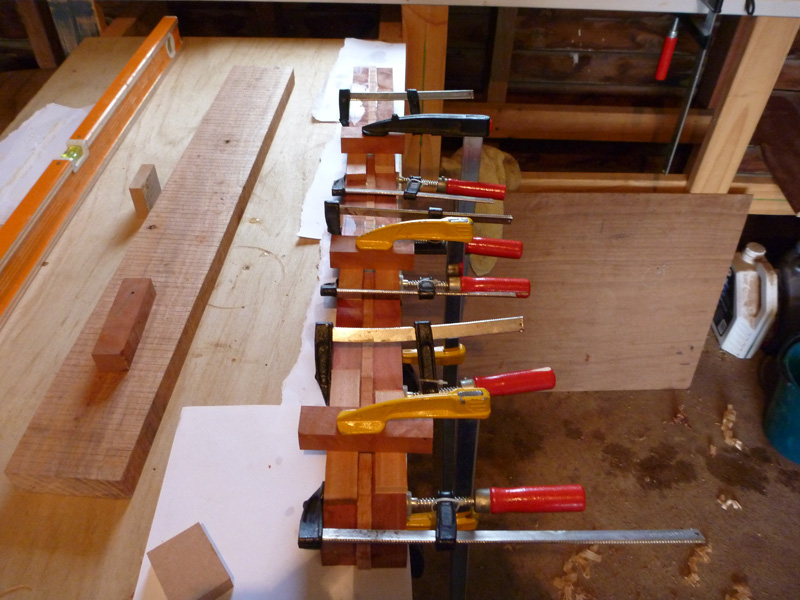
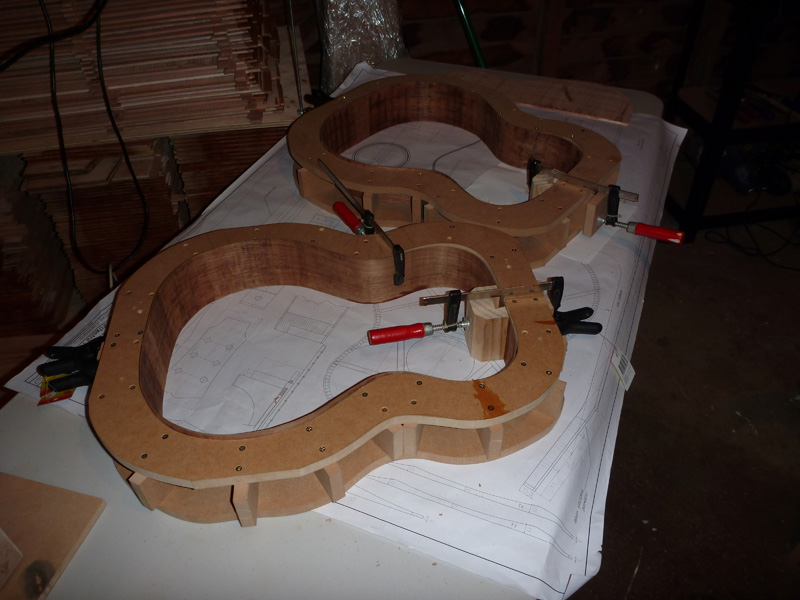
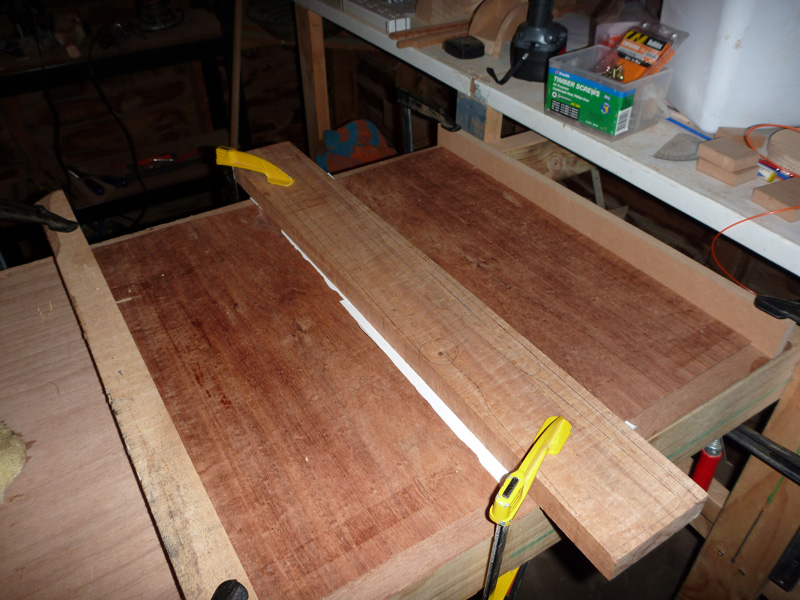
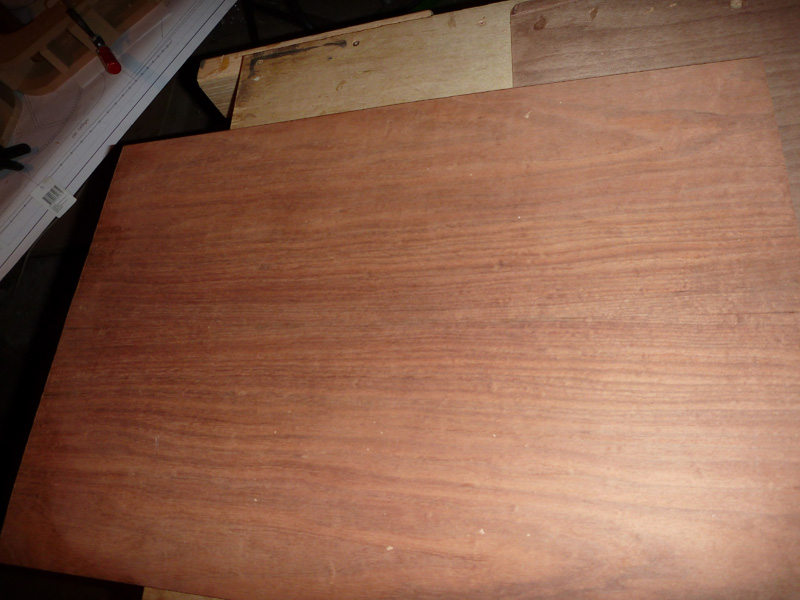
Before i go using some of my really cool/ expensive timber i am going to keep using the plain boring blackwood with no figure and slightly backsawn. This is okay though because it has some interesting patterns towards the edge. The materials:

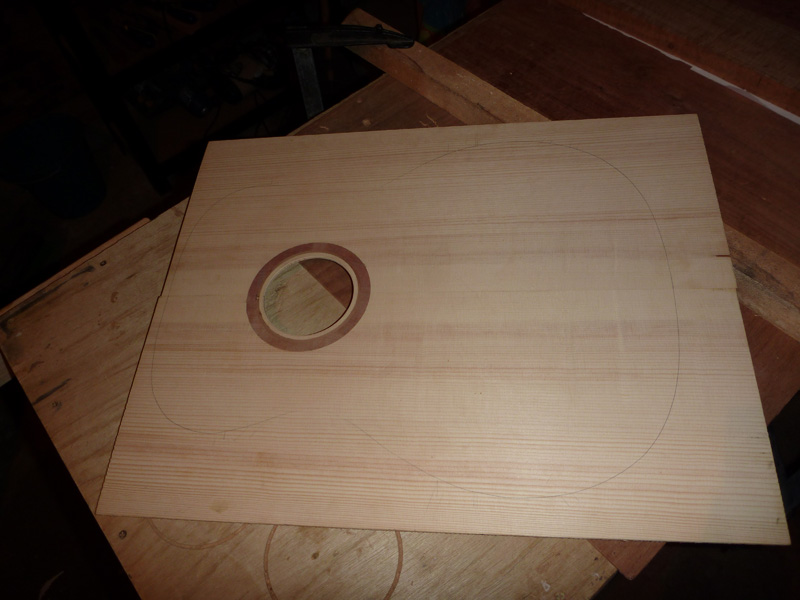
Top 1= Adirondack spruce from tim spittle
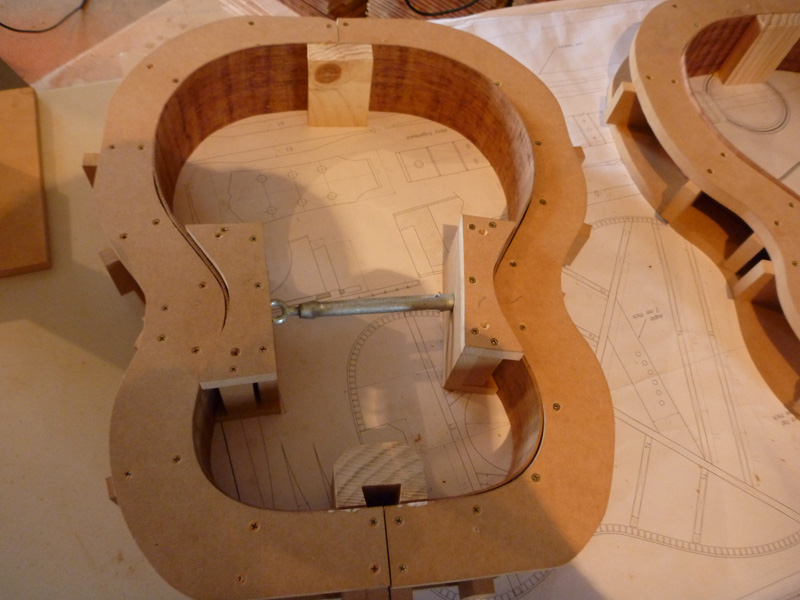
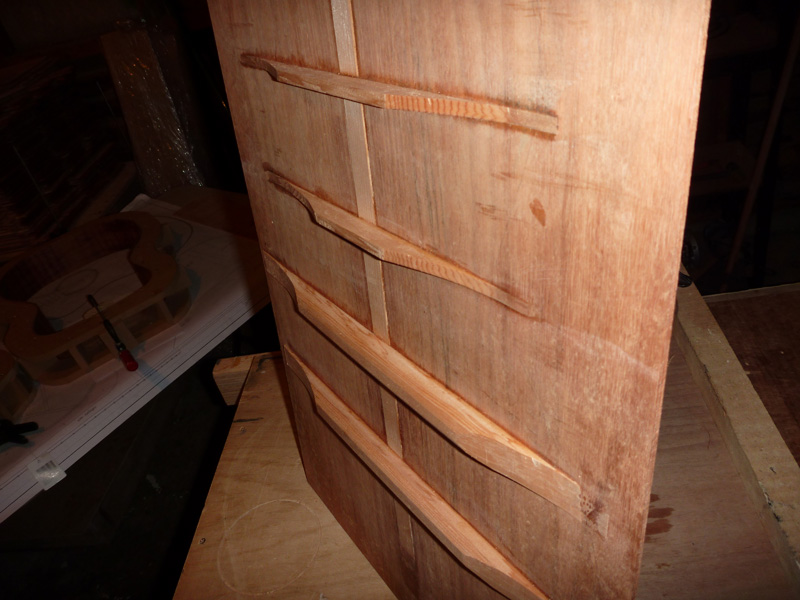
Bracing is all western red cedar on first guitar + back and side bracing

Top 2= AA Grade Engleman Spruce from Michael
Bracing is all Engleman on second guitar + back and side bracing

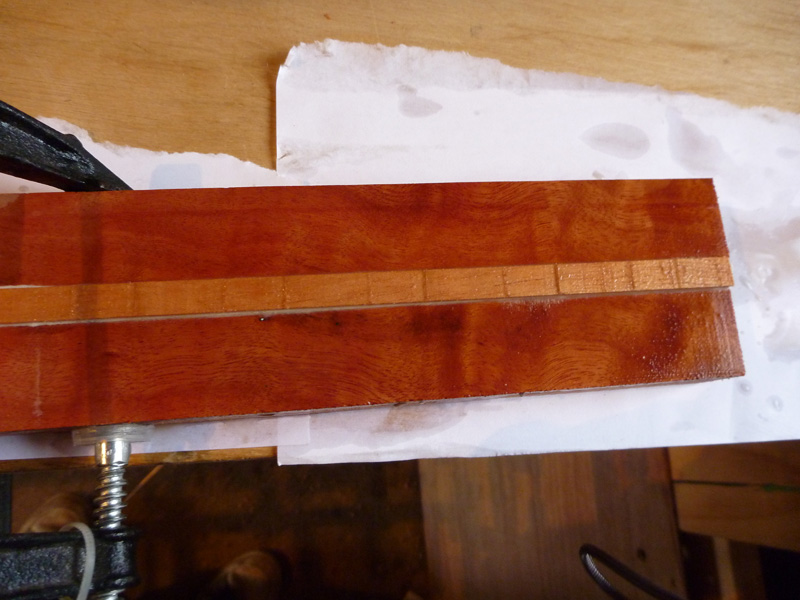
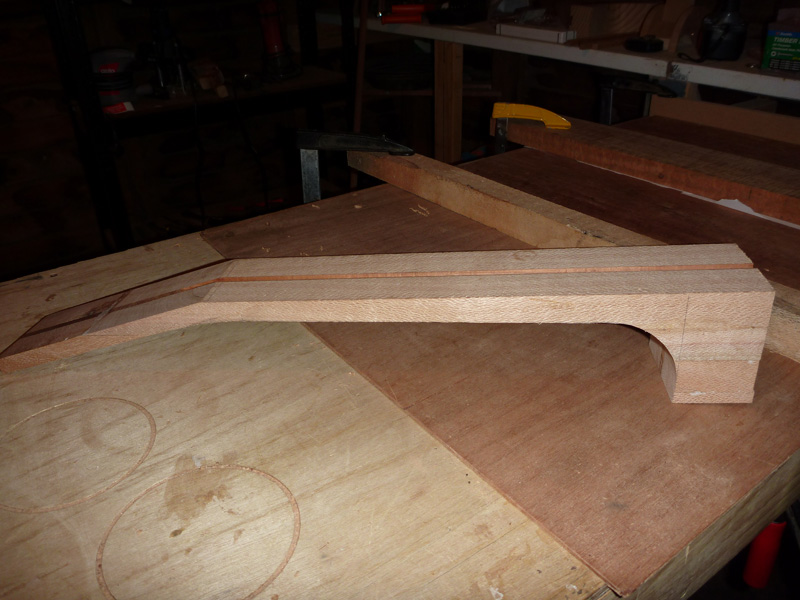
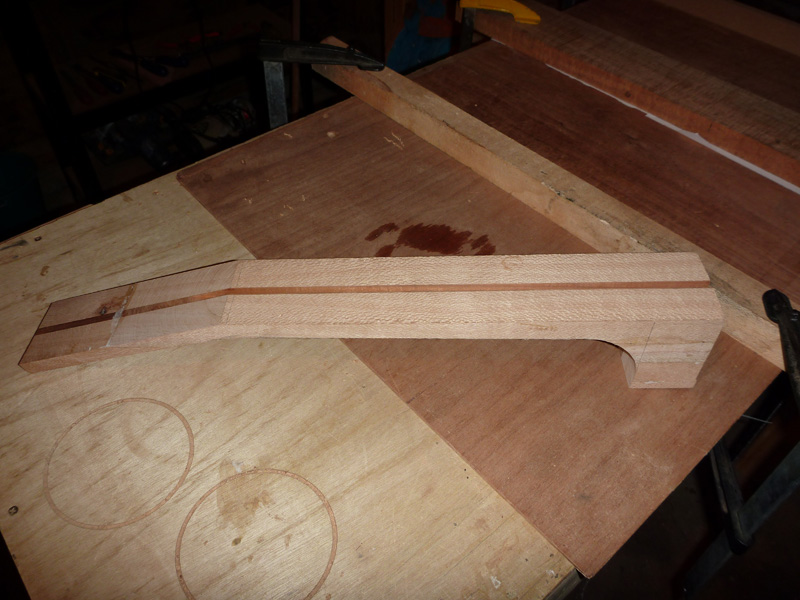
Neck on number 1 is Silky Oak+ Blackwood strip in middle

Back and sides on both is Tasmanian Blackwood but very plain.
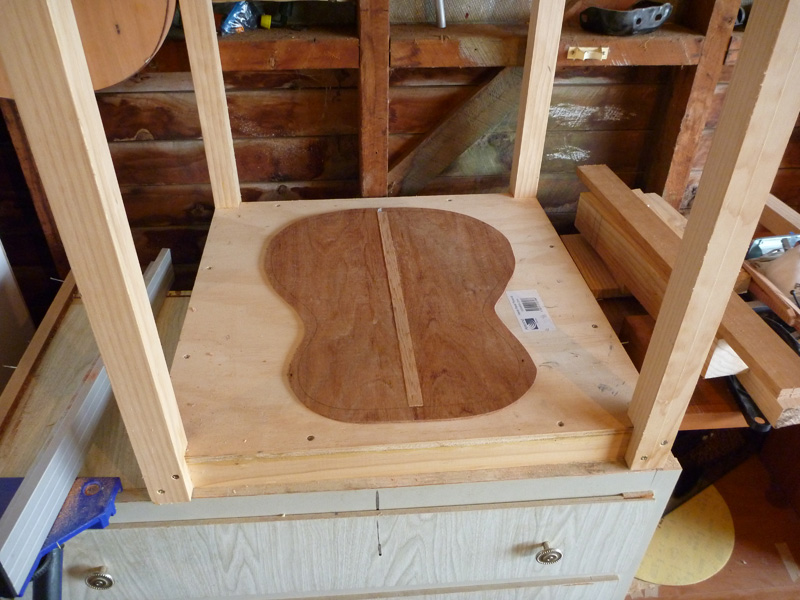
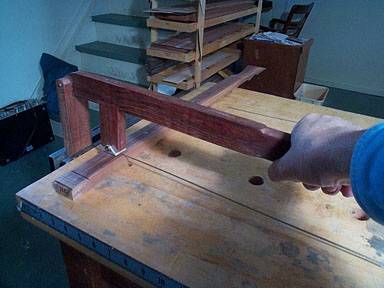
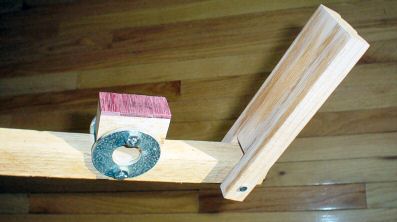
Heres some pics for starters.
Image
Image
Image
Image
Image
Image
Image
please feel free to comment and ill have more pics soon

User avatar
Nick
Blackwood
Posts: 3640
Joined: Thu Feb 26, 2009 11:20 am
Location: Christchurch, New Zealand
Contact:

Post by Nick » Tue Jul 14, 2009 6:18 pm

It's all coming along nicely there XRay, two at once? Greedy bugger :lol: :lol: Will be watching the twins progress.
Now for a couple of questions from somebody who knows nothing about OM design factors!!....What back radius (if any) have you got on those braces? & the two rear ones are considerably wider than the two front ones, is this normal on this type of guitar or is it something you have come up with for some reason?

Looks like you're in competition with Martin there though for the worlds largest supply of privately owned tonewood! :P
"Jesus Loves You."
Nice to hear in church but not in a Mexican prison.

User avatar
Allen
Blackwood
Posts: 5259
Joined: Thu Oct 11, 2007 5:39 pm
Location: Cairns, Australia
Contact:

Post by Allen » Tue Jul 14, 2009 6:21 pm

Hey Andrew, that's some nice wood that you're using and I think what I see so far is looking right.

This is just an observation, I've only used braces of consistent size, rather than those really meaty ones in the lower bout. Not saying yours are wrong, just haven't seen anyone using something that heavy before.
Allen R. McFarlen
https://www.brguitars.com
Facebook
Cairns, Australia

User avatar
xray
Blackwood
Posts: 148
Joined: Sun Aug 24, 2008 5:01 pm

om

Post by xray » Tue Jul 14, 2009 8:03 pm

hey fellas. Well done for noticing and thanks for asking. On the western red cedar braces on the lower bout of number one the two braces are very chunky. I didnt put a radius on this one because i havn't built up a dish yet. The lower strength of a non radiused back and using western red was the reason i decided to go chunky. My plans were from the internet for free also which could be a problem. I cant think off hand the designer.
The second guitar will have a radius and also different engleman braces which will be alot lighter and should be more responsive?

I will be really interested in hearing the difference between the two sounds and which one is louder, the non radiused or the full radiused guitar. I think it is safe to say that due to larger internal volume of the radiused guitar it should produce louder sounding guitar. I dont think it is safe to comment on which one will produce a nicer sound though.

As For knocking Martin off the leader board in the tonewood stakes, im pretty sure he's safe for a while, however when im as old as he is i hope to have a neat stash as it will become harder to get. Sorry martin im sure your not that old. :D
The stash behind the pics is almost ripe and should be ready for picking in a month or two :P

User avatar
Lillian
Blackwood
Posts: 1702
Joined: Fri Sep 28, 2007 10:31 pm
Location: New Mexico, USA
Contact:

Post by Lillian » Tue Jul 14, 2009 9:21 pm

Xray, if you are looking to have an arch in your plates, you don't have to have a dish. If you arch the braces to the radius you want then glue the plate to them, it will have an arch. It won't be a dome shape but it will give it a side to side arch. At the very least, it will be enough to keep the plate from the illusion that it's caving in.

I know of several builders who build this way as opposed to a dome shape. And will argue its merits. And then there are those that build flat. Give it a go and then try the other way. See which you like better.

Bob did a set of twins OMs a while a go. One was scalloped bracing and the other was parabolic. Just to see what changes. I asked him about this recently. I was curious to hear what time and playing changed from his initial take on them.

User avatar
xray
Blackwood
Posts: 148
Joined: Sun Aug 24, 2008 5:01 pm

om

Post by xray » Tue Jul 14, 2009 9:28 pm

i tried this earlier on my first guitar and it didnt work out very well due to my impatience. I think i will invest in the time to build the radius dish and see what happens. I am contemplating rebracing the back in the picture to avoid dissapointment later on. What do you guys think. I have two weeks of holidays and i should be able to get to the shed on almost all of those days for at least a few hours+. I have just glued in the head and heel blocks ready to install the kerfed linings. Thanks lillian for your comments and it is food for thought tonight over a well earned beer.

User avatar
Allen
Blackwood
Posts: 5259
Joined: Thu Oct 11, 2007 5:39 pm
Location: Cairns, Australia
Contact:

Post by Allen » Wed Jul 15, 2009 5:47 am

If you plan is to build with a very stiff back, and there are heaps of very successful guitars built this way, then there's nothing wrong with those braces. Personally, I'd like to see some arching in the plate, just so there is a bit of room for geometry changes due to RH fluctuations. As Lillian said, if it gets a bit dry, then a flat plate is going to look like its caving in rather than just loosing a little bit of its arch.
Allen R. McFarlen
https://www.brguitars.com
Facebook
Cairns, Australia

User avatar
Nick
Blackwood
Posts: 3640
Joined: Thu Feb 26, 2009 11:20 am
Location: Christchurch, New Zealand
Contact:

Re: om

Post by Nick » Wed Jul 15, 2009 6:21 am

xray wrote:i tried this earlier on my first guitar and it didnt work out very well due to my impatience.
Hate to sound like a smart arse, cos I ain't!... just trying to be helpful :? but take (in your own words) 'impatience' out of the equation and it will work. Lillian is quite right, if you mark the required radius on the bottom of you braces and plane, belt/hand sand carefully up to the line. Line the braces up on your back plate and glue with plenty of clamps across the brace (at least 5) and the back plate has no option but to form to the radius. If the braces are narrow then the lateral radius is all you need on individual braces(longitudinal radius would be that tiny over the width of a 10 -12mm wide brace as to be insignificant). Longitudinal radius will be formed when you glue onto the sides. Radius dishes are nice to have but I've now built a few acoustics and still haven't got a radius dish for when I'm gluing up.
"Jesus Loves You."
Nice to hear in church but not in a Mexican prison.

User avatar
xray
Blackwood
Posts: 148
Joined: Sun Aug 24, 2008 5:01 pm

om

Post by xray » Wed Jul 15, 2009 11:52 am

Thanks fellas. Its amazing what coming back with a refreshed view of a day in the shed will do. I have decided to shave the braces off the back of the first om and put an arch on both using lillians method. I also got all of my library books out last night and it is amazing how bloody obvious the procedures are when the problem is happening and not just reading through for leisure. Today will see some new pics and hopefully progress. thanks again.

User avatar
Lillian
Blackwood
Posts: 1702
Joined: Fri Sep 28, 2007 10:31 pm
Location: New Mexico, USA
Contact:

Post by Lillian » Wed Jul 15, 2009 12:13 pm

Xray, when you go to glue the plate to the braces, start in the center and work out. The plates bend and stretch a tad bit. Found out the hard way that working from the edge in will cause a gap in the center. I had to plane them off after the glue dried.

User avatar
matthew
Blackwood
Posts: 1200
Joined: Mon Oct 08, 2007 1:16 pm
Location: Sydney, Inner West
Contact:

Post by matthew » Wed Jul 15, 2009 12:22 pm

Lillian wrote:Xray, if you are looking to have an arch in your plates, you don't have to have a dish. If you arch the braces to the radius you want then glue the plate to them, it will have an arch. It won't be a dome shape but it will give it a side to side arch. At the very least, it will be enough to keep the plate from the illusion that it's caving in.
That's exactly what I do on my doublebass flat backs. i'd hate to have to build a dish for these!

User avatar
Lillian
Blackwood
Posts: 1702
Joined: Fri Sep 28, 2007 10:31 pm
Location: New Mexico, USA
Contact:

Post by Lillian » Wed Jul 15, 2009 12:37 pm

matthew wrote:
Lillian wrote:Xray, if you are looking to have an arch in your plates, you don't have to have a dish. If you arch the braces to the radius you want then glue the plate to them, it will have an arch. It won't be a dome shape but it will give it a side to side arch. At the very least, it will be enough to keep the plate from the illusion that it's caving in.
That's exactly what I do on my doublebass flat backs. i'd hate to have to build a dish for these!
Gawd Matthew, I hope if you did you would have it motorized.

User avatar
xray
Blackwood
Posts: 148
Joined: Sun Aug 24, 2008 5:01 pm

Post by xray » Wed Jul 15, 2009 3:30 pm

Image
This is Rose mahogany with a strip of curly qld maple for my neck blank for number two. Im just really doing this to use up timber in the shed and so it is cost friendly.
Image
In MHO i think rose mahogany is one of the prettiest timbers available when finished. It actually looks like there is real gold veins in it when you look at the right angle in light. It has always had trouble holding finishes apart from a thick gloss coat that im not sure of. This is risky because if it goes blotchy it will be straight back to the shed to refinish.
Image
I also made up side clamping blocks which believe it or not took forever. I stuffed the height of them up but they work and look ugly, so its a case of if the shoe fits wear it.
Image
This is the best thing ive built so far. (The go bar Deck) The back ready to be braced and to the pleasure of the advisors it will be arched.
Ive had enough for today and i will be doing some cleaning up after dinner tonight. Will be away tomorrow. I have to sample some mudgee wine..... its compulsory. let me know what you think! :D

seeaxe
Blackwood
Posts: 769
Joined: Thu Dec 18, 2008 7:20 pm
Location: Auckland NZ

Post by seeaxe » Wed Jul 15, 2009 4:56 pm

Hi Xray

If my eyes do not deceive me, you are using the Grellier plans for your OM. I really like that shape and its appeals to me more than the Antes plan that came with my LMI OM kit. so I'm going to use that instead.

When I printed out the plan on the plotter at work for the first time. I forgot to check the "fit paper to file" tick box and got a scaled down version that fitted on an A1 sheet. It looked really cute so I have decided to build a scale model travel guitar out of whatever is lying around in the shed (no borer in this one though, I promise) and a real thing side by side.

re radius dishes.....I built a dreadnought from a Stemac kit and it used the method Lillian spoke of. I got a big arch in the back, but, as someone else pointed out, its only arched about the long axis so when I tried to glue the back on, the lower and upper bout edges contacted the sides but the center seam is way up in the air. By this time the kerfing was in place so I could not just sand the sides down and anyway it would have looked daft, so I just kept applying spool clamps until the back met the sides. It all seemed to work so I undid everything, glued up and reclamped. The end result was that a lot of the arch disappeared and only a gentle curve was left, which looks fine but I must have left a fair bit of stress in the back. Time will tell if thats a problem.

So I'm thinking that the radius dish is a better way to go as everything should line up a lot better when you glue it all up.

Anyway, sounds like you are about as patient as I am , so I suggest we have a race. Whoever finishes first loses!

Cheers
Richard
Richard

User avatar
xray
Blackwood
Posts: 148
Joined: Sun Aug 24, 2008 5:01 pm

om

Post by xray » Wed Jul 15, 2009 5:03 pm

yeah i made sure that my plans were printed to full scale although a smaller version of this guitar would be very cool. It will be interesting to see how it turns out. The race is on.

vandenboom
Blackwood
Posts: 414
Joined: Sun Oct 26, 2008 2:27 pm
Location: Melbourne (Ringwood), Australia

Post by vandenboom » Wed Jul 15, 2009 5:44 pm

The Williams and Cumpiano books/methods both involve installing arched braces without use of a radius dish.
The arch for the brace can be approximated by bending a thin piece of wood or metal between two nails, and tracing the curve onto the wood. I think the arch is more parabolic than spherical - what difference that makes, blowed if I know.
Lillian's point on gluing the brace on from the centre out is also part of their approach.
And finally, Seeaxe's experience with the difficulty in the back meeting the sides due to the lateral arch - Cumpiano deals with that by using a large flat sanding board. I won't try & describe the steps here as you really need to be able to refer to the detail in the book. But it works well.
Frank

User avatar
xray
Blackwood
Posts: 148
Joined: Sun Aug 24, 2008 5:01 pm

om

Post by xray » Wed Jul 15, 2009 7:10 pm

thanks for that, i just had a quick look at the two books and your right. There in detail is the process for ironing out the arching wrinkles. ive decided to leave it for a while and build other parts while i can be bothered and then when i get motivated i will do the arches. Its probably a last thing job so the glue can dry overnight. Sounds like a plan. Everything so far seems to be going swimmingly and quickly. I have a feeling i will get both bodies done these holidays complete with necks and ill have some weekends to to the fretting work.
Does anyone recomend the stew mack fretting kit with book or is it a waste of money? I think that it is very expensive considering that could go towards other needed tools (The intonator). Thoughts and comments please.

User avatar
Allen
Blackwood
Posts: 5259
Joined: Thu Oct 11, 2007 5:39 pm
Location: Cairns, Australia
Contact:

Post by Allen » Wed Jul 15, 2009 8:27 pm

It's a hell of a lot of money, that I wouldn't be spending as most of the things can be had locally for a fraction of the cost. Don't know about the book. Never seen it.

My first kit consisted of:
  • small hammer - hardware store $10
    fret leveling file 8" from hardware store - $15
    fret crowning file - StewMac
    End nippers - Snap-On because I've got them already
    Fret Tang nipper - StewMac, nice but not necessary unless doing a bound fret board
    Black Felt pen - Newsagent
    Various grades of fine to very fine wet dry sandpaper - Hardware store
    I've added a arbor press - local tool store $80 AU and no freight
    home made fret beveling file - same file for leveling, just a holder for it.
    2.5X reading glasses 'cause my eyesight is getting less than perfect - local chemist
Allen R. McFarlen
https://www.brguitars.com
Facebook
Cairns, Australia

vandenboom
Blackwood
Posts: 414
Joined: Sun Oct 26, 2008 2:27 pm
Location: Melbourne (Ringwood), Australia

Re: om

Post by vandenboom » Wed Jul 15, 2009 8:41 pm

xray wrote:Does anyone recomend the stew mack fretting kit with book or is it a waste of money? I
I agree with Allen. I bought the kit for my first build in ignorance - I simply did not know what I would need. The only part of it use now is the file for beveling the fret ends, and the book.
I haven't used the hammer since the first guitar. I found a small drill press on a nature strip and I use that to put in the frets. The brass radiused thingo you can get from stewmax/LMI is the only extra thing you need to press in the frets and costs about US$4. I didn't fancy the thought of using my good drill press - visions of seals popping etc.
The little metal fretboard protectors aren't even part of the kit but I find them important during crowing, as I use a triangular file for this. I just ground off one of the edges. I prefer this to the dedicated crowing file.

The book has been helpful in my understanding of things. It has lots of detail for different situations. I skim through for each new guitar and always pick up something worthwhile. If you live in Melbourne, you are welcome to borrow it. But there's enough info on the forum to get buy for a while without having to purchase the book.

Frank

User avatar
xray
Blackwood
Posts: 148
Joined: Sun Aug 24, 2008 5:01 pm

fretwork

Post by xray » Wed Jul 15, 2009 9:35 pm

can anyone suggest what the best book/dvd is for fretting? i think the advice so far is brilliant and its nice to head the advice of someone who has been bitten by ignorance and buying stuff in kits. Im also contemplating getting a japenese pull saw from stew mac and a pound of medium/medium fretwire if anyone is interested in halving the fretwire and sharing some freight. or orders from stew mac, pm me and let me know.
http://www.stewmac.com/shop/Fretting_su ... twire.html

User avatar
Bob Connor
Admin
Posts: 3126
Joined: Mon Jul 09, 2007 9:43 pm
Location: Geelong, Australia
Contact:

Post by Bob Connor » Wed Jul 15, 2009 10:09 pm

Hey Andy

Why don't you get the fretwire from LMI?

If you buy a roll you don't have to put a radius om it.

Stewmac only comes in straight sections.
Bob, Geelong
_______________________________________

Mainwaring and Connor Guitars

User avatar
xray
Blackwood
Posts: 148
Joined: Sun Aug 24, 2008 5:01 pm

om

Post by xray » Wed Jul 15, 2009 10:21 pm

cheers bob im on it.

User avatar
Allen
Blackwood
Posts: 5259
Joined: Thu Oct 11, 2007 5:39 pm
Location: Cairns, Australia
Contact:

Post by Allen » Thu Jul 16, 2009 5:32 am

From memory, I got a pound and a half of LMI's fret wire. Worked out to be the price of about 3 - 4 guitars if bought separately. I must be on number 10 out of that roll, and it's still going strong. Definitely the way to go.

Since you're looking at tools to buy from StewMac, I think that the string action gauge is indispensable, especially at how inexpensive it is. The string spacing ruler gets used at both the nut and saddle on every instrument, and inexpensive as well.

And on an impulse I got the new Nut Action Gauge with the dial indicator. I think the thing is brilliant, especially when you want to measure in the thousands range. Not essential, but it is nice and I'll use it for set up from now on.
Allen R. McFarlen
https://www.brguitars.com
Facebook
Cairns, Australia

User avatar
Nick
Blackwood
Posts: 3640
Joined: Thu Feb 26, 2009 11:20 am
Location: Christchurch, New Zealand
Contact:

Post by Nick » Thu Jul 16, 2009 6:23 am

I'm with Allen on the String Action gauge, great piece of kit that can be used for more than just string action, anything that requires measuring heights or gaps can be done with this (action,neck relief,saddle height).It's the swiss army knife of measurements up to 3 inches & it does metric too now.
As for a fretting book, again Stew Mac & Dan Erlewine's book is a fantastic book, gives several different possible ways that freting can be done (giving you choice rather than saying one particular method is the only way it should be done) and follows the process right from selecting fret wire through to polishing the last fret.

Could I ask what wood's you are using for your Neck & Tailblock? It looks like pine (Pinus Radiata) so I'm just wondering about the stability of it and the strength of pine if you are using it as a neckblock.Have you used this before for the blocks and if you did, how it's holding up?
"Jesus Loves You."
Nice to hear in church but not in a Mexican prison.

User avatar
Lillian
Blackwood
Posts: 1702
Joined: Fri Sep 28, 2007 10:31 pm
Location: New Mexico, USA
Contact:

Post by Lillian » Thu Jul 16, 2009 7:13 am

If you don't want to purchase an arbor press you could build something like this. Use the angle if you have a scrap or get the fret press caul from Stew Mac with the various inserts.

This was posted on the MIMF Dwain Wilder in 2003. It should have made it to the archives there by now.

Image

TomS at the OLF did a version of Dwain's and made this

Image


Image


If you think you are going to be ordering from several supply houses but don't want to burn most of your money sending several boxes over the pond, you could have them sent to me and I'll repackage them for you and send them out International Flat Rate.

Post Reply

Who is online

Users browsing this forum: No registered users and 160 guests