Building a Weissenborn

Here's the latest updates to the build progress. Been a bit busy this last week so not much has been happening.
The bindings were bent and channels routed. Actually I did a couple of instruments while I was all jigged up and making a mess.
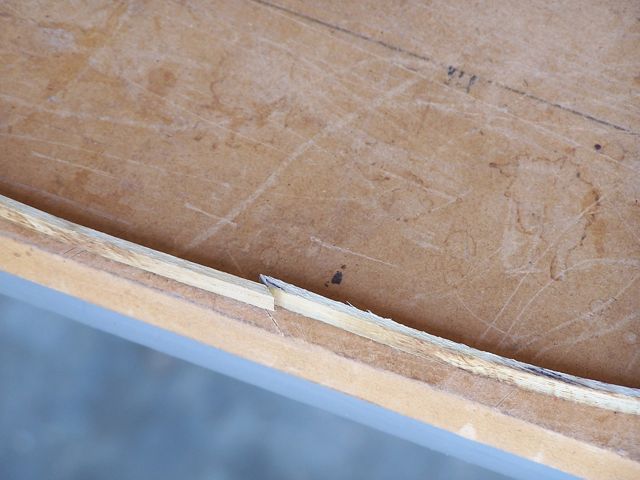
First up I cut a scarf joint for the butt seam on the bindings. I just over lap the two pieces of binding a little bit, then use my Dozuki Saw to cut through both pieces at the same time. That way it's guaranteed to be a good tight joint.
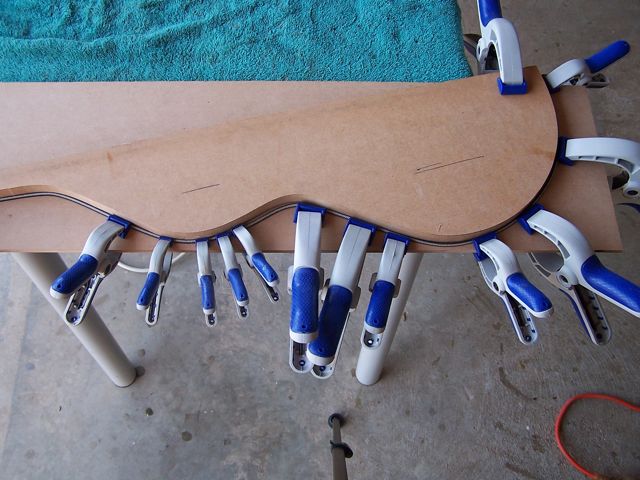
The top is getting a herringbone purfling treatment, so I use a template of the body to help bend the herringbone. A little heat from a hair drier and some spring clamps. to help hold it in shape. I've found this to be the easiest way for me to get purfling this wide to take the bends required.
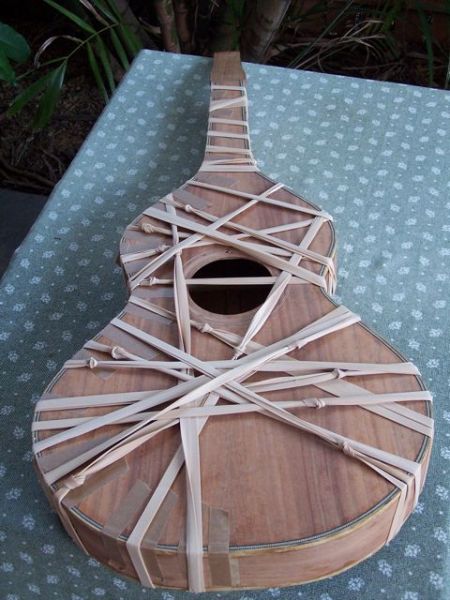
I tacked in the herringbone with Titebond and tape prior to bindings. The herringbone is standard length, so I had to splice about 4" to make the length up for a Weisenborn. I let it set for about 20 minutes, then pulled off the binding tape and finished installing the bindings with more brown tape. Then cinched everything up tight with a rope made from heavy duty elastic bands.
The bindings were bent and channels routed. Actually I did a couple of instruments while I was all jigged up and making a mess.
First up I cut a scarf joint for the butt seam on the bindings. I just over lap the two pieces of binding a little bit, then use my Dozuki Saw to cut through both pieces at the same time. That way it's guaranteed to be a good tight joint.
The top is getting a herringbone purfling treatment, so I use a template of the body to help bend the herringbone. A little heat from a hair drier and some spring clamps. to help hold it in shape. I've found this to be the easiest way for me to get purfling this wide to take the bends required.
I tacked in the herringbone with Titebond and tape prior to bindings. The herringbone is standard length, so I had to splice about 4" to make the length up for a Weisenborn. I let it set for about 20 minutes, then pulled off the binding tape and finished installing the bindings with more brown tape. Then cinched everything up tight with a rope made from heavy duty elastic bands.

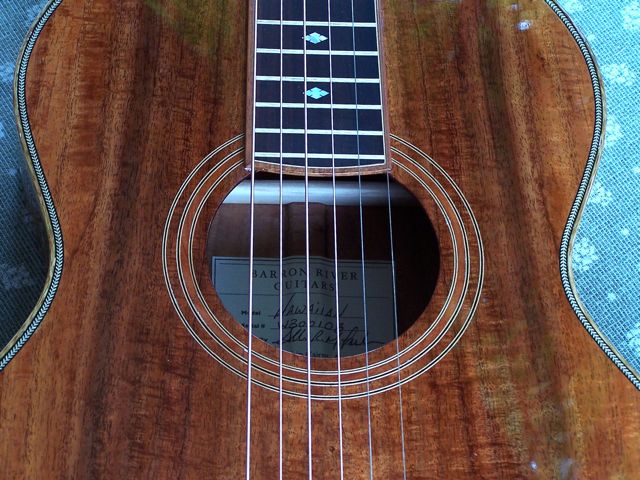
I've got a bit more done over the last week. Leveled the bindings, pore filled with epoxy once, sanded that back. Built a fret board and glued it to the body, plus made the bridge.

The bridge is Mineretchi from Tim Spittle. It's taller than my usual bridge and saddle, but I need the hight to get the strings up higher off the fret board. It is 1/2" as per the specs in the plans.
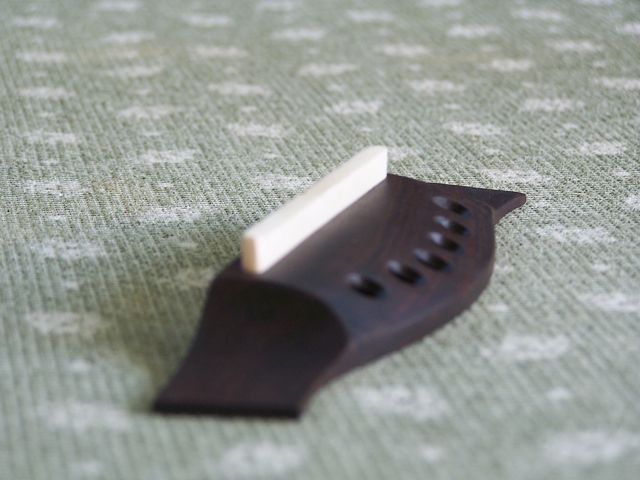
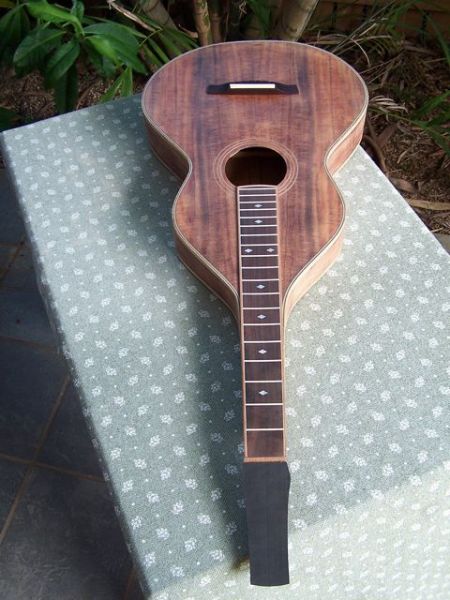
The fret board is Mineretchi as well, with Cheese Wood frets, and MOP inlays. Binding is Black Wood off cuts from the sides.
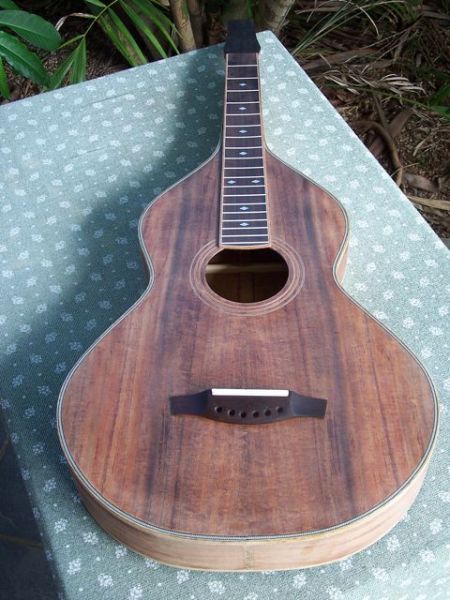
The bridge is just placed in the approximate position for the picture.
The bridge is Mineretchi from Tim Spittle. It's taller than my usual bridge and saddle, but I need the hight to get the strings up higher off the fret board. It is 1/2" as per the specs in the plans.
The fret board is Mineretchi as well, with Cheese Wood frets, and MOP inlays. Binding is Black Wood off cuts from the sides.
The bridge is just placed in the approximate position for the picture.
-
Dave White

- Blackwood
- Posts: 452
- Joined: Mon Nov 12, 2007 3:10 am
- Location: Hughenden Valley, England
- Contact:
Allen,
That's looking really good and you're getting close to hearing how magical these things are - no turning back then!!
But I'd worry about how close to the front of the bridge the saddle slot is. Todd Stock on the OLF built from the MIMF/Stew Mac plans and his bridge cracked - see this post on the OLF. I'd be inclined to make a new bridge with the slot further back - hope you haven't glued it on yet.
Dave White
[url=http://www.defaoiteguitars.com]De Faoite Stringed Instruments[/url]
[url=http://www.defaoiteguitars.com]De Faoite Stringed Instruments[/url]
I made a piece to fit the saddle slot that was about the same hight as the bone saddle and shoved it into the slot. Grabbed it with a pair of pliers and torqued on it. The front of the bridge cracked as you said might be possible. So a new one is under construction. Set back 1/4 inch and saddle slot routed at about a 15 degree backwards tilt.

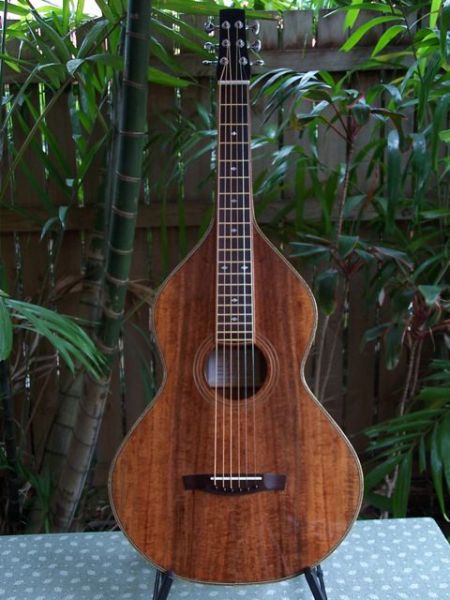
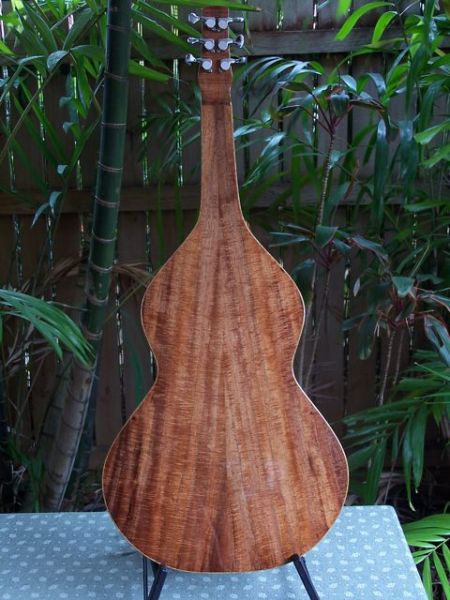
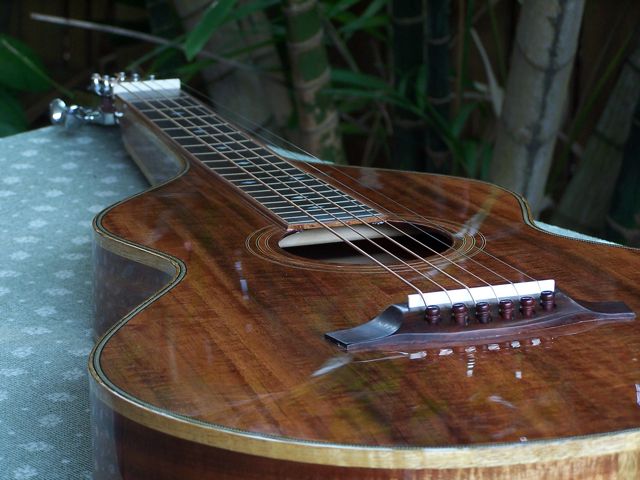
The instrument is finally finished. Got the strings on it yesterday, but have been so flat out, that I've barely been able to pluck a couple of them. Not that I have a clue on how to play one. I bought a steel slide, but yesterday was the first time I'd ever held one.
It sounds pretty cool, but I'll have to wait for Alan, the ozziebluesman to come for a visit, to hear if it really is any good or not.
It's got my usual finish of Mirotone over WEST Systems epoxy. There's bugger all to fill in the way of pores in Blackwood, so just one full strength fill and one cut with metho to wet everything out evenly. Then 5 coats of Mirotone cut 50/50, followed by another 5 coats cut 50/50.


-
Bob Connor

- Admin
- Posts: 3115
- Joined: Mon Jul 09, 2007 9:43 pm
- Location: Geelong, Australia
- Contact:
Allen,
Excellent work as usual, if you want to play, here is a good start.
http://www.12bar.de/slide.php
Cheers mate.
Kim
Excellent work as usual, if you want to play, here is a good start.
http://www.12bar.de/slide.php
Cheers mate.
Kim
-
DarwinStrings

- Blackwood
- Posts: 1873
- Joined: Thu Nov 13, 2008 10:27 pm
- Location: Darwin
Thanks everyone.
I too wasn't much of a fan of these guitars when I first saw pictures of one, but after hearing Alan playing his, and then looking at them some more, they really do start to grow on you.
Bob, I'm hoping that all these fret boards are going to be showing up soon so Alan has an excuse to visit Cairns, and he can give this one, as well as some of the others I have kicking around a bit of a play and critique.
Thanks for the link Kim. Got some practicing to do.
-
ozziebluesman

- Blackwood
- Posts: 1554
- Joined: Wed Oct 10, 2007 9:12 am
- Location: Townsville
- Contact:
Mate, mate, mate, what a beauty!!! The Blackwood set has fine figure and the finish is first class. I like the fret markers a little thicker too. The fingerboard almost looks like ebony. Gotta be happy with this one.
Cheers
Alan
Bob, I'm planning a trip up to see Allen and Karen before Christmas. Hanging out to play this guitar!
Cheers
Alan
Bob, I'm planning a trip up to see Allen and Karen before Christmas. Hanging out to play this guitar!
-
sebastiaan56

- Blackwood
- Posts: 1274
- Joined: Sun Oct 28, 2007 5:23 am
- Location: Blue Mountains

Who is online
Users browsing this forum: No registered users and 75 guests