
I use a bridge plate is made of graphite carbon/epoxy composite bi-axial sheet. I use 0.018" thickness for sopranos and concerts and 0.030" thickness for tenors and baritones. The width of the bridge plate extends 0.5" beyond each end of the soprano and concert bridges and 0.75" beyond the ends of the tenor and baritone bridges. In all cases, the bridge plate extends 0.25" above and below the bridge. The ends are rounded into semi-circles. This material is available from Composite Structures Technology as carbon shear webs and may be ordered in a variety of widths. I usually buy the 3" widths of each and cut them to size with metal cutting shears. The part numbers are: C3001 (0.018") and C3011 (0.030"). The prices seem reasonable to me and service is very good. http://www.cstsales.com/carbon_shear_web.html
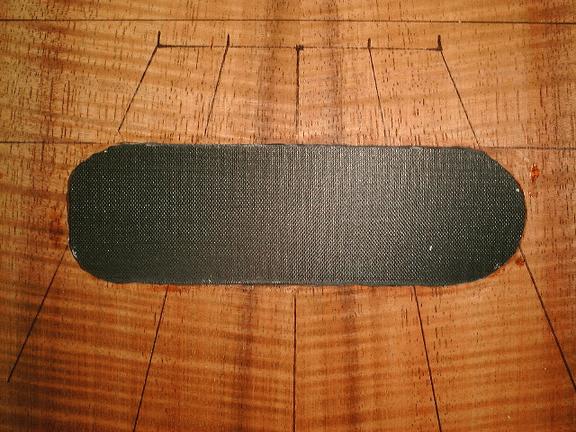
The first picture shows one of the bridge patches. It looks large but remember, it's thin.
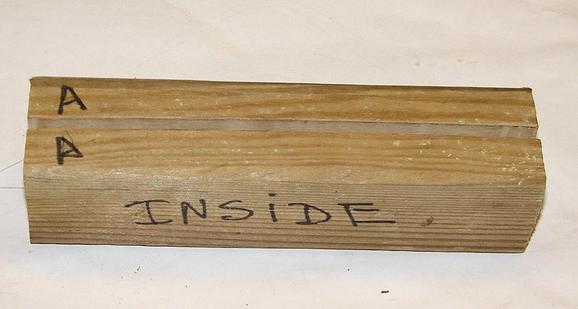
The second picture shows a pair of wooden cauls. The cut down the center is a curve with a nominal 25' or 30' radius depending on the user's preference. After the cut is made, a piece of sandpaper is placed on the cut between the two pieces and the piece next to the sandpaper surface is rubbed until it's smooth. The sandpaper is reversed and the procedure repeated. On the outside of the convex caul, I have labeled it "INSIDE" to remind me that it goes in the underside of the top (or the final inside of the instrument). Please don't ask me why it is necessary to put such a label...
The bridge plate is glued on with Smith Industries 30 minute epoxy, although any of the slower curing other epoxies might suffice as well. I like the Smith Industries brand since it comes in squeeze bottles and it's easy to mix very small batches.
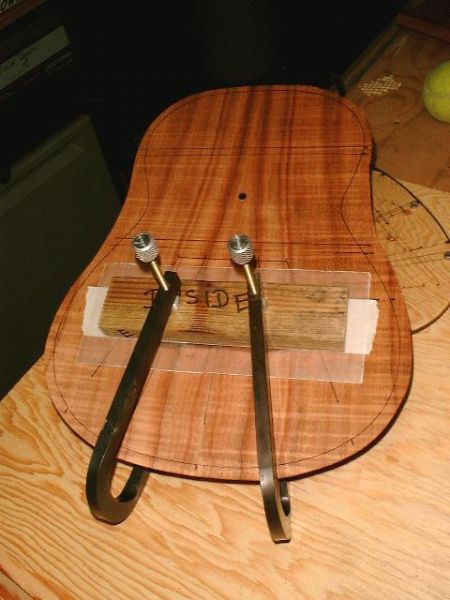
At the beginning of the gluing process, a piece of waxed paper the size of the cauls is cut and set aside. A piece of masking tape the depth of the bridge plate and an inch longer on either end is attached to one side. This unit is now flipped over, tape sticky side up. A sufficient amount of the resin is mixed and set aside. With a hair dryer set on high max, heat the general area of the lower bout on both sides of the plate for about 10 seconds on each side. This will dry the plate considerably. Now, having brushed the work area clean, place the top plate down, put the bridge plate in place and press on the ends of the tape. Now the bridge plate won't move when the cauls are put in place. Put the waxed paper on the bridge plate and the cauls on both sides of the top (convex INSIDE) and gently but firmly clamp. The picture above shows the cauls, wax paper, masking tape and clamps in place. Two hours later, remove excess resin and reclamp overnight.

After the resin has been cleaned from around the bridge plate and allowed to harden it's time to fit the braces. I use 1/4" square Douglas fir with no runout for all my braces because it's stiff, strong and readily available to me. It's best to put the stiffest brace in the center and either equally stiff or less stiff braces further out the fan. But how to know? I've cut all the braces to be 2' long. I grasp each single long brace about 1/5 of the way from the top and tap the middle with a pencil. A high note means a stiff brace, and vice versa. So I do this with a dozen or so of the 2' brace stock pieces and end up with 2-3 piles of varying stiffness braces. The highest frequency ones are then cut for the center-most braces and the others can go further out the fan.
After each brace is cut, I slightly curve the future underside of the brace by pulling the outer third of each end across a piece of 120 grit sandpaper. The picture above shows the braces resting on the glued bridge plate. Place each brace in position and mark on both left and right sides of the brace where the top and bottom edges of the bridge plate cross the brace. Now with a fine blade saw make a cut on the underside of the brace ~ 1/32" deep to connect first the two top marks and then the two bottom marks.

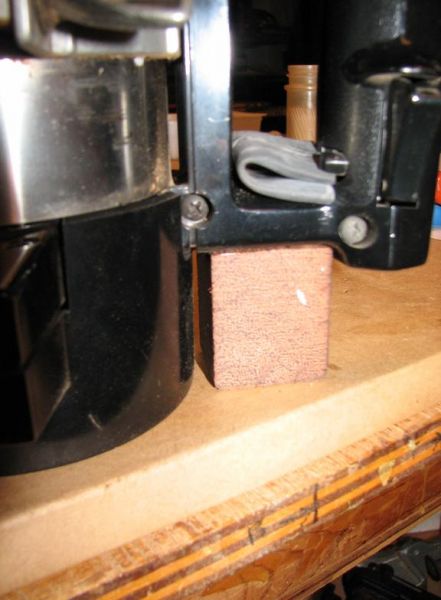
I cut the bridge plate notches with a left-hand spiral down-ward cutting carbide bit in my router. The router is held onto the workbench by clamping the handle to the bench using a sliding clamp, a fitted piece of wood and some bicycle inner tube as shown in the pictures below:
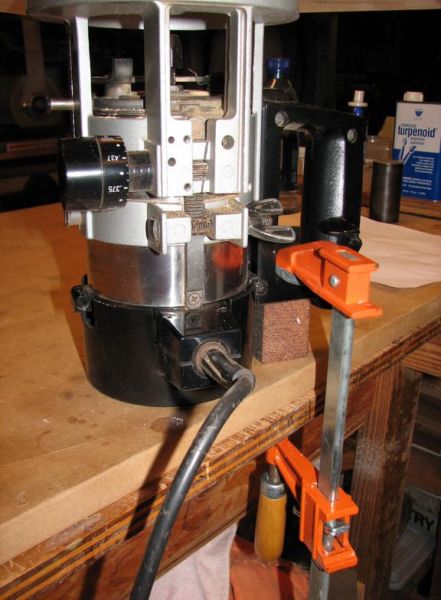
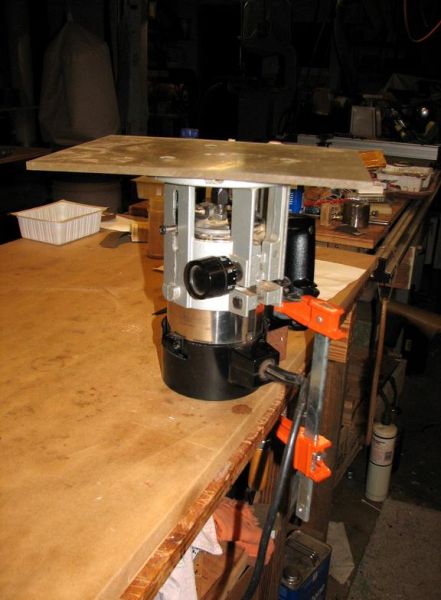
I set the bit so that it sticks up from the router base by the thickness of the bridge plate. Then with the router clamped to my workbench, I turn it on and nibble away at the underside of each brace until I reach the cut marks. Fast, simple to do and a very clean gluing surface results. At this point it's off to the go-bar deck...
aloha,
Dave Hurd
