bindings

Talk about musical instrument construction, setup and repair.

Moderators: kiwigeo, Jeremy D

Post Reply
jmuller92
Myrtle
Posts: 60
Joined: Tue Sep 09, 2008 6:53 am

bindings

Post by jmuller92 » Sun Nov 09, 2008 11:17 am

hey guys,

time has finally come to start my guitar! im really excited about finally getting into it. ill post some photos once theres something worthwhile to post lol.

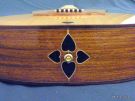
my question was, if anyone doesnt remember im doing this at school, where theres a few dodgy tools. i was wondering with the bindings, is it possible to do them simply with a regular router bit with the ball guide thing, or is it really necessary to get/build a jig to do it properly?

also if anyone had a heap of spool clamps they don't need... they'd come in handy over here :-)

thanks everyone

jake

User avatar
kiwigeo
Admin
Posts: 10778
Joined: Sat Sep 29, 2007 5:57 pm
Location: Adelaide, Sth Australia

Post by kiwigeo » Sun Nov 09, 2008 11:24 am

You can route your binding/pufling channels with a router and bearing build set but keep in mind that the router has a flat face plate and the top of a guitar is usually arched to some degree. Because the router is registering off the top of the guitar your channels are going to vary in depth depending on arch of the top (varies along the guitar).

Simplest solution is a handheld Williams style jig that allows the router to register off the side of the guitar via a couple of bearings on the jig. The jig take sa bit of getting used to but it works fairly well. make sure the sides of your guitar are flat before using the jig too.

User avatar
Lillian
Blackwood
Posts: 1702
Joined: Fri Sep 28, 2007 10:31 pm
Location: New Mexico, USA
Contact:

Post by Lillian » Sun Nov 09, 2008 11:58 am

Jake, if you can beg, borrow or build a gramil, things may go easier for you when you begin routing. The gramil is like a marking gauge, but the bearing face is narrower and longer. The cutter scores/cuts a line so that when you run the router around the top you have a great chance of success. Blowing out a chunk of the top isn't an easy fix.

If you check out OLF, somewhere in the archives a guy by the name of Waddy made his version of a gramil/rosette cutter. It really isn't anything more than a way to hold a Xacto blade perpendicular to the surface without bandages or stitches. Blood isn't easy to get out of a top by the way. Hydrogen peroxide usually works as long as things are still wet.

http://www.lmii.com/CartTwo/thirdproduc ... der+Gramil

jmuller92
Myrtle
Posts: 60
Joined: Tue Sep 09, 2008 6:53 am

Post by jmuller92 » Sun Nov 09, 2008 1:00 pm

does anyone have any parts spare that could assist me in cutting the bindings? im just not sure in the time i have available whether ill have time to build intricate things such as that.

User avatar
Allen
Blackwood
Posts: 5259
Joined: Thu Oct 11, 2007 5:39 pm
Location: Cairns, Australia
Contact:

Post by Allen » Sun Nov 09, 2008 1:34 pm

You haven't said whether this is a flat top / back or if you built a dome in them. If they do not have a dome built in, then its no problem at all to use a router and a guide.

I don't have any spare parts lying around, but building a gramil is not that hard. It's also far less likely that you'll stuff up the binding channels than with a power tool.
Allen R. McFarlen
https://www.brguitars.com
Facebook
Cairns, Australia

User avatar
Kim
Admin
Posts: 4372
Joined: Wed Sep 26, 2007 8:32 pm
Location: South of Perth WA

Post by Kim » Sun Nov 09, 2008 2:02 pm

jmuller92 wrote:does anyone have any parts spare that could assist me in cutting the bindings? im just not sure in the time i have available whether ill have time to build intricate things such as that.
I made my first gramil from a sharpened jigsaw blade, a couple of scrap blocks, one shaped to a rounded "V" profile to ride on the guitar and the other to act as a clamp for the blade and depth stop. The only other thing used was two small bolts to hold it all together and keep the cut adjustment set where I wanted it. Took me about 30 minutes to make this thing and it worked just fine however I doubt it would qualify as intricate, more functional and accurate if one were trying to be nice.

Cheers

Kim

jmuller92
Myrtle
Posts: 60
Joined: Tue Sep 09, 2008 6:53 am

Post by jmuller92 » Sun Nov 09, 2008 2:51 pm

thanks for the advice,

so just so i understand better, does the gramil actually cut the full binding channel or does it just help as a guide for the router?

User avatar
Kim
Admin
Posts: 4372
Joined: Wed Sep 26, 2007 8:32 pm
Location: South of Perth WA

Post by Kim » Sun Nov 09, 2008 3:08 pm

Josh,

The gramil can be used to score the wood, particularly the spruce, to give a nice crisp edge and avoid break out when using the router, however you will still need to pay attention to the grain orientation. The gramil can also be used to do the entire binding rebate by simply repeating the process of scoring and clearing the waste wood with a good SHARP chisel until you reach the desired dept. The secret to the successful use of a gramil is that the cutting edge must be sharp and you allow the tool to do the work making numerous very light passes. If you loose patience and try to force the gramil, it will make you pay by following the grain rather than your desired line of cut. So go forward with patience using a sharp tool and a light hand and you will achieve excellent results.

Cheers

Kim

josh_cain
Sassafras
Posts: 47
Joined: Wed Sep 24, 2008 9:20 am
Contact:

Post by josh_cain » Sun Nov 09, 2008 3:10 pm

I'm Josh, thats Jake. :)
Josh.

User avatar
Kim
Admin
Posts: 4372
Joined: Wed Sep 26, 2007 8:32 pm
Location: South of Perth WA

Post by Kim » Sun Nov 09, 2008 3:51 pm

Woops! Sorry Josh :D

User avatar
Taffy Evans
Blackwood
Posts: 1067
Joined: Wed Apr 30, 2008 6:54 pm
Location: Charters Towers North Queensland

Post by Taffy Evans » Sun Nov 09, 2008 6:06 pm

Hi Jake
I always used to hate doing this job. Heres one of the ways I used to do it years ago.

Makita trimmer white base is standard size, blue base shows how I modified it so theres very little of the table on top of the guitar, so there it little interferance from the radius of the top or back plates.

To aid stability the standard [small] bearing guide was changed as shown so that there was more surface contact with the side. Still a worry though had to be on the ball, sides had to be true. I would also do as suggested by others previously, I used a purfling cutter and only used one blade.

Image

Image

Image
Taff

User avatar
Lillian
Blackwood
Posts: 1702
Joined: Fri Sep 28, 2007 10:31 pm
Location: New Mexico, USA
Contact:

Post by Lillian » Sun Nov 09, 2008 7:07 pm

Jake, send me your address.

User avatar
kiwigeo
Admin
Posts: 10778
Joined: Sat Sep 29, 2007 5:57 pm
Location: Adelaide, Sth Australia

Post by kiwigeo » Sun Nov 09, 2008 7:51 pm

Whoa....Jakes in _Big_ Trouble. Lillian's just asked for his email address!!!

jmuller92
Myrtle
Posts: 60
Joined: Tue Sep 09, 2008 6:53 am

Post by jmuller92 » Sun Nov 09, 2008 7:53 pm

haha nothing suss... hopefully... :-P

Post Reply

Who is online

Users browsing this forum: No registered users and 157 guests