Gibson CS356 build
-
EricDownunder
- Blackwood
- Posts: 170
- Joined: Wed Apr 18, 2012 12:59 pm
- Location: East Kurrajong, NSW
Re: Gibson CS356 build
A little advise please, a good friend of mine recently asked me to build him one of these using teak for the back and neck and maple cap, he has the teak around 100 years old plus he says, I am concerned the waxy nature of teak bonding pieces together could give me problems also sound quality, I have no problem making electrics I am currently teaching my son-in-law how to do his builds. Any advise on this I would greatly appreciate.
Keep Smiling,
Eric Smith
Eric Smith
-
charangohabsburg

- Blackwood
- Posts: 1818
- Joined: Sat Oct 16, 2010 1:25 am
- Location: Switzerland
Re: Gibson CS356 build
Oh, I am sure you feel much better now!Nick wrote: Once this was done everything that was going to be on the inside received a coat of sheilding paint to stop any excess hum/interference, so all that "nasty water staining" has disappeared on the inside at least Marcus!.
But hey, this top looks now like a sieve, Swiss cheese is solid rock compared to this! A few more holes and the "water stains" will be gone also on the outside!
Very nice work Nick
Markus
To be stupid is like to be dead. Oneself will not be aware of it.
It's only the others who suffer.
To be stupid is like to be dead. Oneself will not be aware of it.
It's only the others who suffer.
-
Nick

- Blackwood
- Posts: 3628
- Joined: Thu Feb 26, 2009 11:20 am
- Location: Christchurch, New Zealand
- Contact:
Re: Gibson CS356 build
By a factor of at least 50 Marcus! Not as much fun as an acoustic build but the results come together a lot quicker.charangohabsburg wrote: And progress is much faster than on a marimba prototype, isn't it.
I've never built with Teak Eric but I had a friend who once did a yacht using Teak to clad his deck & yes the oily nature of it was one of his grumbles but he overcame it by using epoxy (Wests system in his case) as his glue. One way around your problem maybe? Not sure how it would take a finish other than an oiled one eitherEricDownunder wrote:A little advise please, a good friend of mine recently asked me to build him one of these using teak for the back and neck and maple cap, he has the teak around 100 years old plus he says, I am concerned the waxy nature of teak bonding pieces together could give me problems also sound quality, I have no problem making electrics I am currently teaching my son-in-law how to do his builds. Any advise on this I would greatly appreciate.
Others who have used Teak (Maybe Rob "Auscab") for furnishings e.t.c may be able to offer much better options or advise Eric, they may chip in if they are looking at the thread or if not, you could start a new thread with your question.
"Jesus Loves You."
Nice to hear in church but not in a Mexican prison.
Nice to hear in church but not in a Mexican prison.
-
Nick
- Blackwood
- Posts: 3628
- Joined: Thu Feb 26, 2009 11:20 am
- Location: Christchurch, New Zealand
- Contact:
Re: Gibson CS356 build
OK where was I? I'd almost forgotten what I'd called the post it has been that long since I last posted! Didn't do much over easter break, decided to keep in sweet with the boss so we did "couples" things all weekend. I mowed the lawns while she pointed out the bits I'd missed, you know,that sort of thing
Next trick was to rout the binding channels. I'd done a Telecaster some years back with a similar tobbacco burst that I want to do this build and I'd just used a single Ivoroid binding on that, no purflings or anything so the channel was an nice simple thing to cut.
I 'adapted' a cradle I originally used for Archtops when routing the channel in my jig. Fortunately I'd built in a fair bit of adjustment when I first made it so this is the third size of guitar that I've been able to fit into this cradle It just needed a little packing under the feet as obviously the body was nowhere near the depth of an acoustic.
Yeah I know, that is a cheap arse Ozito brand router you can see on my routing jig
It just needed a little packing under the feet as obviously the body was nowhere near the depth of an acoustic.
Yeah I know, that is a cheap arse Ozito brand router you can see on my routing jig 
 but they're as cheap as chips, variable speed and seem to be fairly good in the bearings so I don't get any chatter in my cuts and if it burns out, I will just go and get another without crying because I haven't just burnt out my good router.
Channels cut and......
the right size I like to go slightly deeper to allow for any glue thickness and also because it's only a single line binding, I like to scrape the side down to the binding rather than the other way round because then you end up with a 0.040" & under binding rather than the 0.060" it started out as.
but they're as cheap as chips, variable speed and seem to be fairly good in the bearings so I don't get any chatter in my cuts and if it burns out, I will just go and get another without crying because I haven't just burnt out my good router.
Channels cut and......
the right size I like to go slightly deeper to allow for any glue thickness and also because it's only a single line binding, I like to scrape the side down to the binding rather than the other way round because then you end up with a 0.040" & under binding rather than the 0.060" it started out as.
While it was still in the cradle I went to the smallest bearing size in my binding cutting set and machined a ledge for the cavity coverplate to sit in.
Bindings glued in and a hole machined for the battery box for the various 'active' components (the Control X unit for the T Bridge & magnetic pickups ((which allows you to either blend the two signals, run magnetics only or the undersaddle transducers only or run the two signals seperately into in stereo channels)) & also an N-Tune) Hopefully the battery drain will be moderate or I'll have to run two batteries
and a closeup after the sides have been scraped down to the binding.
I finished off the body by drilling all the little screw holes, mounting holes e.tc so the body was essentially in a finished state & I've put that to one side until the neck's ready for fitting & gluing. So it was onto the neck, I've done my usual and laminated two pieces of Sapele, I find this method easier than making a one piece for some reason, maybe because I can bandsaw the shape complete with headstock angle and I don't need to add 'wings' for the headstock ears as it's usually plenty wide enough. It may or may not be technically stronger and I'm not advocating this to be the better method than a one piece, it's just something I've always done.
Here I've joined the two 50mm wide 'halves' & planed my two reference faces (the face where the fingerboard glues on and the headstock face) parallel to each other & I'm gluing on a fingerboard stop.
Any body familiar with Benedetto or read his "How to make an archtop" book will know what I'm talking about. It's just a little scrap piece of spruce 10mm (3/8") wide that glues on at the nut position, this means that you have approximately 10mm of 'flat' area between the end of the fingerboard and where the headstock angle meets. Once the glue's dried you chisel off the excess then clean it up at the same angle as the headstock so that the headstock veneer will eventually continue right up to the fingerboard (only to be chiselled out later for the nut!).
The idea is that the headstock binding will come up and meet the fingerboard binding at exactly the end of the fingerboard/nut point so that it looks like a continuation of the fingerboard onto the headstock, it's really good if you have purf lines as these look like they run continuously from the fingerboard, under the nut then onto the headstock. (sounds more confusing than it really is but if you're having trouble visualising what I mean, pictures to follow at a later date )
Fingerboard is cut and slotted for the Gibson 24.75" scale & bound with the Ivoroid, just waiting for the Gold EVO fret wire (I fret off the neck). Because the L R Baggs T Bridge has a set radius I had to radius the board to a 14" instead of my usual 12 Next step will be to machine the tenon into the neck to match the body slot and then do all the work at the headstock end, it's coming together. Hope you are enjoying the build so far.
Next trick was to rout the binding channels. I'd done a Telecaster some years back with a similar tobbacco burst that I want to do this build and I'd just used a single Ivoroid binding on that, no purflings or anything so the channel was an nice simple thing to cut.
I 'adapted' a cradle I originally used for Archtops when routing the channel in my jig. Fortunately I'd built in a fair bit of adjustment when I first made it so this is the third size of guitar that I've been able to fit into this cradle
- IMG_2496.jpg (123.97 KiB) Viewed 14653 times
- IMG_2497.jpg (63.97 KiB) Viewed 14653 times
- IMG_2499.jpg (82.48 KiB) Viewed 14653 times
While it was still in the cradle I went to the smallest bearing size in my binding cutting set and machined a ledge for the cavity coverplate to sit in.
- IMG_2503.jpg (87.1 KiB) Viewed 14653 times
- IMG_2505.jpg (101.06 KiB) Viewed 14653 times
- IMG_2507.jpg (86.14 KiB) Viewed 14653 times
Here I've joined the two 50mm wide 'halves' & planed my two reference faces (the face where the fingerboard glues on and the headstock face) parallel to each other & I'm gluing on a fingerboard stop.
- IMG_2509.jpg (106.85 KiB) Viewed 14653 times
- IMG_2511.jpg (77.69 KiB) Viewed 14653 times
Fingerboard is cut and slotted for the Gibson 24.75" scale & bound with the Ivoroid, just waiting for the Gold EVO fret wire (I fret off the neck). Because the L R Baggs T Bridge has a set radius I had to radius the board to a 14" instead of my usual 12
- IMG_2512.jpg (106.77 KiB) Viewed 14653 times
- IMG_2515.jpg (133.46 KiB) Viewed 14653 times
"Jesus Loves You."
Nice to hear in church but not in a Mexican prison.
Nice to hear in church but not in a Mexican prison.

-
Nick
- Blackwood
- Posts: 3628
- Joined: Thu Feb 26, 2009 11:20 am
- Location: Christchurch, New Zealand
- Contact:
Re: Gibson CS356 build
Slow progress but there is progress!
Neck slot has been cut and headstock shape cut in with the router.
Tongue has been cut and I'll fine fit to eliminate any gaps e.t.c around the body joint once the neck has been trimmed and shaped but it does still fit reasonably well at this stage just for a 'rough' fit.
Now to explain a bit easier, with pictures, the reason for the fretboard stop I tried to explain earlier
With the bound fretboard sitting against the stop, it gives you a bit of material to make a decent binding channel on the headstock face, the bottom edges of the binding matches up. (Doesn't matter too much in this case but if I was to run purflings along under the binding, this gives the look of a continuous run of purfling between the two different planes).
Binding ledge cut
And sitting the headstock binding in it's ledge, not fitting perfectly yet but you get the idea
and neck taper roughly bandsawn
I've got further than this (fingerboard has now been fretted and glued to the neck stock, truss rod cover hads been added & headstock bound) but haven't taken any photos yet, I'll add these in the next couple of days. Next job will be to cut the nut slot and shape the neck
Neck slot has been cut and headstock shape cut in with the router.
- IMG_2516.jpg (78.63 KiB) Viewed 14600 times
- IMG_2519.jpg (81.43 KiB) Viewed 14600 times
With the bound fretboard sitting against the stop, it gives you a bit of material to make a decent binding channel on the headstock face, the bottom edges of the binding matches up. (Doesn't matter too much in this case but if I was to run purflings along under the binding, this gives the look of a continuous run of purfling between the two different planes).
- IMG_2520.jpg (83.15 KiB) Viewed 14600 times
- IMG_2523.jpg (77.04 KiB) Viewed 14600 times
- IMG_2524.jpg (68.95 KiB) Viewed 14600 times
- IMG_2525.jpg (112.46 KiB) Viewed 14600 times
"Jesus Loves You."
Nice to hear in church but not in a Mexican prison.
Nice to hear in church but not in a Mexican prison.
Re: Gibson CS356 build
I really like that treatment at the nut transition. Very elegant.
And, I'm engrossed in the build as well. As I'm going to use plastic bindings on one in progress, can you, when you get there, detail the finishing process, please? If I recall, you said it would be dark on the back and sides?
And, I'm engrossed in the build as well. As I'm going to use plastic bindings on one in progress, can you, when you get there, detail the finishing process, please? If I recall, you said it would be dark on the back and sides?
I wish I was half the man my dog thinks I am....
Cheers,
Nick
https://www.facebook.com/pages/DMI-hand ... 744?ref=hl
Cheers,
Nick
https://www.facebook.com/pages/DMI-hand ... 744?ref=hl
-
charangohabsburg
- Blackwood
- Posts: 1818
- Joined: Sat Oct 16, 2010 1:25 am
- Location: Switzerland
Re: Gibson CS356 build
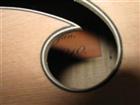
Just make sure to line up properly that ivoroid figure.Nick wrote:[...] not fitting perfectly yet but you get the idea
- Iveroid-Nick-IMG_2524.jpg (63.1 KiB) Viewed 14569 times
The possibility to use the design-simplifying little wedge is a very good technical reason for a bound headstock.
Markus
To be stupid is like to be dead. Oneself will not be aware of it.
It's only the others who suffer.
To be stupid is like to be dead. Oneself will not be aware of it.
It's only the others who suffer.
-
Nick
- Blackwood
- Posts: 3628
- Joined: Thu Feb 26, 2009 11:20 am
- Location: Christchurch, New Zealand
- Contact:
Re: Gibson CS356 build
After these next few pics Nick I'm going to do that. Just for the benefit of anybody that hasn't done it before or the forum archives in general (bursting that is....& as in painting, not as in blowing a fufu valve after too much Italian foodnnickusa wrote:And, I'm engrossed in the build as well. As I'm going to use plastic bindings on one in progress, can you, when you get there, detail the finishing process, please? If I recall, you said it would be dark on the back and sides?
It was pretty close Marcus when I did it but after all that, without the contrast of a purf line under the nut it just didn't look right with the bone nut sitting on top of a thin line of Ivoroid (bit like a patchwork quilt!) so I ended up taking the cut right down to the bottom edge of the binding so the bottom of the nut is flush with the bottom of the bindingcharangohabsburg wrote:Just make sure to line up properly that ivoroid figure.
So I bound the headstock with the Ivoroid binding, cut my pearl Sig and inlaid it (gold MOP which doesn't look much at the moment against the white maple face but the headstock will have a small burst which is when the MOP should stand out). Also made a truss rod cover that sits flush with the headstock face and is located with a small wood key (block) thats the same width as the truss rod slot, the cover is then held down with a small rare earth magnet.
- IMG_2527.jpg (102.23 KiB) Viewed 14515 times
Next step was to shape the back of my neck, I left it a smidge oversize at the heel so that once it was glued in I could scrape & sand it flush with the body.
- IMG_2529.jpg (144.39 KiB) Viewed 14515 times
- IMG_2531.jpg (104.69 KiB) Viewed 14515 times
- IMG_2532.jpg (81.31 KiB) Viewed 14515 times
- IMG_2533.jpg (77.02 KiB) Viewed 14515 times
- IMG_2534.jpg (148.5 KiB) Viewed 14515 times
Anyway the next step is staining the body (Tobacco burst the top & a dark tobacco back & sides) so I'll stop the build post for now & continue the next step in the tutorial section so if you are interested, keep an eye out for it, I should have something up there within the next couple of weeks.
"Jesus Loves You."
Nice to hear in church but not in a Mexican prison.
Nice to hear in church but not in a Mexican prison.
Re: Gibson CS356 build
Shit hot stuff as always......I'll be following in the other thread.....
I wish I was half the man my dog thinks I am....
Cheers,
Nick
https://www.facebook.com/pages/DMI-hand ... 744?ref=hl
Cheers,
Nick
https://www.facebook.com/pages/DMI-hand ... 744?ref=hl
-
rocket
- Blackwood
- Posts: 1210
- Joined: Thu Apr 30, 2009 8:43 pm
- Location: melbourne,, outer east
- Contact:
Re: Gibson CS356 build
I see you've used the same crappy , water stained, boring timber on the headstock Nick!! , nice to see you've matched it with the belly, looking good man, i love the cutaway and the shape of the horns. What process did you employ when making your poly carb routing templates? nice fret job what's the radius? Evo gold jumbo wire?.
In days gone by when a gang of chippies pitched a roof they'd nail a branch of a tree found locally to the ridge and go to the pub to celebrate the achievement. These days most carpenters don't know what it's like to stick build a house frame let alone cut and pitch a roof, the whole bloody lot comes on a semi and is craned on site.
Enjoying this thread Nick.
Cheers.
Rod.
Like I said before the crash, " Hit the bloody thing, it won't hit ya back
www.octiganguitars.com
www.octiganguitars.com
-
Nick
- Blackwood
- Posts: 3628
- Joined: Thu Feb 26, 2009 11:20 am
- Location: Christchurch, New Zealand
- Contact:
Re: Gibson CS356 build
Yeah it's a real pain Rod, I thought that when I applied the water that is mixed in with the stain and gave it a good rub, it would rid me of this cursed water marked patterning but bugger me, it's only made it worse!rocket wrote:I see you've used the same crappy , water stained, boring timber on the headstock Nick!!
The headstock was actually a seperate headplate veneer purchase I made from fine-woods.com but it matches quite well, the patterning is slightly different obviously but the two are far enough apart that dogs balls don't enter your mind when looking at it.
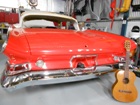
I just marked out where I wanted my 'hole' on an acrylic blank (I used the commercial plan and just laid the acrylic over the top and basically traced it out with a permanent marker) and cut into the shape with the bandsaw (red circle) from the butt/tail end of the shape, somewhere where it wouldn't matter if there was 'slight-if-any' glitch in the internal wall then cleaned the cut up with a file. The pattern was screwed to the wood (outside the profile of courserocket wrote: i love the cutaway and the shape of the horns. What process did you employ when making your poly carb routing templates?
- Pattern Cut.jpg (82.09 KiB) Viewed 14454 times
I haven't actually touched the frets yetrocket wrote:nice fret job what's the radius? Evo gold jumbo wire?.
"Jesus Loves You."
Nice to hear in church but not in a Mexican prison.
Nice to hear in church but not in a Mexican prison.
Who is online
Users browsing this forum: No registered users and 195 guests