
I know many of you are using the tablesaw/fret template method to cut slots in your fingerboards however there are always times when odd scale lengths arise for which you don't have the template; the template does not exist or the expense can not be justified for the one job. Also, as previously mentioned, this does a great job of cutting the slots on a Multiscale guitar which I don't think there is a method of doing easily by tablesaw; so it is of use to any luthier I would think.
I personally also don't have the tablesaw set up for such jobs so for me it was necessary
So here it is, sorry for the poor photo quality - had some trouble uploading higher res images. The labels in the first pic are not because I think you couldn't work this out yourself, but that I refer to them later.
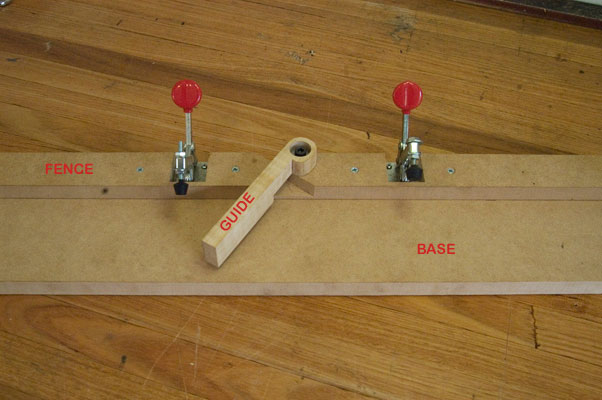
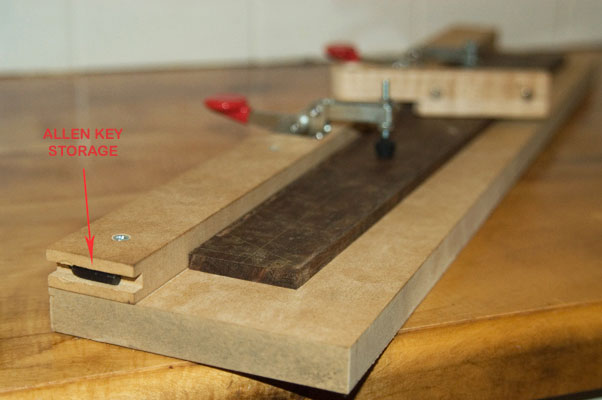
So that's it. A base, fence, two hold downs and a pivoting magnetic guide - pretty basic but works well. I have been using versions of this jig for years but this is the most versatile currently. The hold down clamps (I love these things for jig making) are close enough to the saw as to provide secure clamp force, while far enough not to interfere with the cutting action. Here is another shot showing clearance for up to an 8mm thick fretboard under the guide. Also note the routed section to provide clearance for the cut at any required angle and the two countersunk magnets to guide the saw.

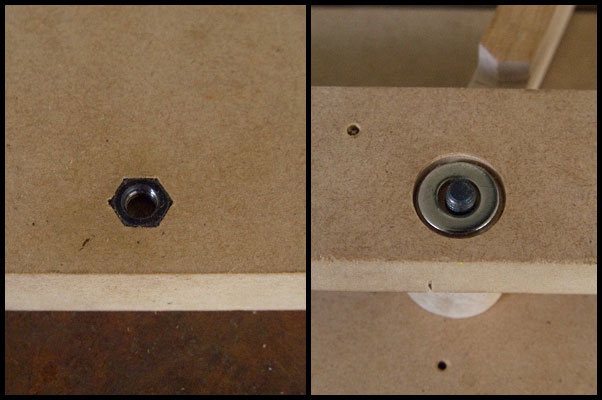
The pivoting guide is locked by an allen key bolt. This clamps up surprisingly firmly with little to no movement under tests with decent hand pressure applied to the end of the guide. Remember too - this is only a guide; the actual sideways force when in use with the saw would be far less than the tests applied. In any case, it has not moved in use at all. In this next picture (left) you can see the base contains a 'captured' nut. The fence mounts on top of this to secure it and to provide a more even clamping pressure, I have rebated an area for a washer under the fence to sit flush against the nut - as shown on the right.
The fence now gets screwed down to the base. The guide is made from a scrap piece of rock maple I had around. The bolt is drilled through the end and the hole is countersunk providing enough room for another washer on this side, while the entire head is below surface level so there is nothing to get in the way. Two rare-earth magnets are countersunk to provide firm attachment and guiding of the saw, yet allow enough movement to be a smooth cut. Something like silverglide could be used if you like to really free up the cutting action. So now it's ready to use on the current project.
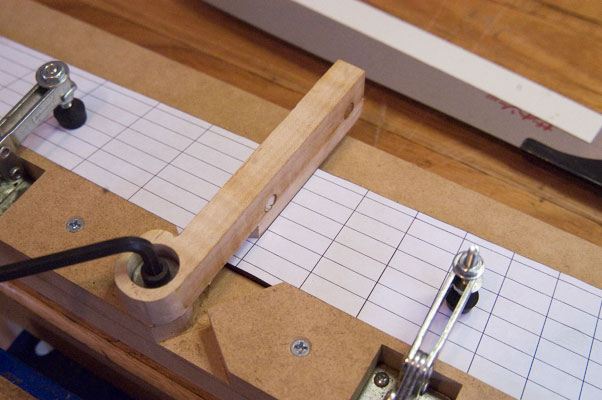
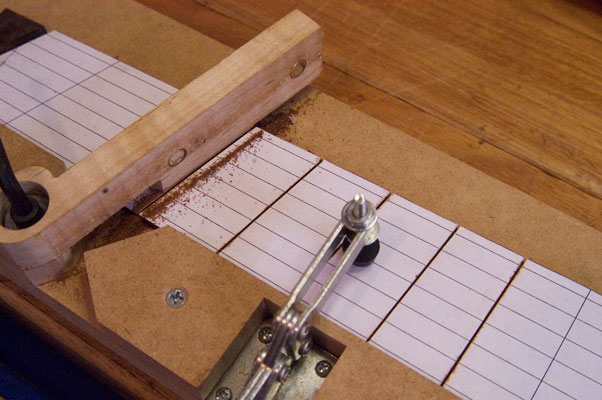
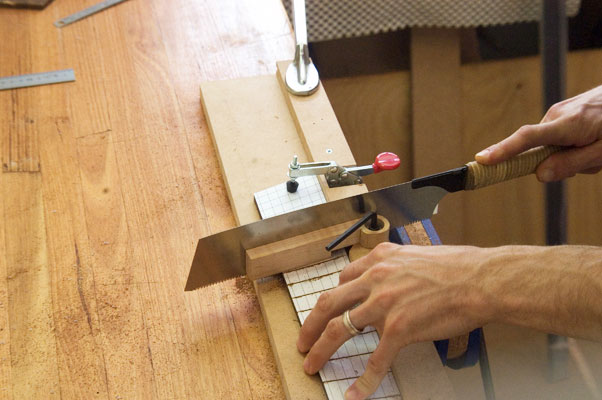
The clearance under the guide is important as the more room you give, the harder to line up accurately it will be. I usually use a 7mm thick board to start with so there is just enough clearance to move things around but easy to line up. The length of the guide is long enough to cover the fret board but not too long exacerbating the risk of movement. Action shots - a few slots done.
Note Hesh - erm of course I'd normally attach my shop vac to the erm, saw blade, but um, photo clarity and all that you know?
Finally, there is nothing worse than not being able to find the right size key when you need it. Hence I simply drilled and rebated a slot in the fence to hold this one by magnet. It always goes back there when I'm done - in use it sits in the guide itself as a 1/4 turn is enough to loosen then re-lock it for the next fret.
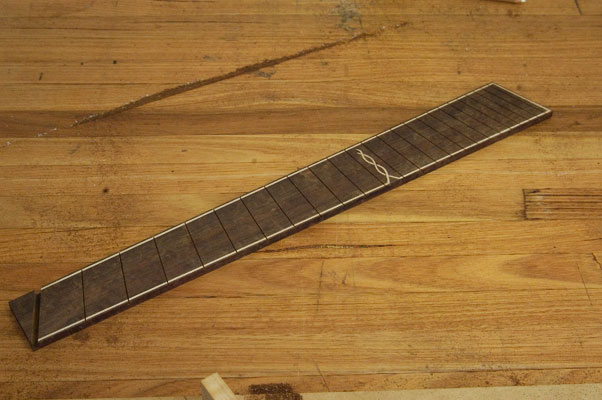
The end result on this particular multiscale fretboard.
That's it. I hope it's of some use. If anyone can think of any improvements or other ways of cutting fanned frets, I'd love to hear it. I'm still trying to get my head around designing a mitre system that can take two fret slot templates... The beauty of this jig too is that there is no reason you couldn't add a pin to accept the fretting templates, though you would have to design it with this in mind and compensate. Also, you can cut fret slots on a single scale length guitar who's fretboard is already tapered or not square. Simply run the fretboard against the fence and set the guide to the required angle. All the slots can then be cut without changing the guide. Probably others will now point me to where this jig already exists and could have saved me the trouble of dreaming it up...
Cheers,
Jeremy.

