Well Ive taken the plunge, quit the Thursday night class and invested in kit instead. Ive bought a proper drill press, http://www.mcjing.com.au/Machinery/toolframe.htm
Ive watched Robbies routing setup from the Tips du Joir, Ive got a Safe-T-Planer, and what Im interested in is a vertical sander. Something like this http://www.luthiersfriend.com/ Ive seen a number of homemade versions of this set up, has anyone made one? Does anyone have good advice?
What else do folks do that is clever with a drill press?
Sebastiaan
Drill Press tips wanted
-
sebastiaan56

- Blackwood
- Posts: 1274
- Joined: Sun Oct 28, 2007 5:23 am
- Location: Blue Mountains
Drill Press tips wanted
make mine fifths........
The robosander that the luthiers friend is bult around is a great unit.
I have the 3" version and it is really good quality compared to a lot of sanding drums around. Removes material really quickly.
I just have the rotary bush set into a hole in a sheet if MDF for stability when not pattern sanding.
I have the 3" version and it is really good quality compared to a lot of sanding drums around. Removes material really quickly.
I just have the rotary bush set into a hole in a sheet if MDF for stability when not pattern sanding.
-
matthew

- Blackwood
- Posts: 1193
- Joined: Mon Oct 08, 2007 1:16 pm
- Location: Sydney, Inner West
- Contact:
I like these aussie products
http://www.piricdesign.com.au/products/inventions.html
The easy-riser is a bit of a trick to install but lets you raise or rotate the drill table with one finger.
the tips section of their site has good ideas too.
Onya Piric!
http://www.piricdesign.com.au/products/inventions.html
The easy-riser is a bit of a trick to install but lets you raise or rotate the drill table with one finger.
the tips section of their site has good ideas too.
Onya Piric!

Me too, I like this tool, got the big one and the little one and just like Jeff, I cut a hole in an auxiliary table fitted to the drill press to inlet the rotating bush into when not in use.jeffhigh wrote:The robosander that the luthiers friend is bult around is a great unit.
I have the 3" version and it is really good quality compared to a lot of sanding drums around. Removes material really quickly.
I just have the rotary bush set into a hole in a sheet if MDF for stability when not pattern sanding.
Cheers
Kim
-
Bob Connor

- Admin
- Posts: 3115
- Joined: Mon Jul 09, 2007 9:43 pm
- Location: Geelong, Australia
- Contact:
Clever stuff Matthew, seen the products available at Timbecon and made me think, hmmmm.matthew wrote:I like these aussie products
http://www.piricdesign.com.au/products/inventions.html
The easy-riser is a bit of a trick to install but lets you raise or rotate the drill table with one finger.
the tips section of their site has good ideas too.
Onya Piric!
-
matthew
- Blackwood
- Posts: 1193
- Joined: Mon Oct 08, 2007 1:16 pm
- Location: Sydney, Inner West
- Contact:
I spent some time with the guy at the wood show a couple of years back. Really impressed with the ease of use and speed of changing grits and shapes. i bought the easy riser right there, and nearly bought the wasp. Just wasn't sure about something that made MORE dust.
I used the vertical lathe idea he other day to turn a dowel to plug a drilled-out bolt hole in a neck. Just fine.
Still can't get my drill to work as a router though. The shaft keeps dropping out.
I used the vertical lathe idea he other day to turn a dowel to plug a drilled-out bolt hole in a neck. Just fine.
Still can't get my drill to work as a router though. The shaft keeps dropping out.
-
sebastiaan56
- Blackwood
- Posts: 1274
- Joined: Sun Oct 28, 2007 5:23 am
- Location: Blue Mountains
The main reason i decided on a new drill press. The poor old Ryobi benchtop just rolled over and spat its little shaft out one too many times. Now Im going to roll it over and turn it into a drum sander.matthew wrote:Still can't get my drill to work as a router though. The shaft keeps dropping out.
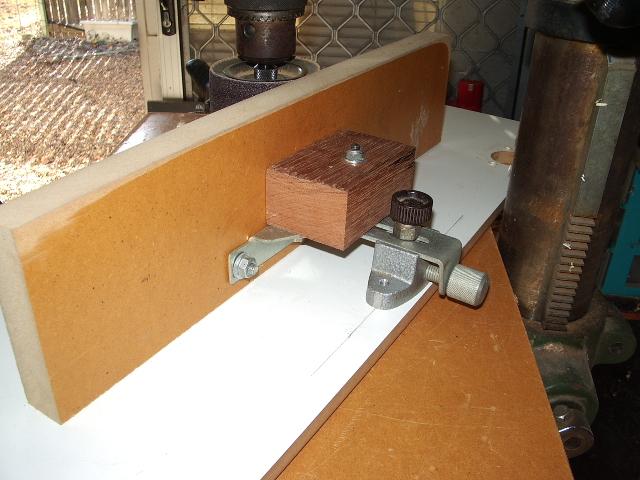
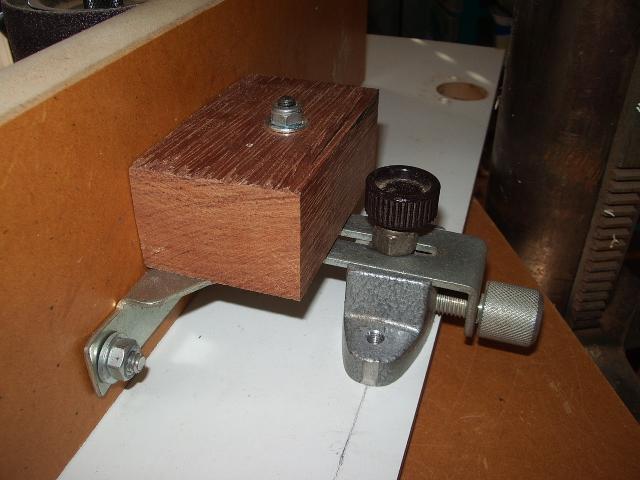
Ive also got a cross slide vice which i wanted for bridges, fipples etc.
Thanks for the tips eveyone, seems like the robo sander is the way to go. Is there and aussie source for replacement paper? The Wasp sander is also a great idea.
Now I can get and XMAS list going.....
make mine fifths........

G'day Sebastiaan .
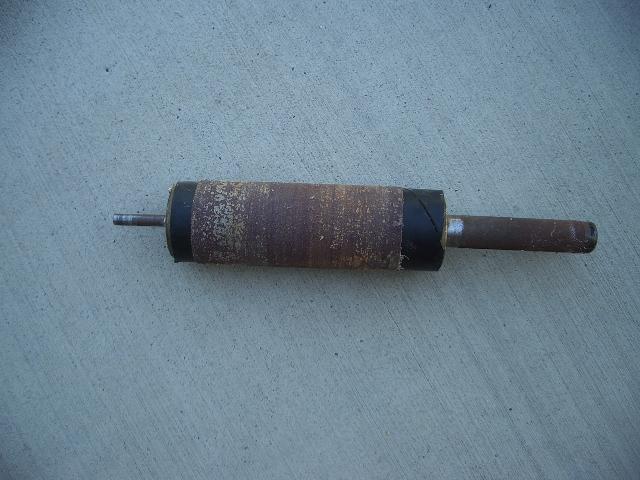
Here's my version of the Robo Sander . Made the bottom Robo part out of Myrtle ( Not Tiger ) Gives a bigger table than the Stewmac and saved a small fortune, although I did buy their slide vise pictured . The drum is wood which I've trued up ( I took off the original soft covering ,,,, rounded corners and all that ) It has a very clever and convenient sandpaper clamping system . Got it from Carbatec .
I don't often use the Robo system , but the drum sander gets a good work out . The drum can be lowered into a hole in the bench top when the Myrtle plate is removed.
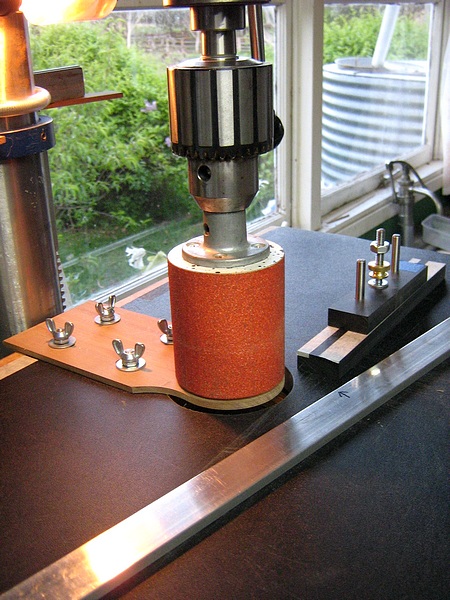
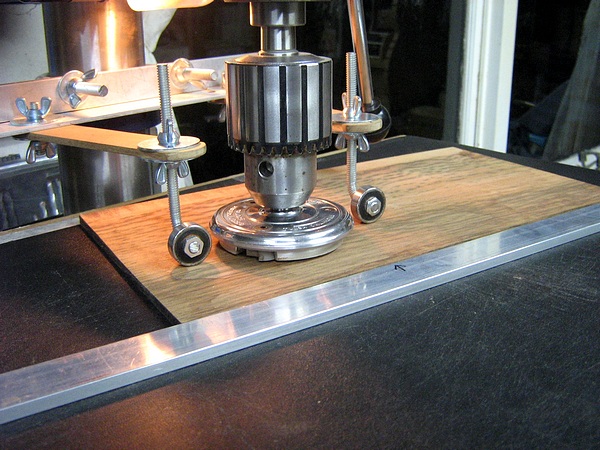
While I'm at it , Here's a pic. of my Saftey Planer set up. I find I don't use it much either, but is handy on reducing down the back of the headstocks , thicknessing bridge blanks etc. Those Myrtle slats give just the right amount of hold down flex
Hoping this may give you some ideas Sebastiaan
Cheers ,
Here's my version of the Robo Sander . Made the bottom Robo part out of Myrtle ( Not Tiger
I don't often use the Robo system , but the drum sander gets a good work out . The drum can be lowered into a hole in the bench top when the Myrtle plate is removed.
While I'm at it , Here's a pic. of my Saftey Planer set up. I find I don't use it much either, but is handy on reducing down the back of the headstocks , thicknessing bridge blanks etc. Those Myrtle slats give just the right amount of hold down flex
Hoping this may give you some ideas Sebastiaan
Cheers ,
Craig Lawrence
-
sebastiaan56
- Blackwood
- Posts: 1274
- Joined: Sun Oct 28, 2007 5:23 am
- Location: Blue Mountains
Thanks Craig,
I must say I wondered why Robbie didnt have anything to hold timber down as it entered and exited the safetplaner on his video, I'll rewatch it and see what I can glean. I was thinking of a roller guide as well. Its good to know you can make it work with the bearings! Some of the timber I have is a bit challenging.
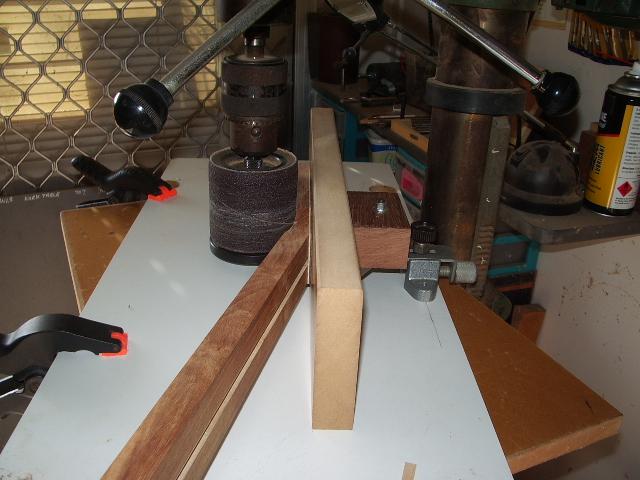
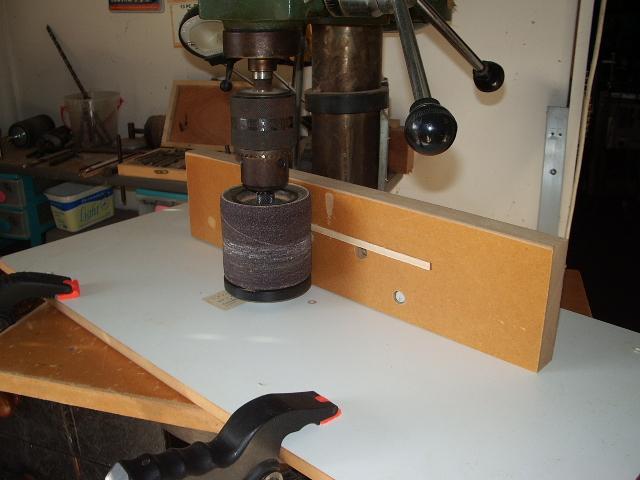
I do have a small sanding drum from CarbaTec but changing the paper is a PITA. I was going to make a 4" drum on the lathe or with a hole saw and glue or staple the paper on. This is also the plan for the drill press press ganged into sander service machine
Sebastiaan
I must say I wondered why Robbie didnt have anything to hold timber down as it entered and exited the safetplaner on his video, I'll rewatch it and see what I can glean. I was thinking of a roller guide as well. Its good to know you can make it work with the bearings! Some of the timber I have is a bit challenging.
I do have a small sanding drum from CarbaTec but changing the paper is a PITA. I was going to make a 4" drum on the lathe or with a hole saw and glue or staple the paper on. This is also the plan for the drill press press ganged into sander service machine
Sebastiaan
make mine fifths........
It may be more of a PITA using glue or staple to attach the sandpaper . Mine has a piece of oval shaped aluminium dowel which enters through and runs down a hole in the side of the drum , below the surface. The paper is wedged in there by it . Turning the dowel tightens up the paper ( with a bit of hand help ! ) . Very clever and works well .I can now change paper /grits very quickly !sebastiaan56 wrote:Thanks Craig,
I do have a small sanding drum from CarbaTec but changing the paper is a PITA. I was going to make a 4" drum on the lathe or with a hole saw and glue or staple the paper on.
Sebastiaan
Cheers Craig
Craig Lawrence


 [/img]
-
sebastiaan56
- Blackwood
- Posts: 1274
- Joined: Sun Oct 28, 2007 5:23 am
- Location: Blue Mountains
Thanks for the replies guys,
Craig, that sounds exactly like the one I bought. Seems like I may have to take a file to it as I cant get the paper into the slot. I'll trash the rubber at the same time.
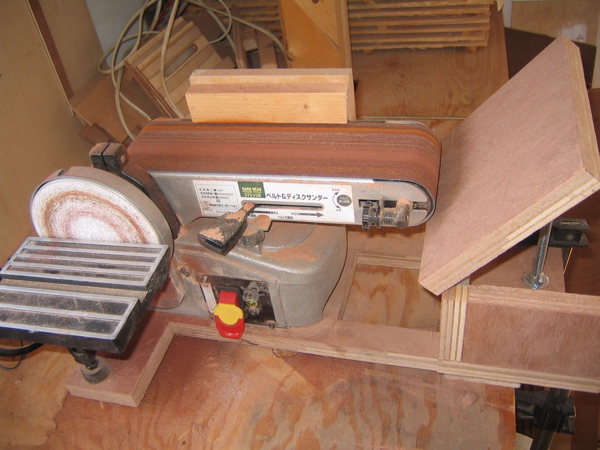
Thanks for the photos Alfred, Its nice to see sawdust sometimes I think that Im the only messy bugger here. That is exactly what I was thinking about. I like the strip to hold the paper. A question about the belt sander, I assume the tilting table setup is for smaller pieces, it doesnt look like its big enough for backs, sides etc.
Sebastiaan
Craig, that sounds exactly like the one I bought. Seems like I may have to take a file to it as I cant get the paper into the slot. I'll trash the rubber at the same time.
Thanks for the photos Alfred, Its nice to see sawdust
Sebastiaan
make mine fifths........

I've built pretty much the same set up for my belt sander after seeing some pictures of Bob's about a year ago. You'll find that using a longer belt rather than a small drum, you'll get less glazing of the paper, because it runs cooler. I can hardly do any work with the sanding drum in my drill press, but there are some jobs that it is the best tool in the shop.
It does bridges, back of head stocks and numerous other small pieces really well. The thing that I like about it is that it's really easy to put that curve in the transition from one thickness to the other like you see on bridges.
I think that trying to do backs and sides would be more than this design could handle. But maybe there is some clever bugger out there that can make it work.
-
Taffy Evans
- Blackwood
- Posts: 1079
- Joined: Wed Apr 30, 2008 6:54 pm
- Location: Charters Towers North Queensland
Hi
I agree with Allen's comments and do use the belt sander for shaping, however at times there is a need for a different way to do things and here are a few of mine.
The newest idea is a couple of years old, the mini drum sander, the other drill press sander I've been using for over twenty years [it's got a modern drum here]. The micro adjustment for the fence is from a Makita router, I keep all machine parts for recycling. However it's there if I need it now, at one time it was all I had
I've also shown the original drum I got made up, close on 30 years ago. It fitted into a hand drill on one end and your hand on the other, later when I got a drill press it fitted into that, never gets used now.
I then built a horizontal drum sander that I used for 15-20 years, now I have a proffessional thickness sander with power feed ect.


From little acorns big oak trees grow....
I agree with Allen's comments and do use the belt sander for shaping, however at times there is a need for a different way to do things and here are a few of mine.
The newest idea is a couple of years old, the mini drum sander, the other drill press sander I've been using for over twenty years [it's got a modern drum here]. The micro adjustment for the fence is from a Makita router, I keep all machine parts for recycling. However it's there if I need it now, at one time it was all I had
I've also shown the original drum I got made up, close on 30 years ago. It fitted into a hand drill on one end and your hand on the other, later when I got a drill press it fitted into that, never gets used now.
I then built a horizontal drum sander that I used for 15-20 years, now I have a proffessional thickness sander with power feed ect.
From little acorns big oak trees grow....
Taff
quite right, but I use the belt sander with that tilting table to thickness pegheads in exactly the same way that Taffy shows in that photo above, (except that he is using his drill press drum sander). Also the belt sander gets used to radius braces. The fence is attached for that purpose.sebastiaan56 wrote: A question about the belt sander, I assume the tilting table setup is for smaller pieces, it doesnt look like its big enough for backs, sides etc.
Sebastiaan
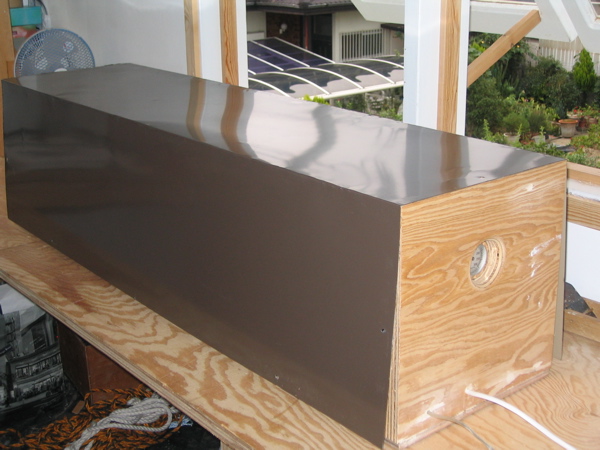
Its all good fun. I still have a small makita power saw up-ended in a makeshift plywood table and use it with a thin tungsten tipped blade for ripping braces (All red spruce. Splitting sitka isn't worth the trouble) and bindings. Bracing billets always seem to be pretty green so after ripping a batch of braces I dry them in a simple solar / electric oven.
I'm getting off topic but I'll fish out a photo for you.
Who is online
Users browsing this forum: 56nortondomy and 130 guests