Some weeks ago I started a thread explaining how to determine runout in spruce tops (here). In that thread arose the question if pronounced silking could generally be regarded as a reliable indicator of little or no runout, as Rudolf Fuchs suggests in the English version of his homepage. The answer was (and is) no. Silk is not a useful runout indicator, an example with nice silk featuring heaps of runout is given in the same thread already mentioned (here).
I had promised to provide some numbers and drawings to explain the relationship between silk appearance and runout a bit further. I'm doing this here in a new thread because silk appearance in fact is a pretty useless indicator for lack of runout so I don't want to mix the two things too much. Silk is a good indicator for a near to perfect radially cut board or veneer. I'll come to this here too.
When talking of silk we see longitudinally sliced medullary rays. Each ray is a band of ray cells which are thin wood cells going from the center of the stem towards the bark, crossing the annular rings at a right angle (90° with really few deviation).
I made some drawing from photos in the book Identifiying Wood, R.Bruce Hoadley's , The Taunton Press 1990. The original magnification indicated by Hoadley is 75x but the drawings here in the forum appear about 2x bigger on the screen (an as these are drawings, with less detail than the photos in the book). It's white pine, not spruce. I start with white pine because Hoaldley's book provides some nice information about it (lots of sharp microscopy photograhps).
When looking from outside to the center of an upright stem ( = looking onto a tangentially cut surface) we see this:
(magnification of the original photo in the book: 75x - this drawing appears bigger on the screen)
We can see the cross section of the ray cells (tiny, lined up circles) that form the rays in numbers of 3 to about 10, "squeezed" between the longitudinal wood fibers called tracheids. The thick, round cell (HR) is a horizontal resin channel. Resin channels in spruces and firs are much smaller than in pines, so we won't find those gorgeous resin channels in spruce.
Normally the ray cells form only one layer, we say the rays are uniseriate. Conifers mainly have uniseriate rays but also show occasionally biseriate, partially biseriate or even partially triseriate rays. We will never find so called multiseriate rays in conifers (some maples feature 4-5 cells thick rays, other maples up to more than 10-seriate rays). Here a picture with a partially biseriate and a partially triseriate ray (still Hoadley's white pine) :

(magnification of the original photo in the book: 150x - this drawing appears bigger on the screen)
Here the horizontally running lines are the longitudinally sliced ray cells of a ray on a radially cut surface - that's what we see as "silk" :
(magnification of the original photo in the book: 75x - this drawing appears bigger on the screen)
And this is the cross cut surface featuring a nice ray (invisible to the naked eye because it's only one cell thick (uniseriate) and a vertical resin channel. The big cells in the top of the picture are earlywood cells. Then there follow about 5 rows of latewood and the rest of the bottom cells are again earlywood without reaching the next (actually the former) latewood cells. With this you get an idea of the magnification:
(magnification of the original photo in the book: 75x - this drawing appears bigger on the screen)
I arranged a 3 dimensional model for a better visualization of the orientation of these pictures.
R = radial surface
T = tangential surface
X = crosscut surface
That 3-D model is not to scale: if that log should serve for a guitar top then the green cube in the left part of the picture is way too big - it should have an edge length of considerably less than the width of an annual ring.
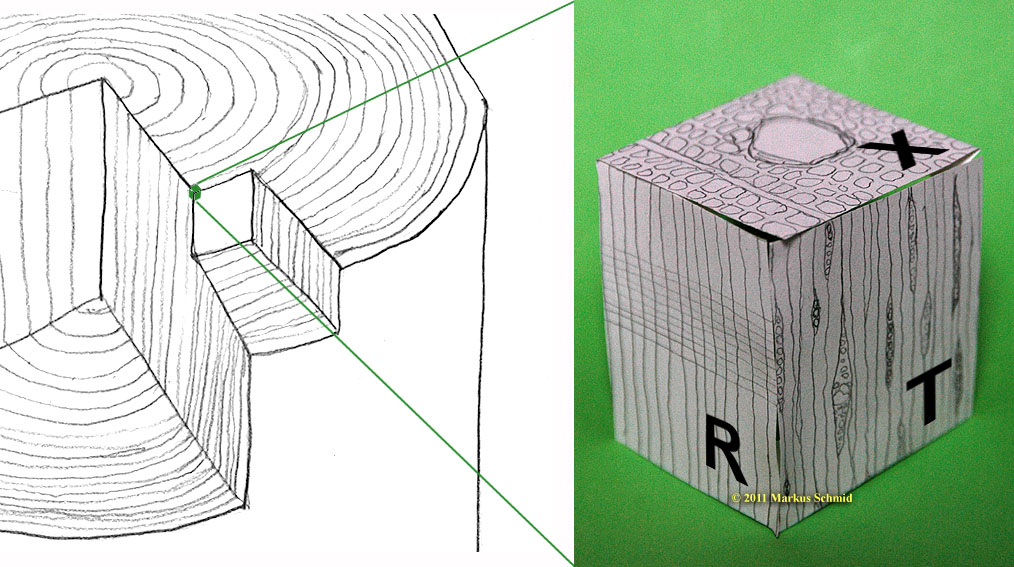
(Click to enlarge)
*************************************
*************************************
Let's take a closer look on the average geometric proportions of the medullary rays. As we can see in some pictures above the space occupied by the cross section of the ray cells can be described by "lightly squeezed between the tracheids" resulting in being about twice as high than thick (in the upright stem - in the following drawings the stem "lies on the floor" ).
The cross section of a ray 8 cells wide:
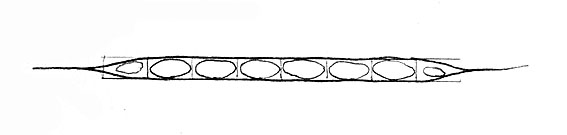
The "grid", an approximation of the ray's cross section shape:

If a board, billet or veneer is cut exactly radially (green cutting line), all exposed (sliced) 8-cells rays are between 6 and 8 cells wide:
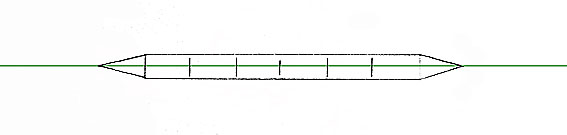
But of course there are also plenty of two-, 3-, 4-, 5-, 6- and 7-cells wide rays... and some wider ones too. But for now let's only look at the 8-cells rays, a well represented number of cell-wideness in spruces.
If we have a runout ratio of 1:16 (which is still OK with A-grade spruce but will produce a pretty pronounced color/refraction difference between the top halves) things look like this:
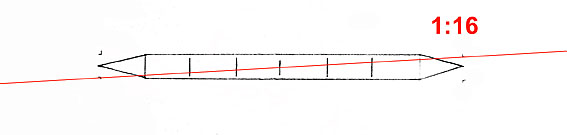
We easily can see that the maximum width will still be something over 6 cells wide - more than the minimum width with zero runout. But how much more? Let's do an approximate "calculation" and look at the tips of the ray cross section:
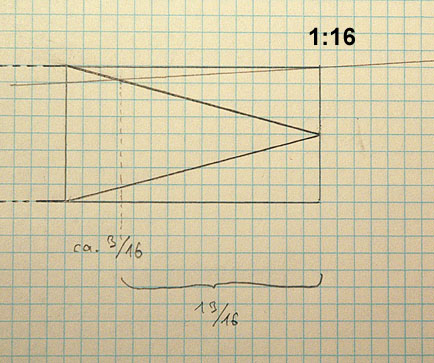
As we see, at a runout ratio of 1:16 each "tip" will be shortened by 13/16 of it's length. The whole width of the ray is 8 x 16/16 or 128/16. With the shortened "tips" it will be about 26/16 shorter. 26 divided by 128 makes 0.2031, or 20.31%, which is the amount by which the visible ray will be narrower on a guitar top with fairly poor runout properties. It still has 80% of it's maximum width at no runout! Barely visible I'd say.
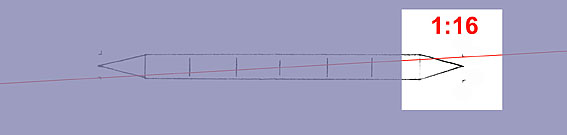
Let's go a step or two further, things get easier without the "tips".
Runout ratio 1:12
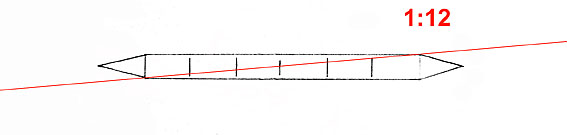
1:12 an interesting ratio because the rising angle of the grain is arctan (1/12) = 4.76°, or close to 5°. Let's see what this means when this angle is applied to the orientation of the growth rings (radial cut = vertical growth rings). If you visualize it, 5° off is not extremely much for a nearly-radial cut. But what happens to the silk with 5° off-radial cut? Right, the length of the silk streaks (on true radial cut up to several centimeters long) shrinks to 75% (6/8) of the ray width (something more than 1/10 millimeter). That's what I call "indicator"!
(Btw, according to the website of High Mountain Tonewoods 5° is the absolute maximum off-quarter angle Shane Neifer allows on his lowest grade spruce tops. Me and certainly many others of you have received amazingly silky tops that came in his popular low grade bundles)
Back to runout. Very poor runout ratio 1:8 still shows half of the actual ray width! (I have not yet spotted a piece of package grade spruce with poorer runout than 1:10)
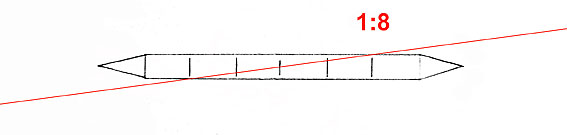
As you see, Mr. Fuchs is not wrong when he says that no runout renders nicer "silk", but he is wrong when believing that one could tell differences apart before runout gets unacceptable.
Here I have created a surface with a runout angle of 45° just to see what "silk" looks like at a runout ratio of 1:1
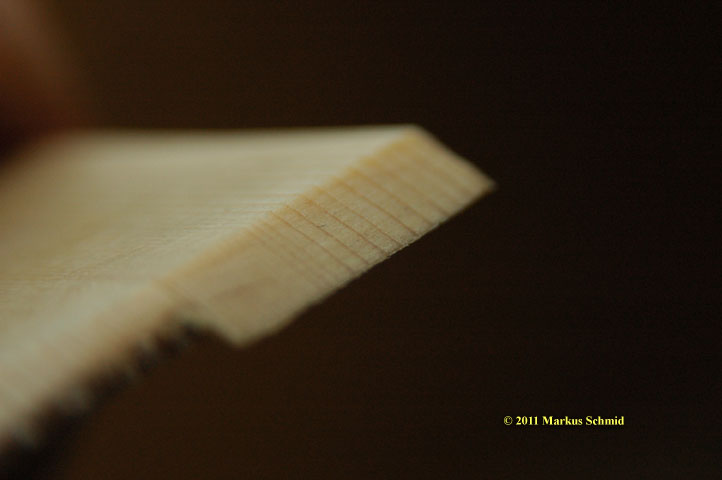
The angle between the surface and grain direction is about 45° (to visualize I placed a straight strut along the grain) :
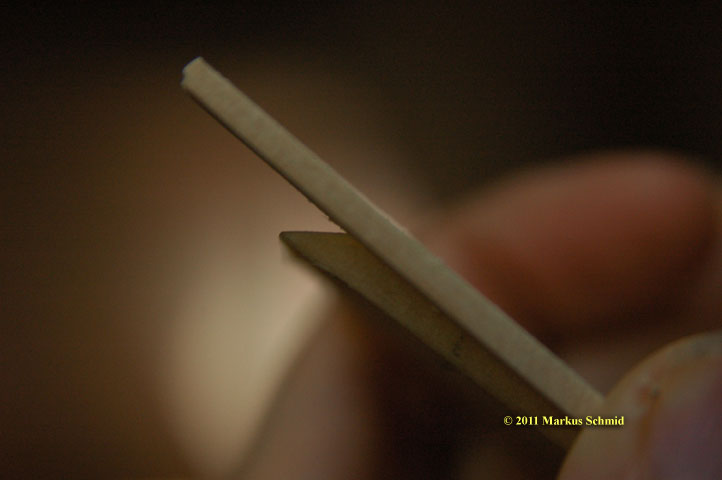
Although the silk lines get really thin at runout ratio 1:1 it is still visible to the unaided eye (Mr. Fuchs' Theory proves to be true at this extreme) :
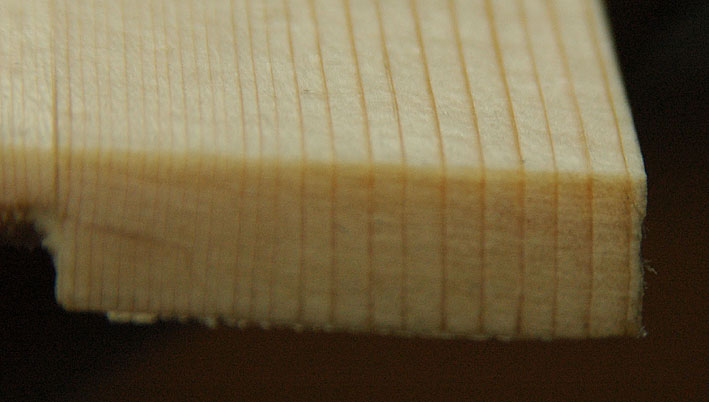
We might think now: what about silk in end grain?
No way! The rays (one cell thin) will not be visible to the unaided eye.
But even a cheap 5 dollar hand lens (claimed magnification 60x) with adequate lighting shows more detail than I had imagined before jumping into this. For taking pictures I bought another toy (same link as before) which is not that bad when using the eyepiece, but taking nice photographs is a bit tricky, especially when not using transmitting light (when looking at solid pieces).
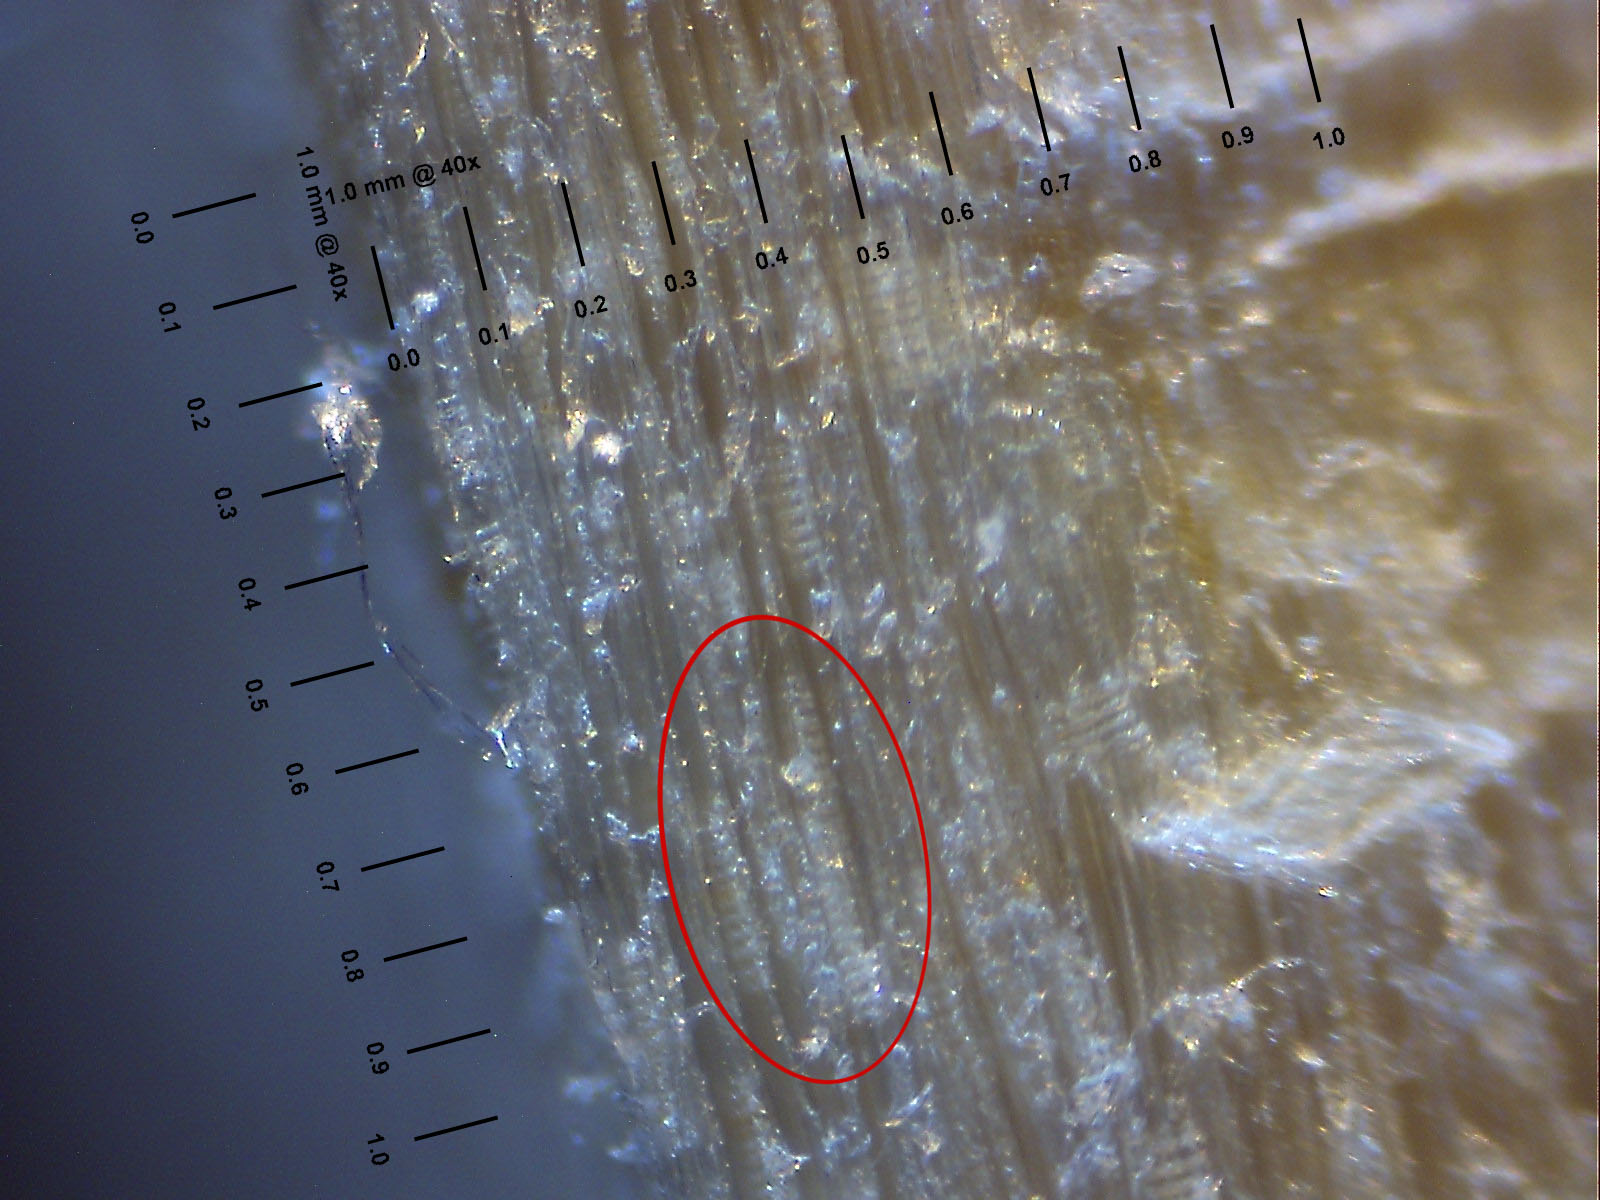
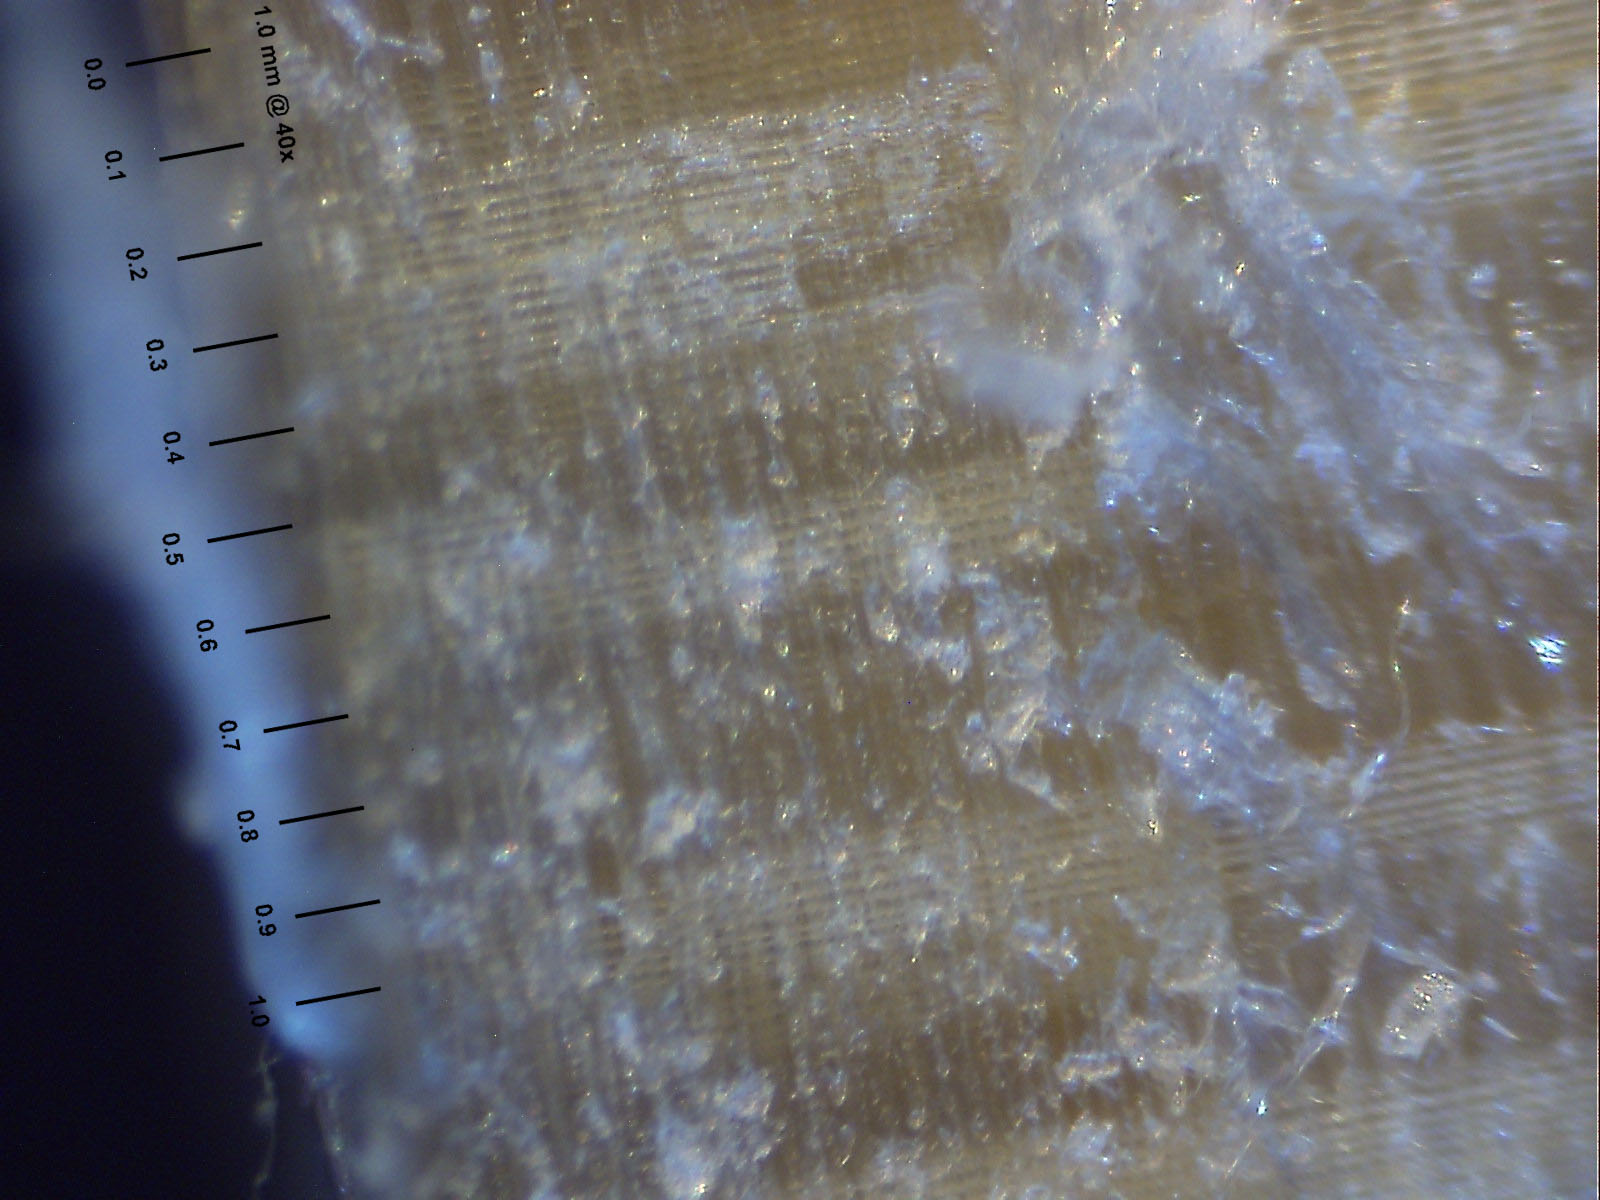
I used a mix of transmitting light plus two direct light sources for the following two pictures (showing the end grain of the same piece of Picea abies as before)
I made the transparent ruler by making a photo of a real ruler under the microscope and then dividing one millimeter in ten parts (in Photoshop).
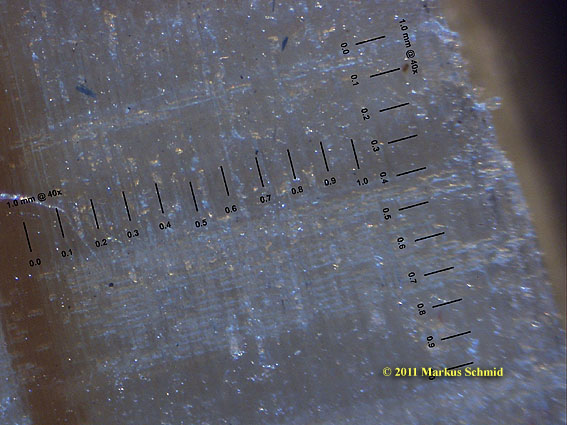
Well, here comes silk in the end grain view (the horizontal lines - pretty thin! ) :
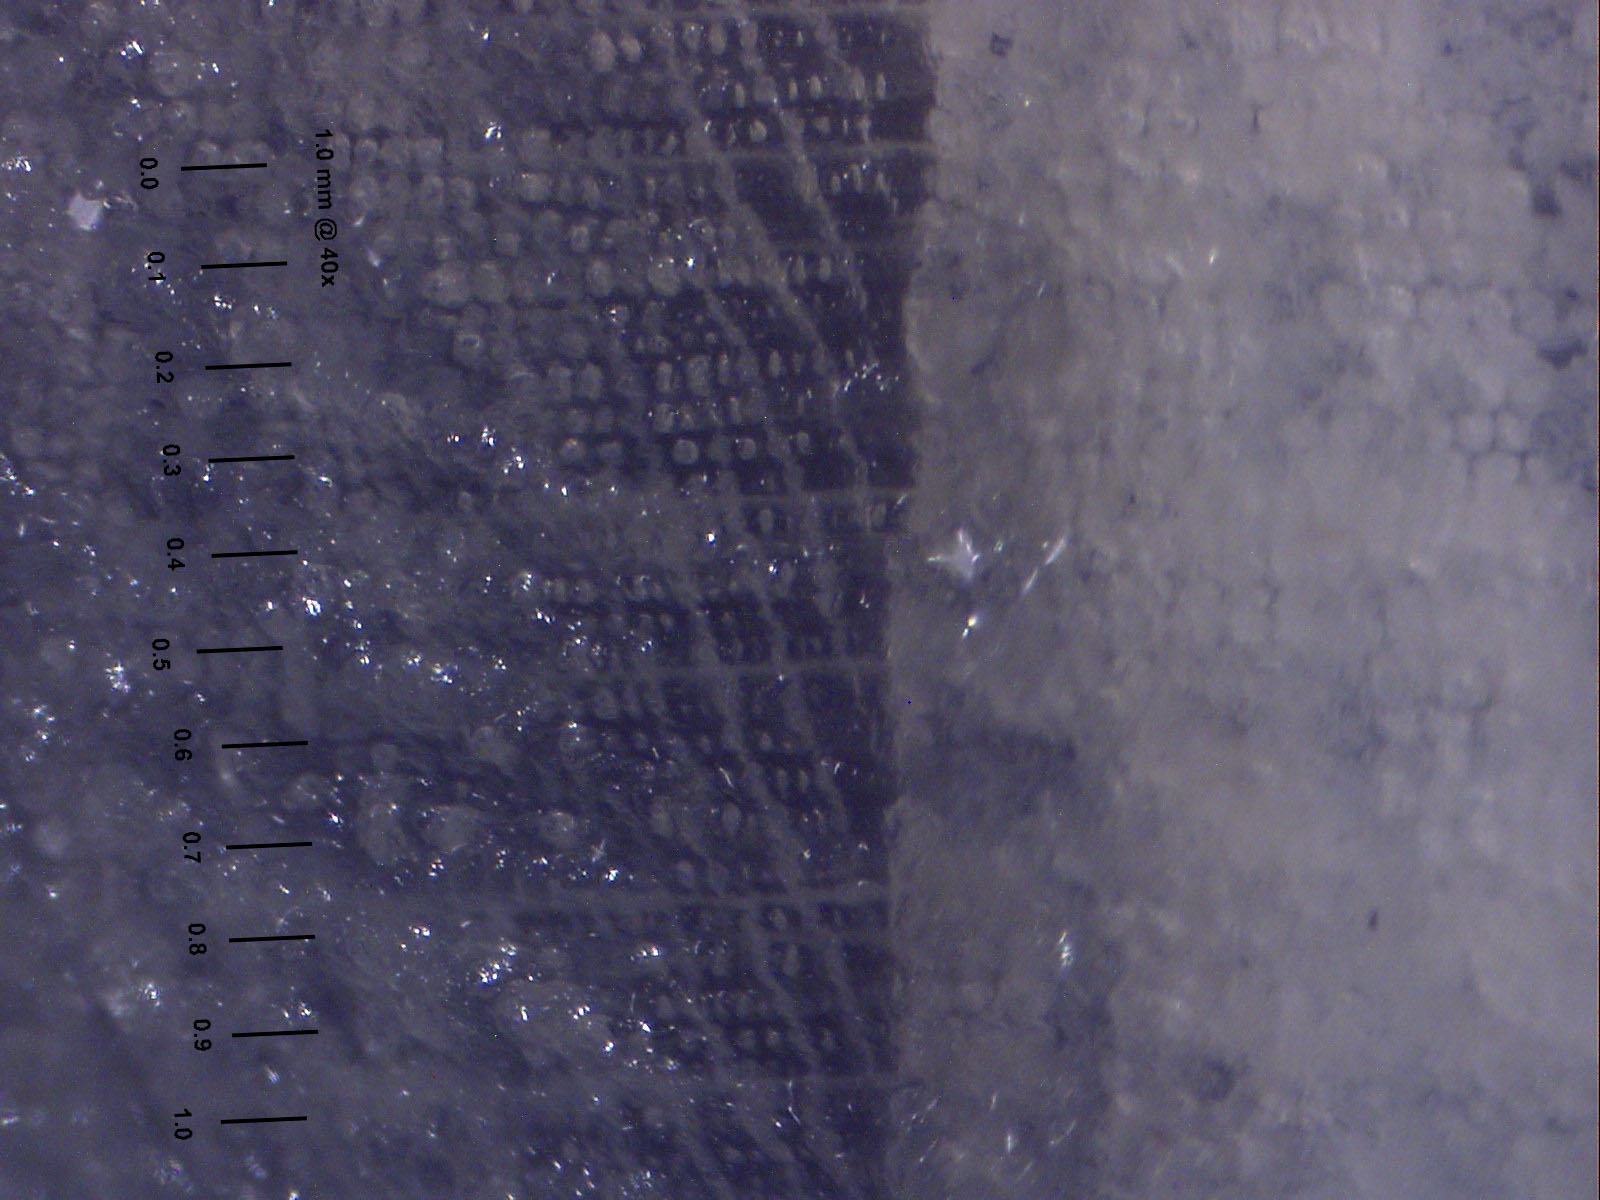
(click on the picture to enlarge)
We also can distinguish very clearly the narrower latewood tracheids towards the center of the picture. Then, further on the right are the blurry but still recognizably bigger earlywood cells. I think the blurry part is sanding dust stuck in the bigger cells (yes, I had sanded the endgrain (to see it at all) and now I had chiseled off a slice for looking at it through the microscope) The diagonal lines (upper left to lower right) are chatter marks from the less than sharp chisel - not really sampling at the peak of state of the art...
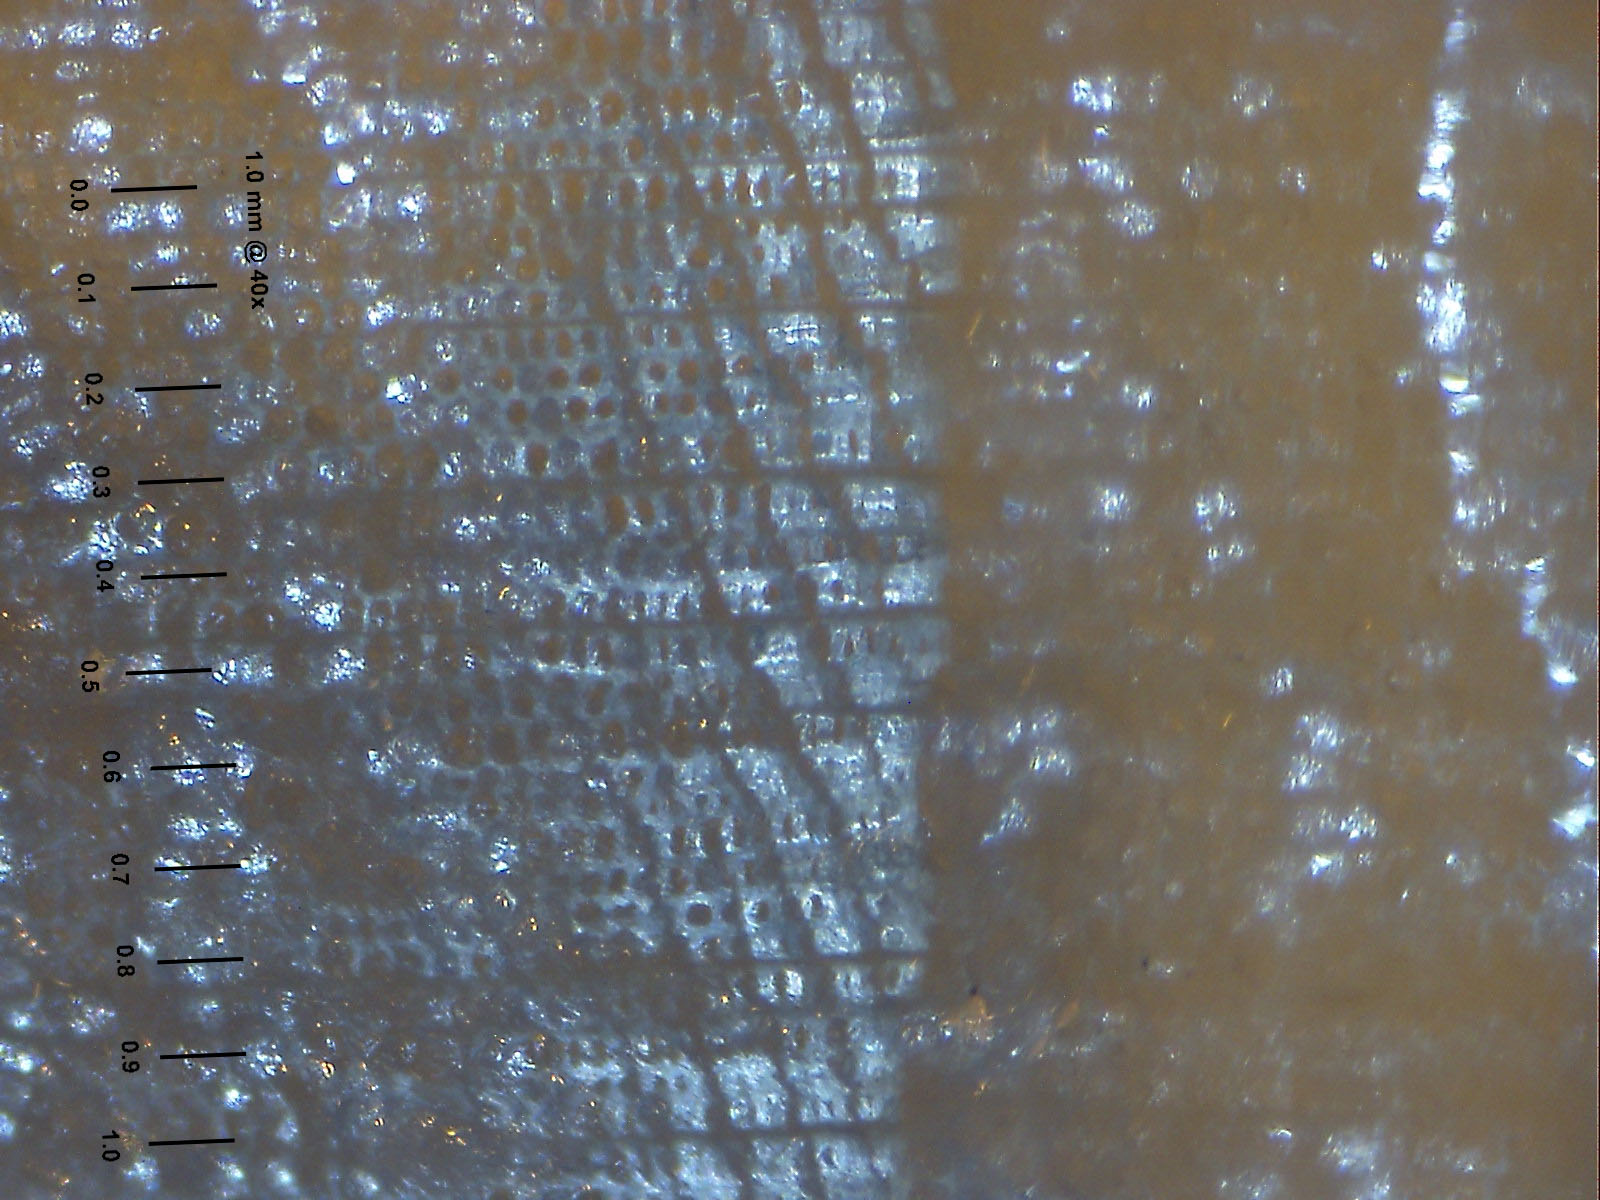
(click on the picture to enlarge)
*************************************
*************************************
However, the simple calculation and cell-count is not the whole story of silky look. Why, for example, Shane Neifer's Lutz Spruce has such a spectacular silk compared to other spruces like Swiss Alpine Spruce or Alaskan Sitka Spruce?
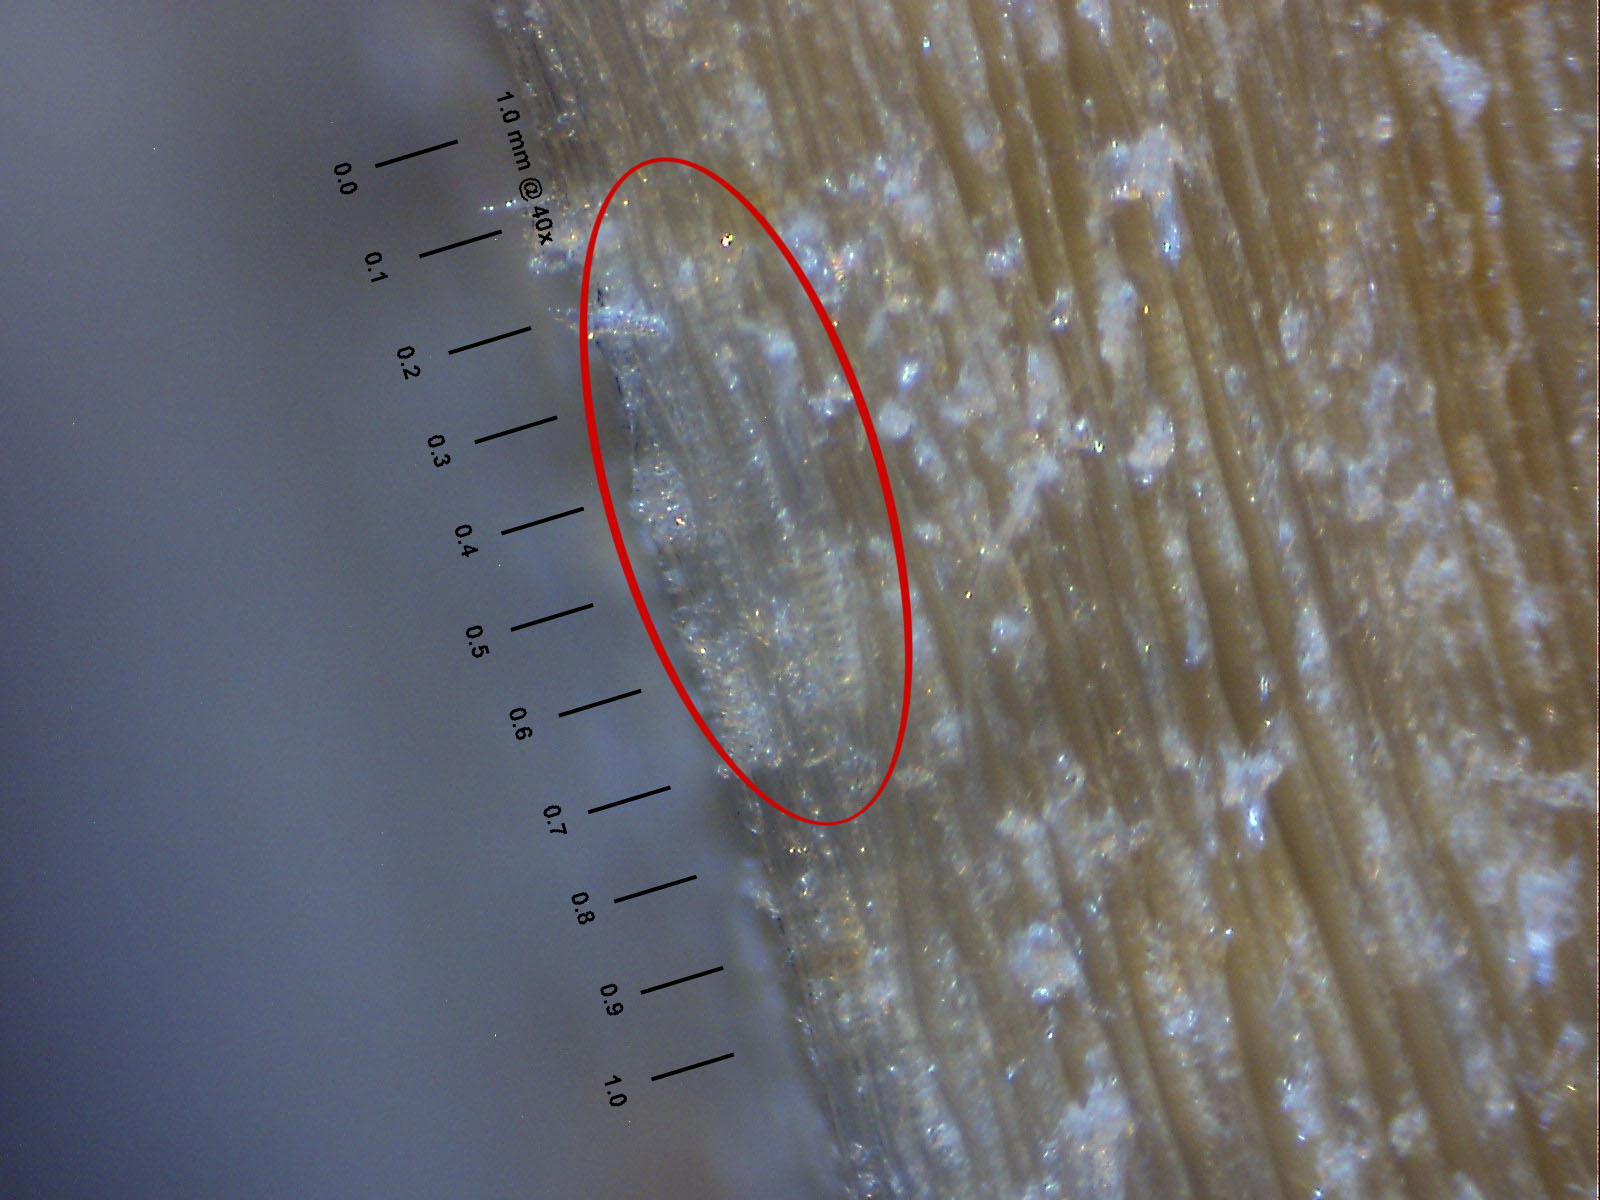
This is a picture of the radial surface of alpine spruce (Picea abies).
(click on the picture to enlarge)
On the left we can see the dark brown latewood which is about 2/10 wide.
We also can distinguish the tracheids running parallel to to (and of course in) the latewood.
There are three rays present. The upper one is very narrow (two ray cells wide, something between 2/100 and 3/100 mm), the middle one which is 5 cells wide (ca. 1/10mm) and directly adjacent the lower one which is 11 cells wide which equals to a bit more than 2/10mm.
I desperately tried to make things decently visible and used two light sources, a blue one and a yellowish one. Also due to the shellac layer that is on (it's a splinter of the piece here) some lines appear twice: in yellow and in blue. The quality of the pictures is much poorer than what I see with the $5 hand lens!
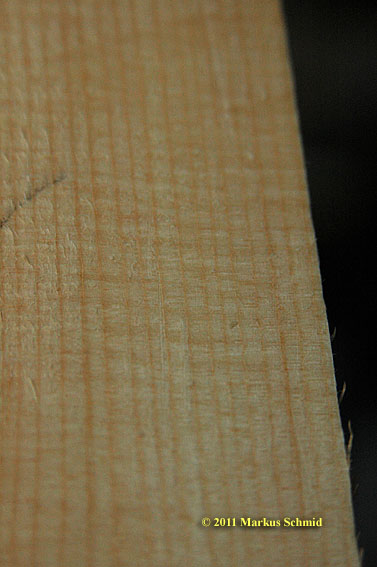
Now let's look at Shane's crazy Lutz-Silk.
Normal view:
Closeup (for better orientation you can use the speck at the left of the red letters as a reference point in the former picture):
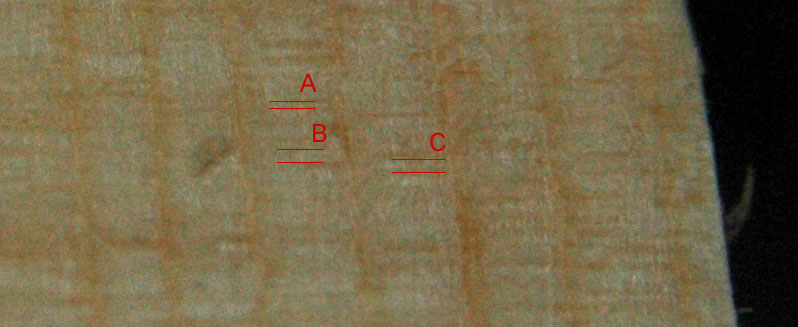
Between/at the right of the fine lines "A" we can see one ray
Between/at the right of the fine lines "B" we can distinguish 2 rays
I'll explain after the next picture what we are seeing between the fine lines labeled with "C"
The dark stripes are the places where no medullary rays are visible (!)
Under the microscope:

(click on the picture to enlarge)
Even at a first sight it is evident that the Lutz rays are not wider than the rays in the alpine spruce sample. But there are much more rays visible, and we can see rays at different depths! I marked four rays, (1) being in the topmost cell layer, (2) one layer below, (3) two layers below and (4) three layers below the surface. This means that the Lutz spruce not only has plenty of rays but also more transparent tracheids than other spruces have. i don't know if this is a genetic property of Lutz spruce or if it is dependent on the ambient / growth conditions. Maybe both. I really don't know, I'm not an expert.
Here two (bad) pictures of the tangential surface of the same Lutz splinter. The section of the ray cells appear much too big because they seem to be a bit out of focus (I'll have to learn to prepare good microscopy samples or stop with this and concentrate on lutherie). Anyway I hope you can get an idea of that incredible effect of "ray clustering" (my term invention) :
(click on the picture to enlarge)
(click on the picture to enlarge)
And here just for the fun of looking at gorgeous silk, two pictures more:
(click on the picture to enlarge)
(click on the picture to enlarge)
Now I'll have to practice a bit on making nice microscopy samples and I hopefully will be able to provide also some decent tangential views of several spruce types.
Cheers,