I would be greatfull if anyone has a tutorial on inlay of carbon fibre for necks, diferent styles and techniques. This is a new relm for me.
Cheers
Richard
Carbon Fibere inlay for necks
-
hilo_kawika

- Blackwood
- Posts: 144
- Joined: Mon Oct 13, 2008 10:29 am
- Location: Hilo, Hawaii
- Contact:
Aloha Richard,
Well, since nobody seems to be picking up the gauntlet, I'll give it a try. The following approach works for my ukuleles and nylon string guitars. I used a 3/8" square rod of graphite epoxy composite although as mentioned in earlier discussions, the same size/shape aluminum rod would do as well.
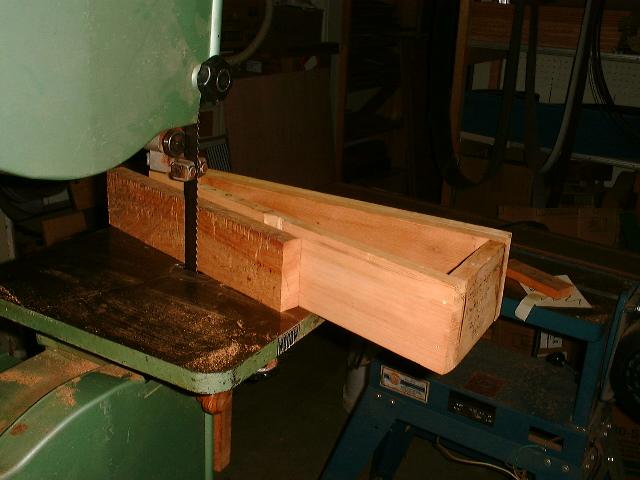
First we need to make the neck blank. I begin by cutting the ~15 degree neck angle with a jig that fits into my bandsaw table slot.
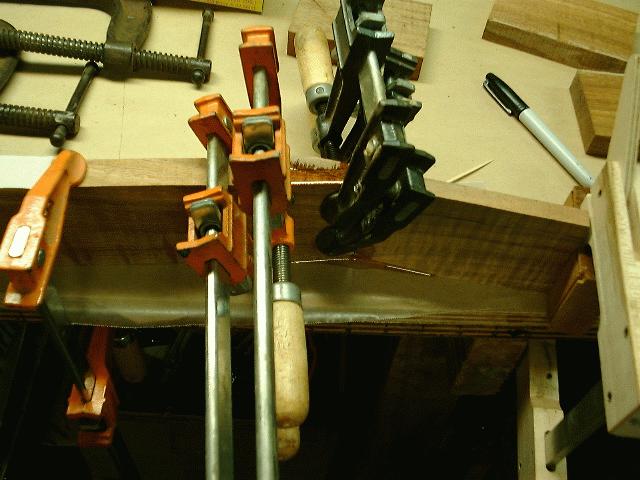
The surfaces are cleaned up for gluing with a belt sander. The gluing operation is shown next:
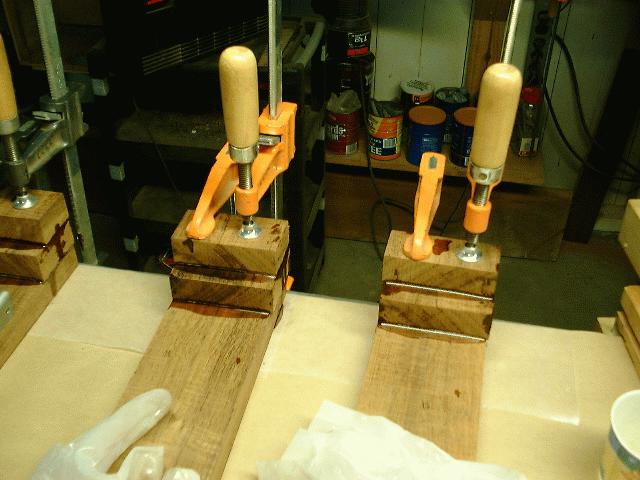
Then the heel blocks are glued into place:
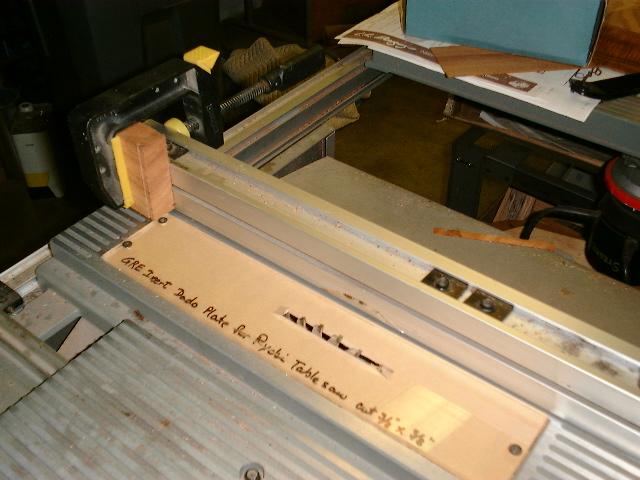
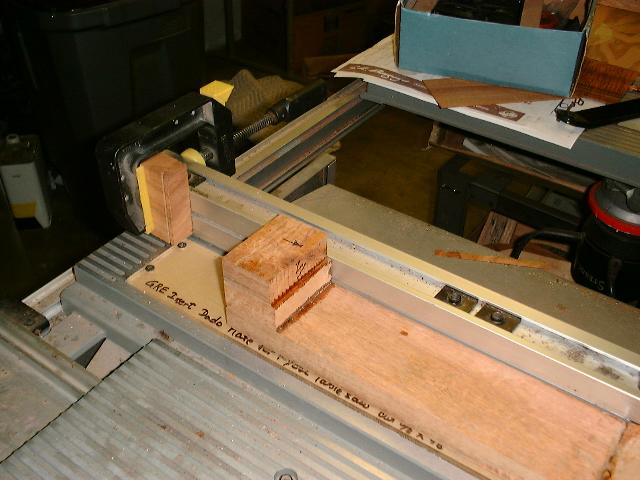
The surface that will contain the rod is cleaned up and trued with the belt sander. Next the table saw and dado blade are adjusted so that the blade is at the right cutting height and that the cut is in the center of the neck:
A stop block is clamped to the fence so that the neck will only move so far forward and the slot cut won't impinge on the headstock face. Now, holding the top of the heel and the end of the headstock and also pressing the neck against the fence, slowly move the neck forward so that the dado will cut the slot (my hands not shown in the picture:
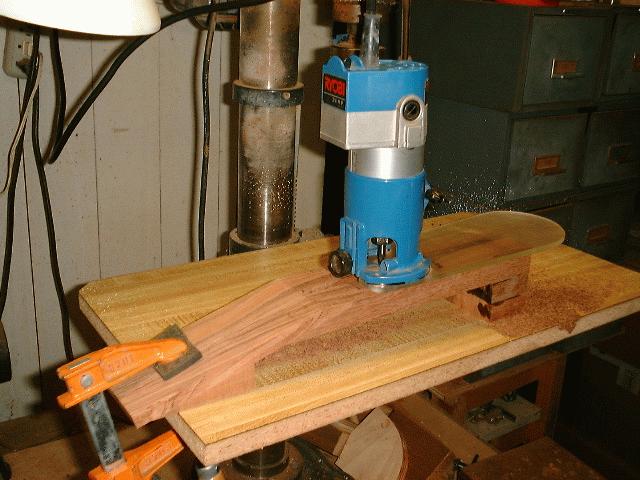
At this point, the end of the slot adjacent to the headstock will need cleaning up. I find the drill press table convenient for this and clamp the neck to it so that it is level and stable. I now use a 1/4", left-hand spiral, right-hand cutting carbide bit to square up the slot:
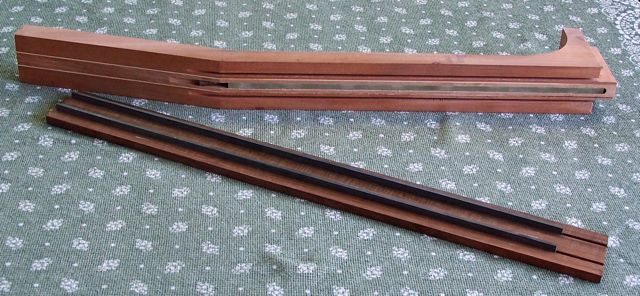
At this point, you only need to cut the rod to length, and use a slow curing epoxy to glue it in place. I put a piece of masking tape across the end of the slot on the heel block to keep the epoxy from running out of the slot. Then I cover the bottom of the slot with the epoxy and put the rod in, hoping there will be some squeeze out. Wear vinyl gloves for this operation and work in a well ventilated place. After 5 minutes or so, I flip the neck over and clamp it onto a flat surface with a piece of wax paper between the neck and the flat surface. When the epoxy has hardened, the wax paper comes off easily.
Any further questions, please don't hesitate to ask.
aloha,
Dave Hurd
http://www.ukuleles.com
Well, since nobody seems to be picking up the gauntlet, I'll give it a try. The following approach works for my ukuleles and nylon string guitars. I used a 3/8" square rod of graphite epoxy composite although as mentioned in earlier discussions, the same size/shape aluminum rod would do as well.
First we need to make the neck blank. I begin by cutting the ~15 degree neck angle with a jig that fits into my bandsaw table slot.
The surfaces are cleaned up for gluing with a belt sander. The gluing operation is shown next:
Then the heel blocks are glued into place:
The surface that will contain the rod is cleaned up and trued with the belt sander. Next the table saw and dado blade are adjusted so that the blade is at the right cutting height and that the cut is in the center of the neck:
A stop block is clamped to the fence so that the neck will only move so far forward and the slot cut won't impinge on the headstock face. Now, holding the top of the heel and the end of the headstock and also pressing the neck against the fence, slowly move the neck forward so that the dado will cut the slot (my hands not shown in the picture:
At this point, the end of the slot adjacent to the headstock will need cleaning up. I find the drill press table convenient for this and clamp the neck to it so that it is level and stable. I now use a 1/4", left-hand spiral, right-hand cutting carbide bit to square up the slot:
At this point, you only need to cut the rod to length, and use a slow curing epoxy to glue it in place. I put a piece of masking tape across the end of the slot on the heel block to keep the epoxy from running out of the slot. Then I cover the bottom of the slot with the epoxy and put the rod in, hoping there will be some squeeze out. Wear vinyl gloves for this operation and work in a well ventilated place. After 5 minutes or so, I flip the neck over and clamp it onto a flat surface with a piece of wax paper between the neck and the flat surface. When the epoxy has hardened, the wax paper comes off easily.
Any further questions, please don't hesitate to ask.
aloha,
Dave Hurd
http://www.ukuleles.com
How to become a millionaire? Start with $2 million and become a luthier...
Nice little tutorial David.Good to see you haven't completely retired to fishing .This is a link to the ABC prgram from Albany.
http://www.abc.net.au/rn/intothemusic/default.htm
http://www.abc.net.au/rn/intothemusic/default.htm
Cheers from Micheal.
Remember the "5P Rule".
Preparation Prevents Piss Poor Performance.
Remember the "5P Rule".
Preparation Prevents Piss Poor Performance.

Sorry, somehow I missed this when it was first posted.
For my guitar necks I use 1/8 x 3/8 rods along with a truss rod. The CF rods are spaced about 1/4 " from the truss rod. Cut in a similar manner that David does.
For my adjustable necks I have the CF rods inlet into the fret board by 2.5 mm and they extend to the end of the fret board. This is so that the floating part of the fret board is supported by the CF rods, and makes them rock solid.
Cutting the slots in both pieces to mate up perfectly is a little tricky, but doable. After the fret board is shaped, and slotted, the sound hole end is bound to hide the slots and ends of the CF rods.
Who is online
Users browsing this forum: No registered users and 3 guests