Bolt on neck borer
Posted: Mon Apr 13, 2009 12:33 pm
It's another recycled project but I find it useful and time saving if doing a few necks at a time, which is my plan in the future. The jig is dedicated so even one neck can be worked on quickly, if it was the same as the last one.
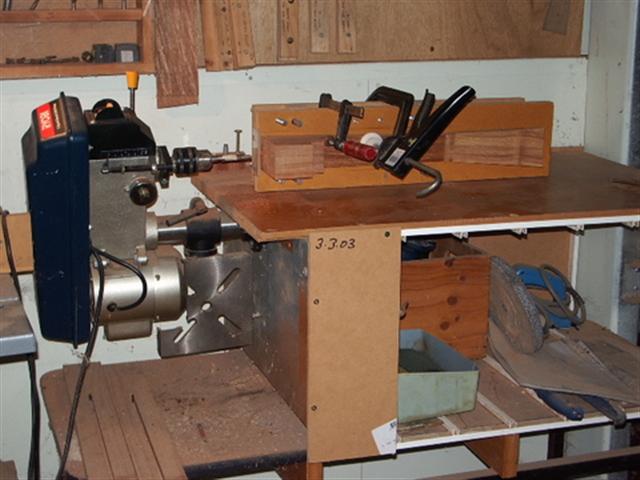
The first photo shows the full set up with a neck in position. It can be seen how the drill press has been mounted on its side, a horizontal borer.
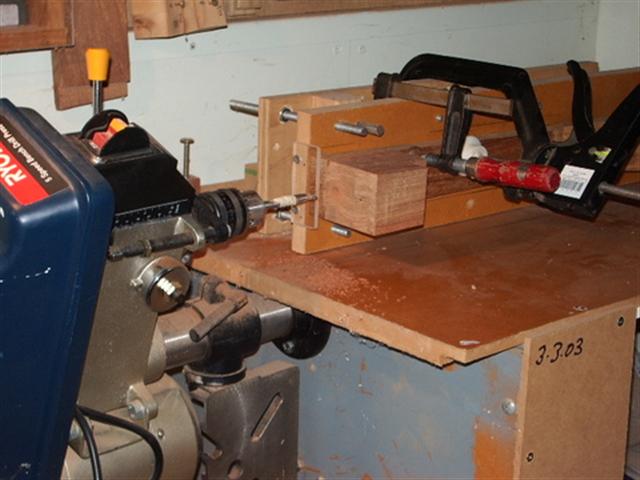
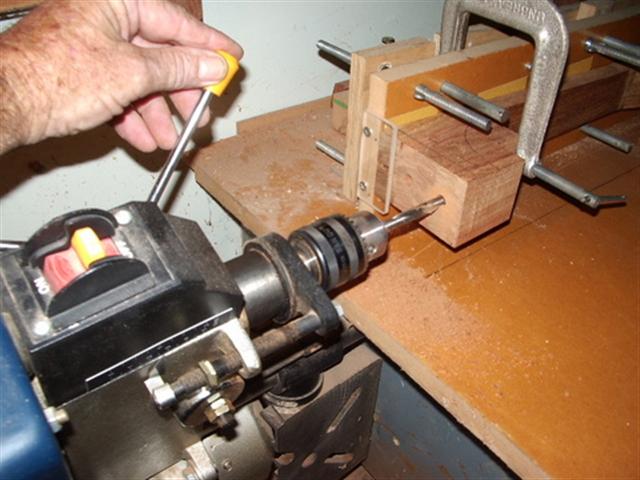
Photo Two: [if they come out in the right order] is a close up of the borer
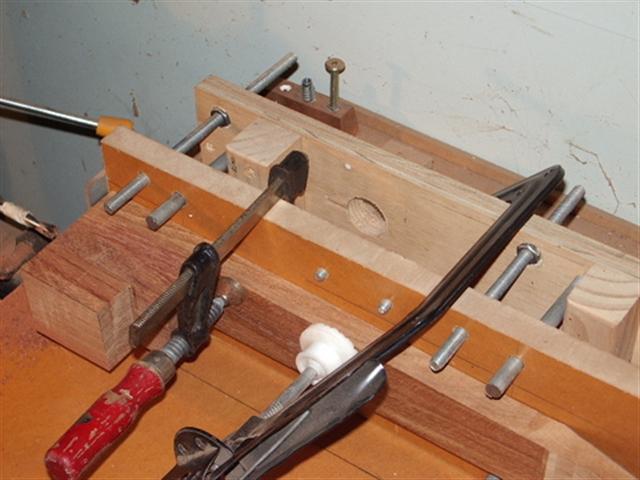
Photo Three: Shows the red clamp holding the neck to the adjustable neck holder board, and the black clamp holding this assembly to the back base board. Sandwiched between these are wooden spacer blocks that give the bolt holes their location in the heal. There are different size blocks for different neck and heal sizes.
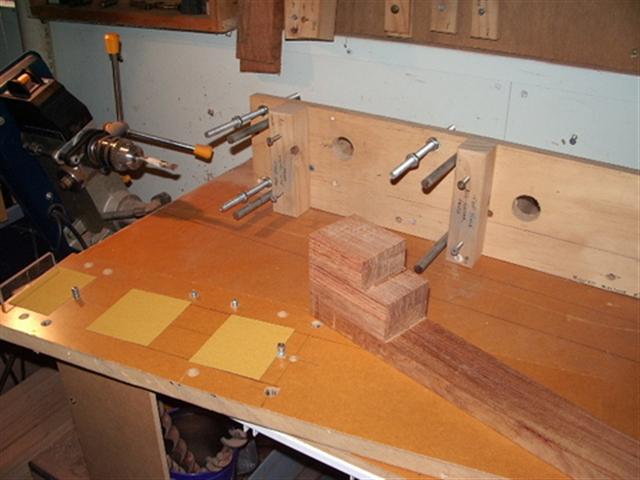
Photo Four: Shows the neck holder board with sandpaper glued to it for grip and two reference pins that locate into the necks rod channel for centering the bolt holes. In the back base board can be seen four locating pins and three depth adjusting posts. The spacers are put in place, the neck board brought up to them and the nuts wound up on the adjusting posts to spread the clamping pressure and keep the assembly square to the drill bit.
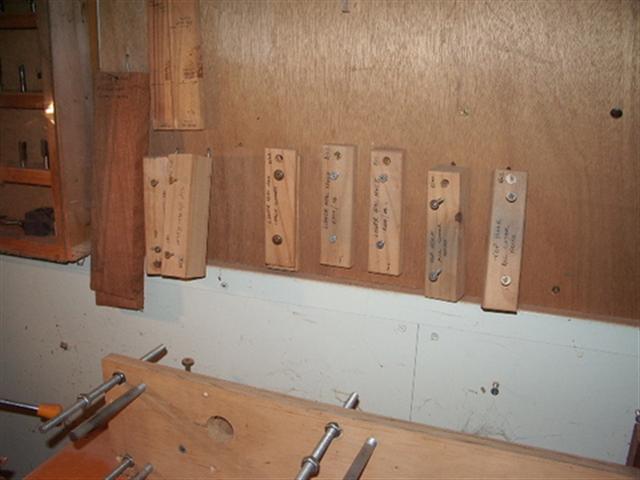
Photo Five: Shows a close up of the back board and the wooden spacer blocks [hanging] that give a quick reference to bolt hole spacing.
Photo Six: Shows the borer in action.
I have some refinements in the pipeline but not fitted as yet
Thanks for looking
The first photo shows the full set up with a neck in position. It can be seen how the drill press has been mounted on its side, a horizontal borer.
Photo Two: [if they come out in the right order] is a close up of the borer
Photo Three: Shows the red clamp holding the neck to the adjustable neck holder board, and the black clamp holding this assembly to the back base board. Sandwiched between these are wooden spacer blocks that give the bolt holes their location in the heal. There are different size blocks for different neck and heal sizes.
Photo Four: Shows the neck holder board with sandpaper glued to it for grip and two reference pins that locate into the necks rod channel for centering the bolt holes. In the back base board can be seen four locating pins and three depth adjusting posts. The spacers are put in place, the neck board brought up to them and the nuts wound up on the adjusting posts to spread the clamping pressure and keep the assembly square to the drill bit.
Photo Five: Shows a close up of the back board and the wooden spacer blocks [hanging] that give a quick reference to bolt hole spacing.
Photo Six: Shows the borer in action.
I have some refinements in the pipeline but not fitted as yet
Thanks for looking