new to the forums~ Cole Clark

Talk about musical instrument construction, setup and repair.

Moderators: kiwigeo, Jeremy D

User avatar
Allen
Blackwood
Posts: 5252
Joined: Thu Oct 11, 2007 5:39 pm
Location: Cairns, Australia
Contact:

Post by Allen » Sun Sep 21, 2008 1:15 pm

Ok, there is a lot of things that you'll need, but heaps of them you probably already have, or can improvise something else.
  • 2 good rulers, 6" and 24" can double as a straight edge
    small hammer for fretting, I have a small ball peen hammer
    block plane, I use it all the time
    larger plane, I've got one but don't use it all that much
    hand drill and drill bits.
    screw driver, small phillips head for tuner screws.
    allen keys for neck hardware and truss rod
    saw suitable for fret slots, or get fret board pre-slotted
    chisels, narrow, medium and large
    razor saw, not necessary but really handy.
    files, rasps, sanding blocks
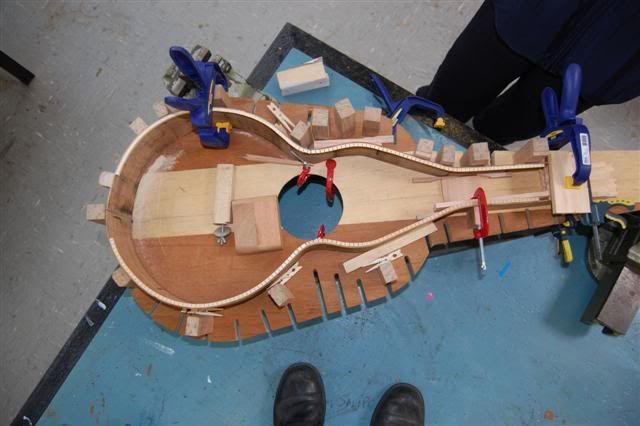
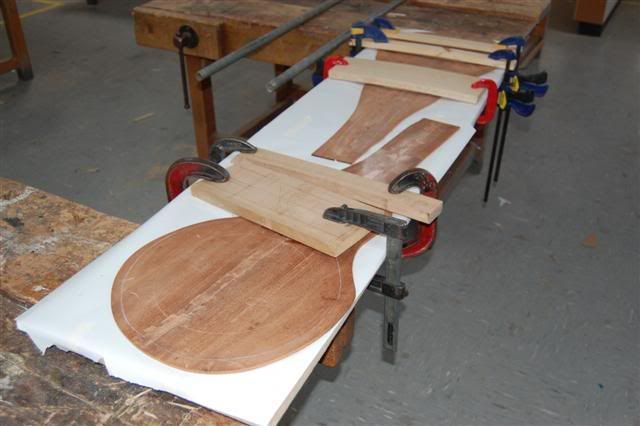
    clamps, you will never have too many, various sizes
    pliers
    end cutters
There are lots of ways of inlaying a rosette, and cutting the purfling / binding channel. These will require different tools, depends on the method you choose. Machinery that you will use includes bandsaw, table saw, drill press, jointer, thicknesser, drum sander, disk sander, belt sander, bobbin sander. Hopefully your school has all of these, though the drum sander is probably asking for a lot.

And if you want a vague idea of what the cost of setting up shop is, then Sylvan Wells has put together a list on his site. This is in US currency, and some prices are reasonable, while others are totally unrealistic for Australia. You can see his list here. Don't let this scare you off of this. You can get by with just the basics, building with nothing more than hand tools. I watched some fellows in Mexico build guitars in a lean too with nothing more than hand tools, crude wooden benches and a dirt floor.

I recommend you have a look at his "Articles" section. He has a lot of great info on it.
Allen R. McFarlen
https://www.brguitars.com
Facebook
Cairns, Australia

User avatar
ozziebluesman
Blackwood
Posts: 1529
Joined: Wed Oct 10, 2007 9:12 am
Location: Townsville
Contact:

Post by ozziebluesman » Sun Sep 21, 2008 2:11 pm

G'day Jake,

I spose I am really just repeating what most have already said but from on beginner builder to another, make up a planned list of necessary tools and start watching eBay. It dose take time but it is well worth it.

I am a beginner builder and have just finished my first two acoustic guitars. They are weissenborn copy guitars built with hand tools only from the MIMF plan. My only shop tool is a bench sander which is very handy indeed!

I use three older chisels all bought off eBay, one Marples 3/16s paring length $20, one Berg 3/8s standard length $15 and a Marples 3/4" $28 beveled edge paring length chisel. I personaly like the longer length of a paring chisel. They are all made from very good steel and hold an edge very well. As Kim explained the scary edge method with the glass and the wet and dry paper is the trick. I have a vintage stanley, English made block plane that come from England bought off eBay. It cost $30 aus. I think a drill press is a must also. I don't have one yet but it is on the birthday gift list for november. So you just need to make up a list and slowly but surely, find what you need on eBay and build up your tool kit. These tools are available in second hand shops too but eBay is convenient.

For rosette channels and soundhole cutting I used the soundhole cutter from LMI in the USA. It cost about $70 if I remember right. Great little tool to use. There are lots of great little specialist tools that you can buy from Stew Mac also. Althought these tools are not absolutely necessary they do help you to do a more pro job. I use their small hand saws to cut fret slots. These saws are very resonable in price. One of the Japenese saws are also great for small cutting requirements. Once you get used to the reverse cutting action they can cut very precisely. You can buy one of these for about $70. I have a good solid work bench, a gobar deck and plenty of different type clamps.

Finally there are great venders on the forum that will sell you excellent wood already machined to your specs. I even bought neck blanks already band sawn to the correct shape at very resonable prices.

Take your time, read all you can and enjoy being creative!

Cheers

Alan

User avatar
Lillian
Blackwood
Posts: 1705
Joined: Fri Sep 28, 2007 10:31 pm
Location: New Mexico, USA
Contact:

Post by Lillian » Sun Sep 21, 2008 2:52 pm

Jake, scrounge what you can before you buy. Talk to friends and anyone you know who has or knows someone with a woodworking shop. They might have the odd plane or chisel you can have or borrow. Swap meets always have hidden treasures. But no matter what, learn how to sharpen them. Using a dull tool is frustrating and dangerous. You are much more likely to do something stupid with a dull tool try to get it to work.

You can make a cheap "rasp" using lengths of old bandsaw blade bundled together. Cut a half a dozen or so pieces. Stack them together with something small in between each of them as a spacer. so there is a bulge in the middle. Its going to be a bit tricky and the blades will cut you so, be mindful of them as you squeeze the ends together. Use a clamp to hold them in place. Another set of hands might be a good idea here. Put the clamps where you have access to the last inch or so of the blades. Wrap them with wire and then rap that with enough duct tape so that when you grab it you won't feel the teeth. Make it comfortable to hold. Blood isn't impossible to get out, but it can be difficult to remove.

Essentially what you are making is a home made version of a Shinto Saw Rasp

It works a treat for shaping a neck. The blades you pick and how you lay them up affects how smooth or course it cuts.

gratay
Blackwood
Posts: 186
Joined: Sat Oct 27, 2007 8:33 pm

Post by gratay » Sun Sep 21, 2008 3:00 pm

apart from the basic handtools already listed..which is basically what I have..
there are a few bits of machinery I would find hard to live without.

A bandsaw...I only have a small one ....you could probably just get a coping saw .
A drillpress ..I use for thickness planing. sanding bobbins. and drilling.
A wagner safe-t-planer
and
At least 1 router....and bits aren't cheap.

User avatar
Allen
Blackwood
Posts: 5252
Joined: Thu Oct 11, 2007 5:39 pm
Location: Cairns, Australia
Contact:

Post by Allen » Sun Sep 21, 2008 4:52 pm

That's the big problem isn't it? It aint cheap at all. Hopefully your school workshop has a lot of what you'll need.

One of your first tasks is going to be building a mold. Your going to need to decide on what type of mold your going to use. The most common is to use an outside mold and there are some great tutorials on how to build one.

Here's a link to the OLF's tutorial section.

And Bob has made a page of links to the OLF's archived tutorials that were made before the OLF had a software upgrade and many disappeared into the ether.
Allen R. McFarlen
https://www.brguitars.com
Facebook
Cairns, Australia

User avatar
Lillian
Blackwood
Posts: 1705
Joined: Fri Sep 28, 2007 10:31 pm
Location: New Mexico, USA
Contact:

Post by Lillian » Mon Sep 22, 2008 1:43 am

I think Bob was able to fix all but one or two of Hesh's. Jake if you come across a dead link, let me know. I think I have all of Hesh's tutorials saved on my computer.

jmuller92
Myrtle
Posts: 60
Joined: Tue Sep 09, 2008 6:53 am

Post by jmuller92 » Mon Sep 22, 2008 7:00 am

hey guys,

i had a look at those tutorials posted and they are fantastic, thankyou!

in regards to tools, i remembered that my pop was once a carpenter, and his workshop is still in existence so im on my way down there in a few weeks to scrounge around... what luck!


..jake

User avatar
Kim
Admin
Posts: 4376
Joined: Wed Sep 26, 2007 8:32 pm
Location: South of Perth WA

Post by Kim » Mon Sep 22, 2008 8:16 am

You should do well at the Pop's workshop, when it comes to hand tools it is all too true that they don't make them like they use to,,,good luck Luke.

Cheers

Kim

User avatar
SteveF
Myrtle
Posts: 51
Joined: Sat Dec 29, 2007 10:17 am
Location: Bathurst

Post by SteveF » Mon Sep 22, 2008 9:17 am

Hey Jake....Don't know if anyone has suggested this but are there any woodworking clubs in your area,if there is you can get a lot of good advice from the members.......Steve

User avatar
sebastiaan56
Blackwood
Posts: 1279
Joined: Sun Oct 28, 2007 5:23 am
Location: Blue Mountains

Post by sebastiaan56 » Mon Sep 22, 2008 11:38 am

I take fine woodworking lessons every Thursday evening. A fuly kitted workshop!
make mine fifths........

jmuller92
Myrtle
Posts: 60
Joined: Tue Sep 09, 2008 6:53 am

Post by jmuller92 » Tue Sep 23, 2008 6:07 pm

sounds like a good idea. thanks guys

User avatar
kiwigeo
Admin
Posts: 10597
Joined: Sat Sep 29, 2007 5:57 pm
Location: Adelaide, Sth Australia

Post by kiwigeo » Tue Sep 23, 2008 9:31 pm

I did a guitar building course a few years ago and the venue was actually a high school woodworking room at a New Zealand high school.

Most of the hand tools we used were straight off the racks in the woodwork room, we just had to make sure they got a good sharpen before we used them. The machines we used were the bandsaw and drill press. Sides were pre bent and tops and backs were already glued up.

The only "special tools" supplied were go bar decks, a couple of block planes and a box of cam clamps.

When tops weren't being worked on they were stored in a box with a light bulb inside to keep humidity low.

Cheers Martin

jmuller92
Myrtle
Posts: 60
Joined: Tue Sep 09, 2008 6:53 am

Post by jmuller92 » Wed Sep 24, 2008 6:56 am

oh ok, thats a bit of relief that it has been done before.

we have block planes at school, and i guess im going to have to improvise the rest coz i cant really afford to buy the specialty tools. how did the guitar turn out?

cheers

jmuller92
Myrtle
Posts: 60
Joined: Tue Sep 09, 2008 6:53 am

Post by jmuller92 » Wed Sep 24, 2008 7:04 am

are there any alternatives to go-bar decks?

User avatar
sebastiaan56
Blackwood
Posts: 1279
Joined: Sun Oct 28, 2007 5:23 am
Location: Blue Mountains

Post by sebastiaan56 » Wed Sep 24, 2008 7:37 am

jmuller92 wrote:are there any alternatives to go-bar decks?
The point of the go bar deck is to assure even pressure over the length of the brace while the adhesive dries/sets. Some alternatives; clamps with shaped cauls or dead weights on shaped cauls. I have used bricks but only on a radius dish, wrapping the brick in paper eliminates the bits that fall off and scar the soundboard. The radius dish can be emulated with layers of cardboard or mdf trimmed to size on a piece of particle board. Of course a more permanent system will lead the better accuracy but if your budget is an issue there are ways around these issues.
make mine fifths........

josh_cain
Sassafras
Posts: 47
Joined: Wed Sep 24, 2008 9:20 am
Contact:

Post by josh_cain » Wed Sep 24, 2008 9:34 am

Hi Jake,

I havent had time to read through all the posts, so i might repeat a few things. But let me warn you- get you ass into gear asap.
Im in year 12 now and building a Weissenborn with a resonator cone system, so ive got a fair idea of what youve got to do (in regards to getting it done at school)

I chose the weiss style for a few reasons- the main being that i didnt have to worry about a neck, the intonation isnt a huge issue, it looks different (so the assesors will like the 'design' element) and i knew that i wouldnt have to worry as much about bracing.

I've been really lucky as far as my build has gone. I bought a book by terry buddell which helped me heaps and i also contacted tim kill from tim kill custom, who invited me to his workshop a few times to help me out and he bent my sides just to make life easier.

As mine was my own shape, i made a template and then he just went off that, however if youre doing a Dreadnaught shape thats probably not going to be much of an issue.

I also managed to borrow a mould, which has made the build so much easier, to be honest i dont think i wouldve been able to do it.
Image

as far as bracing goes, i didnt have the time or resources to get a go bar deck, so i used a really bastardised technique that alot of members here will hate....i just glued the braces (which i was given by a guy who works for cole clark, again- to save time/effort) then i put a piece of timber over the whole brace, clamped both ends, and put steel weights on the top of the wood. (for the back, which is radiused, i used some little bits off wood cut into triangles and wedged them under the timber so as to create the radius.

Image

Thats all i can think of right now, feel free to shoot any questions at me.
and also- make sure you get your folio done! i have neglected mine for the last few months and now have a fortnight to do a sh!tload of work.

Cheers,
Josh.

User avatar
ozziebluesman
Blackwood
Posts: 1529
Joined: Wed Oct 10, 2007 9:12 am
Location: Townsville
Contact:

Post by ozziebluesman » Wed Sep 24, 2008 9:54 am

Hey Josh that guitar is very innovative indeed! Congratulations on the job thus far. I too built a weissenborn copy for my first build for many of the reasons you stated. I hope you keep the forum informed with your progress. There are some very experienced builders here so ask away your questions. Welcome!!!

Cheers

Alan

josh_cain
Sassafras
Posts: 47
Joined: Wed Sep 24, 2008 9:20 am
Contact:

Post by josh_cain » Wed Sep 24, 2008 3:34 pm

thanks Alan!
I followed your build quite closely on the guitarseminars forum...nice job on both of your weiss's.
Josh.

jmuller92
Myrtle
Posts: 60
Joined: Tue Sep 09, 2008 6:53 am

Post by jmuller92 » Wed Sep 24, 2008 5:19 pm

hey josh,

you have no idea how relieving it is to find someone else that is doing something similar, and it looks like ur doing a great job.

i've just gotten my hands on 2 guitar making books which ill get into over the next few weeks. im expected to start building in about 3 weeks. would you say that you were hard pressed for time or was it comfortable so far to fit everything in on time?

just started work on my folio, and i would hope to get alot of it done by the time year twelve starts. Is there any chance you could send me ur folio so i can get an idea of how u laid it out and pushed the design elements? probably sounds like im just trying to copy lol but im really not. its cool if ur not comfortable with that.

cheers

josh_cain
Sassafras
Posts: 47
Joined: Wed Sep 24, 2008 9:20 am
Contact:

Post by josh_cain » Wed Sep 24, 2008 5:35 pm

i would say that if i'd used my time more wisely i wouldve been fine, but keep in mind that youve got a fair bit more to do with the neck/frets/top bracing.

ill send you what parts of my folio i have on my computer, but most of it is hand drawn kinda stuff. ill have a look what i can find.

Does you DT textbook have a blue cover?
Josh.

jmuller92
Myrtle
Posts: 60
Joined: Tue Sep 09, 2008 6:53 am

Post by jmuller92 » Wed Sep 24, 2008 5:41 pm

oh ok sweet, my emails jmuller92@hotmail.com if u wanna email anything.

yeh i know i've got a gutload of work ahead of me, im getting the sides pre-bent by tim spittle (legend) and im thinking about maybe getting the fingerboard slotted and radiused as well.

i dont even have a dt folio lol. my class has done barely any theory this year, all i got was some stapled together booklet which sort of followed the curriculum. I presume you go to school in melbourne?

User avatar
Allen
Blackwood
Posts: 5252
Joined: Thu Oct 11, 2007 5:39 pm
Location: Cairns, Australia
Contact:

Post by Allen » Wed Sep 24, 2008 5:42 pm

Welcome to the forum Josh, and please feel free to start a new thread with your build progress. That way it's a lot easier for people to find it when they search the archives.
Allen R. McFarlen
https://www.brguitars.com
Facebook
Cairns, Australia

User avatar
Allen
Blackwood
Posts: 5252
Joined: Thu Oct 11, 2007 5:39 pm
Location: Cairns, Australia
Contact:

Post by Allen » Wed Sep 24, 2008 5:58 pm

Jake, you're better off to take some of this to PM if it's more of a personal nature such as sharing your email address. Just trying to keep the spammers at bay.

You can edit your message to remove it or spell it with "at" and "dot".
Allen R. McFarlen
https://www.brguitars.com
Facebook
Cairns, Australia

Richard
Myrtle
Posts: 75
Joined: Tue Feb 19, 2008 7:12 pm
Location: Brisbane
Contact:

Post by Richard » Wed Sep 24, 2008 7:33 pm

For alternatives to go-bar decks, you can make radiused cauls from a length of wood about 2" wide. Just pencil the radius in, cut it on a bandsaw and sand it smooth. Glue the braces one at a time, clamping the caul under each brace. Plus you can stick some sandpaper to them and use them to correctly radius the braces. Using this method you'll probably need some deeper clamps to reach the middle -- not sure if the classroom would have these. Three or four 8.5" (or larger) cam clamps should do the trick alongside whatever other clamps you have available to you. You could probably forgo the caul for the finger braces on the top.

I know the Stewmac kits suggest you just clamp the top against a flat workboard and use a caul only for the back bracing, which would be the easiest way to go about it, but it'd be wiser from a structural perspective to use cauls on both to maintain the radius.

Josh, the Weiss looks great. I'm intrigued by the use of Cole Clark braces -- what model were they from? Obviously the resonator's soundwell and overall design simplifies the bracing greatly, so you've probably dodged a bullet there while also doing something a little more unusual. Good luck with the build... would love to see more pics as it comes together. Perhaps as Allen suggests you can start your own topic to document its progress.

User avatar
kiwigeo
Admin
Posts: 10597
Joined: Sat Sep 29, 2007 5:57 pm
Location: Adelaide, Sth Australia

Post by kiwigeo » Wed Sep 24, 2008 7:36 pm

The guitar turned out fine...the person I loaned it to 4 years ago hasnt yet given it back.
jmuller92 wrote:oh ok, thats a bit of relief that it has been done before.

we have block planes at school, and i guess im going to have to improvise the rest coz i cant really afford to buy the specialty tools. how did the guitar turn out?

cheers

Post Reply

Who is online

Users browsing this forum: No registered users and 170 guests