Truss-rod channel woes

Talk about musical instrument construction, setup and repair.

Moderators: kiwigeo, Jeremy D

Post Reply
gratay
Blackwood
Posts: 186
Joined: Sat Oct 27, 2007 8:33 pm

Truss-rod channel woes

Post by gratay » Sun Aug 17, 2008 4:14 pm

Following on from the Epoxy thread.....and you can
probably ignore that one now as I will most definitely
have to put in a filler piece..
Problem is how?

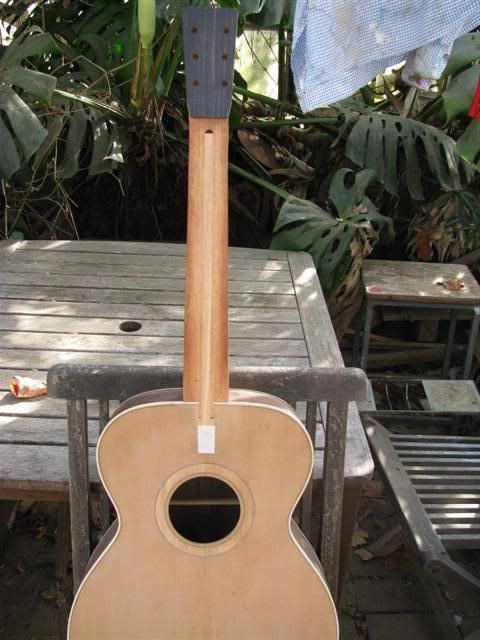
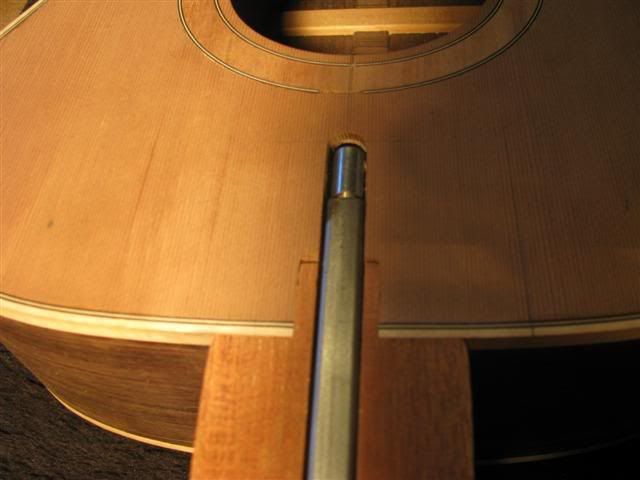
First the problem:- The slot is not deep enough
and the truss-rod adjustment cannot be accessed
through the soundhole because its not low enough to
get below the face and be somewhat accessable through
the brace ..

I fitted and glued my neck in last night...
this morning I set up a fence for my router to
continue the channel through the head block and face ..
The truss-rod fits perfectly flush and snug but :roll: ...
This is something I completely overlooked and is going to
be a bit of head scratching needed to remedy..

The main problem is the neck is fitted, tapered, and half
shaped. ...and although its a bolt-on neck I decided to
glue it in place..which now means the truss-rod channel
will have to be routed with the neck connected to the body. :roll:

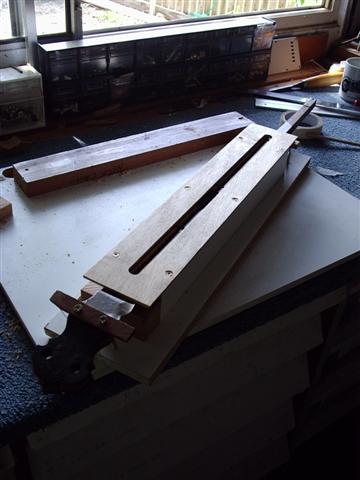
So I'll take a photo of the contraption I concoct to remedy
this situation..It may be quite crude.
Image

User avatar
kiwigeo
Admin
Posts: 10596
Joined: Sat Sep 29, 2007 5:57 pm
Location: Adelaide, Sth Australia

Post by kiwigeo » Sun Aug 17, 2008 5:05 pm

Grant,

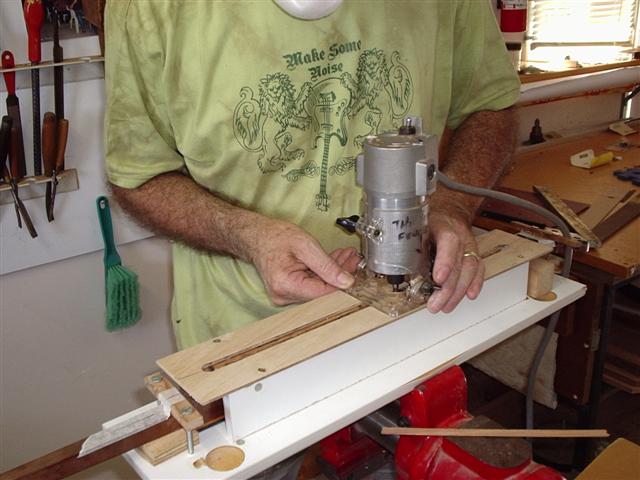
Routing a truss rod channel deeper with neck on the guitar is not a huge issue. Make up a routing jig from plywood or MDF and secure it temporarily onto the neck using wood screws. My jig is just a length of MDF with a slot routed through it to allow the router cutter to protrude below. Onto this I have two lengths of MDF attached to act as guides for the sides of the router sole plate. The router runs along the recessed area between the guides and Bobs your uncle. Sorry I dont have any pics of my jig handy.

On my second steel string I ended up with the truss rod adjustment too high in the slot. I ended up enlarging the access hole in the upper transverse brace and having to use an allen key with a balled end. The balled end allen key allows you to work the adjuster without having to have the key squarely fitted into same. Just watch you dont make the hole in the brace so big that you weaken integrity of same.

All a learning experiece isnt it? :D

Cheers Martin

User avatar
matthew
Blackwood
Posts: 1192
Joined: Mon Oct 08, 2007 1:16 pm
Location: Sydney, Inner West
Contact:

Post by matthew » Sun Aug 17, 2008 5:56 pm

I use the same jig as Martin. the MDF routing template tacked onto the neck and a sliding baseplate for the router

A trick I use to help you know when you're reaching the end of the slot is to place the router in "end position" and mark two converging lines ending at the edge of the baseplate. Do this at both ends. Now you can be sure where you are, even with the router screaming atcha and swarf flying everywhere ...

gratay
Blackwood
Posts: 186
Joined: Sat Oct 27, 2007 8:33 pm

Post by gratay » Sun Aug 17, 2008 6:15 pm

cheers guys,
thats exactly what I'll do...great..
I was thinking way to much of a haphazard contraption like the game "Mousetrap"
thanks again.

User avatar
Taffy Evans
Blackwood
Posts: 997
Joined: Wed Apr 30, 2008 6:54 pm
Location: Charters Towers North Queensland

Post by Taffy Evans » Sun Aug 17, 2008 6:56 pm

I think its pretty much covered, but heres a pic of a banjo I had to do. There no body to worry about but the jig is similar

Image
Image
Taff

gratay
Blackwood
Posts: 186
Joined: Sat Oct 27, 2007 8:33 pm

Post by gratay » Sat Aug 23, 2008 3:00 pm

Just for some closure on this thread...just in case anybody is researching this topic in the future this is what i did.
I followed Martins advice to a simple jig that screws into the neck and used my straight edge as a fence..Thanks for those pics as well Taffy..

I've read so many different opinions as to how people install their truss rods..I did this.
Ran a very thin bead of silicone down each bottom edge of the channel and put 3 small dots of silicone on each side of the rod.
I'm using a gotoh 2-way rod so i roughed up the top of the rod with some course sandpaper...placed epoxy on the bottom of the filler piece and titebond on the edges of the filler piece...clamped up and...bob's your uncle...

So ,...thanks everyone for your advice ..I'm so glad to have gone with a filler piece instead..It feels like there will be less of a chance of a rattle ocurring now.
Image

now, onto the fingerboard.

User avatar
kiwigeo
Admin
Posts: 10596
Joined: Sat Sep 29, 2007 5:57 pm
Location: Adelaide, Sth Australia

Post by kiwigeo » Sat Aug 23, 2008 3:11 pm

Looks good Grant. Glad to hear it all worked out for you.

Looking forward to seeing pics of the finished instrument.

User avatar
joel
Blackwood
Posts: 284
Joined: Thu Oct 11, 2007 7:55 pm
Location: Brisbane, Australia

Post by joel » Sat Aug 23, 2008 9:44 pm

How thick is the filler piece Grant? And how much 'meat' is left below the bottom of the truss rod channel? I drew up a scale drawing of my no.1 before commencing on the neck, and I've initially drawn my truss rod cavity to the exact depth of the rod. Mainly because I'm nervous of stuffing up the neck carving and going too deep (and into the rod cavity). I'll be using the group buy truss rod (LMI I think) which is 9.5mm thick by my measurements. I've got the neck thickness at 14mm where the truss rod ends approx halfway from the nut to 1st fret. That's 4.5mm of wood below the truss rod, so I'm a bit nervous about going deeper in the rout. Do my measurements look OK? Or have I stuffed up? I'd much rather learn now than once I've made the neck incorrectly.
- If God had intended us to drink beer, He would have given us stomachs. - David Daye.

- The mouth of a happy man is filled with beer. -

User avatar
kiwigeo
Admin
Posts: 10596
Joined: Sat Sep 29, 2007 5:57 pm
Location: Adelaide, Sth Australia

Post by kiwigeo » Sat Aug 23, 2008 10:28 pm

The fillet over the LMI truss rod on my 12 string is about 3mm thick.

User avatar
Craig
Admin
Posts: 1090
Joined: Wed Sep 26, 2007 10:08 am
Location: N.S.W. in the bush

Post by Craig » Sat Aug 23, 2008 10:51 pm

joel wrote: I've got the neck thickness at 14mm where the truss rod ends approx halfway from the nut to 1st fret. That's 4.5mm of wood below the truss rod, so I'm a bit nervous about going deeper in the rout.
Joel , that's the exact measurements I've used . With a 6mm. fretboard , it gives me a 20 mm.neck which I love.

I haven't used a filler strip ,as I figure a 2 mm. strip would then only leave 2.5 mm under the rod . Not enough for me to rest easy.

L.M.I. , state there is no need for the filler strip in their rod installation directions. I've had no problems,and the rods work well .

I've also found that it's only the square section at the end of the rod that require a 10mm. depth . I rout a channel slightly less than that for the round part of the rod length ,and carefully chisel out a little extra for the square ends to fit snug so that the rod ends up flush with the neck surface.

Looks like it's ended up all good for you Grant. Nearly there mate , and looking very good too ! Exciting stuff Huh ?
Craig Lawrence

User avatar
Allen
Blackwood
Posts: 5252
Joined: Thu Oct 11, 2007 5:39 pm
Location: Cairns, Australia
Contact:

Post by Allen » Sun Aug 24, 2008 6:38 am

If its a group buy rod that I put together, then the rods are from Allied Luthier. Here is the link to their truss rod page with instructions on how to install them.

Allied Truss Rod Installation
Allen R. McFarlen
https://www.brguitars.com
Facebook
Cairns, Australia

gratay
Blackwood
Posts: 186
Joined: Sat Oct 27, 2007 8:33 pm

Post by gratay » Sun Aug 24, 2008 10:11 am

joel wrote:How thick is the filler piece Grant? And how much 'meat' is left below the bottom of the truss rod channel? I drew up a scale drawing of my no.1 before commencing on the neck, and I've initially drawn my truss rod cavity to the exact depth of the rod. Mainly because I'm nervous of stuffing up the neck carving and going too deep (and into the rod cavity). I'll be using the group buy truss rod (LMI I think) which is 9.5mm thick by my measurements. I've got the neck thickness at 14mm where the truss rod ends approx halfway from the nut to 1st fret. That's 4.5mm of wood below the truss rod, so I'm a bit nervous about going deeper in the rout. Do my measurements look OK? Or have I stuffed up? I'd much rather learn now than once I've made the neck incorrectly.
My truss rod is 9.5mm deep also.. so i routed the trench roughly about 3mm more which allowed for access to the adjustment through the soundhole.
So all up the trench is about 12.5-13mm deep and the filler piece around 3-3.5mm.
my neck minus the fingerboard at this stage is about 20mm thick at the nut so theres a bit of meat behind it..And I like a slightly fatter neck so it will be a bit bigger than normal OM spec..

And yes Craig I'm getting pretty excited about hearing this guitar.
Its been a long time coming as I only have small amounts of time to work on this inbetween doing a house extension as owner builder, new baby#2 arriving 3 weeks ago and working full time doesn't leave much time to do little else. But I can see the light at the end of the tunnel so to speak.

User avatar
SteveF
Myrtle
Posts: 51
Joined: Sat Dec 29, 2007 10:17 am
Location: Bathurst

Post by SteveF » Sun Aug 24, 2008 11:06 am

Howdy All
Gratay good to see you solved your prob...

Just thought I'd put up an alternative to the silicon damper in the truss rod channel..I've used liquid electrical tape on my two electrics and there's been no problems so far(couple of years),it sets to a hard rubber,brush inluded in tin and I donn't think there's any silicon in it..
Should have posted this earlier but these days got a mind like a steel trap(old and rusty with a weak spring).......Steve

Post Reply

Who is online

Users browsing this forum: No registered users and 262 guests