Completely traditional looking Hauser style classical guitar

Talk about musical instrument construction, setup and repair.

Moderators: kiwigeo, Jeremy D

johnparchem
Blackwood
Posts: 546
Joined: Mon Jan 21, 2013 2:59 am
Location: Seattle
Contact:

Completely traditional looking Hauser style classical guitar

Post by johnparchem » Fri Aug 26, 2016 1:37 pm

I have made a few flacate braced contemporary classical guitars. While they fall in the classical range for size, nut width, scale length and string spacing, they are contemporary looking with a cutaway and a slightly radiused fret board. In general the guitars have been well received, in fact my instructor commissioned me to build one and he switched from his mid 70 Kohno 30 guitar. There are some that can not get over the contemporary features. So I am making what will look like a Hauser knock-off but with the falcate bracing pattern.

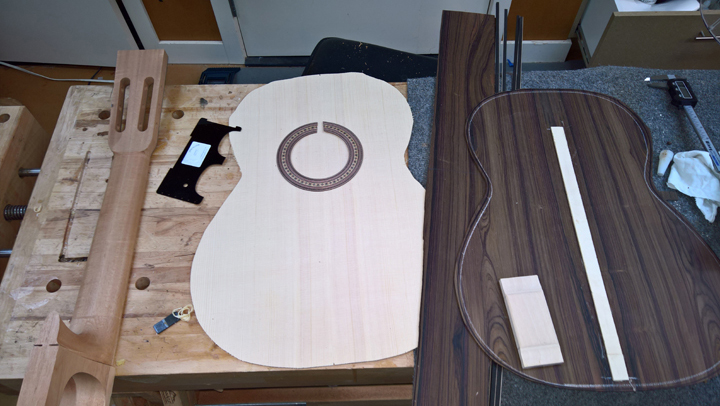
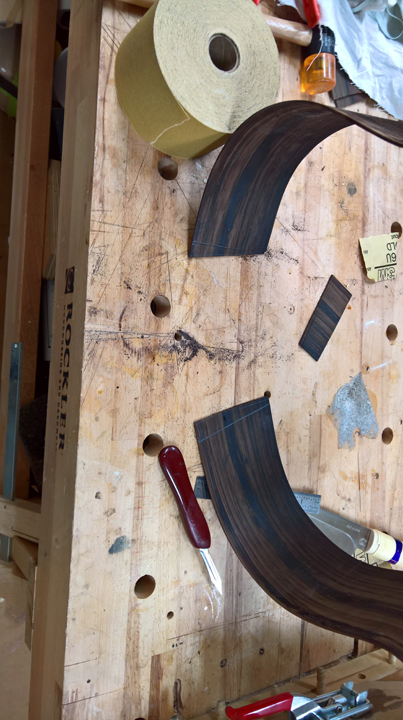
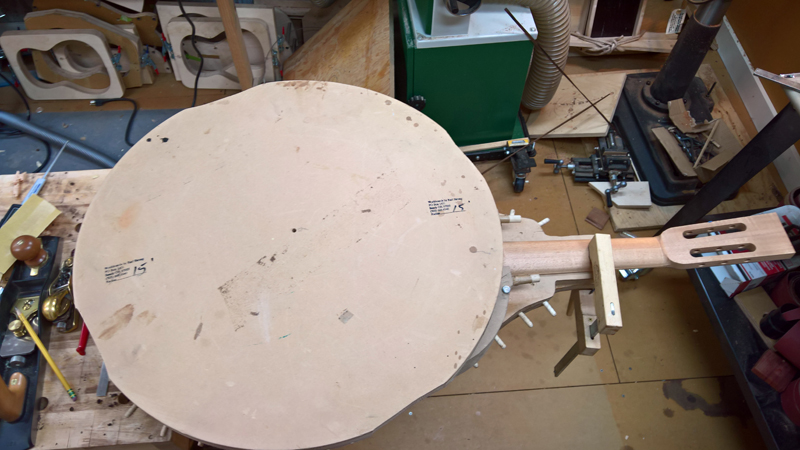
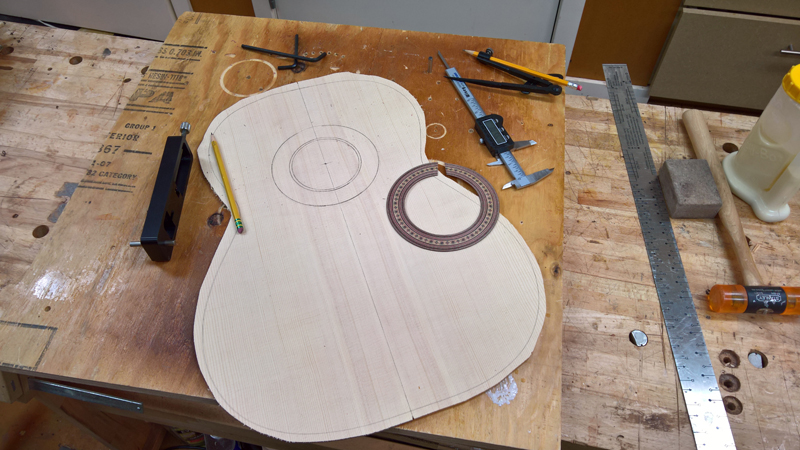
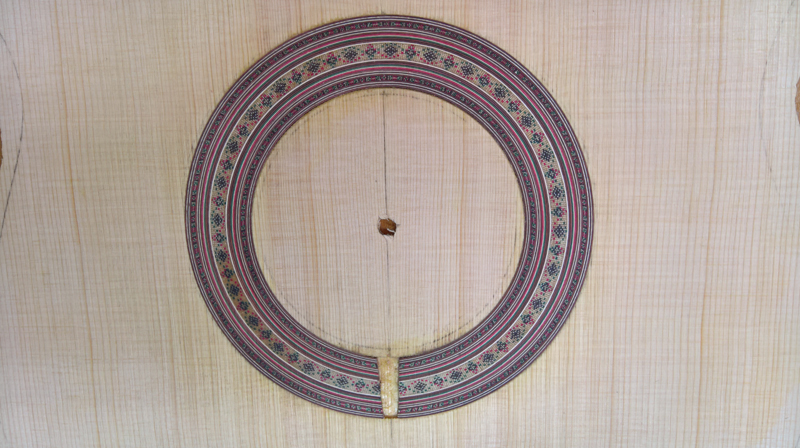
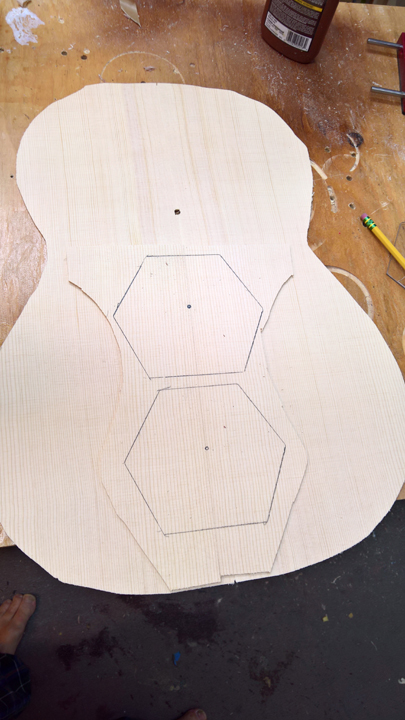
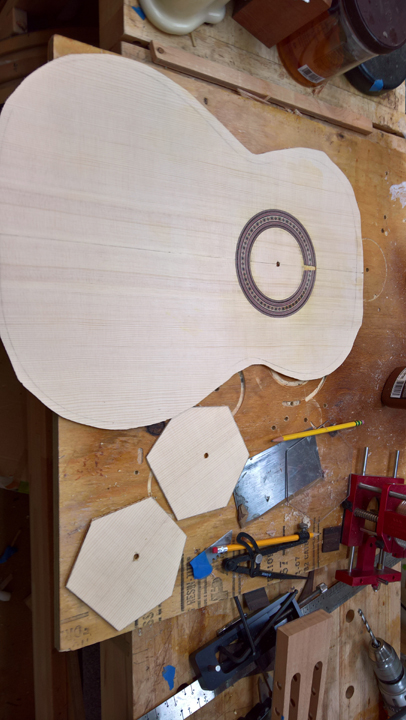
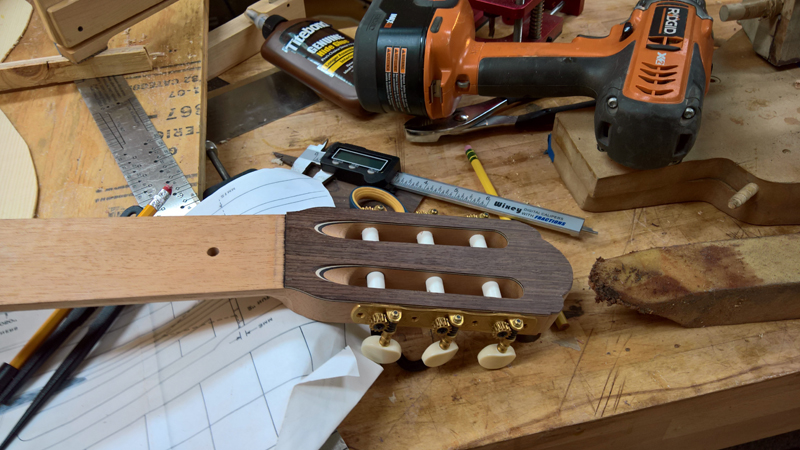
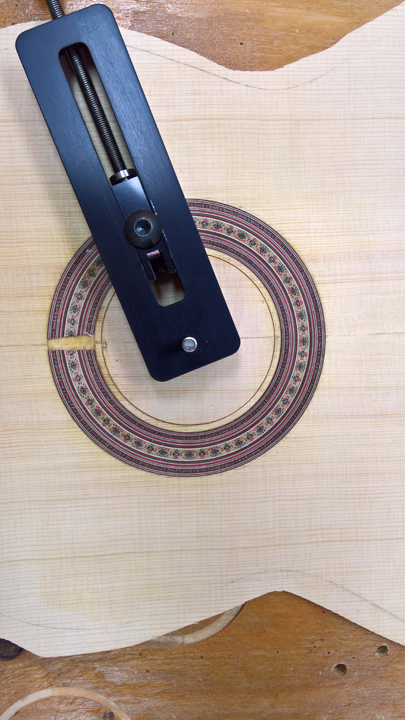
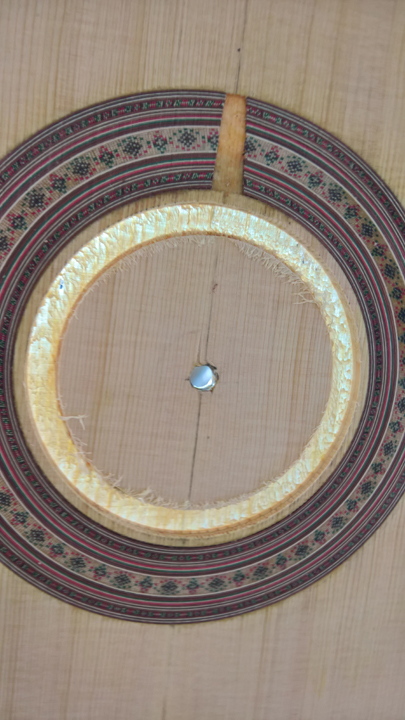
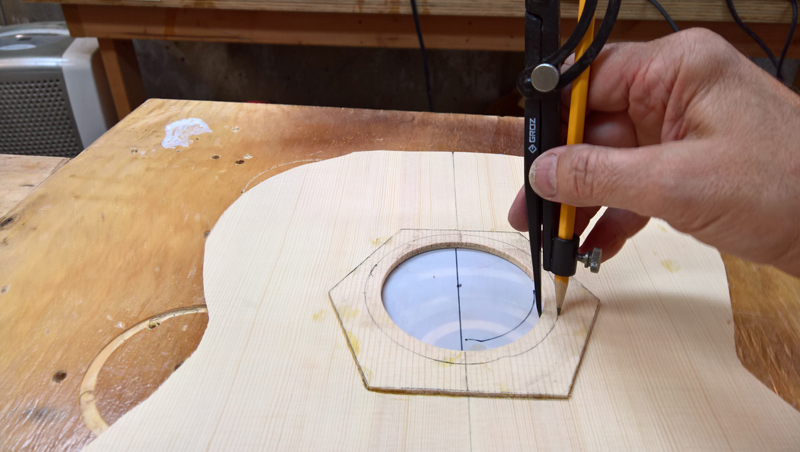
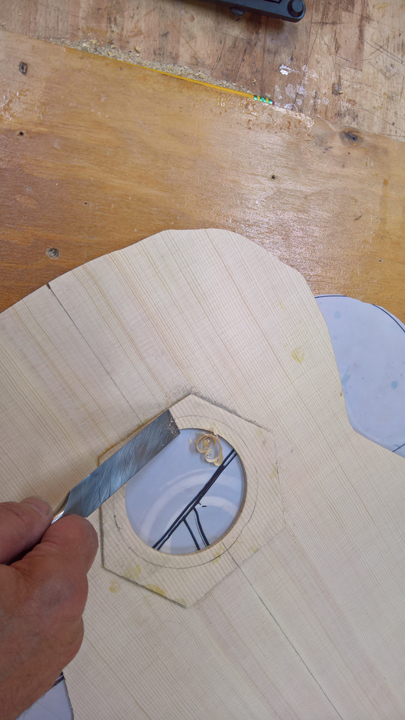
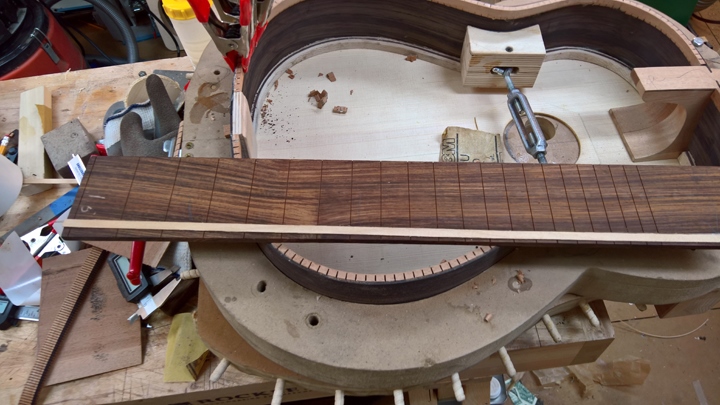
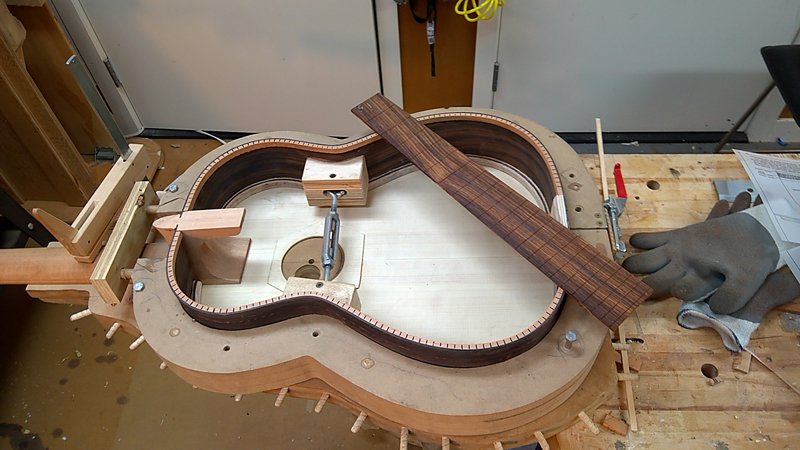
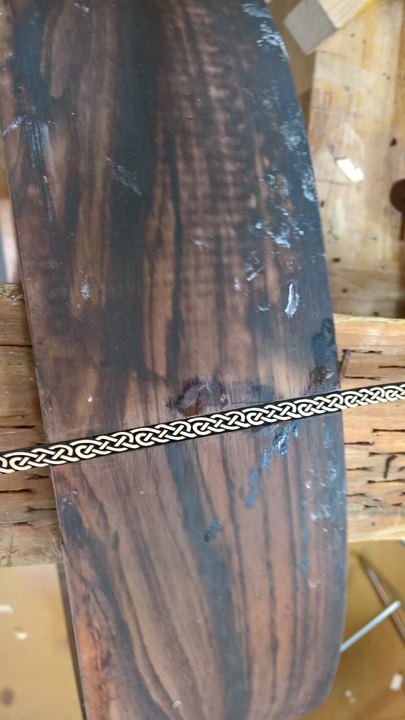
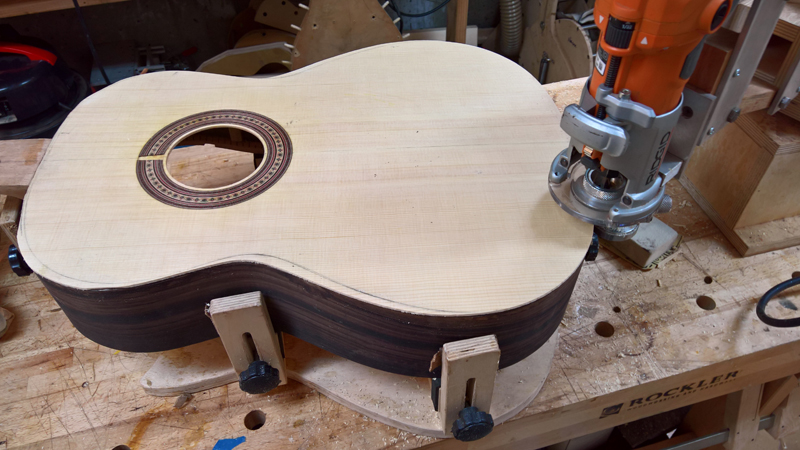
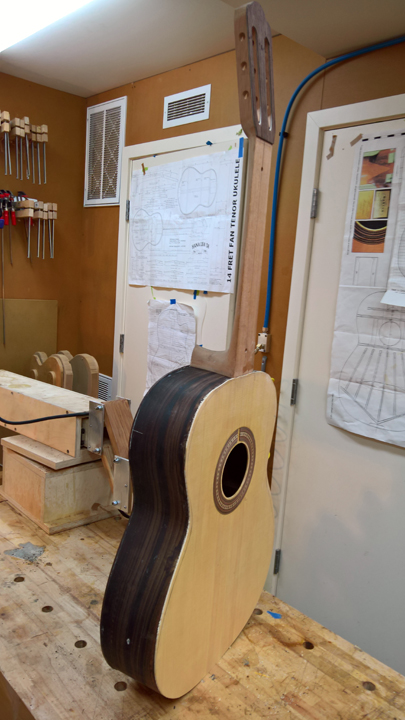
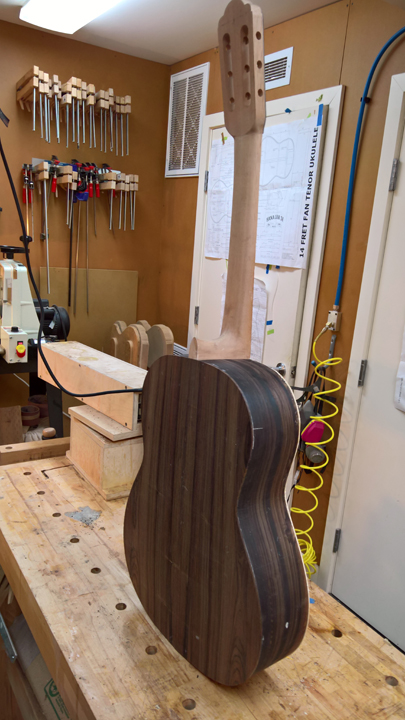
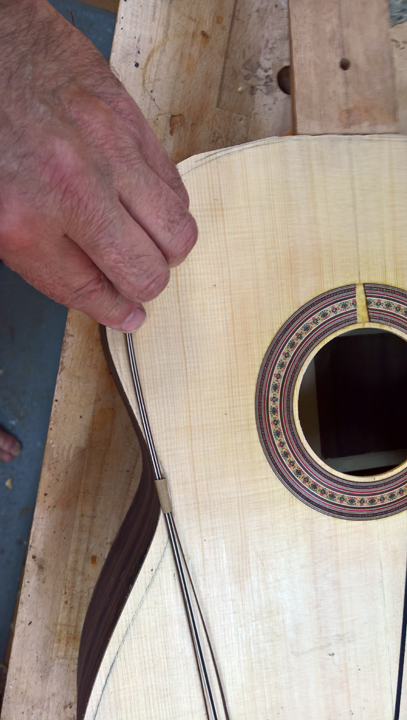
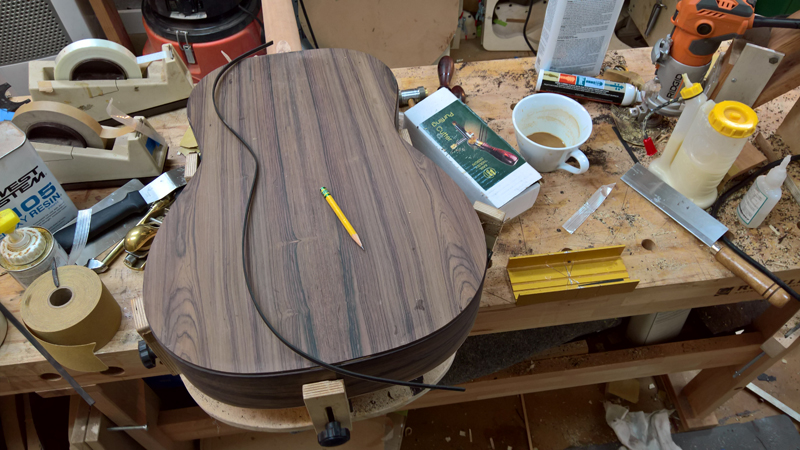
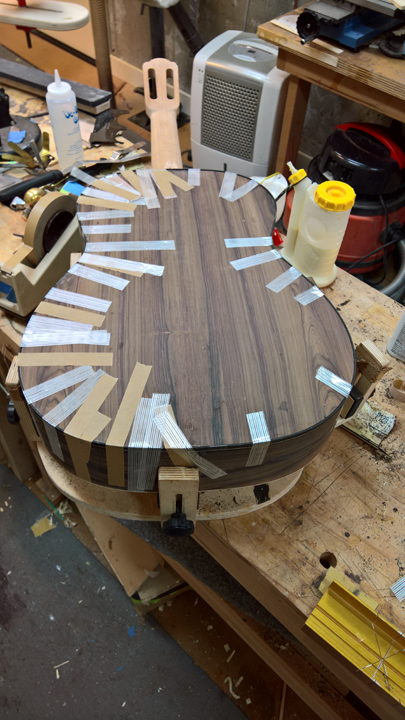
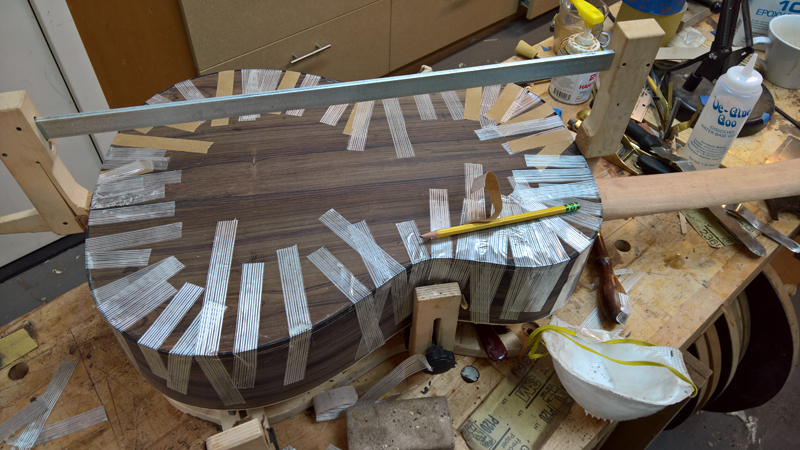
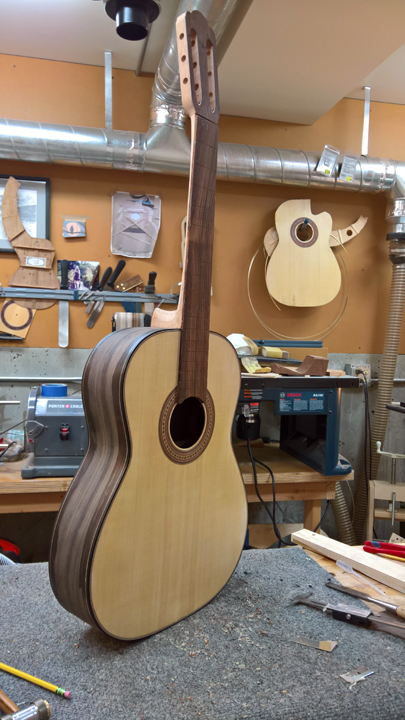
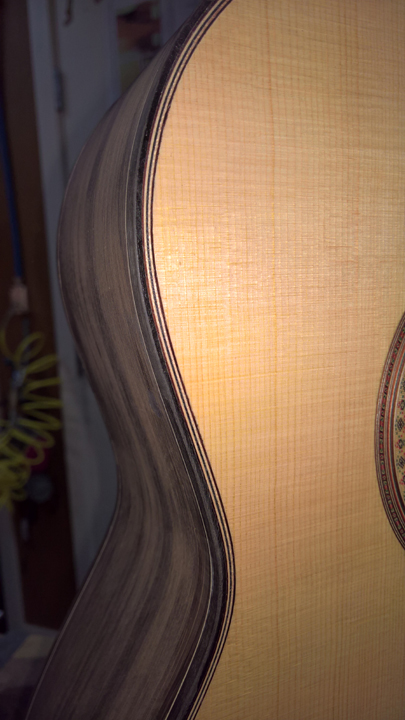
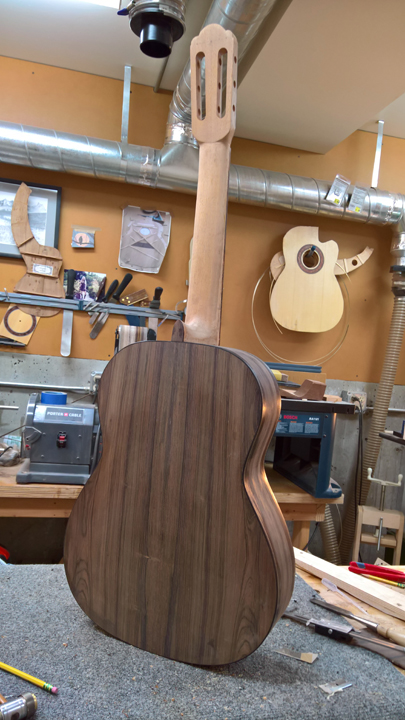
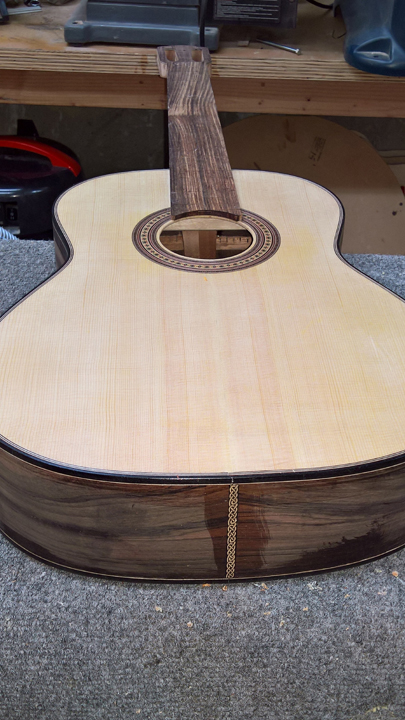
The guitar will be Lutz spruce and Brazilian rosewood. I will use ebony bindings with a maple purfling. Also I will come up with some purfling patern for the top. I will take a bit of a short cut and use a LMI classical neck and a classical rosette that I have.

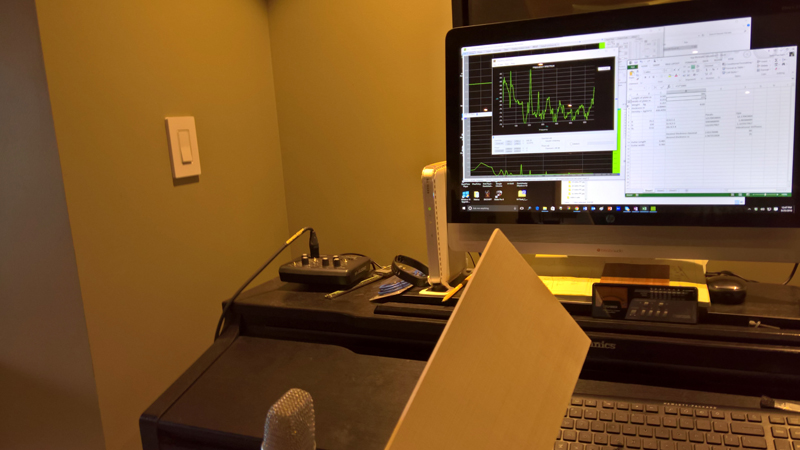
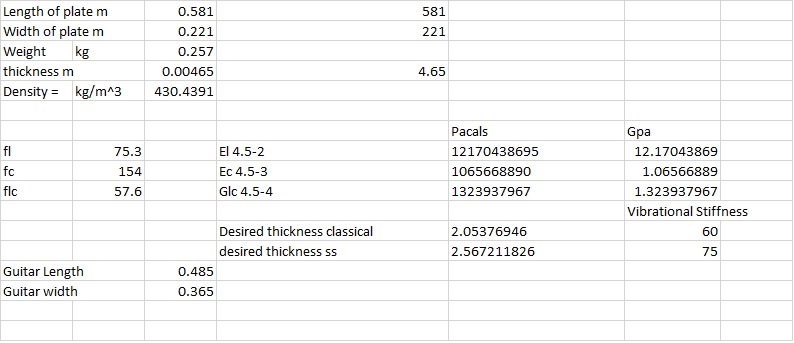
I spent the day getting the project up and going. First off I did the tap test to determine the target using one of the Gore\Gilet methods. The Lutz fell into a normal range, a little more cross stiffness than other tops.

Image

Image

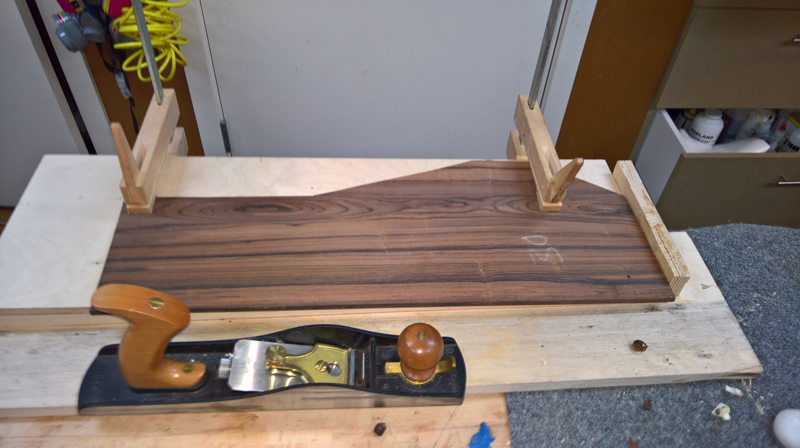
I joined both of the plates. I am a bit embarrassed, maybe being on the wrong side of 60, but when I went to my plane drawer to get a plane with a sharp blade I found a new looking Lie Nelson #62 low angle jack plane that I have no idea that I had or when I might of bought it.

Image

Image

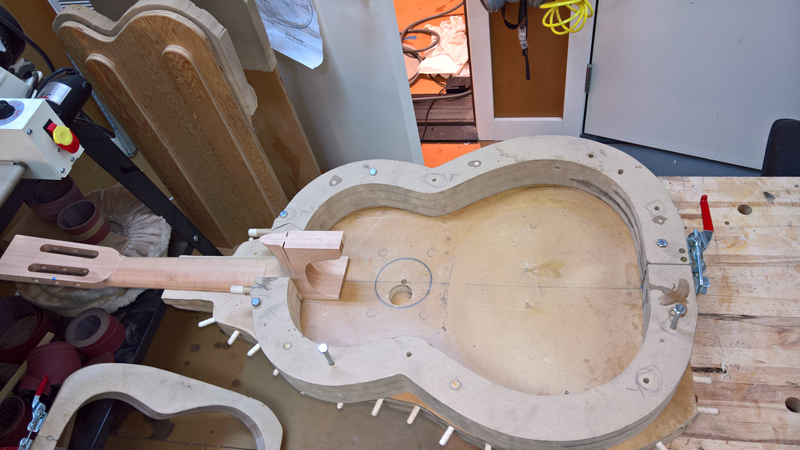
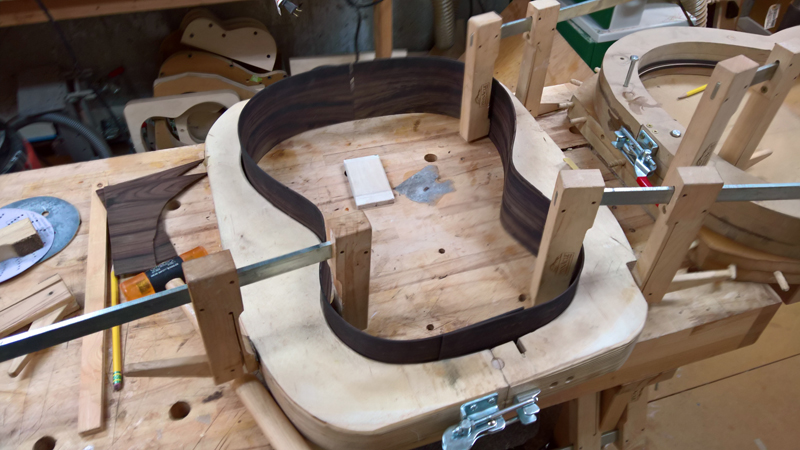
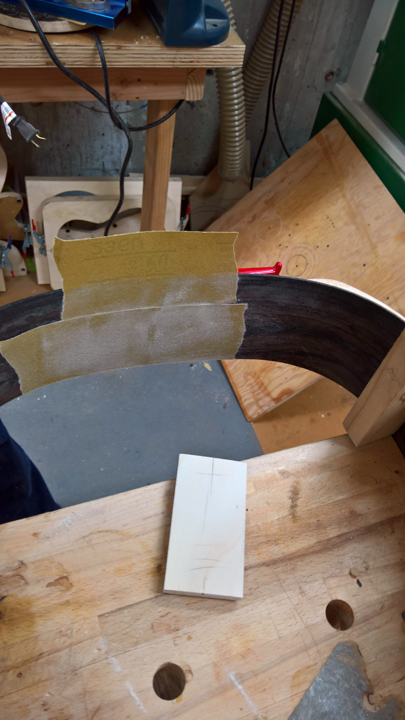
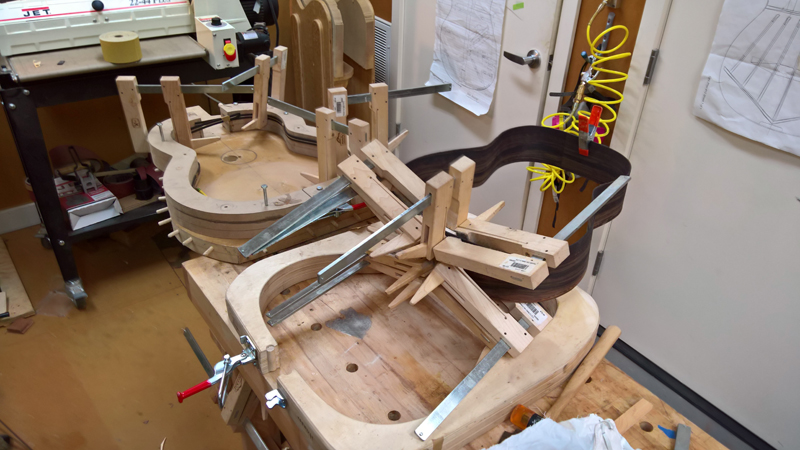
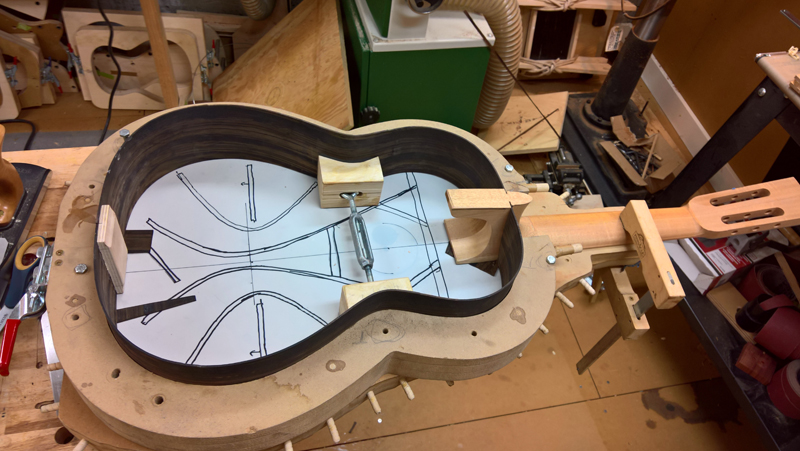
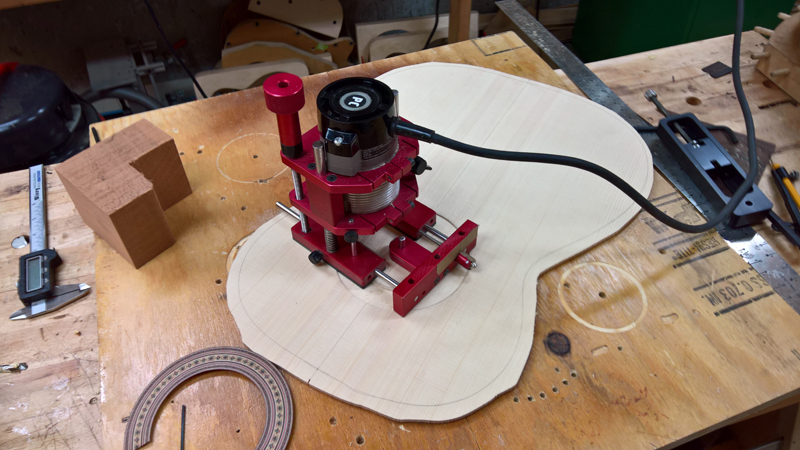
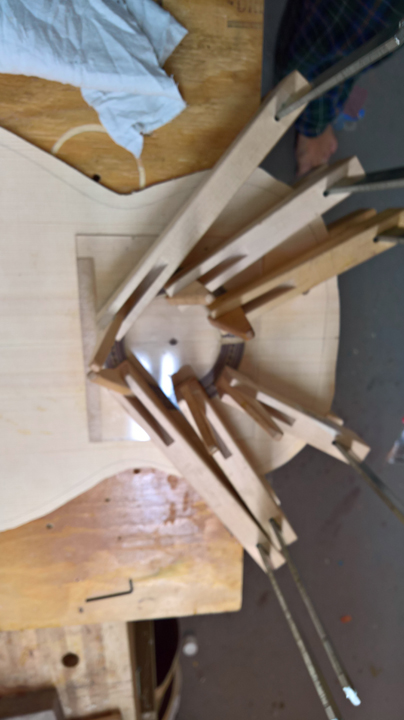
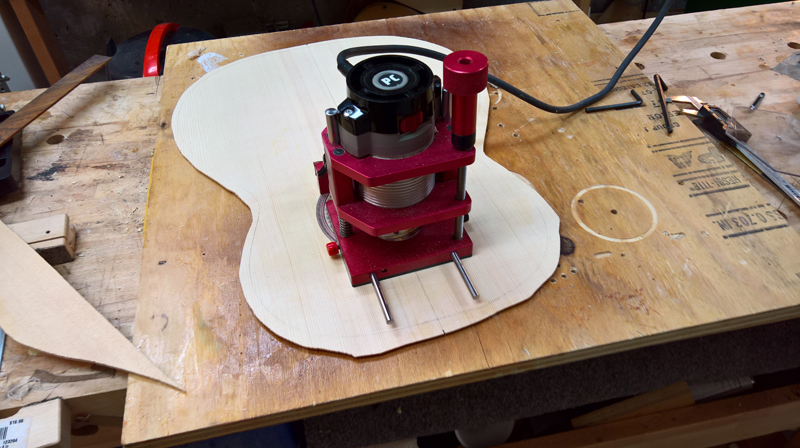
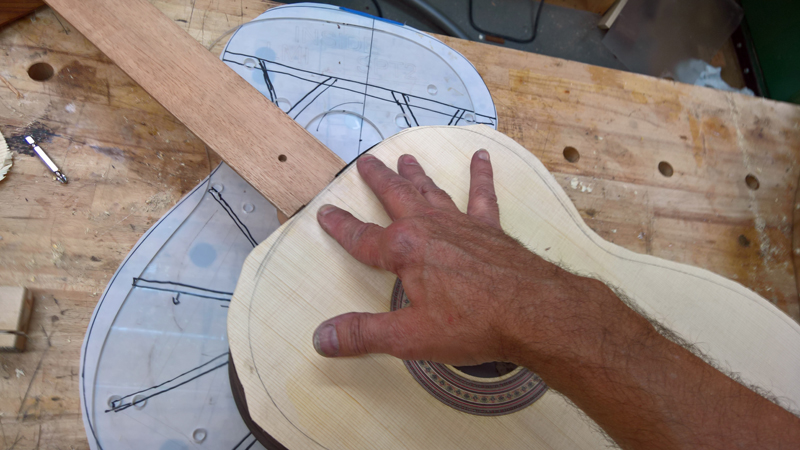
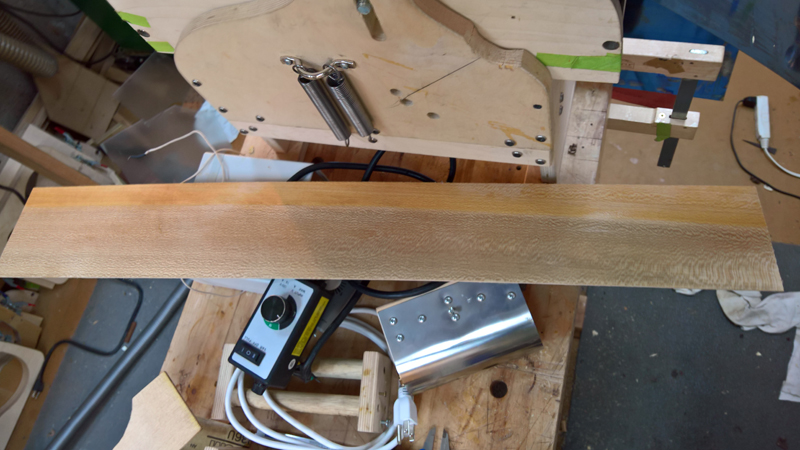
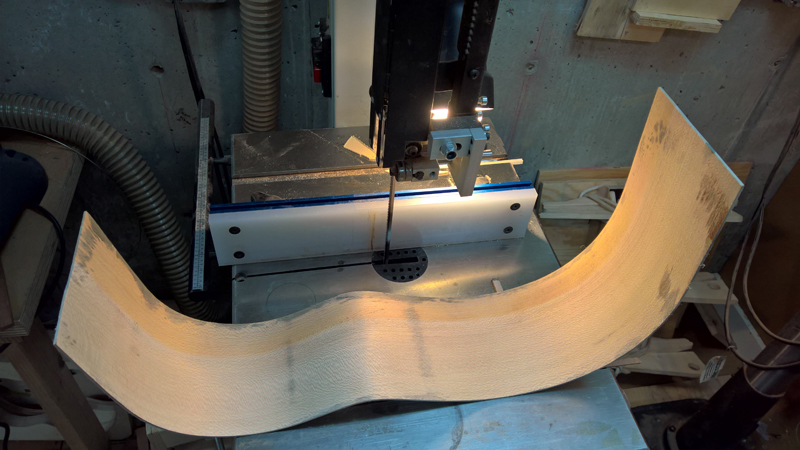
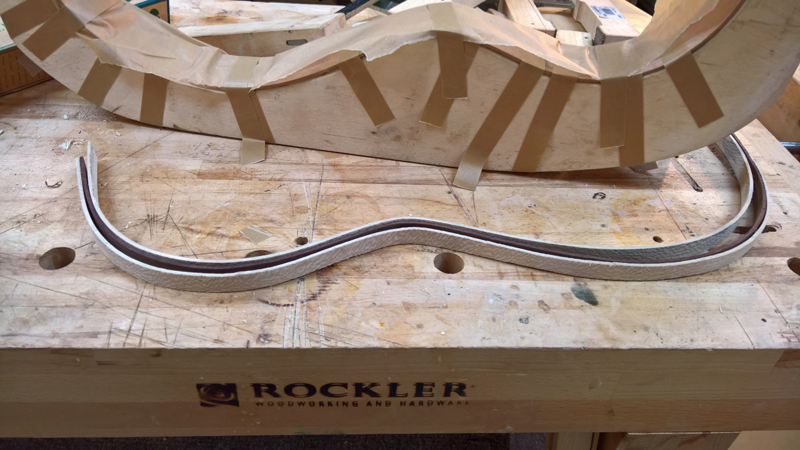
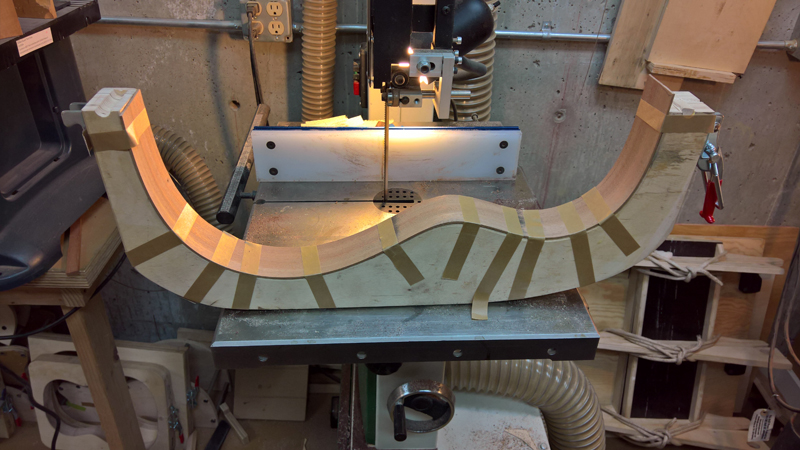
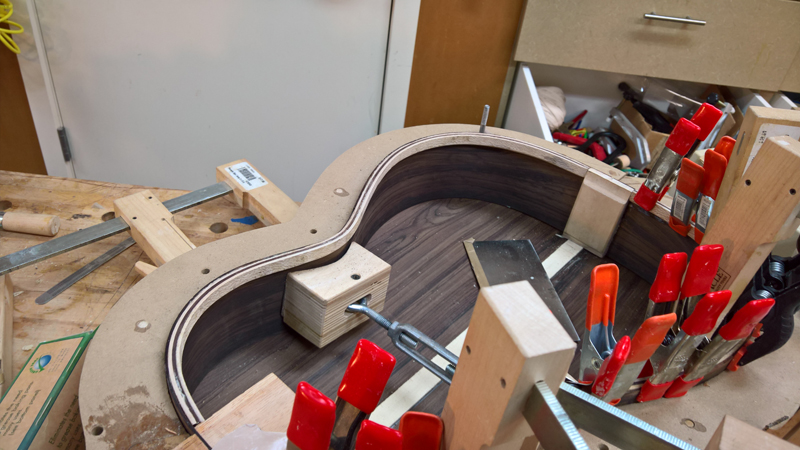
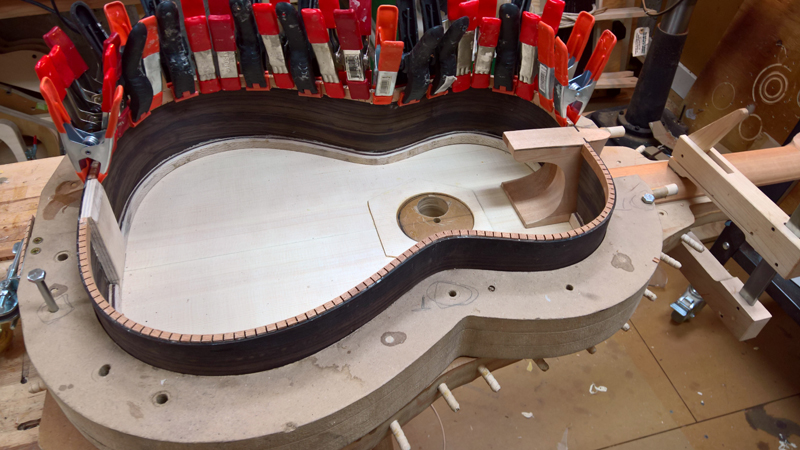
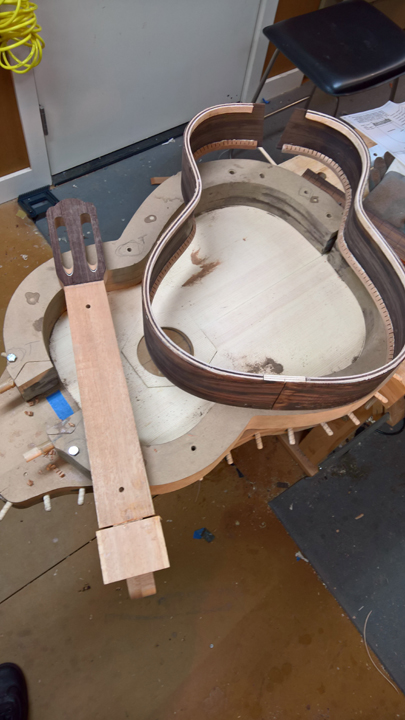
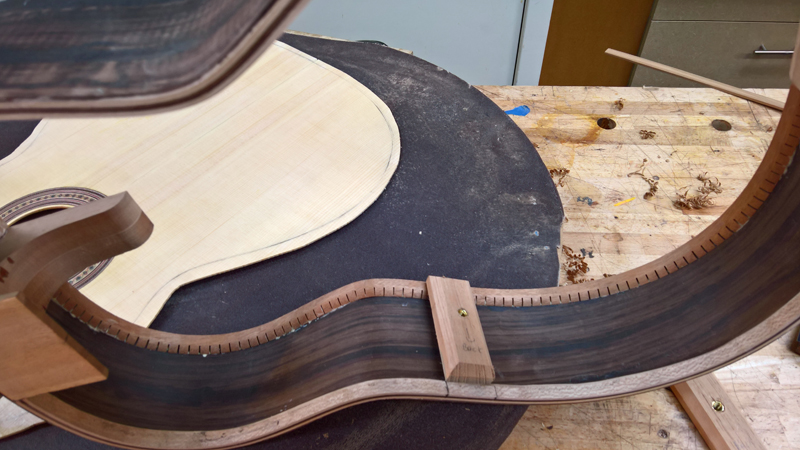
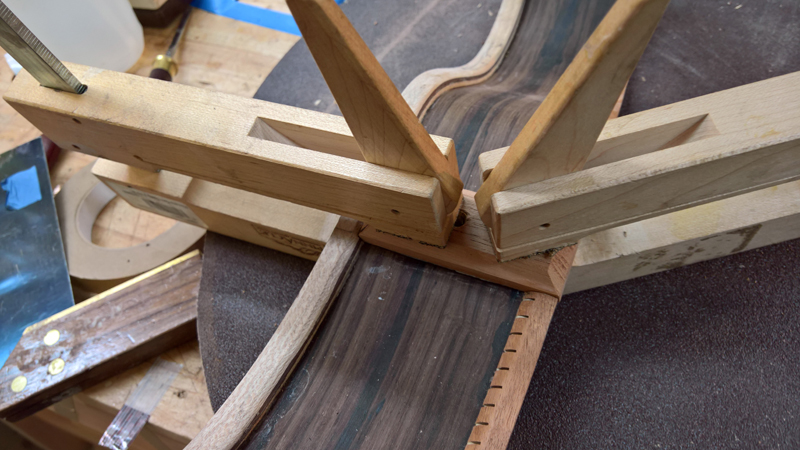
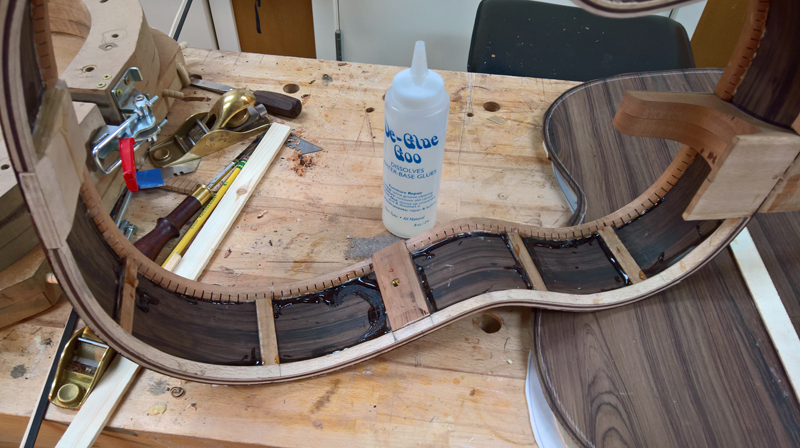
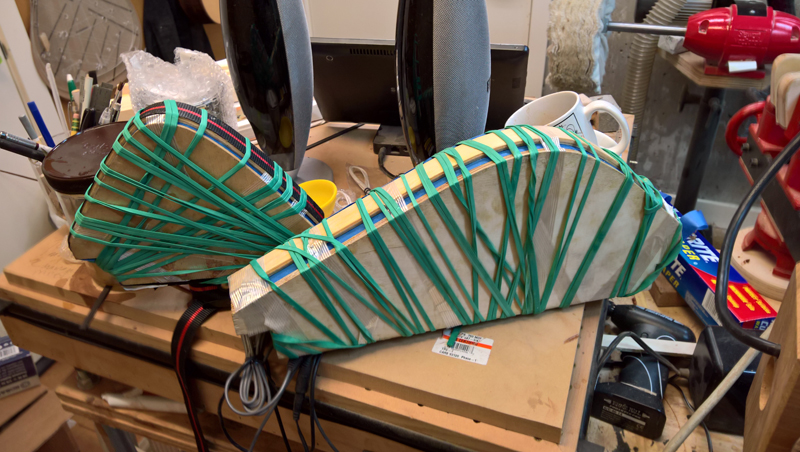
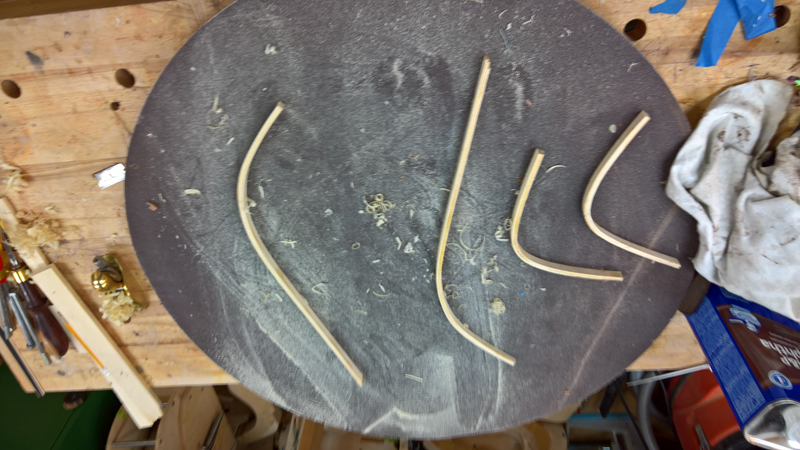
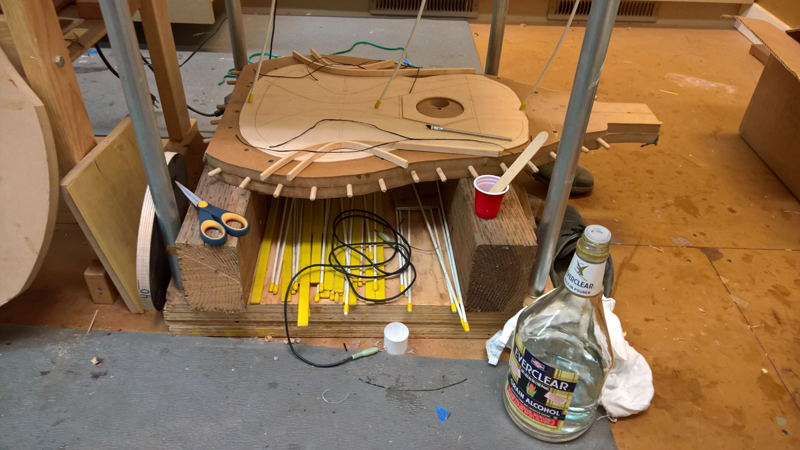
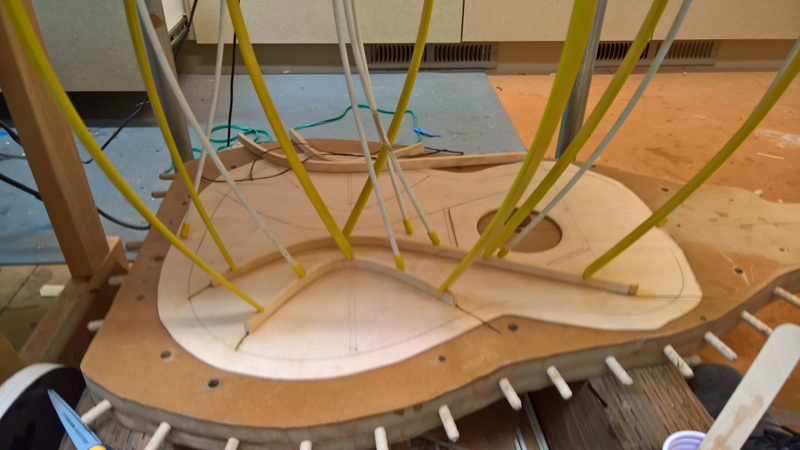
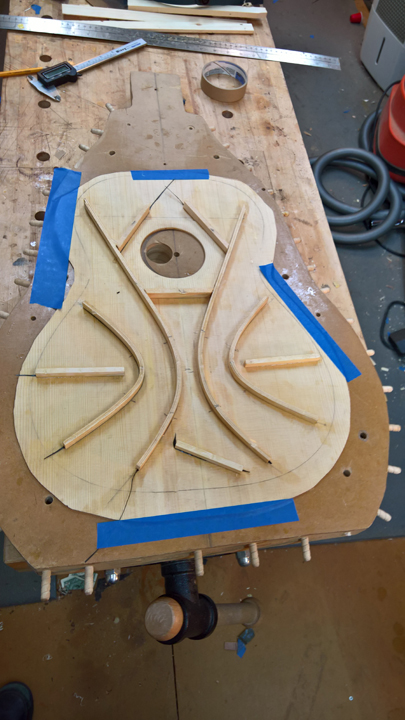
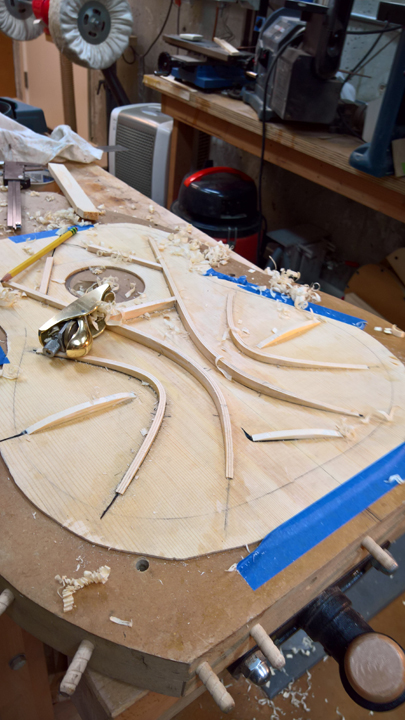
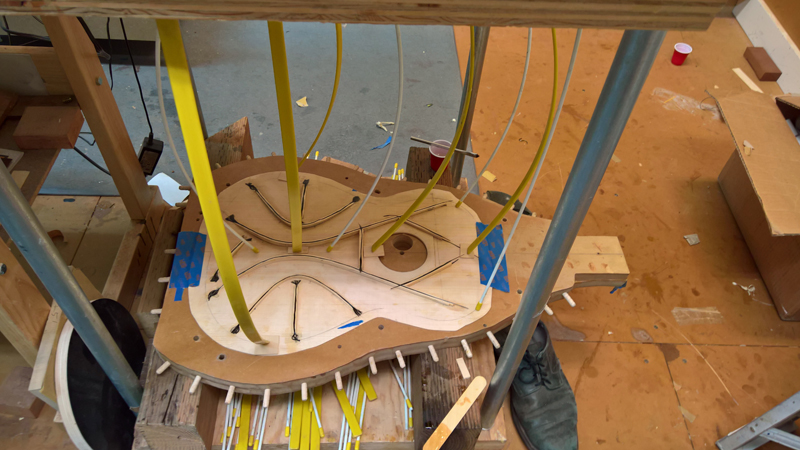
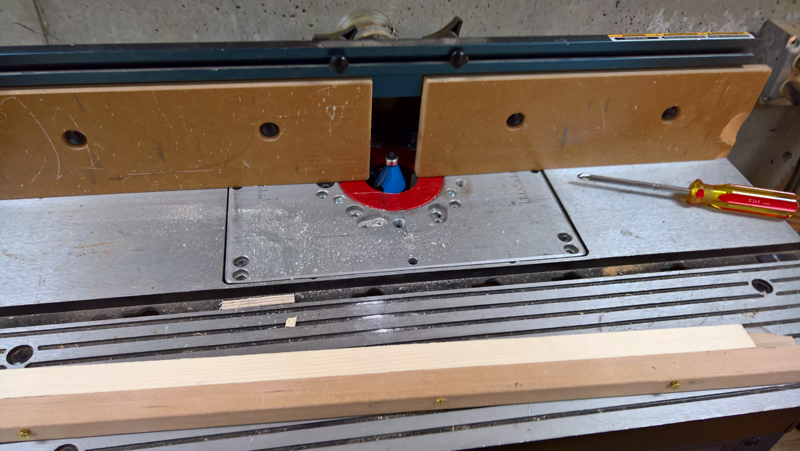
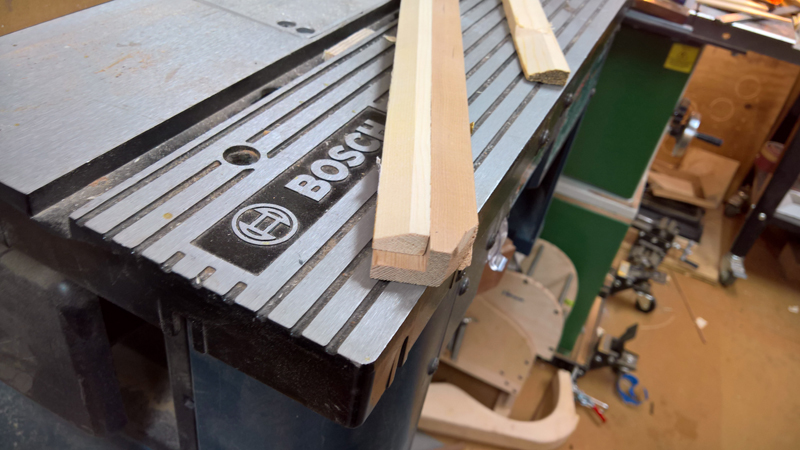
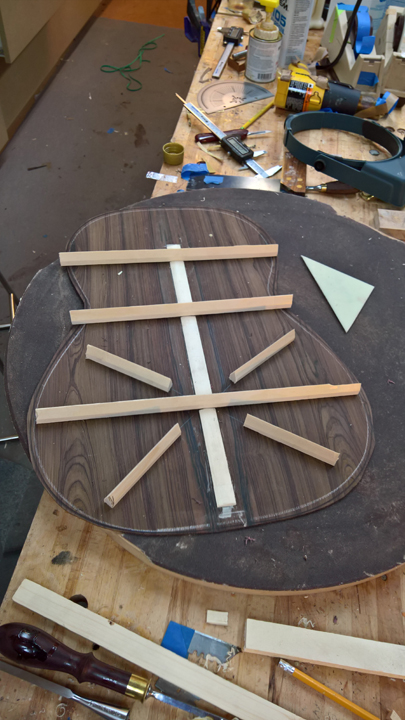
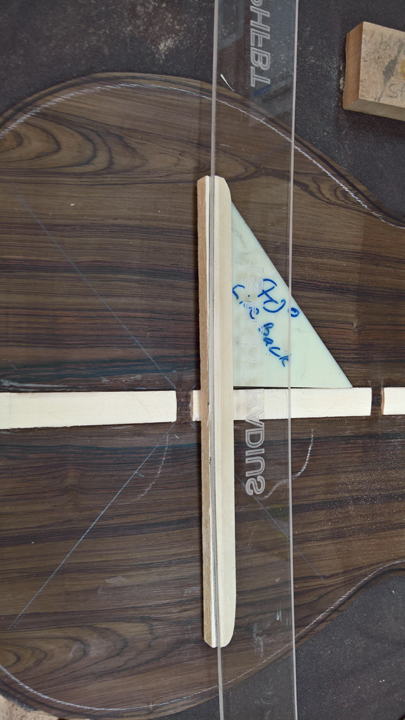
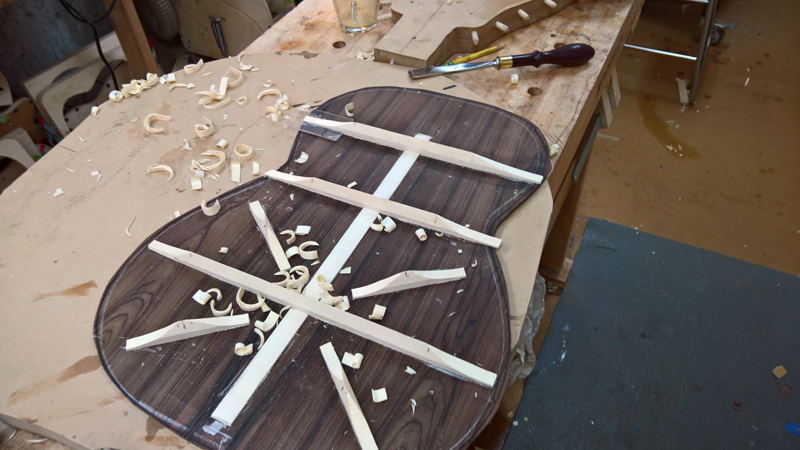
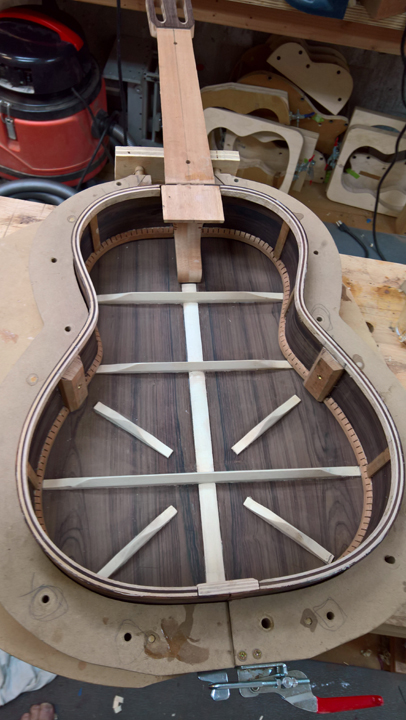
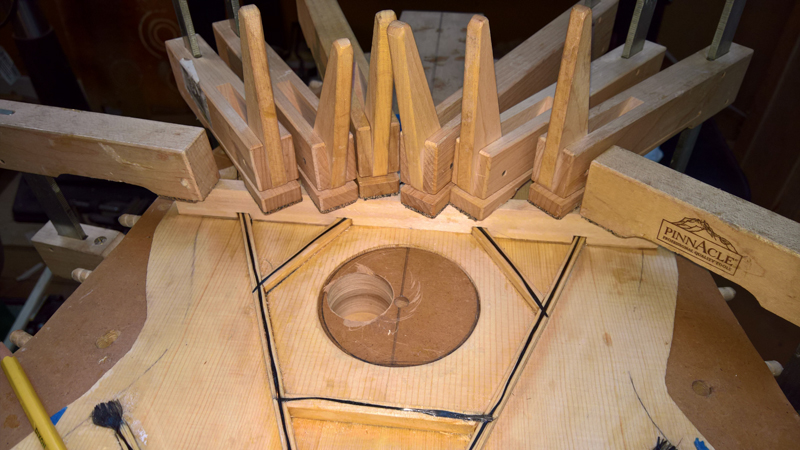
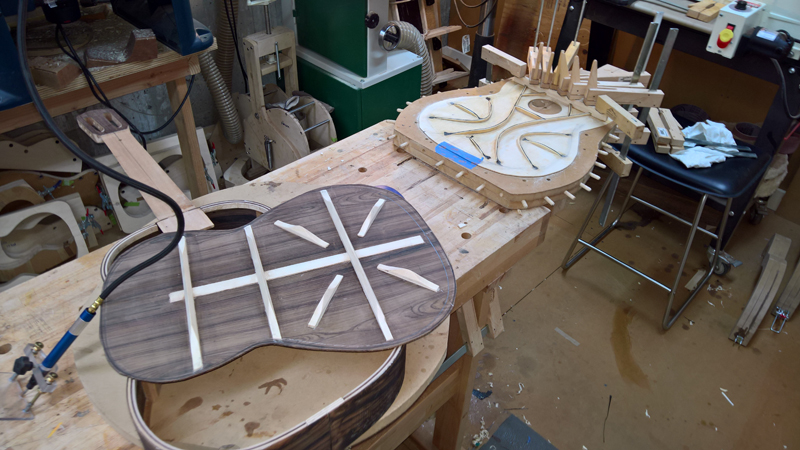
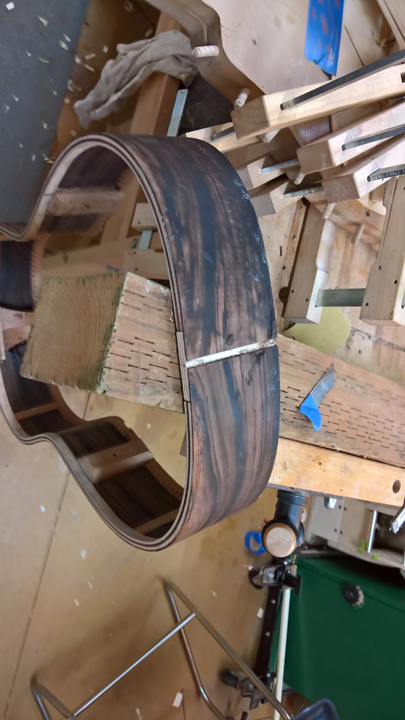
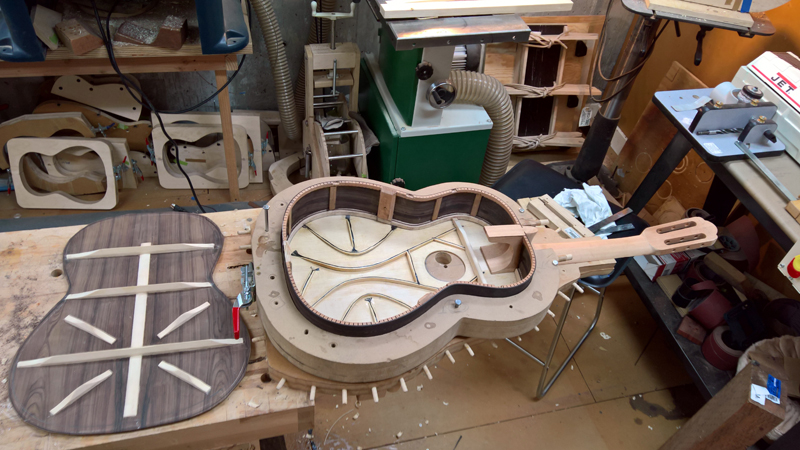
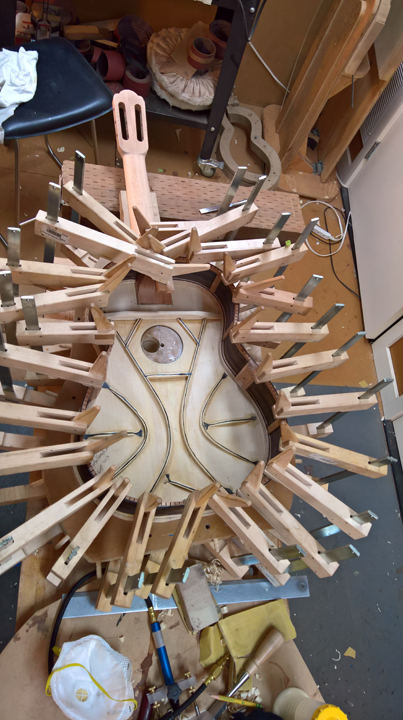
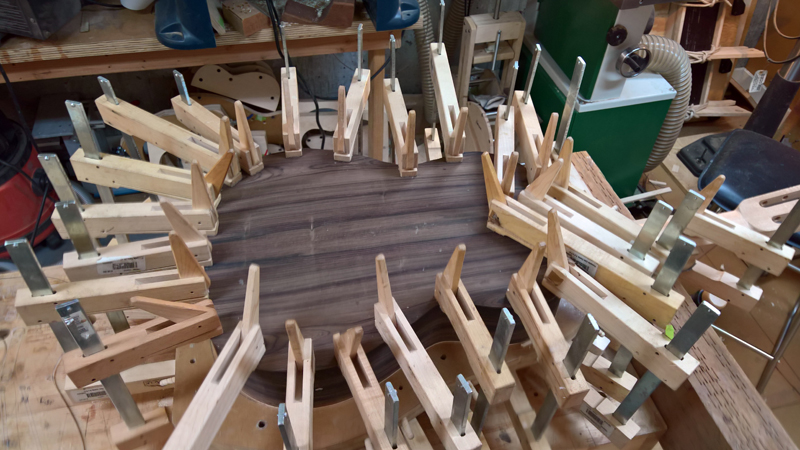
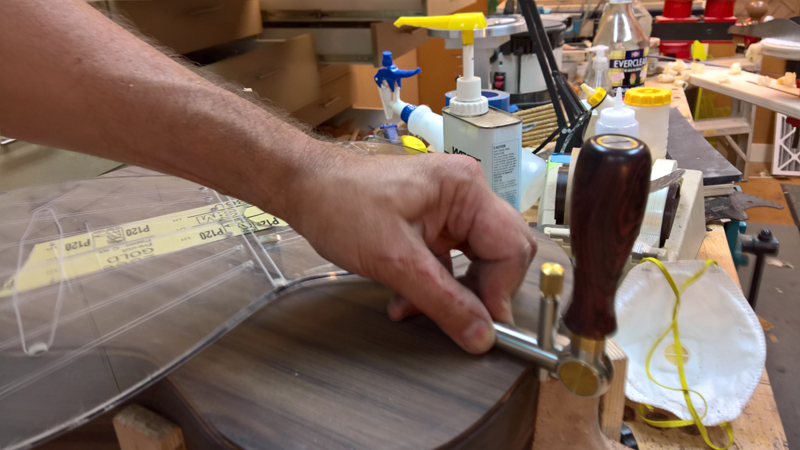
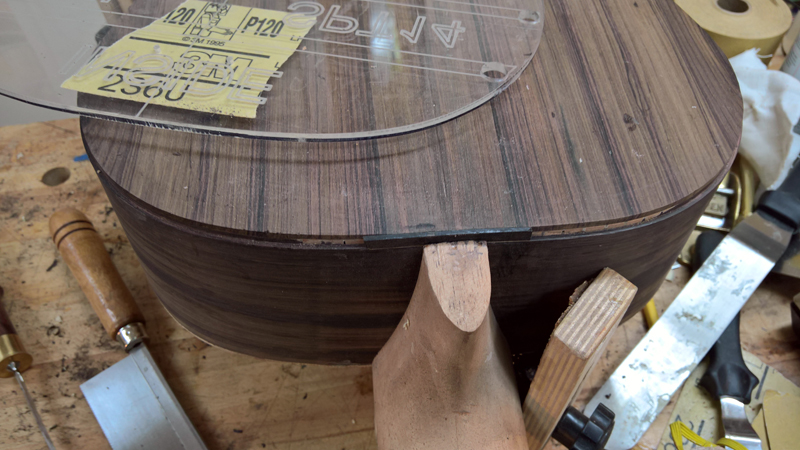
I loosely profiled the top, back and sides, thicknessed the back and sides and glued on the back reinforcement strip. Ready to start bending and putting things together.

Image

seeaxe
Blackwood
Posts: 768
Joined: Thu Dec 18, 2008 7:20 pm
Location: Auckland NZ

Re: Completely traditional looking Hauser style classical guitar

Post by seeaxe » Fri Aug 26, 2016 1:42 pm

Another build thread!
That back looks nice, cant wait to see that later on.

Getting itchy fingers now and need to get my next builds under way - but I have to read the GG theory book again before plough into them. I may be some time :D

Good luck John, looking forward to this one.

Cheers
Richard
Richard

User avatar
kiwigeo
Admin
Posts: 10587
Joined: Sat Sep 29, 2007 5:57 pm
Location: Adelaide, Sth Australia

Re: Completely traditional looking Hauser style classical guitar

Post by kiwigeo » Fri Aug 26, 2016 2:48 pm

"I went to my plane drawer to get a plane with a sharp blade I found a new looking Lie Nelson #62 low angle jack plane that I have no idea that I had or when I might of bought it."

I'm calling BS on that one!!! :D
Martin

johnparchem
Blackwood
Posts: 546
Joined: Mon Jan 21, 2013 2:59 am
Location: Seattle
Contact:

Re: Completely traditional looking Hauser style classical guitar

Post by johnparchem » Fri Aug 26, 2016 4:03 pm

Thanks Richard.
kiwigeo wrote:"I went to my plane drawer to get a plane with a sharp blade I found a new looking Lie Nelson #62 low angle jack plane that I have no idea that I had or when I might of bought it."

I'm calling BS on that one!!! :D
Alas it is true. I think I may have picked it up when I saw someone dumping it on the OLF. Some deals are too good to pass up. Not needing it at the time I just put it away. I really do not know how long I've had it. I know I did not buy it new. I did the top plates with an old Stanley #8. I was too lazy to sharpen it for the back and went to grab an old record jack plane I have when I found it.

blackalex1952
Blackwood
Posts: 776
Joined: Tue Aug 27, 2013 6:36 pm
Location: North East Victoria

Re: Completely traditional looking Hauser style classical guitar

Post by blackalex1952 » Fri Aug 26, 2016 6:05 pm

kiwigeo wrote:"I went to my plane drawer to get a plane with a sharp blade I found a new looking Lie Nelson #62 low angle jack plane that I have no idea that I had or when I might of bought it."

I'm calling BS on that one!!! :D
Kiwigeo, you are obviously younger than us! Or sharp as a tack! I can relate. The worst thing is when I clean up and can't remember where I have put things. I'm now wishing that I had a plane that I suddenly find, having hidden it away and forgotten! Particularly at the moment when I need one! The upside of forgetfulness-a pleasant surprise! Probably the most important thing here, is if it hasn't become a new good habit, to practice until it becomes one -always remember to sharpen a plane before hacking into a nice piece of wood....My memory is so bad,I can't remember when it was any good!
"Everything I say on the topic is based solely upon inexperience and assumption!"

User avatar
kiwigeo
Admin
Posts: 10587
Joined: Sat Sep 29, 2007 5:57 pm
Location: Adelaide, Sth Australia

Re: Completely traditional looking Hauser style classical guitar

Post by kiwigeo » Fri Aug 26, 2016 6:28 pm

I'm 58....but I'd NEVER misplace a Lie Nelson plane....it's be like buying a Rolls Royce, parking it in your garage and then discovering it a couple of years later having forgotten you'd bought the thing!! :D
Martin

User avatar
Mike Thomas
Blackwood
Posts: 226
Joined: Fri Jan 30, 2009 1:34 pm
Location: Adelaide

Re: Completely traditional looking Hauser style classical guitar

Post by Mike Thomas » Fri Aug 26, 2016 7:35 pm

I'll bet you've got some gems in your wood stash you've forgotten about :D
Mike Thomas


"There are some enterprises in which a careful disorderliness is the true method"

johnparchem
Blackwood
Posts: 546
Joined: Mon Jan 21, 2013 2:59 am
Location: Seattle
Contact:

Re: Completely traditional looking Hauser style classical guitar

Post by johnparchem » Sun Aug 28, 2016 8:04 am

The plane was a joy to use; actually a bit of a learning experience in how well a properly tuned plane works. Mike I do have some long forgotten wood gems in my closet. I watch the classified on various forums if I see some nice wood at a nice price I buy. It goes into my stash and generally out of my memory.

I spent the last couple of days getting ready and starting on the rims and top. As this is a traditional design I am going to build on a modified soleara that I made for my very first guitar. The modification is one that I got from the Bogdanovich book. I liked the idea of having a removable outside mold on the solera. So I combined my solera with an outside mold I got from Kenneth Michael Guitars.

Image

I also have a closed outside mold that I use for my contemporary Classical guitar with a bolt on bolt off neck. It comes in handy when trimming the sides and gluing on the tail block. I also use the mold to sand the tail block to match the rim. I had no issues bending the sides and my bindings with my fox style side bender.

Image


Image

Image

I got a little ahead of myself. I normally would wait until I had both sides cut to fit in the mold. That way I would have the sides cut right on the center line at the heel end. But I went ahead and glued on the tail block. No real issue but I had to do all of the measurements and cuts to fit the sides to the neck with a floppy glued assembly.

Image

Image

I did remember to take a couple of mm off the top side of the heel block so the top can sit flush to the neck. I used my Bishhop Cockran router base to route off the heel block. I extended the guide bar a bit so that I could balance the router on the plane of the neck.

Image

With the sides fit I used 15 foot radius sanding bar to trace out a close cut for the heel slipper for the back of the guitar. I used a band saw to cut close to the line. Then assembled it all in to my solera. I am going to wait to actually glue in the sides until the neck is close to the final profile. It is a lot easier to deal with a neck than to deal with a neck with a guitar stuck to the end.

I also propped up the rims the thickness of my top. The solera has a sloped ramp for the neck to ultimately give me 1.5 - 2 mm (measure at the nut to the plane of the top) of forward angle to the neck. Assembled as below I can use a radius board to profile the rims and the neck heel slipper.

Image

Image

My side profile was much closer in depth at the neck end than the tail end. When the neck side was close I used some stick-um sand paper to prevent over sanding.

Image

I also was able to install the rosette. I used a router to cut the channel but decided to cut the outline with a knife circle cutter and then route out the waste to the knife cut. I think I got the tool from LMI. It is nice in that it has the same size hole as my router base.

Image

Image

Image

I got my cleanest channel ever with a perfect fit. I used titebond hide glue to glue it in. The dark lines around it are a combination of pencil lines and shellac from my initial preparation.

Image

Image

I jointed some of the waste from profiling the top for a couple sound hole doublers and thickness sanded it and the top to close to my final thickness.

Image

Image

Image

While waiting for that glue up I profiled the head stock. I am glad I did not glue the sides to the rims. It was a lot easier cutting the profile on a band saw without the rims flopping around.

Image

blackalex1952
Blackwood
Posts: 776
Joined: Tue Aug 27, 2013 6:36 pm
Location: North East Victoria

Re: Completely traditional looking Hauser style classical guitar

Post by blackalex1952 » Sun Aug 28, 2016 12:43 pm

I enjoy people's build threads immensely. I noticed in one photo that you have some Tightbond liquid hide glue there. Apart from wondering what you use it for, I decided to search the forum for references to it. I have never used it, and use hot hide glue or Tightbond Original. (There was a good suggestion on this forum by Kiwigeo [Martin] to make up small batches of HHG, keep them in the fridge then use a microwave oven to heat and liquify.)

Here is a link to a discussion that you may not be aware of:
viewtopic.php?f=1&t=4498&p=53112&hilit= ... ue#p53112

Cheers! Ross
"Everything I say on the topic is based solely upon inexperience and assumption!"

johnparchem
Blackwood
Posts: 546
Joined: Mon Jan 21, 2013 2:59 am
Location: Seattle
Contact:

Re: Completely traditional looking Hauser style classical guitar

Post by johnparchem » Sun Aug 28, 2016 1:45 pm

blackalex1952 wrote:I enjoy people's build threads immensely. I noticed in one photo that you have some Tightbond liquid hide glue there. Apart from wondering what you use it for, I decided to search the forum for references to it. I have never used it, and use hot hide glue or Tightbond Original. (There was a good suggestion on this forum by Kiwigeo [Martin] to make up small batches of HHG, keep them in the fridge then use a microwave oven to heat and liquify.)

Here is a link to a discussion that you may not be aware of:
viewtopic.php?f=1&t=4498&p=53112&hilit= ... ue#p53112

Cheers! Ross
Thanks, I only use the liquid hide glue for non structural elements like the rosette and bindings. Although I have read that if it is a fresh bottle it would work to glue the top, back, braces and the like. I mostly use LMI yellow glue, but I find it is too viable for any seam that shows. I do have have a bunch of granular hide glue. I think I will follow the Martin's guide to use it in small batches. I want to get a heat lamp first to heat the surfaces so I have a bit more open time.

User avatar
kiwigeo
Admin
Posts: 10587
Joined: Sat Sep 29, 2007 5:57 pm
Location: Adelaide, Sth Australia

Re: Completely traditional looking Hauser style classical guitar

Post by kiwigeo » Sun Aug 28, 2016 5:43 pm

johnparchem wrote: I want to get a heat lamp first to heat the surfaces so I have a bit more open time.
I use a painter's heat gun on low setting for pre-heating wood and undoing hide glue joints.
Martin

blackalex1952
Blackwood
Posts: 776
Joined: Tue Aug 27, 2013 6:36 pm
Location: North East Victoria

Re: Completely traditional looking Hauser style classical guitar

Post by blackalex1952 » Tue Aug 30, 2016 12:19 pm

I use some heat lamps that used to live in a ceiling/heat lamp device in my bathroom. The kids kept leaving them on and with the high electricity costs in Australia these days, I took them out to the shed. I use a microphone boom stand to hold them over the instrument. Ross
"Everything I say on the topic is based solely upon inexperience and assumption!"

johnparchem
Blackwood
Posts: 546
Joined: Mon Jan 21, 2013 2:59 am
Location: Seattle
Contact:

Re: Completely traditional looking Hauser style classical guitar

Post by johnparchem » Wed Aug 31, 2016 3:20 pm

Thank you guys,

Making a bit more progress mostly working on the rims. It has been a while since I made a Spanish style neck joint.

I used the LMI circle cutter to mostly cut out the sound hole. With the sound hole doubler patch I need to cut about 4 mm deep. A bit much for one pass. One bad feature of the tool is that I need to back out the radius to get the hex wrench on the set screw for the blade. Screw that! after I made the initial cut I pulled out the router and left just enough wood to keep my pilot hole center. I did have a nice clean knife cut on the top.

Image

Image

Image

I marked and beveled the sound hole patch to make it look good from the front.

Image

Image

I also trimmed the neck side of the top real close to the final profile to fit on the neck heel.

Image

Image

I grabbed a sycamore side from my stash of orphaned sides I have bought over the years bent it and ripped it to make solid linings for the top. I also had a pre-bent EIR side hanging around for a few years, so I also popped it back into the bender and riped it to make fancy laminated linings.

Image

Image

Image

I just used my mold with another bend side to laminate the stack. I just used LMI yellow glue. Never enough clamps though. I needed to do one lining at a time.

Image

Image

Image

By hook or by crook I got the solid linings in the top and reverse kerfed linings for the back.

Image

Image

During the binding glue ups I made the fret board and worked on cleaning up the headstock

Image

Image

Image

I glued a 1mm thick strip on the base side of the fret board and then thickness sanded it. Now the base is 1 mm thinner than the treble.

Image

Image

Image

I re-radiuded the back of the rims, also along the way I profiled the fretboard.

Image

I have yet to glue the sides to the neck so I removed the sides and will be ready to profile the neck tomorrow. Hopefully I will also finish the rims with a mass support block and some of the side reinforcement strips.

Image

johnparchem
Blackwood
Posts: 546
Joined: Mon Jan 21, 2013 2:59 am
Location: Seattle
Contact:

Re: Completely traditional looking Hauser style classical guitar

Post by johnparchem » Fri Sep 09, 2016 1:23 pm

Sorry I have a big post. I have the rims nearly ready, I have braced the back and have one remaining brace for the top.

To finish the rims I added a couple of the mass blocks, that would allow me to tune down the top a bit after finishing the instrument. I also added a bunch of side reinforcement strips.

Image

Image

I used de glue do to clean off the harden glue. I got a bit sloppy

Image

Around the same time I ripped a bunch of 1.7 mm englemann spruce strips and bent them on a hot pipe. The engelmann really bent easily for me this time. I used german spruce on my last classical and that wood was not happy about bending. I was amazed at the difference. I used West system 105\206 to laminate the falcate braces on the forms.

Image

Image

Image

The next day I ripped them in half on the bandsaw, sanded them flat and prepared to epoxy them to the top.

Image

Image

I make sure that I have everything ready before I mix the epoxy. Once mixed I try to work quickly but more and more I try to be a bit neater.

Image

Image

It took me two session but ultimately I got them all epoxied. I then profiled the braces. For this guitar I am going to use 10 mm for the main falcate braces and 7 mm for the secondary. The braces all need to be profiles before they are capped with another strip of CF tow.

Image

Image

Note the effort I made to force the top to follow the solera before laying on the fiber.

Image

The Solera has a 2 mm dish in the lower bout.

Image

The back is a little more conventional. As per the book I pre profile the back braces with a 22.5 degree chamfer bit.

Image

Image

I will brace it has an active back, using 3 transfer braces and a set of radial braces

Image

I used a combination of a plane and a radius brace sander to put the radius on the braces.

Image

Image

Image

I glued the up in my vacuum box on a 15' radius disk.

Image

I was able to find and use my handy brace end profile jig, and made quick work putting the profile on all of the braces.

Image

Image

Another couple of days and I will close the guitar.

Image

johnparchem
Blackwood
Posts: 546
Joined: Mon Jan 21, 2013 2:59 am
Location: Seattle
Contact:

Re: Completely traditional looking Hauser style classical guitar

Post by johnparchem » Mon Sep 12, 2016 1:48 am

Sorry about the previous long posts with pictures. I will break up todays into a few posts.

I added the upper transverse brace to the top. This is a bit of a pain as I inlet all of the braces that cross its path. As shown in the pictures I clamp the brace down, carefully mark the brace crossing with a scalpel and then use a razor saw and chisel to make the cut out. I set the brace right to the cutline in the vice and use the vice as a stop. I finally learned after many guitars how to keep the saw straight up and down.


Image


Image


Image


Image


Image

Then I just clamped it down. As I did not use any CF for this brace, I could have used yellow glue, but to stay consistent I epoxied it down as well.

Image

Next up final prep for the wings.

johnparchem
Blackwood
Posts: 546
Joined: Mon Jan 21, 2013 2:59 am
Location: Seattle
Contact:

Re: Completely traditional looking Hauser style classical guitar

Post by johnparchem » Mon Sep 12, 2016 1:51 am

I took the time to profile the upper transverse brace (no pictures).

I had to do the final prep of the rims. I notched out a rebate for the lateral braces both back and top. I use a pencil mill grinder. I also notched cut out a rebate for the end graph. I just used a scalpel to mark out the cut and a razor file and chisel to cut and clear the rebate. I have some Petros Guitar shop Purflex that will match the maple purfling on the bindings and the ebony binding that I will use. I will install the purflex after the binding. Before routing for the bindings I wedged in a strip of ebony so that I had a smooth surface for the binding machine to register.


Image


Image


Image


Image


Image

With everything ready I started closing the box. I glued the sides to the top with the neck clamped to the solera to force the correct neck angle. The angle does not rally get locked until the back is glued on is well with the top and neck still clamped the the solera.

Image

Before clamping the back I cleaned the inside of the guitar again and routed the over hang of the top flush.

Image

The back fits on nicely so I clamped it on as well, again note that the neck is clamped to the solera to force the small forward angle of the neck.

Image

All cleaned up

Image

Image

next the bindings

johnparchem
Blackwood
Posts: 546
Joined: Mon Jan 21, 2013 2:59 am
Location: Seattle
Contact:

Re: Completely traditional looking Hauser style classical guitar

Post by johnparchem » Mon Sep 12, 2016 1:51 am

The back bindings are simply ebony with a maple prufling. The top will have a multi-line purfling to give it that traditional classical look. I tried adding some red and green lines from the rosette but I just could not do it. So I ended up with a black, rosewood and maple stack that I will install.

Image

I carefully set and test the binding jigs cuter depths and routed the back for the bindings. I had a bit of chip out right on the outside curve of the upper bout. It was about 3/14 inch deep and an inch long. I found the pieces but it would have been a mess to put back together. Luckily I had the cutout from right next to the chip out. I clean the chipped out area straight and square with a chisel and glued on a small strip. Sorry no pictures of the damage but here is a picture after the repair. The repaired area is right over the chisel handle

Image

The biggest pain for spanish neck joint guitars is having to install the bindings with the neck on. I start with a scalpel and a template to continue the binding line. I use a purfling cutter to continue the cut on the sides. I increase the depth with a razor saw and clear the waste with 1 mm and 2 mm chisels. It is a real pain.


Image

Image

The test binding seems to fit.

Image

After that it is just a matter of trimming the bindings and installing them. I used a scarf joint for the bottom and a butt joint for the top. When working with a scarf joint I install the binding with inward cut first. That gives me a solid notch to insert the second binding into. I am really able to push it tight that way.


Image


Image


Image

Next up is the top binding.

seeaxe
Blackwood
Posts: 768
Joined: Thu Dec 18, 2008 7:20 pm
Location: Auckland NZ

Re: Completely traditional looking Hauser style classical guitar

Post by seeaxe » Mon Sep 12, 2016 6:45 pm

Appreciate the detail you are going to in your posting here John. There are many useful tips for me in there.
Im planning to try my hand at a falcate.
Looks very nice, best of luck with the rest of the build
Cheers
Richard
Richard

User avatar
kiwigeo
Admin
Posts: 10587
Joined: Sat Sep 29, 2007 5:57 pm
Location: Adelaide, Sth Australia

Re: Completely traditional looking Hauser style classical guitar

Post by kiwigeo » Mon Sep 12, 2016 7:12 pm

johnparchem wrote:Sorry about the previous long posts with pictures. I will break up todays into a few posts.

I added the upper transverse brace to the top. This is a bit of a pain as I inlet all of the braces that cross its path. As shown in the pictures I clamp the brace down, carefully mark the brace crossing with a scalpel and then use a razor saw and chisel to make the cut out. I set the brace right to the cutline in the vice and use the vice as a stop. I finally learned after many guitars how to keep the saw straight up and down.

Cutting the slots in the UTB is indeed a pain in the proverbial. What I do is cut the slots for the ends of the primary braces before the two soundhole braces are glued in. I make the sound hole braces a bit lower than the ends of the primary braces..this way once the former are glued in I can fit the UTB over the ends of the primary brace ends and then mark the cuts for the soundhole brace ends. I generally end up with a better fit of the UTB over the four brace ends.
Martin

Dave M
Blackwood
Posts: 596
Joined: Tue Jul 15, 2014 6:44 am
Location: Somerset UK

Re: Completely traditional looking Hauser style classical guitar

Post by Dave M » Tue Sep 13, 2016 6:15 am

John thanks (once again) for a detailed build thread. As Seeaxe said there is always a detail here or there which helps us all.

The pencil mill grinder you mention is by the look of it a plug in for a dremel type tool? I'll admit I seem to make a bit of a meal of cutting notches for braces in linings using saws and chisels.

You say you are using 10 mm height for the falcate mains. This sounds quite high. Is it something you have calculated from the rather fearsome calcs in the book?

Good luck with the continuing build.
------------------
Dave

johnparchem
Blackwood
Posts: 546
Joined: Mon Jan 21, 2013 2:59 am
Location: Seattle
Contact:

Re: Completely traditional looking Hauser style classical guitar

Post by johnparchem » Tue Sep 13, 2016 6:50 am

Thanks Martin and Dave,

Actually for a classical guitar I find that 10 mm is on the low side for a classical where the T(1,1)2 is higher than 190 Hz. This my 5th classical top. On my first I thought that the falcate braces could be lower due to the lower load. My first thought turned out wrong. The Gore medium sized SS is braced with 7 mm or 8 mm with a target of 170 or 180 Hz. The lowest target for a classical is 190 Hz up to 220 Hz. Using the Book's vibrational stiffness parameter values, I find a classical spruce top in about .4 mm thinner than a steel string. So the thinner top will tend to lower the T(1,1)2 of a top but I want to go higher not lower. I do get a little back as the classical is a smaller guitar but I still find I needed taller braces. So I picked 10 mm.

I need to start playing a bit with the secondary brace height as I am finding they do have a big affect the tops resonance. Looking at the closed box numbers I think this guitar will be right at 190 Hz. It is 1 Hz higher than my last classical at the same stage.

John

johnparchem
Blackwood
Posts: 546
Joined: Mon Jan 21, 2013 2:59 am
Location: Seattle
Contact:

Re: Completely traditional looking Hauser style classical guitar

Post by johnparchem » Tue Sep 13, 2016 6:54 am

johnparchem wrote:Thanks Martin and Dave,

Actually for a classical guitar I find that 10 mm is on the low side for a classical where the T(1,1)2 is higher than 190 Hz. This my 5th classical top. On my first I thought that the falcate braces could be lower due to the lower load. My first thought turned out wrong. The Gore medium sized SS is braced with 7 mm or 8 mm with a target of 170 or 180 Hz. The lowest target for a classical is 190 Hz up to 220 Hz. Using the Book's vibrational stiffness parameter values, I find a classical spruce top in about .4 mm thinner than a steel string. So the thinner top will tend to lower the T(1,1)2 of a top but I want to go higher not lower. I do get a little back as the classical is a smaller guitar but I still find I needed taller braces. So I picked 10 mm.

I need to start playing a bit with the secondary brace height as I am finding they do have a big affect the tops resonance. Looking at the closed box numbers I think this guitar will be right at 190 Hz. It is 1 Hz higher than my last classical at the same stage.

I am not quite sure at this point as I do not have enough experience, but I am finding as a first approximation that the vibration stiffness parameter values basically normalize the effect of the top between classical and SS of close to the same sized instruments and the target resonance can be controlled by the brace heights. If I wanted a classical at 170 Hz I would go with the same brace height I used on the SS to achieve that resonance.

John

johnparchem
Blackwood
Posts: 546
Joined: Mon Jan 21, 2013 2:59 am
Location: Seattle
Contact:

Re: Completely traditional looking Hauser style classical guitar

Post by johnparchem » Fri Sep 23, 2016 3:12 am

I finished the bindings, added a scrap piece of purflex for the end graph and have started finish prep.
I still need to make a bridge.

Image

Image

Image

Image

User avatar
kiwigeo
Admin
Posts: 10587
Joined: Sat Sep 29, 2007 5:57 pm
Location: Adelaide, Sth Australia

Re: Completely traditional looking Hauser style classical guitar

Post by kiwigeo » Fri Sep 23, 2016 10:20 am

All looking very nice John...
Martin

User avatar
demonx
Blackwood
Posts: 1395
Joined: Sat Jul 14, 2012 6:55 pm
Location: Ballarat Victoria
Contact:

Re: Completely traditional looking Hauser style classical guitar

Post by demonx » Fri Sep 23, 2016 6:41 pm

Looking GREAT so far!

Bit jealous of the vacuum press!

How did you find the purflex? I've wanted to use it for a while now but no one seems to order anything lately that it would fit into the theme!

Post Reply

Who is online

Users browsing this forum: No registered users and 58 guests