What's going on in your shed?

Talk about musical instrument construction, setup and repair.

Moderators: kiwigeo, Jeremy D

User avatar
Allen
Blackwood
Posts: 5252
Joined: Thu Oct 11, 2007 5:39 pm
Location: Cairns, Australia
Contact:

What's going on in your shed?

Post by Allen » Sun Jun 22, 2008 4:48 pm

This is the latest creation, and is a complete departure from the very vintage Size 5 that I just completed. It's an OM using some Allied "Opportunity Grade" East Indian Rosewood. Using an Engelman top from Graham Hein and the neck is some local grown "African Mahogany" and Queensland Maple.

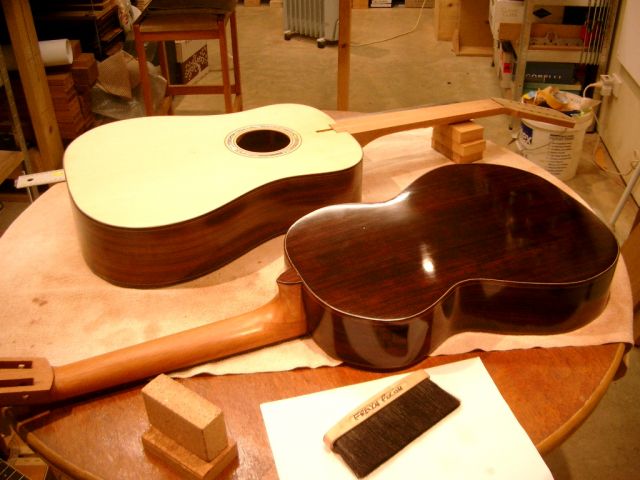
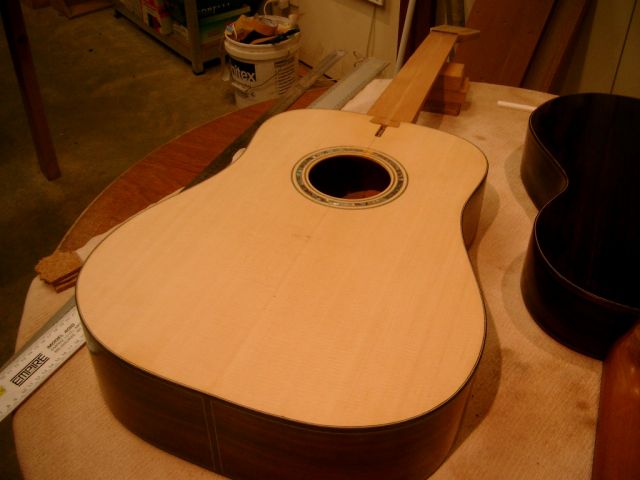
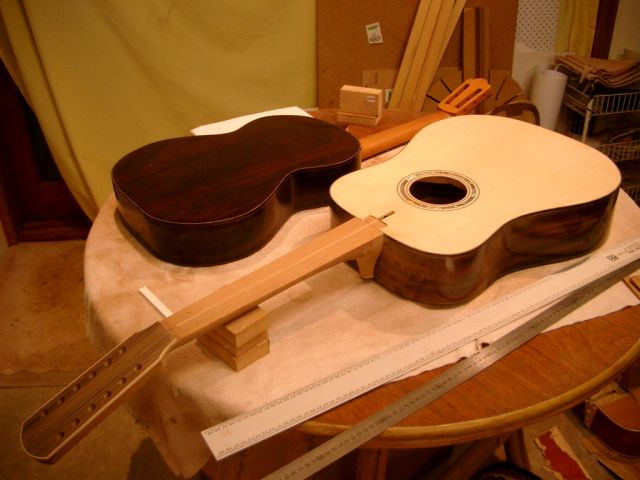
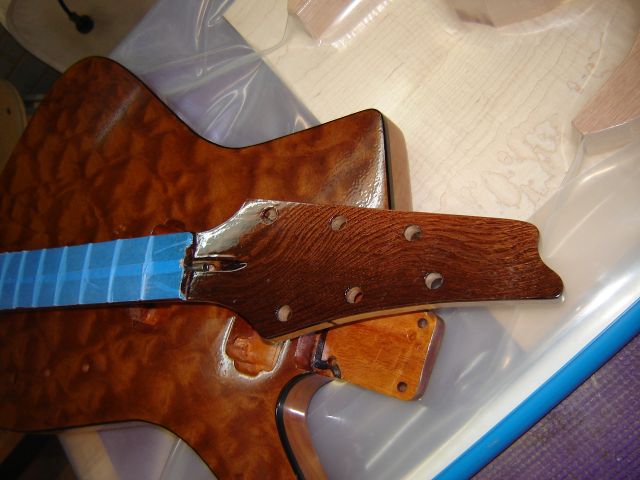
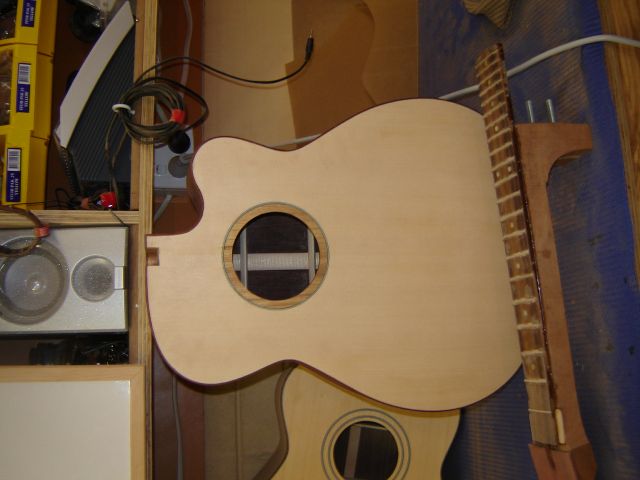
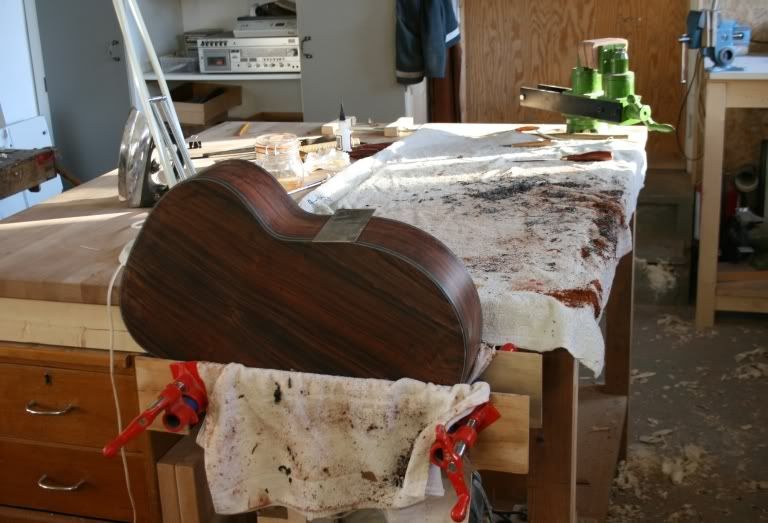
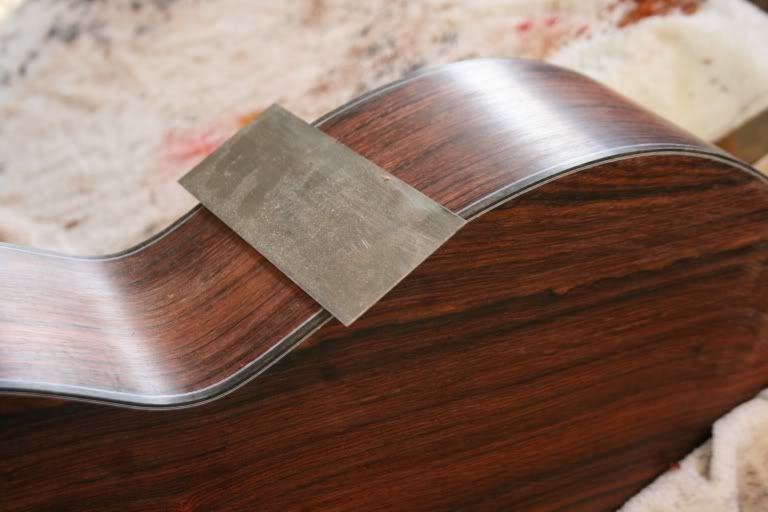
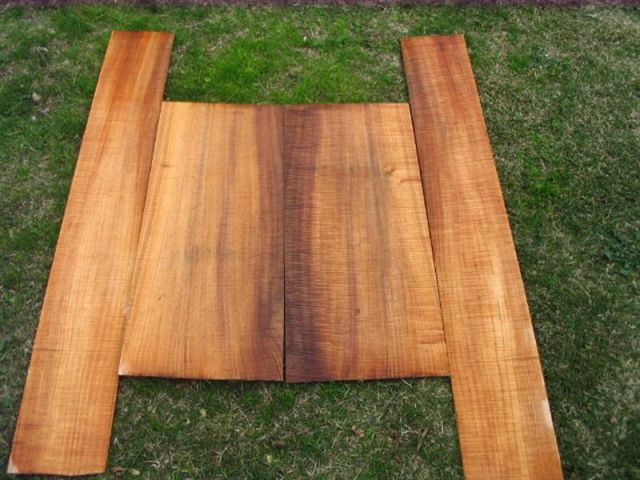
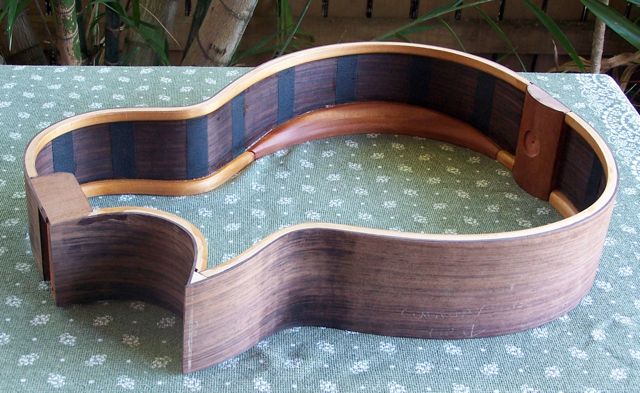
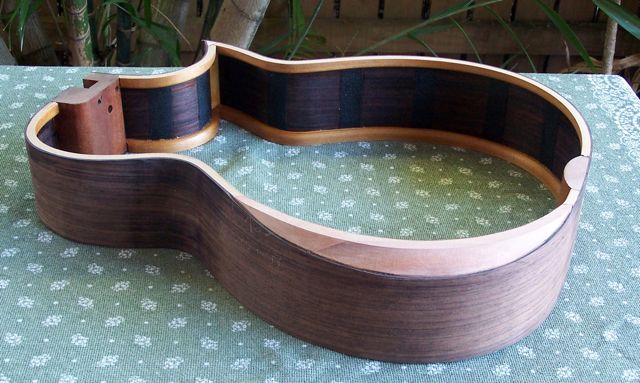
I bent the sides on a hot pipe, as I don't have a bending mold for an OM and I thought I could use the practice. Surprisingly easy to bend by hand. As you can see I wanted to stretch my building skills some more and I' going to give the Ryan style arm rest a go. So far so good. No disasters yet. I reckon the only difficult part to it now is going to get the bindings to look good.

Image

Image

Image

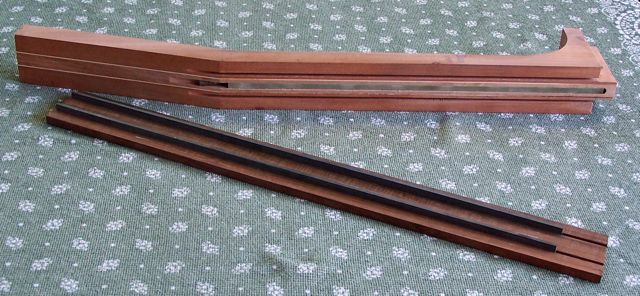
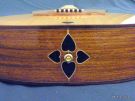
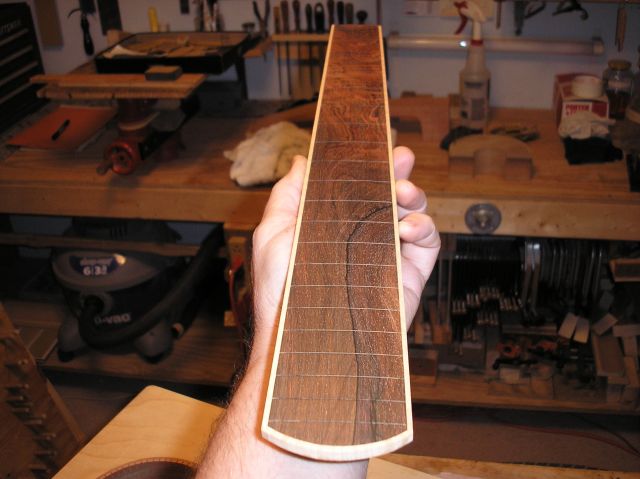
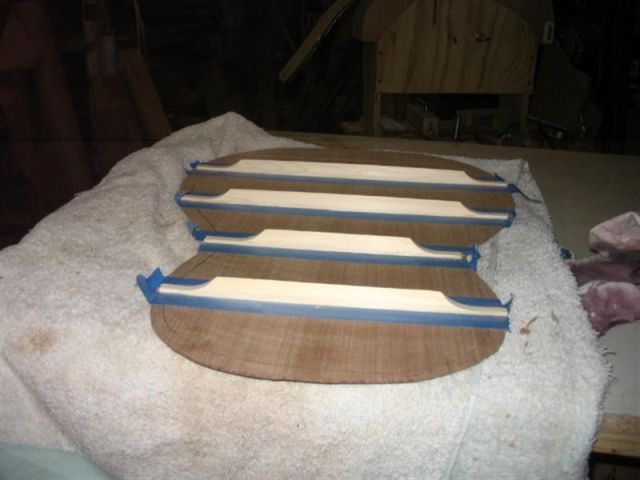
The fret board has been slotted 1/8 " for the CF rods to help support the fret board over the body, as Rick Turner does. This one is going to get a revision of the adjustable neck I used on the last one. Not shown is the back that I managed to get inlayed and braced. It's in the go-bar deck drying, but you've all seen a braced back, haven't you :lol:
Allen R. McFarlen
https://www.brguitars.com
Facebook
Cairns, Australia

User avatar
Taffy Evans
Blackwood
Posts: 997
Joined: Wed Apr 30, 2008 6:54 pm
Location: Charters Towers North Queensland

Post by Taffy Evans » Mon Jun 23, 2008 1:59 pm

Hi Allen
Never a dull moment on this forum, thanks for sharing that, it looks and sounds very interesting so far. I'm looking forward to watching it grow. Whats going on in my shed??? Well at the moment I've got the following still to complete, all already started and some close to the lacquer stage:
An '0' /'00' size guitar [my plans] an 'OM' Style cutaway [my plans] a '000' size guitar [Stumac plan] last weekend I cut out a solid body electric Resonator guitar [my plan]. As the majority of my time goes into repairs things move slow in the building department. Now before you ask for pictures, my computer and dial up together just don't cut it, so changes are underfoot as I write. Oh! I forgot the hollow neck lap steel on the back burner.
Taff

Nick Payne
Myrtle
Posts: 87
Joined: Tue Jun 10, 2008 9:31 am
Location: Canberra

Post by Nick Payne » Mon Jun 23, 2008 5:17 pm

Allen

What wood have you used for the bindings.

User avatar
Allen
Blackwood
Posts: 5252
Joined: Thu Oct 11, 2007 5:39 pm
Location: Cairns, Australia
Contact:

Post by Allen » Mon Jun 23, 2008 5:38 pm

The linings are 3 piece laminate of Kuari Pine. I bought a meter long plank of it, thinking that I might cut some tops out of it, but the color of the wood just wasn't to my liking. I've got enough to do linings in at least another dozen guitars, so while it's a bit fiddly to make them, I really like the look, and they really stiffen up the sides.

I tried Qld. Maple once for the laminated linings, but they were so freaking hard to work for this purpose that I wouldn't recommend them

The arm rest bevel is some off cuts of African Mahogany from the neck. I laminated up the bits that were left over, trying to get as much edge grain to the side as possible.
Last edited by Allen on Mon Jun 23, 2008 7:22 pm, edited 1 time in total.
Allen R. McFarlen
https://www.brguitars.com
Facebook
Cairns, Australia

User avatar
kiwigeo
Admin
Posts: 10598
Joined: Sat Sep 29, 2007 5:57 pm
Location: Adelaide, Sth Australia

Post by kiwigeo » Mon Jun 23, 2008 7:17 pm

Goings on in my workshop:

1. 12 string Dreadie. Neck got glued on last week. Scale length got shortened slightly during neck fitting process so a new fretboard needs to be made up

2. a very troublesome classical that has had three backs and several french polish jobs. This guitar will hang on my wall of shame rather than be inflicted on a hapless musician friend.


Image
Image
Image

User avatar
Dominic
Blackwood
Posts: 1098
Joined: Thu Jan 10, 2008 8:58 am
Location: Canberra

Post by Dominic » Mon Jun 23, 2008 10:38 pm

Hey, Ive been quite busy and a bunch of things are close or have been finished. First a couple of dreads. 1 EIRW, 1 insane Narra
Image Image Image
Been making an IbanezIC400 (just strung up) and an RG style 7 string (in the vacumm bag getting a nice maple drop top) waiting for a kahler bridge
Image
Also nearly finished my first cutaway, EIRW/sitka with bloodwood bindings. Just doing the neck. And a Thunderbird style bass with flamed tas BW drop top. I'll post more pics if there is interest.
I've also just got a nice table saw so have been remaking jigs etc. Oh, and playing with vacumm clamping for holding, gluing bridges and soon, doing back and top bracing. I read the Charles Fox artilce in a recent GAL journal and took his advice and set up a cheap system. All in all, lots of fun. Some of these things might be of interest in a new thread.
Cheers
Dom
You can bomb the world to pieces,
but you can't bomb the world to peace!

User avatar
Allen
Blackwood
Posts: 5252
Joined: Thu Oct 11, 2007 5:39 pm
Location: Cairns, Australia
Contact:

Post by Allen » Tue Jun 24, 2008 5:58 am

Dominic, I'd like to see some more pictures of your projuects. And what sort of saw did you get. I'm wanting to add a saw to the shed, but can't justify the Felder that I really want.
Allen R. McFarlen
https://www.brguitars.com
Facebook
Cairns, Australia

User avatar
Dominic
Blackwood
Posts: 1098
Joined: Thu Jan 10, 2008 8:58 am
Location: Canberra

Post by Dominic » Tue Jun 24, 2008 9:27 am

Hey Allen, by projects do you mean guitars or jigs and things or both? I tend to have lots of things going at once. I only mentioned about half of them above.

The TS I got is an MBS300 from Carba-Tec. It is a 12 inch. They get good raps on the Ubeaut Woodworkers forum. Frankly it scares the c%&p out of me as ive never had one before but this is probably a good thing at this stage. When I first got my bandsaw I was convinced I would cut my arm off with it. (Could have something to do with the fact that there is a meat version in the catalogue next to the one I bought). Once my brain has run every possible scenario about how a machine can get me once or twice from every possible angle I tend to relax.

If you have any specific questions i am happy to answer. And I been meaning to start a new thread about my jigs and other things soon.
Meanwhile, the bloodwood cutaway with neck and the finished IC400 in which I used the new SD blackout active pickups. The cutaway has a tappered heal joint so there is a bit going on.
Cheers
Dom

Image
Image
You can bomb the world to pieces,
but you can't bomb the world to peace!

User avatar
cactus bum
Myrtle
Posts: 72
Joined: Tue Jun 10, 2008 3:19 am
Location: Arizona

Post by cactus bum » Wed Jun 25, 2008 1:39 pm

Allen, what is the technique of bent unkerfed lining called, as on your guitar here? You must have heat bent it, correct? Is it standard procedure to add the beefier, darker (hard?) wood portion that will be just below the player's upper arm? Is this solely for additional support? Your craftsmanship is top notch. Michael Pollard


Dominic, Are the three pieces in the back of your Nara guitar butt jointed then a half-depth black inlay added? Is there an inside support strip running the length of each joint? Beautiful guitar.

User avatar
Dominic
Blackwood
Posts: 1098
Joined: Thu Jan 10, 2008 8:58 am
Location: Canberra

Post by Dominic » Wed Jun 25, 2008 2:08 pm

Mr Bum, cheers mate. The 3 bits of narra are butt joined with offcuts of EIR sides stuck in there at the same time full depth. I used spruce strips along the seams as usual. Lovely wood. I have more.
Dom
You can bomb the world to pieces,
but you can't bomb the world to peace!

User avatar
Allen
Blackwood
Posts: 5252
Joined: Thu Oct 11, 2007 5:39 pm
Location: Cairns, Australia
Contact:

Post by Allen » Wed Jun 25, 2008 5:54 pm

Michael, as far as I know they are just called solid linings. They are 3 piece laminated Kauri Pine. Could be any wood that suits the task.

I bend them on a hot pipe. It takes a heck of a lot longer than using kerfed linings, but they are a lot cheaper to make than buying the kerfed ones it time is no object. I will usually get them all bent and laminated in 2 sessions of 1 hour each day after work. Gives me a chance to unwind from work, knock the top off a beer, and putter in the shed. :D

The large mahogany section under the players arm is for a beveled armrest. It's not installed in a guitar unless you are going to be carving out a bevel in the side and top to ease the transition for the arm to rest on. This is my first attempt at it, so it's a bit of a learning curve.
Allen R. McFarlen
https://www.brguitars.com
Facebook
Cairns, Australia

User avatar
Dominic
Blackwood
Posts: 1098
Joined: Thu Jan 10, 2008 8:58 am
Location: Canberra

Post by Dominic » Wed Jun 25, 2008 6:35 pm

So Allen, (I’m just thinking out loud here) with the arm rest, it effectively makes the bass side lower bout a different shape, smaller. I would assume this to have some effect on sound but what? Somewhere in the gazillion things I have read on guitars was something about symmetry.
I suppose you could put the arm rest on the outside of one and see what it was like.

But I like the idea of bevelling the edge for playability, I often end up playing with the guitar very flat on my lap so my elbow is not stressed having to reach over the hard edge when playing. Maybe have to make an ergo like guitar. Can't be that hard, just a crooked guitar after all.
Dom
You can bomb the world to pieces,
but you can't bomb the world to peace!

User avatar
Allen
Blackwood
Posts: 5252
Joined: Thu Oct 11, 2007 5:39 pm
Location: Cairns, Australia
Contact:

Post by Allen » Wed Jun 25, 2008 6:46 pm

Yes, it's going to be taking up some of the top on the bass side. Will it have a noticeable effect. Who knows?

The reason I thought about giving it a go is that I really admire Ryans work and wanted to try building in a similar armrest. Also, the Size 5 has an extraordinary sound for such a small instrument, so while the top on this OM is going to be reduced with the arm rest, it's going to be no where near as small as the previous guitar. Perhaps I'll get lucky and have the comfort of the arm rest and still retain good tone.

And after all, if you don't jump in and build, you'll never know.
Allen R. McFarlen
https://www.brguitars.com
Facebook
Cairns, Australia

User avatar
Bob Connor
Admin
Posts: 3132
Joined: Mon Jul 09, 2007 9:43 pm
Location: Geelong, Australia
Contact:

Post by Bob Connor » Wed Jun 25, 2008 11:09 pm

I would think the arm-rest would make bugger all difference to the sound Allen.

It really is making very little difference to the internal volume of the body
and it reduces the resonating surface of the top of one of the lower bouts by 1/4 to 1/2 an inch over a 12 inch span.

No one would pick it in a blind listening test with a non arm-rest model.
Bob, Geelong
_______________________________________

Mainwaring and Connor Guitars

User avatar
kiwigeo
Admin
Posts: 10598
Joined: Sat Sep 29, 2007 5:57 pm
Location: Adelaide, Sth Australia

Post by kiwigeo » Wed Jun 25, 2008 11:25 pm

I would expect the instrument to have a restful sound.. :D

User avatar
Dave Anderson
Blackwood
Posts: 260
Joined: Sun Sep 30, 2007 2:38 pm
Location: Florida, USA

Post by Dave Anderson » Thu Jun 26, 2008 9:14 am

Hi guys, Well, lets see whats going on in my shed today...
I've started another little one, a 00 - 12fret in Tassie Blackwood and from deep in the Carpathian mountains of Transylvania ...a spruce top.
Image
And here's the fb. - braz. w/ curley maple binding.
Image
Dave Anderson
Port Richey,Florida

Hesh1956
Blackwood
Posts: 1420
Joined: Thu Sep 27, 2007 9:58 am

Post by Hesh1956 » Thu Jun 26, 2008 9:50 am

Not a damn thing but I just named my new garden tractor "Dread*ought..... :D

Image

In addition I have been buying lots of wood for production next year and getting ready to build the new shop. I have a bit of a shop design contest going on on the OLF so if you guys have any ideas, besides a self refilling Le Fridge..... :D , please let me know.

User avatar
Dominic
Blackwood
Posts: 1098
Joined: Thu Jan 10, 2008 8:58 am
Location: Canberra

Post by Dominic » Thu Jun 26, 2008 7:38 pm

Allen, I wasn't sayng you shouldn't do it and stick to Martin 000 copies. Far from it. It makes me think about the merits of an asymmetric lower body.

I like the cutaway. Did you just stick the sides to a pre-formed triangle block or is there something more tricky?
Dom
You can bomb the world to pieces,
but you can't bomb the world to peace!

User avatar
Allen
Blackwood
Posts: 5252
Joined: Thu Oct 11, 2007 5:39 pm
Location: Cairns, Australia
Contact:

Post by Allen » Fri Jun 27, 2008 5:54 am

Dominic wrote:Allen, I wasn't sayng you shouldn't do it and stick to Martin 000 copies. Far from it. It makes me think about the merits of an asymmetric lower body.

I like the cutaway. Did you just stick the sides to a pre-formed triangle block or is there something more tricky?
Dom
Didn't think that you were implying that Dominic.

I'm not sure what your asking about a preformed triangle. If it's the cutaway shape, I made a removable cutaway mold the exact shape that I wanted that I attach to my regular mold. I bend the long portion of the side first and have a small groove cut into the cutaway portion of the mold that allows the side to run past the point of the cutaway a few millimeters. Then the cutaway portion is bent on the hot pipe and it butts up against the side that is running just a little longer.

I bevel the end grain of the cutaway piece to get a good joint so that when I clamp it in the mold it's nice and tight to the side. Fitting the spruce reinforcement in the joint is a little tricky, but this time around I must have got lucky, because it only took about 10 minutes.
Allen R. McFarlen
https://www.brguitars.com
Facebook
Cairns, Australia

User avatar
Arnt
Blackwood
Posts: 134
Joined: Tue Oct 02, 2007 4:13 am
Location: Trondheim, Norway

Post by Arnt » Fri Jun 27, 2008 7:21 am

Here's what I've been up to; a coco / Italian spruce steel string. The new shop already looks like a mess of course...

Image


Here's a close-up. Gotta be a Sandvik scraper!

Image
Arnt Rian,
Norway

User avatar
Dominic
Blackwood
Posts: 1098
Joined: Thu Jan 10, 2008 8:58 am
Location: Canberra

Post by Dominic » Fri Jun 27, 2008 2:16 pm

Hi Allen, you answered my question even though you didn't know it. I was asking what order you put the joint together. From what i think you are saying you fit the spruce reinforcement (what I am calling a pre formed triangle block) last. I was wondering if you made that bit first then glue the sides to it.
Again, just thinking out loud again as I want to make a guitar with this kind of cutaway and am thinking through the process.
Cheers
Dom
You can bomb the world to pieces,
but you can't bomb the world to peace!

User avatar
Allen
Blackwood
Posts: 5252
Joined: Thu Oct 11, 2007 5:39 pm
Location: Cairns, Australia
Contact:

Post by Allen » Fri Jun 27, 2008 5:17 pm

There is a tutorial on the OLF that I I followed the first time around, where you run a saw through the join of the "horn" and it's suppose to give you a perfect mitre. Perhaps I'm just not all that skilled, because I found it to be a real pain to get this to happen as it was suppose to. I found this way to be much easier.

Arnt, that's some beautiful work. I just wish I could use a scraper here in the tropics. As quick as I get them looking that good, they'll rust and pit on me within hours. Tried giving them a mist of oil, but even that hasn't worked. The only thing that has done the trick is to totally coat them in oil, then store them in a zip lock bag. This just made it far to much of a hassle to use them :cry:
Allen R. McFarlen
https://www.brguitars.com
Facebook
Cairns, Australia

User avatar
Arnt
Blackwood
Posts: 134
Joined: Tue Oct 02, 2007 4:13 am
Location: Trondheim, Norway

Post by Arnt » Fri Jun 27, 2008 6:00 pm

Hi Allen, that sounds like a real hassle alright. How do you handle this with your other tools, not to mention woods? How do you control humidity in your shop?

I love using the scraper for stuff like this, it makes it really easyto true up the sides and bindings, and you avoid kicking up so much of that awful coco dust. I'm going on holiday next week, and I had planned on pore filling and spraying nitro before I leave so it can cure while I'm away; hopefully I can get the neck done by then too... better get going!
Arnt Rian,
Norway

User avatar
Bob Connor
Admin
Posts: 3132
Joined: Mon Jul 09, 2007 9:43 pm
Location: Geelong, Australia
Contact:

Post by Bob Connor » Fri Jun 27, 2008 6:34 pm

Finished the back for a O-61NY nylon string today. It's made from dirty old Gum Tree.

Image

Did some resawing as well.

Myrtle.

Image

This is the Cheeswood I spoke of. As you can see there's shakes and knots all through it and I believe the tree usually has a hollow centre.
There are worm holes in the middle of the brown spots so I guess the the brown stuff is worm shite.

Image

An last but not least some blackwood. You can't see it in the pic but that figure goes right through the board.

Image

Image

I'm on holidays for a couple of weeks so I'm looking forward to gwtting a bit done.
Bob, Geelong
_______________________________________

Mainwaring and Connor Guitars

User avatar
Allen
Blackwood
Posts: 5252
Joined: Thu Oct 11, 2007 5:39 pm
Location: Cairns, Australia
Contact:

Post by Allen » Sat Jun 28, 2008 5:33 am

Arnt, it is a real pain to have to deal with rust on everything. I've been wanting to get a really good table saw, but they're all cast iron tops and I don't want to spend that much money and have it rust up on me in a matter of weeks. I know there are products that you can put on the metal surfaces to protect them, but all that I've seen have the possibility of contaminating the wood, and turning a really expensive piece of spruce into some scrap.

As for wood. I store it in a spare bedroom with a large ceiling fan running 24/7. In order to keep the power bill down I Don't use humidity control in there this time of year until I'm getting to critical build stages. Then the dehumidifier gets turned on and left running until were out of the woods so to speak and the box is closed up. Come around mid September I'll have to turn the dehumidifier on and keep that room closed up until about March. We also keep photo's, books and leather goods in there as the humidity will destroy them pretty quickly. I end up pulling about 12 liters a day out of that room during the wet season., but thankfully it stays right on 40% RH. It's also a great place to use hide glue. It's about 43 C in there, so you've got heaps of time to get the clamps on. :lol:

That's some great looking wood Bob. That Cheese Wood is going to look really striking with the right trim. Any thoughts on what you'll use? How did the saw blade stand up to the resawing?
Allen R. McFarlen
https://www.brguitars.com
Facebook
Cairns, Australia

Post Reply

Who is online

Users browsing this forum: No registered users and 60 guests