Hi all, I'm not so active here these days due to life's other demands but I do manage to get into the workshop a couple of times a month to restore some sense of well being and I often check into this forum - always grateful for what if offers.
I am trying to do more of the build process with hand planes and I think the skills are improving gradually.
Of course this has required developing techniques for holding the pieces. Clamps and vise can do a lot quite well.
The world of 'dogs' and associated hardware has been an eye opener - another potential $$$ sink.
Veritas have all sorts of bits and pieces. This UK site has some extra useful things not found on our Carbatec site.
UK Veritas dogs
As usual, you can achieve a lot using quite simple techniques. A couple of 19mm dowels with a spring loaded ball that can be raised or lowered in holes in my table has worked well for some things. But I struggle with tops and backs when u have to get down to 2-3mm. How do you hand plane users manage those?
In my case, if I clamp the left half of a jointed back, work the right side (right handed). I can't turn it around to do the other half as I run into problems with tearout. So I have problems with access. So would be grateful to read about your techniques.
The following link provides an attractive alternative to dogs, but again, I can't see how I can use it for getting tops and back down to 2-3mm.
Paul sellers vise clamp system
Thanks. Frank.
Piece holding techniques when hand planing
-
vandenboom
- Blackwood
- Posts: 414
- Joined: Sun Oct 26, 2008 2:27 pm
- Location: Melbourne (Ringwood), Australia

Re: Piece holding techniques when hand planing
Vacuum works really well. 
-
charangohabsburg

- Blackwood
- Posts: 1818
- Joined: Sat Oct 16, 2010 1:25 am
- Location: Switzerland
Re: Piece holding techniques when hand planing
For top and back I use upholstery nails as stops (thank you Gerard and Trevor):

I clamp the sides on one end, plane and scrape, then flip the side over to do the formerly clamped end on the other face.
For small and thin pieces I hold, clamp or glue some sandpaper to a board:
With this technique I get the pieces 0.3 mm thin, without a problem.
I clamp the sides on one end, plane and scrape, then flip the side over to do the formerly clamped end on the other face.
For small and thin pieces I hold, clamp or glue some sandpaper to a board:
With this technique I get the pieces 0.3 mm thin, without a problem.
Markus
To be stupid is like to be dead. Oneself will not be aware of it.
It's only the others who suffer.
To be stupid is like to be dead. Oneself will not be aware of it.
It's only the others who suffer.

Re: Piece holding techniques when hand planing
Whenever I'm down in NSW I stop in at HNT Gordon. They were working on a new batch of tail vices that were really nice. Precise and easy to use. If I was building a bench I would definitely install one.
-
vandenboom
- Blackwood
- Posts: 414
- Joined: Sun Oct 26, 2008 2:27 pm
- Location: Melbourne (Ringwood), Australia
Re: Piece holding techniques when hand planing
Thank you gents.
Marcus, you just confirmed...." As usual, you can achieve a lot using quite simple techniques."
Allen - very nice & simple, will think about that.
Frank
Marcus, you just confirmed...." As usual, you can achieve a lot using quite simple techniques."
Allen - very nice & simple, will think about that.
Frank
-
woodrat
- Blackwood
- Posts: 1155
- Joined: Tue Nov 25, 2008 6:31 am
- Location: Hastings River, NSW.
- Contact:
Re: Piece holding techniques when hand planing
+1 of Vacuum...great for soundboards.Kim wrote:Vacuum works really well.
"It's never too late to be what you might have been " - George Eliot
Re: Piece holding techniques when hand planing
I use vacuum for a lot of stuff, but the set up costs are a fair bit more for something so specialised for most people.
Re: Piece holding techniques when hand planing
I use my vacuum system for heaps of stuff, much much more than just lutherie.
The other day I used it with a platen and bag to lay up bookmatched sheoak veneers onto a number of plywood drawer fronts. With the bag I was able to glue up 4 drawer fronts at a time, each turning out with a perfect glue line and very little clean up.
A while back I made up a 90 degree clamping jig to assist in melamine carcase construction and it works just brilliantly. The jig is simply 2 x 600 x 175 x 12 off cuts of LFB, each with a 10mm gasket rebated about 20mm from the edge. These 600 x 175 sheets are set at 90 degree via 2 x 150mm right angle steel brackets from bunnings and secured in place via a couple of countersunk 1/4" bolts placed outside the extraction area.
The jig is controlled with a foot-switch leaving both hands free for initial alignment and each vacuum face is fitted with an air cock allowing each individual sheet to be repositioned if required while the other is held securely in place. Its fast, accurate and compact enough to be used in situ while sheeting out shelving and drawer carcases etc, yet its strong enough to hold a couple of full 600 x 2400 x 16 sheets, one vertical and at a perfect right angle, ready to drill and fix with confirmat screws.
IMO, for this job alone, the vacuum set-up is worth every cent I paid. But the vacuum system itself is so adaptable. Its usefulness is only limited by imagination making the initial investment some of the best bang for buck money I ever spent in the shed.
Cheers
Kim
-
vandenboom
- Blackwood
- Posts: 414
- Joined: Sun Oct 26, 2008 2:27 pm
- Location: Melbourne (Ringwood), Australia
Re: Piece holding techniques when hand planing
Re vacuum option, when I look at the LMI Robbie O'Brien demo video , I am very tempted. But at US$400+ for the LMI product, I would have to explore a homebuilt option (Joe Woodworker??). I notice also that LMI warn against using their pump at 240V so an alternative would be needed there as well.
Frank
Frank
Re: Piece holding techniques when hand planing
Hey Frank,
Joe Woodworker has a DIY plan and has everything needed to put it all together. Shipping is a killer of course so Ebay/Gumtree is the way to go for your pump, and you can get any brass fitting you need from Masters Hardware. You can do it all on the cheap if you take your time and look around, and I promise, there is no way you will be sorry for the effort once your set up.
Cheers
Kim
-
vandenboom
- Blackwood
- Posts: 414
- Joined: Sun Oct 26, 2008 2:27 pm
- Location: Melbourne (Ringwood), Australia
Re: Piece holding techniques when hand planing
Thanks Kim, you have pushed me to go and have a look sooner rather than later.Kim wrote:Hey Frank,
Joe Woodworker has a DIY plan and has everything needed to put it all together. Shipping is a killer of course so Ebay/Gumtree is the way to go for your pump, and you can get any brass fitting you need from Masters Hardware. You can do it all on the cheap if you take your time and look around, and I promise, there is no way you will be sorry for the effort once your set up.
Cheers
Kim
Here are the Joe Woodworker plans if anyone else is interested. Extraordinary detail!!

Re: Piece holding techniques when hand planing
Ive never had an issue with holding a top down while planing same. Most of the top wood I use has some degree of runout so inevitably Im only planing one half of the top in one direction at a time. I simply clamp the other half of the top onto the workbench.
Martin
Re: Piece holding techniques when hand planing
I think this is an interesting area for all woodworkers. The trick being to grip, often awkward shapes, with the minimum of time spent clamping and unclamping.
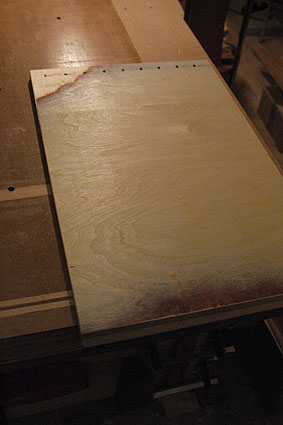
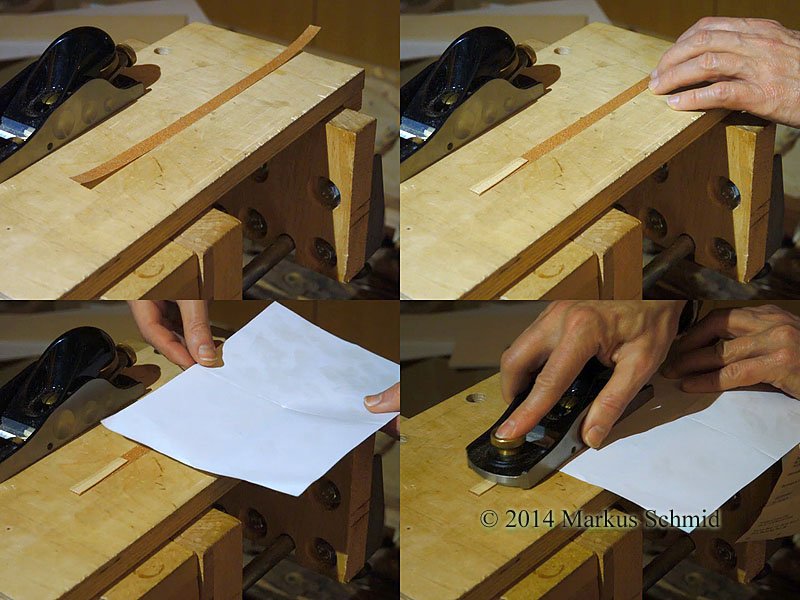
It is often useful to see what was used in the past when workshop equipment was simpler. Below is what I was using today to reduce the width of my rosewood bridge. It is a variation on a very old theme and works remarkably well. It is held by a dowel into a benchdog hole.
Dave M
It is often useful to see what was used in the past when workshop equipment was simpler. Below is what I was using today to reduce the width of my rosewood bridge. It is a variation on a very old theme and works remarkably well. It is held by a dowel into a benchdog hole.
Dave M
- Attachments
-
------------------
Dave
Dave
-
vandenboom
- Blackwood
- Posts: 414
- Joined: Sun Oct 26, 2008 2:27 pm
- Location: Melbourne (Ringwood), Australia
Re: Piece holding techniques when hand planing
Thanks Dave. I like that and do find it is interesting to see these 'old' techniques, as you say.
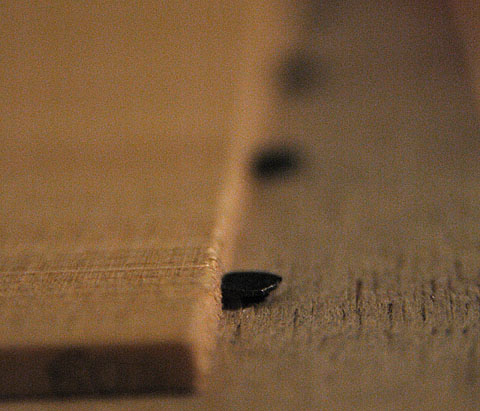
A question about the holes in the small wedges - I presume they are just to hang on something, or do they have some other purpose?
A question about the holes in the small wedges - I presume they are just to hang on something, or do they have some other purpose?
-
charangohabsburg
- Blackwood
- Posts: 1818
- Joined: Sat Oct 16, 2010 1:25 am
- Location: Switzerland
Re: Piece holding techniques when hand planing
I would use that hole to grab the wedge to get it out again without risking to touch the clamped workpiece wit a screwdriver or so.vandenboom wrote:A question about the holes in the small wedges - I presume they are just to hang on something, or do they have some other purpose?
Nice device Dave, thanks for sharing!
Last edited by charangohabsburg on Thu Sep 04, 2014 9:04 pm, edited 1 time in total.
Markus
To be stupid is like to be dead. Oneself will not be aware of it.
It's only the others who suffer.
To be stupid is like to be dead. Oneself will not be aware of it.
It's only the others who suffer.
Re: Piece holding techniques when hand planing
Yes I tend to string the wedges up to the birsdmouth I think it's called so that I can find them when needed, then hang the lot up out of the way.
------------------
Dave
Dave
-
needsmorecowbel
- Blackwood
- Posts: 974
- Joined: Sun Oct 04, 2009 7:48 pm
- Location: Melbourne
Re: Piece holding techniques when hand planing
I'm finding printmaking/ letterpress quoins are fantastic when clamping becomes a problem and fairly cheap ($5 a quoin and $8 for a "key"). Regardless it is a handy "clamp" to have as I don't have the luxury of a bench vise/ bench dogs...
http://lestaret.files.wordpress.com/2010/01/chase-x.gif
Stu
http://lestaret.files.wordpress.com/2010/01/chase-x.gif
Stu
Re: Piece holding techniques when hand planing
Well Stu I am a big user of 'folding wedges' as the furniture makers call them. I guess the advantage of your quoins is that they stay open once they've been expanded. No chance of them slipping apart and losing the pressure as does sometimes happen with wedges... Dave
------------------
Dave
Dave
Who is online
Users browsing this forum: No registered users and 120 guests