Double Bass Repair

Talk about musical instrument construction, setup and repair.

Moderators: kiwigeo, Jeremy D

Post Reply
User avatar
Allen
Blackwood
Posts: 5259
Joined: Thu Oct 11, 2007 5:39 pm
Location: Cairns, Australia
Contact:

Double Bass Repair

Post by Allen » Sat May 03, 2008 2:20 pm

Do the rest of you folks have people dropping instruments buy that need repair work just because they heard you build (insert favorite instrument here)?

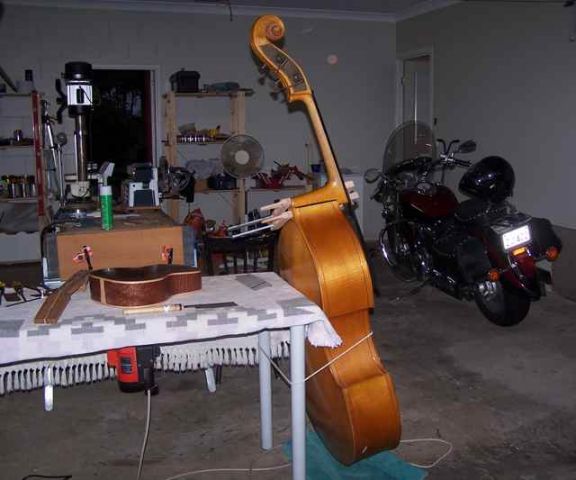
This double bass showed up today from a close friend of the fellow that actually owns it. Want's to know if I can do anything with it. So I said that I would take it home and take some pictures of it and get some input from people more accustomed to doing repair work.

Image

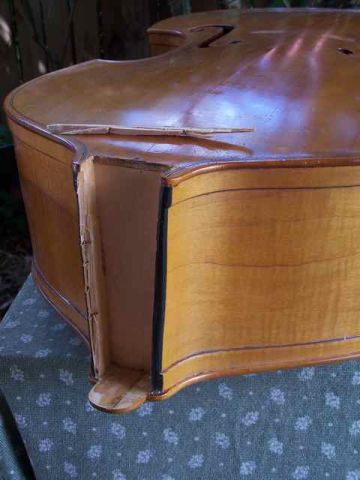
It looks to me as though the neck had let go, or slipped previously and someone thought that putting in some small finishing nails through the side and into the neck would do the trick.

Image

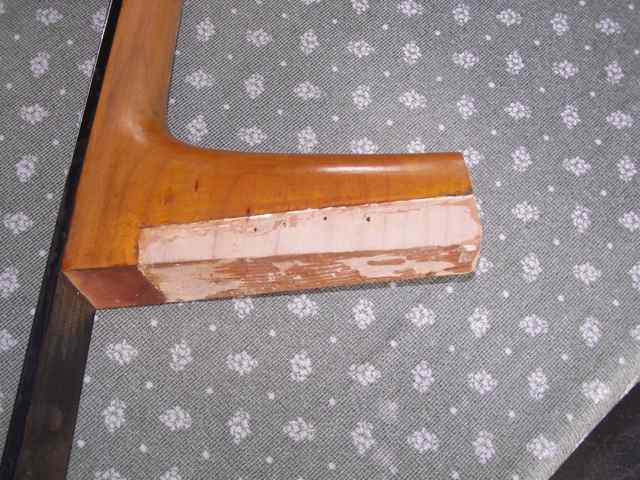
There were 4 small nails that I've pulled out to see what the fit was like for the neck to the body. It seems to fit pretty good. The nails have done all the damage by tearing out the small bit of wood.

Image

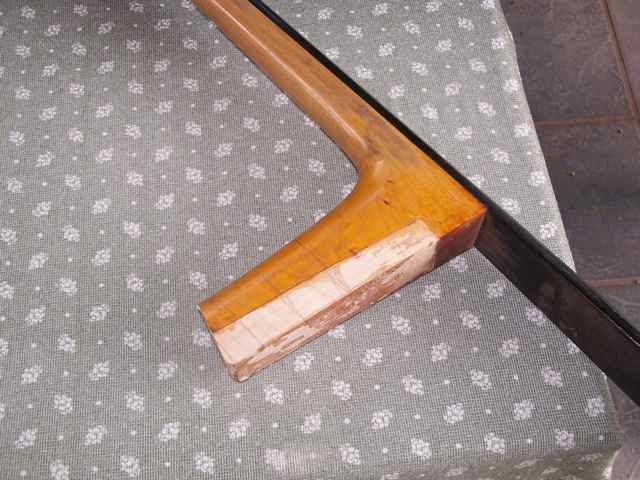
The other side of the neck has a nice clean surface. Just a bit of glue to clean up. The joint looks like it was pretty dry to me. There are large patches of bare wood, with no glue at all. Probably why the joint failed in the first place.

It looks like the piece that has been torn out will glue back in with a bit of work. Then I suppose it's just a matter of cleaning up the joint and making a fresh batch of Hide Glue and having at it.

Does this sound about right? I can't think of any other way of tackling it. And it's got to be better than hammering in some nails and hoping that is going to do the trick. :shock:
Allen R. McFarlen
https://www.brguitars.com
Facebook
Cairns, Australia

User avatar
matthew
Blackwood
Posts: 1200
Joined: Mon Oct 08, 2007 1:16 pm
Location: Sydney, Inner West
Contact:

Post by matthew » Sun May 04, 2008 1:33 am

Allen to do it properly you need to get a really snug fit with that mortise.

First clean up the neck root, make sure all the surfaces are straight and clean of all old glue, which is probably PVA.

Use chalk on the neck, and see how close you can get it fitting in the mortise. Only remove wood from the neck block, not the neck. You may have to add a sliver of wood to the sides of the block if its too loose.

Check alignment with centreline and if it is all good, glue it in with hide glue and clamp tight. Prime the surfaces with thin hide glue first.

When dry you can replace the trim on the top edge. Don't use any metalwork.

Look here for a pictorial

http://home.exetel.com.au/studio205/e10 ... opic.php?5

Matthew

User avatar
Allen
Blackwood
Posts: 5259
Joined: Thu Oct 11, 2007 5:39 pm
Location: Cairns, Australia
Contact:

Post by Allen » Sun May 04, 2008 7:00 am

Thanks for that link Matthew. I'm going to see if I can make some progress on this over the weekend. Holiday up here in Qld. on Monday so I'll get a bit of time with it.
Allen R. McFarlen
https://www.brguitars.com
Facebook
Cairns, Australia

User avatar
matthew
Blackwood
Posts: 1200
Joined: Mon Oct 08, 2007 1:16 pm
Location: Sydney, Inner West
Contact:

Post by matthew » Sun May 04, 2008 8:02 am

the other thing you need to check while you have it clamped up, but before glueing, is that the string height will be OK for the bridge he has.

use a straightedge along the fb and put the bridge in place between the inner FF hole nicks. straightedge should touch about 1cm below the bridge top.

if the bridge has adjuster wheels it makes your life easier. Otherwise, in resetting the neck, you may find that you need to end up cutting a new bridge as well.

clamping is tricky. but you don't need to clamp the joint really tightly if you have a good contact all surfaces.

User avatar
Allen
Blackwood
Posts: 5259
Joined: Thu Oct 11, 2007 5:39 pm
Location: Cairns, Australia
Contact:

Post by Allen » Sun May 04, 2008 1:31 pm

Don't have the bridge. Just body and neck. I've cleaned up the glue. Looks to have been PVA as you said. I've also glued back in the piece that was broken out. That was pretty tricky, and I'm not sure how it's going to turn out. I'll let it dry overnight and have a look at it tomorrow. It might require a veneer glued on the side that was broken out as a reinforcement. Will have to do some fitting to get that all to work out.
Allen R. McFarlen
https://www.brguitars.com
Facebook
Cairns, Australia

User avatar
matthew
Blackwood
Posts: 1200
Joined: Mon Oct 08, 2007 1:16 pm
Location: Sydney, Inner West
Contact:

Post by matthew » Sun May 04, 2008 8:31 pm

The trim is usually added AFTER the neck is glued in. Nothing special about it, just a decorative piece of ebony or something. You could plane both trims off, plane the top of the block flat, glue the neck and add new trims.

User avatar
Allen
Blackwood
Posts: 5259
Joined: Thu Oct 11, 2007 5:39 pm
Location: Cairns, Australia
Contact:

Post by Allen » Sat May 31, 2008 5:15 pm

I got the neck cleaned up, checked the alignment, and got the HHG going. I primed all the mating surfaces with dilute glue and let it dry overnight, then heated up joint with a hair drier for about 10 minutes. It's pretty bloody big, so it took some time.

Slathered on the glue and slide the neck it. It's pretty easy to clamp as it holds itself pretty well once it's fully pushed into the dovetail. The hardest part was trying to manage such a large instrument when your not geared up for it.

Image

That's my size 5 on the table. About the same size as the peg head on the base. :lol:
Image
Allen R. McFarlen
https://www.brguitars.com
Facebook
Cairns, Australia

Post Reply

Who is online

Users browsing this forum: No registered users and 83 guests