bridge designs or lack thereof

Talk about musical instrument construction, setup and repair.

Moderators: kiwigeo, Jeremy D

Post Reply
User avatar
Localele
Moderator
Posts: 367
Joined: Tue Aug 12, 2008 6:54 am
Location: Corndale,NSW
Contact:

bridge designs or lack thereof

Post by Localele » Wed Oct 21, 2009 4:21 pm

I submit the "Round Pyramid Bridge" prototype for Inspection , Selection or Rejection as the membership sees fit.

Image


Image
Cheers from Micheal.

Remember the "5P Rule".
Preparation Prevents Piss Poor Performance.

User avatar
kiwigeo
Admin
Posts: 10867
Joined: Sat Sep 29, 2007 5:57 pm
Location: Adelaide, Sth Australia

Post by kiwigeo » Wed Oct 21, 2009 4:56 pm

Need to see the rest of the guitar to make a judgement Michael.

User avatar
Kim
Admin
Posts: 4372
Joined: Wed Sep 26, 2007 8:32 pm
Location: South of Perth WA

Post by Kim » Wed Oct 21, 2009 6:07 pm

Like Martin i would need to see what style this design fits in with. Weight is also an important factor as well, too light will not drive the top and too heavy will not be driven well by the strings, but this is all relative to the size and stiffness of the soundboard.

For my own perception of when to stop removing wood from the top and it's bracing, i am currently quite happy with early to medium-high 20's on the gram scale. to be clearer i would not use a bridge lighter than 24 grams or heavier than 28 grams after radiusing the bottom, but still unslotted, on my current bracing structure applied to an SJ.

Scott van Linge has come in for quite a bit of flack regarding his 'sound is round' theory, however i feel he may have some good points about the presents of nodes on the bridge acting as termination points for a certain amount of available energy. With this in mind, i would rather see a smoother transition from the top of the bridge down to the wings.

http://www.vanlingeguitars.com/

Cheers

Kim
Last edited by Kim on Wed Oct 21, 2009 7:23 pm, edited 3 times in total.

User avatar
Localele
Moderator
Posts: 367
Joined: Tue Aug 12, 2008 6:54 am
Location: Corndale,NSW
Contact:

Post by Localele » Wed Oct 21, 2009 6:41 pm

A bit more body of the OOO. The shape is a new take on the traditional square ended pyramid bridge.Not all that sold on the idea but it looks hard to make the square version without jigging up especially.':?'
No idea on the weight Kim but it is gidgee and 150 x 25 x 8 mm.

Image
Cheers from Micheal.

Remember the "5P Rule".
Preparation Prevents Piss Poor Performance.

User avatar
Nick
Blackwood
Posts: 3640
Joined: Thu Feb 26, 2009 11:20 am
Location: Christchurch, New Zealand
Contact:

Post by Nick » Wed Oct 21, 2009 7:12 pm

Certainly ended up with something different there Micheal! I like the curved outline on the overhead, just not sure of the sudden transition from the saddle plane down to the ends. Personally I would have retained the outline but just stuck it on the radius of the belt sander so that the 'wings' tapered from the top down to the ends much the same as Kim pointed out. If you dont want there to be a straight line as the radius meets the top plane then you could maybe turn the bridge on the belt sander towards the rear of the bridge? (so looking from the top the transition shape starts perpendicular to the front edge then gently curves as it moves toward the rear).
Structurally (I'm no expert though as I prefer floating bridges) how would the curved ends interact with the X bracing as far as torsional resistance of the top against string pull?
"Jesus Loves You."
Nice to hear in church but not in a Mexican prison.

User avatar
kiwigeo
Admin
Posts: 10867
Joined: Sat Sep 29, 2007 5:57 pm
Location: Adelaide, Sth Australia

Post by kiwigeo » Wed Oct 21, 2009 9:34 pm

I keep thinking paddlepop...but then again that might be because Ive just finished off a Heaven icecream out here at work.

User avatar
DarwinStrings
Blackwood
Posts: 1877
Joined: Thu Nov 13, 2008 10:27 pm
Location: Darwin

Post by DarwinStrings » Wed Oct 21, 2009 10:31 pm

Kim wrote:too light will not drive the top
Is there any literature you have seen Kim that might confirm this as I have been thinking that light is good lately and the turning moment is maybe more important? Also weight can be regulated by the bridge patch.

Jim

User avatar
Kim
Admin
Posts: 4372
Joined: Wed Sep 26, 2007 8:32 pm
Location: South of Perth WA

Post by Kim » Thu Oct 22, 2009 12:33 am

Jim,

With so much read over the years, there is no particular publication i can point to off the top of my head. However this same notion seems to be held up by a good many prominent builders as having merit and my own experiments in changing our bridges would seem to bare out that 'too' light is just as bad as too heavy and that mass in this area of a steel string guitar does have an important role to play. Someone with more credibility than myself who i know has made the same statement on a number of occasions would be Mario Proulx, a builder whom i respect very much, but there have also been quite a few others as well.

Your point is well taken about being able to regulate weight with the bridge plate, but should the bridge be 'too' light, then forcing a thicker bridge plate to conform to the radius of the top may not be an overly good thing as this may, over the long term, work against form. The bottom of the bridge on the other hand carries a radius conforming to that of the top and therefore acts as a large 'supportive' brace reinforcing the radius. Mario Proulx over comes this issue by not increasing the bridge plate thickness rather he adds mass to the bridge area by fitting a 'hardwood' ladder brace between the rear legs of the "X" directly behind the bridge plate.

Other important considerations which, to a certain extent, dictate the physical 'size' of a bridge are the gluing foot print, and the need to maintain adequate height of the bridge to carry the saddle without having so much bone exposed lifting the strings that a destructive lever is created which, over time, can cause the saddle to split out the front of it's slot. To an extent this can be addressed by paying careful attention to the structural integrity of the timber chosen for the bridge and setting the slot back far enough from the front edge to offer plenty of support. But stronger usually comes at a price of heavier, and further back can alter the styling of the bridge as the pin holes will need to be drilled into sufficent material to form the correct tapper to nest the pins. So to an extent, this then determines the contour at the rear of the bridge. The further the pins are brought back, the more acute the contour at the rear will need to be to accommodate them.

So i guess one can find themselves chasing their tail a bit with bridge design however i encourage everyone to try your own recipe and see what they can come up with and then share their results with us here. At this stage of my journey i remain very happy that a 24 to 28 grams bridge on an SJ with my own bracing and sense of when to stop removing wood can providing me with enough mass and material to give security, form, function and a pretty good sounding guitar.

Cheers

Kim

Pete Brown
Blackwood
Posts: 115
Joined: Tue Dec 09, 2008 1:15 pm

Post by Pete Brown » Thu Oct 22, 2009 12:45 am

Sound Attributed to the Size and Weight of a Bridge
http://www.luthiersforum.com/forum/view ... 01&t=23040

Conceptual Questions Regarding Bridge Design
http://www.luthiersforum.com/forum/view ... 01&t=19905

Bridge weight
http://www.luthiersforum.com/forum/view ... 01&t=18047

User avatar
DarwinStrings
Blackwood
Posts: 1877
Joined: Thu Nov 13, 2008 10:27 pm
Location: Darwin

Post by DarwinStrings » Thu Oct 22, 2009 1:38 pm

Damn I was hoping you had some little university study tucked away in your bookmarks there Kim. Thanks for the reply. Thanks Peter I skipped through that but was looking more for the sort of thing that David Hurd would post.

I radius my bridge plates too Kim.

Micheal, I think it looks great on that body and would like to hear what you think of the sound when finished.

Jim

User avatar
Localele
Moderator
Posts: 367
Joined: Tue Aug 12, 2008 6:54 am
Location: Corndale,NSW
Contact:

Post by Localele » Thu Oct 22, 2009 1:57 pm

I'd be surprised if my ears could tell the difference in guitars by the shape of the bridge, Jim.I do believe that weight of the bridge will play a part but like all these theories it is hard to Quantify (Qualify ).
Cheers from Micheal.

Remember the "5P Rule".
Preparation Prevents Piss Poor Performance.

Hesh1956
Blackwood
Posts: 1418
Joined: Thu Sep 27, 2007 9:58 am

Post by Hesh1956 » Fri Oct 23, 2009 2:38 am

Nice looking bridge Michael.

I went through the bridge design need/process several years ago trying to find my own way and design. Back then I was in touch with Scott Van Linge too and he was very generous and helpful to me with this process.

Before I started hacking any wood I made a list of goals for myself that I tried to use to guide my design. Here was my list:

weight: No more than 36 grams in ebony

foot print: A shape that is not difficult to score the finish on a finished guitar to make the bridge fit well. As such I wanted continuous lines as opposed to a foot print shape with lots of peaks and valleys. It's just easier to make fit and less risky too.

Glue lines for the foot print: I wanted a shape that had a decent amount of gluing area but I also had a hunch that since a bridge rocks being anchored over the X-brace that an extended back for the bridge would be more efficient in pulling up the middle of the lower bout making the top more active. Now I have no idea if this is a valid thought but it sounded good to me at the time so my bridge is pretty wide, front to back, as a result.

Copied from something in nature: I am always a fan of nature and the designs that we see in birds, fish, plants etc. It's something that inspires me in my own thinking. After being in touch with Scott and his aversion to bumps and hard edges on braces and bridges I got inspired one night in the summer by the sight of a melting Hershey's kiss chocolate on a cookie... :D

Seriously - the chocolate was melting and spreading out when it did. Peaks disappeared and the shape became very organic and pleasing, at least to me. And no I was not high.... :D

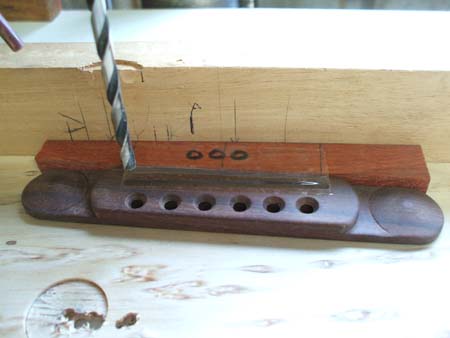
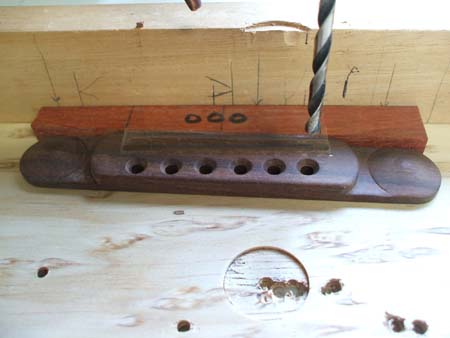
Anyway after eating the cookie I whipped out a bridge blank, cut out the outline, and stuck 80 grit on my ROS and went to town shaping my new bridge design.

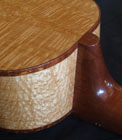
This is what resulted:

Image

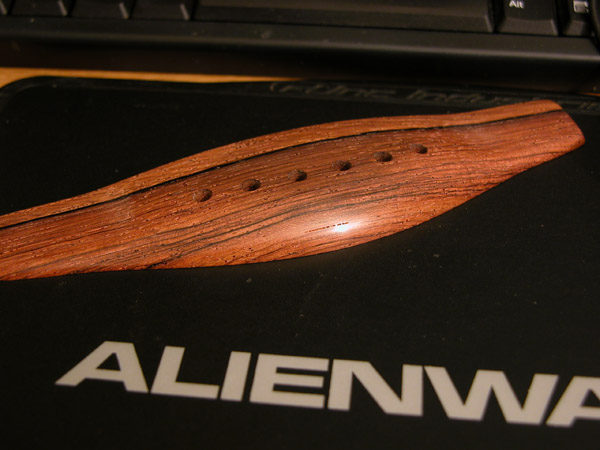
I liked the results a great deal and started to make a few more working on the weight and overall size:

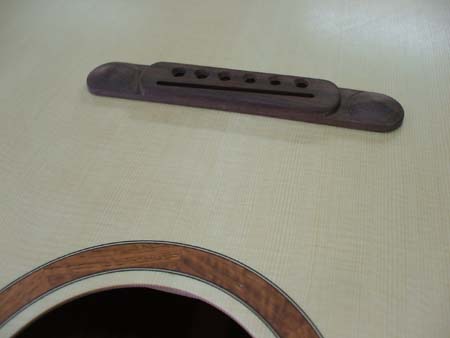
This one is mad rose and came in at around 20 grams, too light for my intended purpose so I made the foot print bigger in search of more mass:

Image

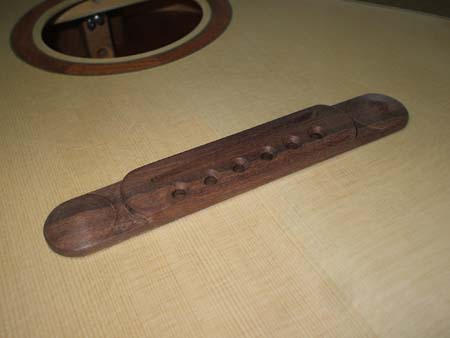
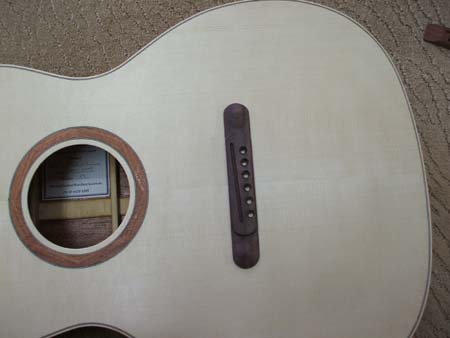
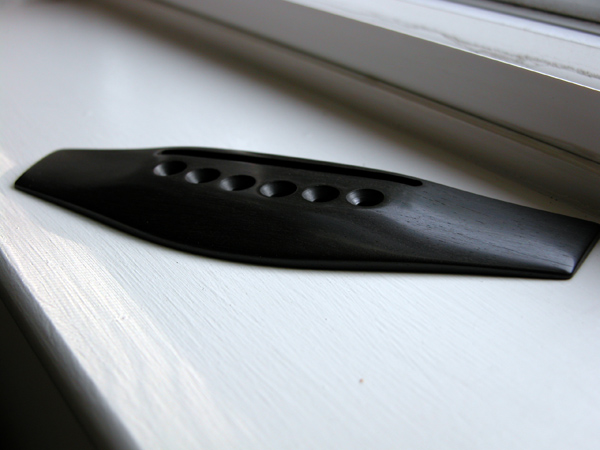
When I had my final shape and size it looked like this:

Image

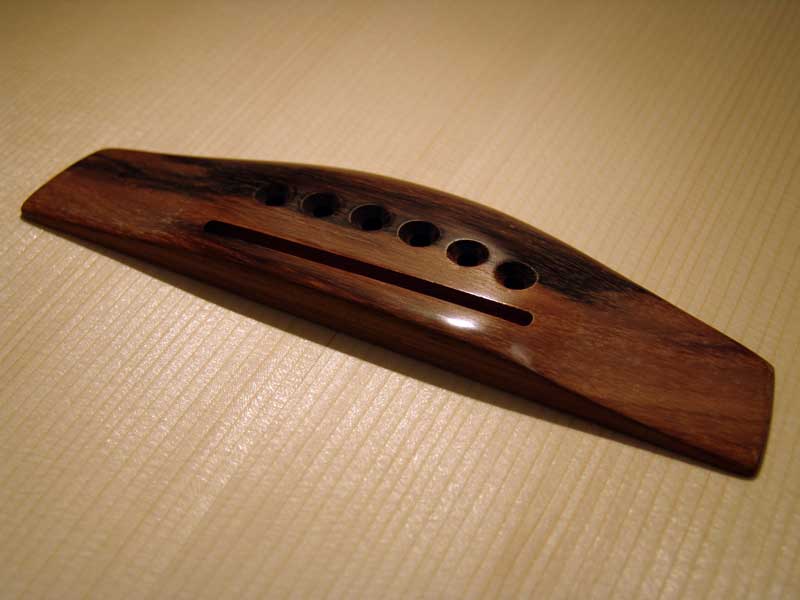
And that is what I use today. The only issue, well not really an issue but something to know when using this bridge was the break angle for some of the strings where the pins are farther back from the saddle. Since I use unslotted pins and slot and ramp my bridges the ramps help with the break angle.

Some other things to consider if I was doing this again is that one bridge does not fit all. Different guitar styles and playing styles may benefit from a lighter or different shaped bridge.

Also the bridge is part of a greater system but the immediate system that the bridge is an important member of is the system of the bridge, top, and bridge plate. Heavier bridges may perform better with lighter weight bridge plates and vice versa. I always think of a bridge as being like one side of a hot dog bun with the plate being the other side of the bun and the top being the hot dog. It's a system and needs to be thought of as a system in my view.

Good thread!

User avatar
Localele
Moderator
Posts: 367
Joined: Tue Aug 12, 2008 6:54 am
Location: Corndale,NSW
Contact:

Post by Localele » Fri Oct 23, 2009 7:26 am

My thoughts on bridge pin placement compared to the saddle slot.
If the angle over the saddle creates more or less down-force on the bridge surely keeping the holes parallel to the slot makes sense.To give the strings a more equal pressure. This pressure may change with the gauge of string but I could never work out why you would try to bend the low E in the tightest radius by having its hole closest to the saddle slot.
As for making the holes parallel to the slot a simple wedge equal to the angle of compensation taped to the bridge will give you holes exactly parallel to the slot.

Image

Image
Cheers from Micheal.

Remember the "5P Rule".
Preparation Prevents Piss Poor Performance.

Post Reply

Who is online

Users browsing this forum: Google and 39 guests