A Productive Week

Talk about musical instrument construction, setup and repair.

Moderators: kiwigeo, Jeremy D

User avatar
Kim
Admin
Posts: 4376
Joined: Wed Sep 26, 2007 8:32 pm
Location: South of Perth WA

Post by Kim » Wed Nov 07, 2007 9:59 pm

Dennis Leahy wrote: Kim,

Is that your work, your headstock, your logo?!!! Is that the neck for your first guitar? Could you please start a thread documenting progress on the guitar? I think you've been flying under the radar! I'd love to see your work.
Dennis
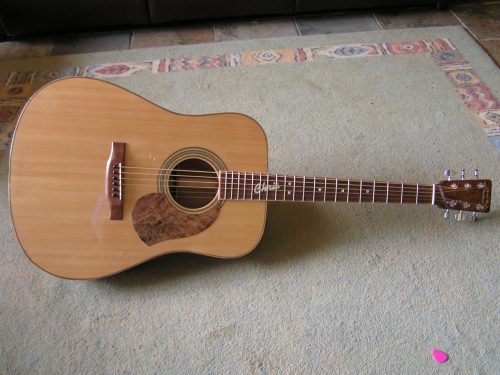
Yes Dennis this my work, it is one of the designs I have come up with that I am going to use as a headstock shapes. The inlay is one of the ideas I have under consideration for a logo, but what you see is second grade worm eaten shell from Taiwan which crumbled like chalk as it was cut so it is made up of bits and pieces and is not as neat as I would like.

Also, I fitted the machines just to see how they would look so the Mulga only has one quick wipe of shellac, it and the inlay should pop a bit more under a finish but you can see the short comings more clearly in this image.

Image

The materials are chalky bits of Green Ab shell, Awabi for the white of the eye, and ebony for the cat like eye ball. The design is my spin on the eye of Horus. I don't like to waist material or work so yes indeed, this neck most probably will be used on the first as I continue on my path of R&D. But my progress is much too slow to support a documented thread, so I will probably pass on that. One thing to note, this neck is QLD Maple and I love the stuff. It is stronger, lighter and more stable than Hondo Hog and it carves very, very well. If your in AU, it would be difficult to justify not using this wood for a good portion of your builds and if you are in the USA I feel for you. :D

Cheers

Kim

User avatar
Dennis Leahy
Blackwood
Posts: 872
Joined: Wed Oct 10, 2007 12:32 am
Location: Duluth, MN, US
Contact:

Post by Dennis Leahy » Thu Nov 08, 2007 2:18 am

Kim wrote: ... what you see is second grade worm eaten shell from Taiwan which crumbled like chalk as it was cut so it is made up of bits and pieces and is not as neat as I would like.

... you can see the short comings more clearly in this image.
Cheers

Kim
Kim, No, I can't (see the shortcomings.) Looks delicate, detailed, and extremely well executed. Those are tiny, narrow strips of shell, not easy to deal with when completely solid, and triple the degree of difficulty when not so solid. And, it's not inlaid into Ebony, with its extremely forgiving ability to jam in some glue and Ebony dust to hide the mistakes. I'd be MIGHTY proud of that work!

Dennis
Another damn Yank!

User avatar
BillyT
Blackwood
Posts: 355
Joined: Thu Sep 27, 2007 7:57 pm
Location: Location Location

Post by BillyT » Thu Nov 08, 2007 5:37 am

Looks good from here Kim!!!!

User avatar
Allen
Blackwood
Posts: 5252
Joined: Thu Oct 11, 2007 5:39 pm
Location: Cairns, Australia
Contact:

Post by Allen » Thu Nov 08, 2007 6:27 am

Hey Billy, I like your new cat...Boy, I'd have to have forgot the cat food around your place :!:
Allen R. McFarlen
https://www.brguitars.com
Facebook
Cairns, Australia

User avatar
Bob Connor
Admin
Posts: 3132
Joined: Mon Jul 09, 2007 9:43 pm
Location: Geelong, Australia
Contact:

Post by Bob Connor » Thu Nov 08, 2007 7:24 am

Love the eye Kim and a very nice inlaying job as well.

Any wood other than Ebony is always a challenge.

Our headstock logos are very fine and sometimes break when installing but you can never notice it unless you get a magnifying glass on to it.

User avatar
Bob Connor
Admin
Posts: 3132
Joined: Mon Jul 09, 2007 9:43 pm
Location: Geelong, Australia
Contact:

Post by Bob Connor » Thu Nov 08, 2007 7:28 am

Dennis Leahy wrote:Bob,

For the gold (slightly harder) fret wire:
I'm curious if you bought the ultra-heavy-duty fret wire nippers/end cutters (the ones designed for stainless steel) or if your regular nippers are up to the task.
Just used the regular Stewmac tang nippers and pliers to cut it Dennis. Didn't seem to be a problem at all.

I do have some stainless fretwire that I haven't used yet. That may be more of a challenge. :lol:

Bob

User avatar
ozziebluesman
Blackwood
Posts: 1529
Joined: Wed Oct 10, 2007 9:12 am
Location: Townsville
Contact:

Post by ozziebluesman » Thu Nov 08, 2007 12:05 pm

Thank you all for you for your suggestions on easier ways to make bridges. The info is very valuable.

Bob I think the GMC Linisher is a great tool and will suit me for my applications.

Craig L thanks for your encouragement. Here is another progress picture.

Image

The acoustic project that I am embarking on now is far more complex than the soild body lappie so the more advice and ideas I can gain from this forum, the better.

Anyway, there will be some final pics and sound clips shortly.

Cheers

Alan

User avatar
Craig
Admin
Posts: 1090
Joined: Wed Sep 26, 2007 10:08 am
Location: N.S.W. in the bush

Post by Craig » Thu Nov 08, 2007 2:27 pm

That looks to be way cool Alan !

Now that I see the bridge with the saddle in it , I'd be concerned with the 6th and 1st pin holes being so close to the saddle .


Kim, that is some beautiful work there mate . I really LOVE that inlay !
Well done mate . This guitar is going to be very special !

Cheers , Craig
Last edited by Craig on Mon Nov 19, 2007 8:34 am, edited 3 times in total.

User avatar
Serge
Blackwood
Posts: 543
Joined: Thu Sep 27, 2007 10:43 am

Post by Serge » Thu Nov 08, 2007 4:37 pm

Kim wrote: Image


Cheers

Kim
Nice work bro!

Bob, you have been quite busy! Thanks for sharing all those tips!

User avatar
Allen
Blackwood
Posts: 5252
Joined: Thu Oct 11, 2007 5:39 pm
Location: Cairns, Australia
Contact:

Post by Allen » Thu Nov 08, 2007 5:07 pm

That's really looking good Alan, but I too would be concerned about the 1st and 6th pins.

Kim, you must be pretty critical of your work, 'cause from what I can tell in the photo's, that's some really fine work. Much better than I have done by a long shot. I'd be interested in knowing how you've managed to get the shell and wood to mate up so nicely?
Allen R. McFarlen
https://www.brguitars.com
Facebook
Cairns, Australia

User avatar
ozziebluesman
Blackwood
Posts: 1529
Joined: Wed Oct 10, 2007 9:12 am
Location: Townsville
Contact:

Post by ozziebluesman » Thu Nov 08, 2007 11:15 pm

Thanks Allen and Craig. Yep there is going to be a problem with the saddle placement. I think I will go with a round metal or brass rod for a saddle. I do have plenty of height to play with above the fretboard. So yes, if I had made the bridge for the weissenborn copy I would be in real trouble. I'm learning!!!!

Cheers

Alan

User avatar
ozziebluesman
Blackwood
Posts: 1529
Joined: Wed Oct 10, 2007 9:12 am
Location: Townsville
Contact:

Lap Slide Complete

Post by ozziebluesman » Sun Nov 18, 2007 10:10 pm

Hello everybody,

This is my latest effort at lap slide guitar building all completed.

Image

This guitar is

Sapelly Mahognay Body
Indian Rosewood fingerboard and Bridge
Single Humbucker Pickup

At www.myspace.com/ozziebluesman there are two short sound clips. One demo is a clean tone, the other with some distorsion.

Thanks for looking

Cheers

Alan

User avatar
Bob Connor
Admin
Posts: 3132
Joined: Mon Jul 09, 2007 9:43 pm
Location: Geelong, Australia
Contact:

Post by Bob Connor » Sun Nov 18, 2007 10:22 pm

Great job Alan.

It sounds good on both of those tracks with some nice bottom end and plenty of bite as well.

The playing aint too shabby either :D

Bob

Hesh1956
Blackwood
Posts: 1420
Joined: Thu Sep 27, 2007 9:58 am

Post by Hesh1956 » Mon Nov 19, 2007 12:47 am

Very nice work Alan and it sounds great too.

It has a bit of the Jerry Garcia visual vibe without, of course, the patina of all the roach and seed burns......... :lol:

Great job!!! :cl :cl :cl :cl :cl

User avatar
Allen
Blackwood
Posts: 5252
Joined: Thu Oct 11, 2007 5:39 pm
Location: Cairns, Australia
Contact:

Post by Allen » Mon Nov 19, 2007 6:26 am

Those clips sound great Alan. Thanks for sharing.

Good looking instrument too.
Allen R. McFarlen
https://www.brguitars.com
Facebook
Cairns, Australia

User avatar
Tom West
Myrtle
Posts: 70
Joined: Thu Jun 25, 2009 7:40 am
Location: Nova Scotia Canada

Post by Tom West » Mon Jun 29, 2009 6:53 am

Kim: Beautiful design work with the bookmatched head plate and a lovely flow with the grain. Not every one has the chops to pull this off so nicely...! Congrats, Tom.
The person who has never made a mistake has never made anything....!

vandenboom
Blackwood
Posts: 414
Joined: Sun Oct 26, 2008 2:27 pm
Location: Melbourne (Ringwood), Australia

Post by vandenboom » Tue Jun 30, 2009 5:00 pm

Allen wrote:[I've not installed a pick guard on a guitar, mostly 'cause I haven't been able to find one I like. I do have some pick guard sheet material, so I'd be up for a bit of a tutorial on how you go about making a custom one.
Image
I have always liked the Maton shape.
In this case I used some figured blackwood-finished with Organoil.
I have always liked this pickguard.
Frank

User avatar
Allen
Blackwood
Posts: 5252
Joined: Thu Oct 11, 2007 5:39 pm
Location: Cairns, Australia
Contact:

Post by Allen » Tue Jun 30, 2009 5:06 pm

That pick guard is a stunner Frank. What did you use to tack it down to the top with?
Allen R. McFarlen
https://www.brguitars.com
Facebook
Cairns, Australia

vandenboom
Blackwood
Posts: 414
Joined: Sun Oct 26, 2008 2:27 pm
Location: Melbourne (Ringwood), Australia

Post by vandenboom » Tue Jun 30, 2009 6:38 pm

Allen wrote:That pick guard is a stunner Frank. What did you use to tack it down to the top with?
I just use the ultra thin double sided adhesive sheet, available from LMI etc. It took me a couple of goes to get the sheet to grip to the guard as the bottom was too oily. So I removed the guard, gave it a month to really dry, and then sanded to P600. That took care of it.
Frank

Post Reply

Who is online

Users browsing this forum: No registered users and 277 guests