One for Me and a Mini-me for me

Talk about musical instrument construction, setup and repair.

Moderators: kiwigeo, Jeremy D

Post Reply
seeaxe
Blackwood
Posts: 768
Joined: Thu Dec 18, 2008 7:20 pm
Location: Auckland NZ

One for Me and a Mini-me for me

Post by seeaxe » Wed Jul 15, 2009 7:42 pm

The whole point of me getting into building guitars was so that after a bit of practice building for the kids I could build myself a high spec lefty acoustic. The time has now come to start it! Inspired by X-ray's similar Two-OMs-at-once post, I am going to document the process here.

I really enjoy reading the threads of peoples builds, so hopefully this will be of interest too.

I built my first two acoustic guitars side by side. I found that I really liked swapping between them, they were usually at slightly different stages but not so far apart that I had forgotten the things I'd learnt on the one before, so when I ended up with a reduced set of plans for the OM I am now about to start for yours truly, I decided to build them both at once.

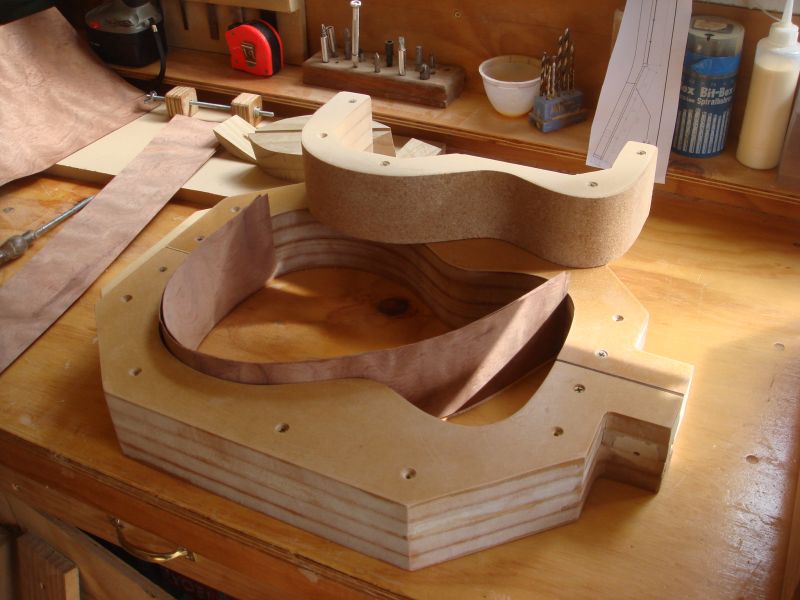
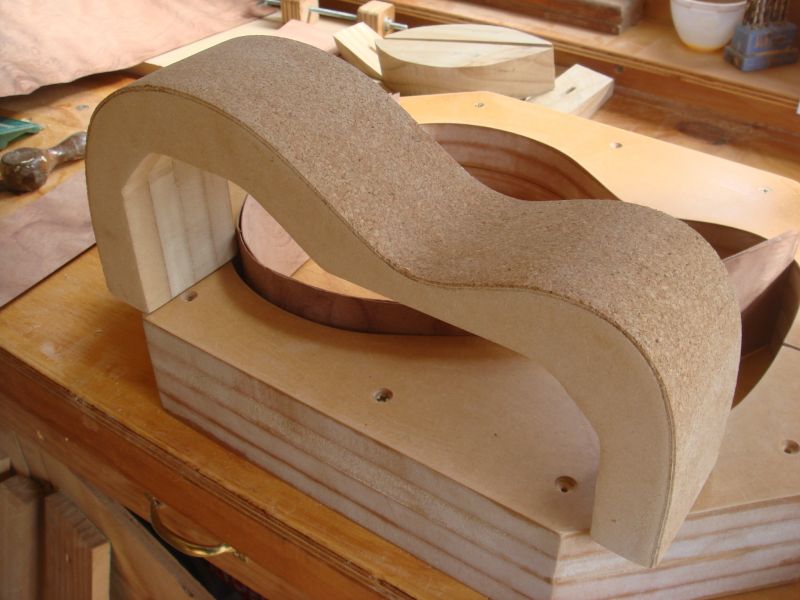
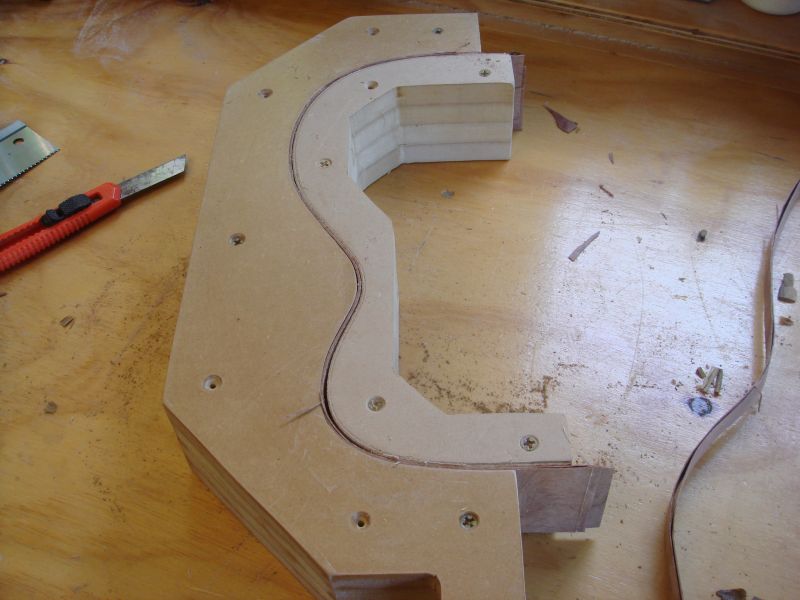
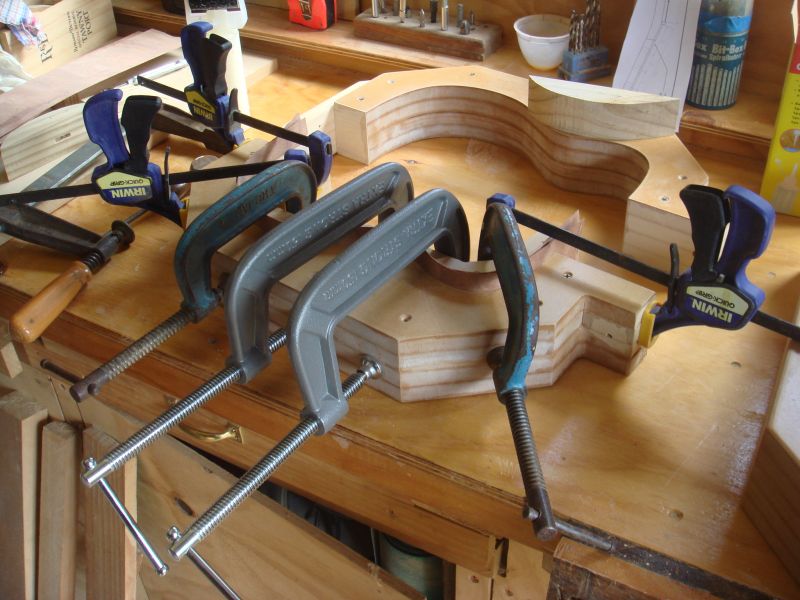
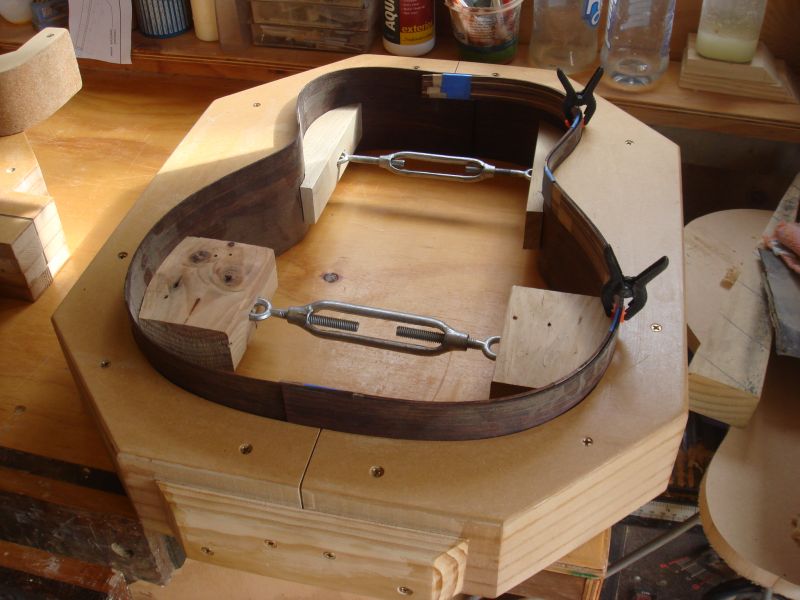
I'm going for the mould method this time, so job No1 was to build those. Thanks to all tutorials on this site, this is the result so far.

Image

Image

I am going to put a couple more layers on the OM mould to make it deeper, but I will screw them on so I can remove them if I need to, to get at kerfing etc,

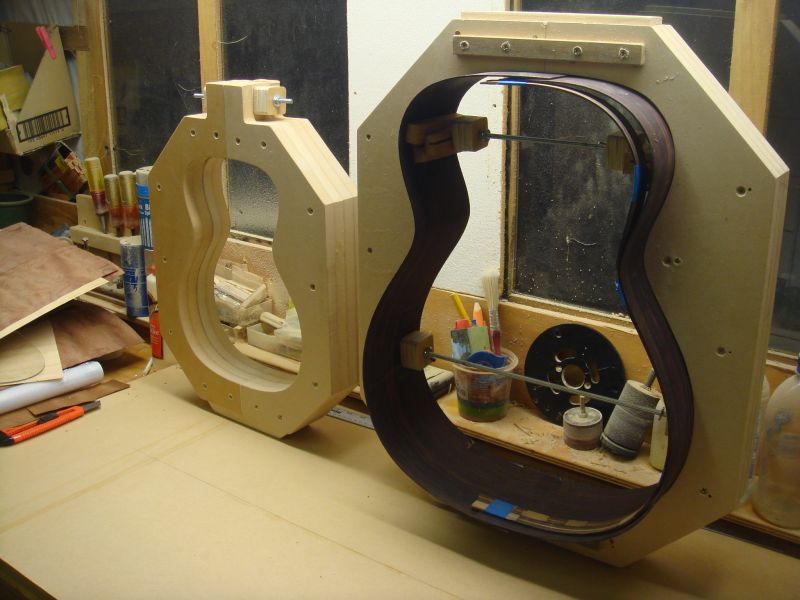
The rosewood sides are sitting in the OM mould. I have a master grade redwood top and spruce bracey bits for inside, ebony fretboard and bridge. The neck is an LMI premade bolt-on jobbie, so I am cheating a bit there.

Mini-me on the left, is going to be built out of odds and sods lying around the workshop and anything I can lay my hands on. The latest idea was to use veneer laminate for back and sides for this little beauty. It is currently awaiting the outcome of experiment No2 with laminating veneer.

Here is the result of experiment No 1 - not entirely successful!!

Image

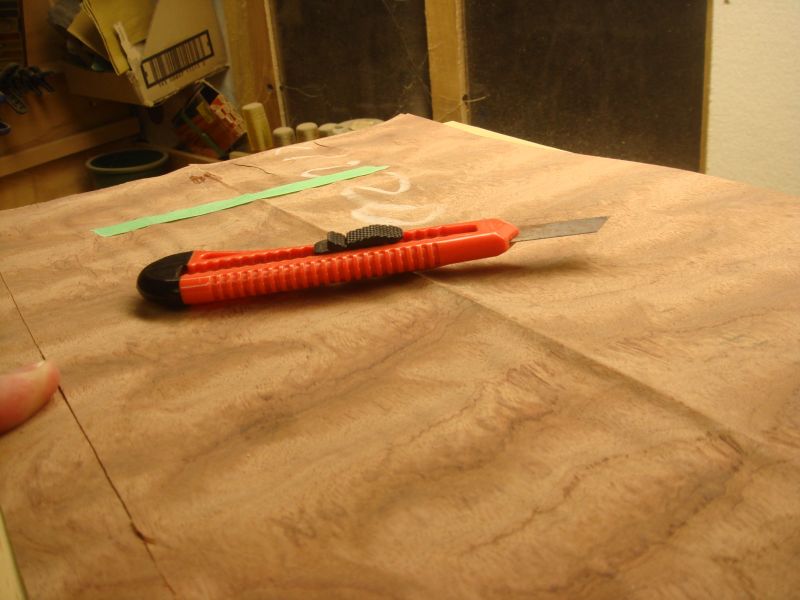
I'll have a go with epoxy (Thanks again Tim!) and attempt a laminate rather than faux plywood. If that doesnt work I will have to have a go at bending some sides, which to date I have been too chicken to attempt.

I think this will all take a while, as I should be doing a Martin in mid to late August and taking off into the Pacific for work for about 4 weeks, then my daughter gets married in October and I suppose I'll have to come out of the shed for that, so it will be a case of luthierus muchus interruptus.

Thanks for looking, comments and suggestions always welcome.

BTW, supposing the veneer results don't improve, does anyone know where I can get tonewood in New Zealand? It hurts to pay as much for the postage as the tonewood costs

Cheers and thanks for looking
Richard
Richard

User avatar
Allen
Blackwood
Posts: 5252
Joined: Thu Oct 11, 2007 5:39 pm
Location: Cairns, Australia
Contact:

Post by Allen » Wed Jul 15, 2009 8:39 pm

Everything is looking pretty smick right now. Your molds are a fair bit nicer than mine, so you've got a leg up already.

What are the dimensions on mini 0M, and what is the planned scale length for it.
Allen R. McFarlen
https://www.brguitars.com
Facebook
Cairns, Australia

User avatar
xray
Blackwood
Posts: 148
Joined: Sun Aug 24, 2008 5:01 pm

om

Post by xray » Wed Jul 15, 2009 9:22 pm

Great to see you are documenting your build too. I have honestly learnt more from docos of peoples builds than books and dvd's (well almost, thanks allen) Check your PM about the tonewood. The other option is to go to a camping store buy your self some boot polish black pants and black thermals, head on down to Martins shed and "purchase" some tonewood. Be carefull of the state of the art alarm and now i think of it you would have a better chance of stealing from fort knox. Maybe just check your PM.
Allen im curious to know what your upto build wise currently after your overseas commish jobs. Any plans for future build?

User avatar
Bob Connor
Admin
Posts: 3132
Joined: Mon Jul 09, 2007 9:43 pm
Location: Geelong, Australia
Contact:

Post by Bob Connor » Wed Jul 15, 2009 10:01 pm

MMM.

Redwood and Rosewood.

That's what I built for myself last. An OM as well.

I look forward to seeing it progress Richard.
Bob, Geelong
_______________________________________

Mainwaring and Connor Guitars

User avatar
Allen
Blackwood
Posts: 5252
Joined: Thu Oct 11, 2007 5:39 pm
Location: Cairns, Australia
Contact:

Post by Allen » Thu Jul 16, 2009 5:42 am

Don't want to hijack this thread, but I'm on a tenor uke right now, and I'm going to be teaching a course at the Cairns Woodworkers Guild on building ukes, so have to work out a plan, and test it out before the class.

And then there's the Torimba festival in Ravenshoe that I'll be exhibiting at again this year. Gotta start on something special for that.
Allen R. McFarlen
https://www.brguitars.com
Facebook
Cairns, Australia

User avatar
obmit
Blackwood
Posts: 125
Joined: Sun Apr 05, 2009 3:57 pm
Location: Darwin
Contact:

Post by obmit » Thu Jul 16, 2009 10:31 am

Richard

How did you press that veneer?
[img]http://i4.photobucket.com/albums/y116/ImBroken8/annoyingbug.gif[/img]
http://holeshotnitro.com/

seeaxe
Blackwood
Posts: 768
Joined: Thu Dec 18, 2008 7:20 pm
Location: Auckland NZ

Post by seeaxe » Thu Jul 16, 2009 5:50 pm

Hi Tim

Not very well, clearly!!

I pasted it all with glue then put it between two sheets of mdf then loaded everything heavy I could find in the workshop on top, starting with the thicknesser and ending with a nearly full petrol can (my guitars share their habitat with the lawnmower)

The moisture from the glue expanded the thin veneer and hey presto - a major stuff up. I posted the pic for a bit of light entertainment for you all, it certainly made me laugh.

Ironically, the finished wrinkly product is far too stiff - I have used too many plies.

As I said, I'll have another go.

Cheers
Richard

User avatar
Nick
Blackwood
Posts: 3642
Joined: Thu Feb 26, 2009 11:20 am
Location: Christchurch, New Zealand
Contact:

Post by Nick » Fri Jul 17, 2009 5:44 am

Hi Richard, it's starting to take shape (literally!) nicely, the "scaling of the plans during copying" stuff up has actually worked out to be a blessing by the look of it!
Im a little puzzled by your veneering or laminating experiment & sorry it didn't work out for you, I've used Titebond in similar sitations and haven't had a problem :? I usually apply it with a roller so that you get a very thin coating and only to one face. From your description, it sounds like you did all your layers at once then pressed the whole sandwhich? With thin veneers & glue inbetween each layer this may be too much moisture content for the thin wood hence your problem with wrinkles e.t.c.
If you have any left over you might experiment further & have a crack at just doing a layer at a time and press it the same, wait until the glue dries before putting another layer on. Titebond also make a 'cold press veneer' glue which I've used but apart from the longer setup & slower drying times of the veneer glue, I didn't notice much of a difference.

Keep them pictures coming btw :wink: always a learning experience watching other's build.
"Jesus Loves You."
Nice to hear in church but not in a Mexican prison.

seeaxe
Blackwood
Posts: 768
Joined: Thu Dec 18, 2008 7:20 pm
Location: Auckland NZ

Post by seeaxe » Fri Jul 17, 2009 10:27 am

Hi Nick, yes, you are dead right. Not only did I glue all up at once, I used too much glue and then after putting all the plies together I wrapped it in cling film so it didnt stick to the mdf sheets - so the moisture had no chance to get out.

Luckily I have heaps of veneer left so I can try again. I will save my bubinga until I have the technique better sorted.

Tim suggested using epoxy, so I will have a go at that.

I do need to get one of those roller jobbies though... they sell them at Carbatec but I have seen them anywhere else. Presumably you have to wash it all out when you have finished with it.

When you did it, how many plies did you stck together in the end?

Cheers and thanks for the comments and advice, all very useful.
Richard

User avatar
Nick
Blackwood
Posts: 3642
Joined: Thu Feb 26, 2009 11:20 am
Location: Christchurch, New Zealand
Contact:

Post by Nick » Fri Jul 17, 2009 11:30 am

This is the roller that I bought (they're having a clearance sale at the moment too!) as well as the smaller one CarbaTec sell. I don't know if there's anybody here in NZ that have that one or an equivalent but it has a nice big hopper for holding the glue & yes I just tip the surplus back into the container when I've finished & it all comes apart for cleaning up in water. I haven't glued up huge numbers of veneer layers (three was the thickest I went with once) but Micheal Collins, who laminates all his back and sides on his Selmers (as was originally done in the Selmer factory) glues 4 laminates using Titebond, backs are flat but his sides are glued,laminated and clamped in a side mold while things are still 'wet' without wrinkles e.t.c so it just comes down to a moisture level thing.
"Jesus Loves You."
Nice to hear in church but not in a Mexican prison.

seeaxe
Blackwood
Posts: 768
Joined: Thu Dec 18, 2008 7:20 pm
Location: Auckland NZ

Post by seeaxe » Sun Aug 09, 2009 8:19 pm

As the old saying goes, if at first you don't veneer, ply, ply, ply again. So I did

This time I decided to have a go at the sides, as they have a smaller face area. I figured if I couldn't do those successfully I was not going to have much luck with the back.

So first I finished the mini me mould and made an internal form. I lined the form with cork so as to get even pressure when I clamped it, as it was going to be difficult to get the internal mould to be perfect and allow for the thickness of the veneers.

Image

Image

When I glued up the first pair of sides (I bought a glue roller from Carbatec this time) I found that even though I had put lots of clamp pressure on it, the upper bout had not mated well and as a result I had a section of the veneers in that area that hadn't stuck together and they opened up when the side "sprang" out of the mould.
You can see it in the photo below, just beside the splinter.
Also, it looked like I had not used enough glue this time! Doh!!

Image

So then I tried again and this time the veneers glued better, I clamped the pesky upper bout first with lots of ergs and then clamped everything else afterwards. In the middle of exerting lots of macho clamping force, I heard a cracking noise, which I couldn't track down to anything broken but it turns out that was the top laminate shifting - its only screwed on while the rest are glued. This is so I can remove it when I have the sides made and want to work on the purfling etc. End result is that there is a little "ripple" parallel to the edge where the mould shifted, just about the thickness of the veneer, so I guess that one's buggered too.

I also found that the veneer is very porous and lets the glue through - I found this as it had glued it self to my cork faced mould! However, the glued, bent side did at least look like something that might one day be part of a guitar. Its pretty thin, 1.75mm. I think I need a third layer, which could be a problem as two thicknesses only just fit in the mould...

Image

Anyway, trial side #3 is now in the mould, this time with lunch wrap in between it and the mould, and this time I have used sapele veneer instead my precious but dwindling supply of bubinga.

I put a couple more layers of MDF on the big mould so its now more like the depth of the body. but very heavy. Thanks for the turnbuckle idea, Bob.

Image

Also made a couple of radius dishes thanks to Dave Olds and his router sledge thingee - so not a bad few weeks really.

Watch this space!!
Cheers
Richard

Post Reply

Who is online

Users browsing this forum: No registered users and 252 guests