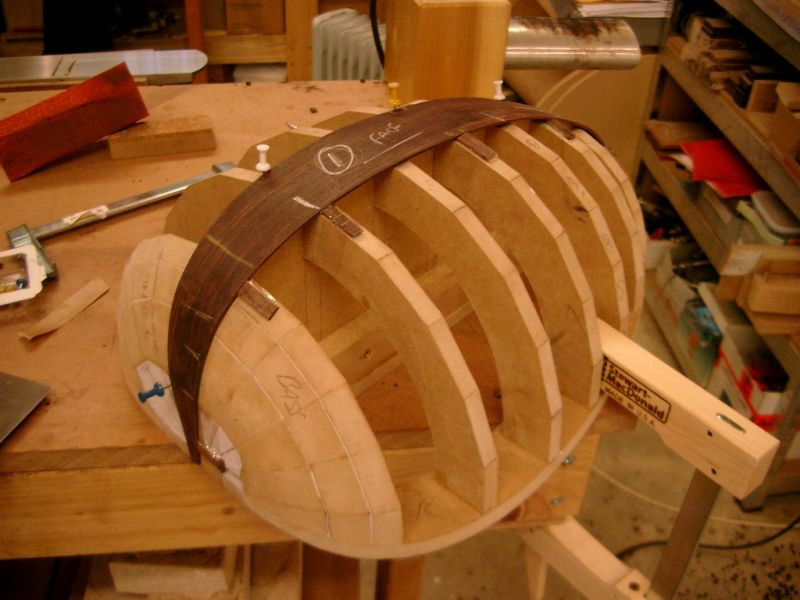
7 course Renaissance Lute Build

Talk about musical instrument construction, setup and repair.

Moderators: kiwigeo, Jeremy D

Post Reply
User avatar
kiwigeo
Admin
Posts: 10594
Joined: Sat Sep 29, 2007 5:57 pm
Location: Adelaide, Sth Australia

7 course Renaissance Lute Build

Post by kiwigeo » Sun Jun 14, 2009 7:37 pm

Back to square one with the (bldi) Renaissanice Lute. I wasnt happy with the first attempt on the body mold so made version two of same this time paying more attention to dimensions. I followed Allens suggestion of sticking photocopies of the plans of each ribhb section onto the MDF and it resulted in more accurate cutting out and shaping of same. I also shaped the rib sections using a hand plane and sanding stick rather than the power sander.

Ive got a stack of Opp grade Allied IRW back and side sets and most of them arent matched so theyre going to make up the bowl of the lute. Some of this stuff is really quite pretty.

Image

Working side blanks down to circa 1.4mm (0.065") using the trusty old Miller Falls scraper plane. This bodgey looking old handtool is great for working on rosewood and other woods with rogue grain.
Image
Image

User avatar
Allen
Blackwood
Posts: 5252
Joined: Thu Oct 11, 2007 5:39 pm
Location: Cairns, Australia
Contact:

Post by Allen » Mon Jun 15, 2009 5:32 am

Now there's a mold that anyone would be proud to hang on the wall.

Are you going to be using some contrasting purflings between the staves Martin?
Allen R. McFarlen
https://www.brguitars.com
Facebook
Cairns, Australia

User avatar
Dennis Leahy
Blackwood
Posts: 872
Joined: Wed Oct 10, 2007 12:32 am
Location: Duluth, MN, US
Contact:

Post by Dennis Leahy » Mon Jun 15, 2009 7:54 am

Looks good, Martin!

Somehow, it makes me think of The Golden Compass:


Image

Dennis
Another damn Yank!

User avatar
kiwigeo
Admin
Posts: 10594
Joined: Sat Sep 29, 2007 5:57 pm
Location: Adelaide, Sth Australia

Post by kiwigeo » Mon Jun 15, 2009 8:09 am

Allen wrote:Now there's a mold that anyone would be proud to hang on the wall.

Are you going to be using some contrasting purflings between the staves Martin?
Undecided on the fill between the ribs...either maple strips or WBW purflings.

User avatar
Nick
Blackwood
Posts: 3642
Joined: Thu Feb 26, 2009 11:20 am
Location: Christchurch, New Zealand
Contact:

Post by Nick » Mon Jun 15, 2009 8:22 am

Looking good Martin and good to see traditional techniques employed shaving the sides down! It's nice to know I'm not the only 'fussy' bugger & scrap things that I'm not happy with. So what are you going to do with the old mold? Will the boss get a new planter or Martin get a new see through cycle helmet? or following on in Dennis's theme, you could do half a Hindenberg recreation :lol:
"Jesus Loves You."
Nice to hear in church but not in a Mexican prison.

User avatar
kiwigeo
Admin
Posts: 10594
Joined: Sat Sep 29, 2007 5:57 pm
Location: Adelaide, Sth Australia

Post by kiwigeo » Tue Jun 16, 2009 8:52 pm

Like any huge project that gets into trouble I've spent the last few days looking at what Ive done so far and how I could re-do things better. Version 2 of the body mould went ok and although its not perfect Im going to run with it.

Van Andrews supplies plans of the ribs but in his instructions he says to make up cardboard ribs and test fit them and from these make up actual rib templates. I tried this with the central rib and just about drove myself crazy trying to get the thing right. The original middle rib plan as supplied by Van Andrews fits roughly with a few adjustments needed in places. Im going to run with same and make final adjustments to the rib prior to gluing. This is the approach Dave White took with his lute and it sort of makes sense.

I've decided to go with hide glue as per the tutorial. Ive never used beast glue before so next activity will be a few days of playing around with the stuff. Ive got a baby bottle warmer which Ill use until my Hiden glue pot arrives from Germany. In the meantime there are the IRW ribstock to work down to 0.065" thickness.

User avatar
Dave White
Blackwood
Posts: 452
Joined: Mon Nov 12, 2007 3:10 am
Location: Hughenden Valley, England
Contact:

Post by Dave White » Tue Jun 16, 2009 9:30 pm

Martin,

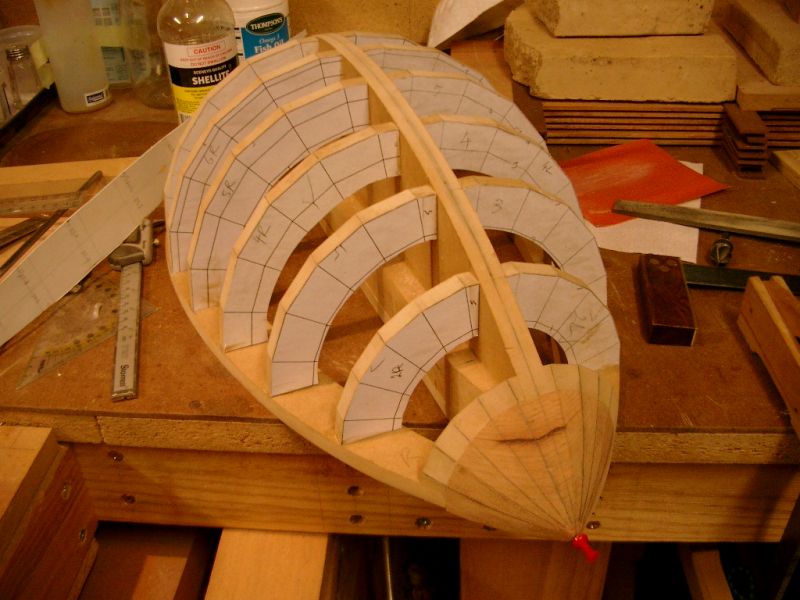
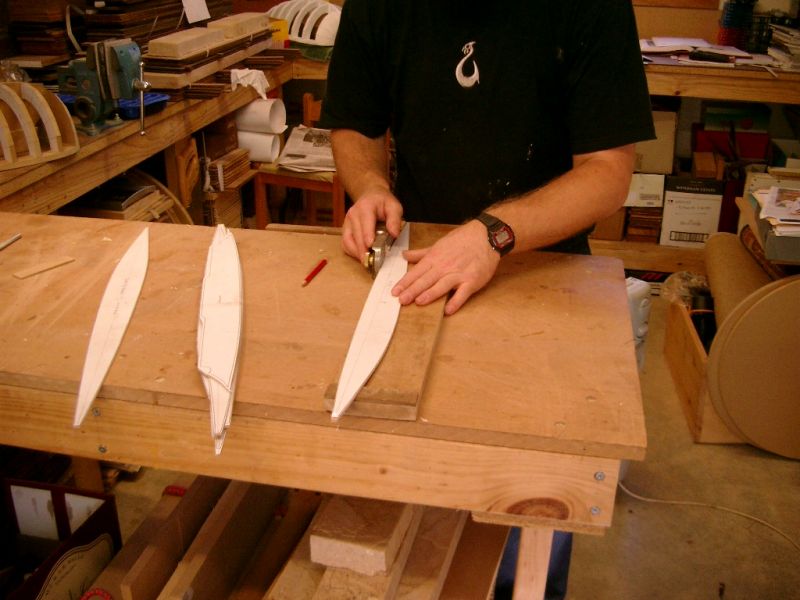
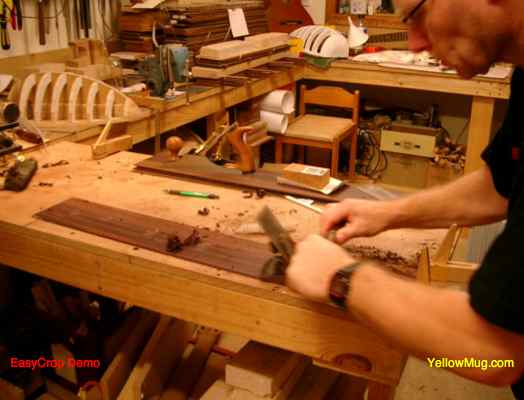
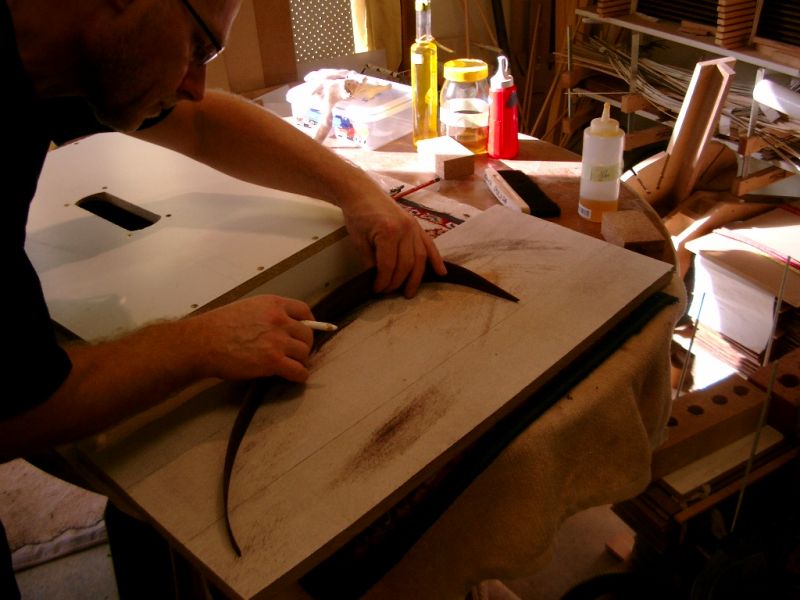
Colin told me that on the old lutes he's examined, nearly all of them have the bottom two ribs next to the soundboard a different size to the others. I think we tend to get too anal about plans and precise measurements, the old guys used their eyes and hand skills and corrected/adapted as they went. I've seen a couple of threads on other forums where builders have been lost as how to shape sides for tops and backs without the comfort of a nice "ball shaped" sanding dish. The answer is you use your eyes, some chalk, a sharp plane and make it fit. In that way I found making the lute liberating and I hope you do too.

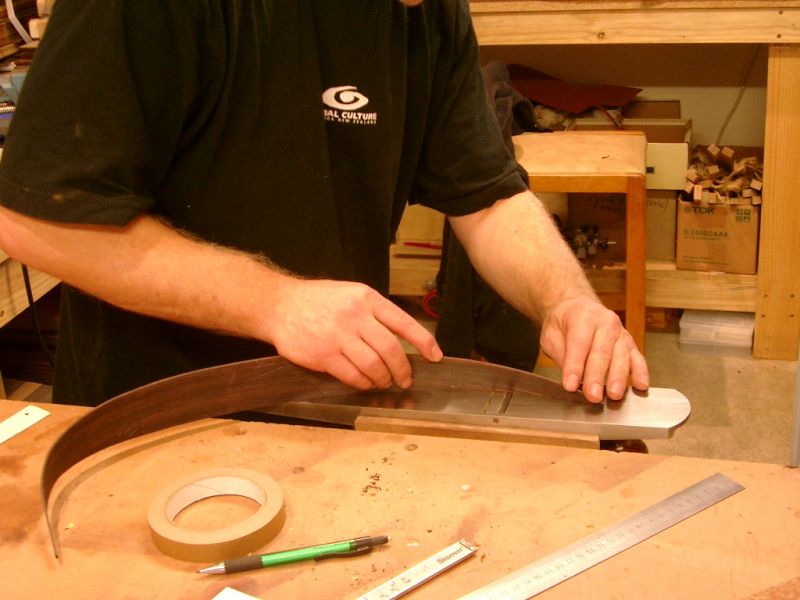
Mind you, get a big swear box as the last two ribs on each side took me over a week to fit correctly. It was basically make a card template that fit the gap and use that and a lot of patience - plus the old chestnut of you can take wood off but it's harder to put it back :D

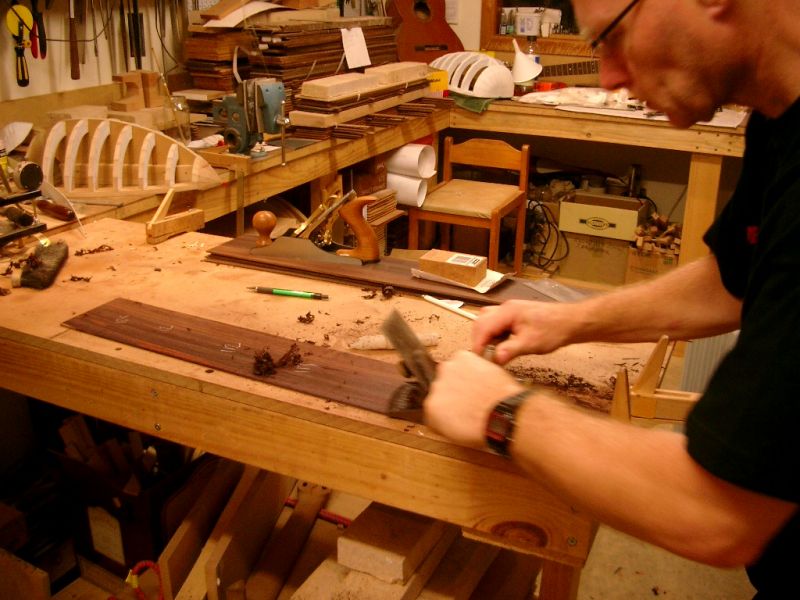
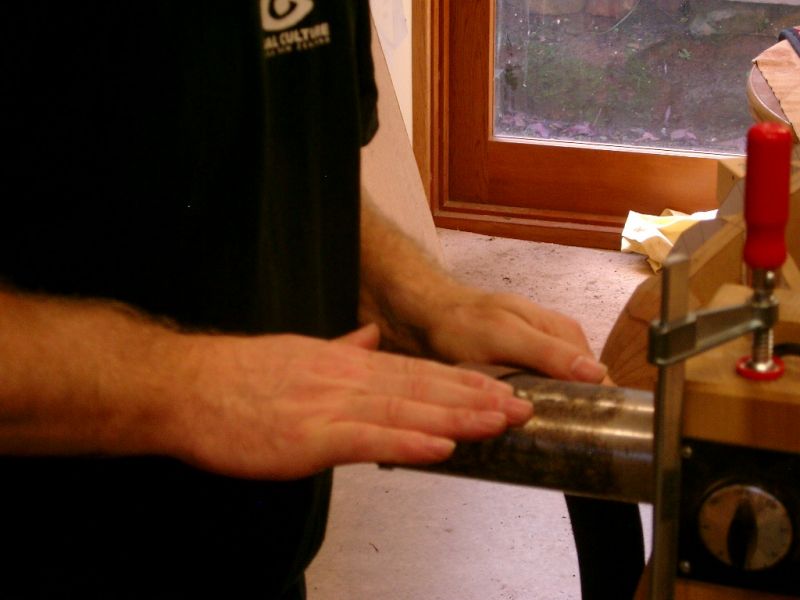
You'll be fine with the hide glue - the ribs when you've planed (sanded :oops: ) them for fit are just rub joints, and if you aren't quite fast enough, then running a hairdryer over the joint will re-melt the glue and let it set with the ribs joined. What seems like a very fragile construction becomes surprisingly strong when all the ribs are glued and the inside joints covered with silk or paper covered in hide glue.

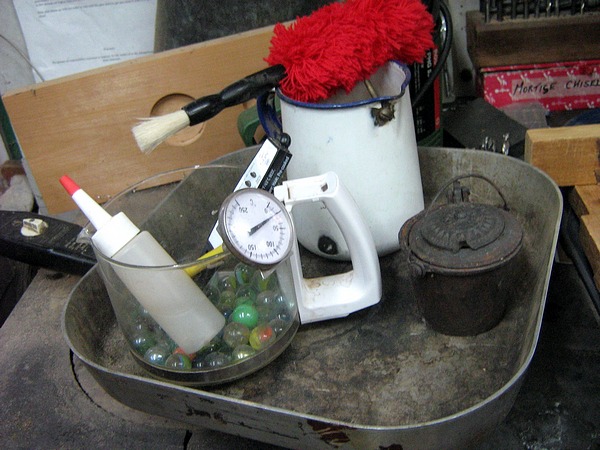
I know some people diss the baby bottle warmer but they work perfectly well and for £10 versus £150 to me it's a no brainer. The old lute makers didn't use thermostatically controlled glue pots forsooth.

The new mold looks great and I'm looking forward to seeing it get filled up with ribs.
Dave White
[url=http://www.defaoiteguitars.com]De Faoite Stringed Instruments[/url]

User avatar
kiwigeo
Admin
Posts: 10594
Joined: Sat Sep 29, 2007 5:57 pm
Location: Adelaide, Sth Australia

Post by kiwigeo » Tue Jun 16, 2009 10:51 pm

Thanks for the tips Dave. Yes the vocabulary of swear words is getting a work out. Luckily I work an oil rig so the vocabulary is almost endless!

Cheers Martin

User avatar
Kim
Admin
Posts: 4376
Joined: Wed Sep 26, 2007 8:32 pm
Location: South of Perth WA

Post by Kim » Wed Jun 17, 2009 12:48 am

The Avanti baby bottle warmers are THE best glue pot on the market. I fooled around with a thermometer and the thermostat control until I got it spot on. I then marked the plastic body of the unit with a hot pin. Now if I knock the control knob I just turn it back to my pin point and it's spot on, the accuracy is brilliant but then it would need to be, after all it is made to heat baby food, imagine the law suits if they were bunky.

Cheers

Kim

User avatar
Allen
Blackwood
Posts: 5252
Joined: Thu Oct 11, 2007 5:39 pm
Location: Cairns, Australia
Contact:

Post by Allen » Wed Jun 17, 2009 5:29 am

Once you get onto using Hide Glue, you'll wonder why you waited do long. I'm using the baby bottle warmer as well, and I can't fault it. Especially for the $5 is cost from Vinnie's.

Looking forward to seeing a few ribs going on.
Allen R. McFarlen
https://www.brguitars.com
Facebook
Cairns, Australia

User avatar
Craig
Admin
Posts: 1090
Joined: Wed Sep 26, 2007 10:08 am
Location: N.S.W. in the bush

Post by Craig » Wed Jun 17, 2009 8:08 am

That's some great work there Martin and hats off on remaking the mold.

I've always used hot glue for my piano work . Here's a pic of what I've been using for many many years . Just an old second hand electric frypan . It allows plenty of room for a jug of hot water for clean-up and brushes etc , an old glue pot, and more recently, the newer idea of a little squirt bottle. I warm up parts to be glued on it as well. I sit it next to the job at hand and because of it's thermistat keeps a constant temperature


Image
Craig Lawrence

User avatar
kiwigeo
Admin
Posts: 10594
Joined: Sat Sep 29, 2007 5:57 pm
Location: Adelaide, Sth Australia

Post by kiwigeo » Wed Jun 17, 2009 3:58 pm

Okay Ive been playing around with hide glue all afternoon and its been alot of fun. I bought myself a wax pot from Carbatec here in Adelaide a few years back and Ive never fired the thing up. After a bit of playing around I worked out temp settings on the thing to get a steady temp in the pot of around 145degF. I mixed up a batch of hide glue using Ubeauts pearl hide glue. Not sure on the strength rating on the stuff...anyone got any ideas? I imagine its around the 190gm mark.

After letting the glue absorb added water I stuck it in the pot and got it to a runny consistency. I then whacked a bit on a couple of pieces of scrap wood and clamped it with moderate pressure. Hey presto....the two bits of wood are now stuck together. The glue in the pot (its actually in a plastic pottle) has nowq cooled to a gel and Ive stored it in the fridge for use in a day or two during some more test sessions.

User avatar
kiwigeo
Admin
Posts: 10594
Joined: Sat Sep 29, 2007 5:57 pm
Location: Adelaide, Sth Australia

Post by kiwigeo » Thu Jun 18, 2009 5:51 pm

Working on the templates for the ribs. Ive just taken the plans and stuck photocopies of the rib drawings on some 3mm MDF. Ill cut the ribs oversize and then trim them to final shape after test fitting on the mold.


Image

User avatar
Nick
Blackwood
Posts: 3642
Joined: Thu Feb 26, 2009 11:20 am
Location: Christchurch, New Zealand
Contact:

Post by Nick » Fri Jun 19, 2009 5:57 am

Is that Your Jan Ackerman you were talking about Martin? The Matau looks funky :)
Are most of the staves different shapes or will one pattern do several?
"Jesus Loves You."
Nice to hear in church but not in a Mexican prison.

User avatar
kiwigeo
Admin
Posts: 10594
Joined: Sat Sep 29, 2007 5:57 pm
Location: Adelaide, Sth Australia

Post by kiwigeo » Fri Jun 19, 2009 8:32 am

Nah thats not my JA shirt......thats a Global Culture job I bought at Auckland Airport.

Ribs are different shapes.....13 ribs in all. Each template makes up two ribs...one either side of the centre rib.

User avatar
Nick
Blackwood
Posts: 3642
Joined: Thu Feb 26, 2009 11:20 am
Location: Christchurch, New Zealand
Contact:

Post by Nick » Fri Jun 19, 2009 8:45 am

So there's definitly no chance of production line stuff here! my hats off to you, which on a cold morning and bugger all hair takes some doing I can tell you!!
"Jesus Loves You."
Nice to hear in church but not in a Mexican prison.

User avatar
kiwigeo
Admin
Posts: 10594
Joined: Sat Sep 29, 2007 5:57 pm
Location: Adelaide, Sth Australia

Post by kiwigeo » Fri Jun 19, 2009 9:03 am

Cold weather not an issue here....workshop is fully climate controlled. 21 deg C and 40% humidity.

User avatar
kiwigeo
Admin
Posts: 10594
Joined: Sat Sep 29, 2007 5:57 pm
Location: Adelaide, Sth Australia

Post by kiwigeo » Wed Jun 24, 2009 4:38 pm

No work on the lute today......spent an hour and a half in the dentists chair this morning having a root canal done so now Im in no mood to be &&&&&ng with a lute.

User avatar
kiwigeo
Admin
Posts: 10594
Joined: Sat Sep 29, 2007 5:57 pm
Location: Adelaide, Sth Australia

Post by kiwigeo » Thu Jun 25, 2009 6:25 pm

Still working away thicknessing down IRW side stock. Four sections done and 4 more to go.


Image

User avatar
kiwigeo
Admin
Posts: 10594
Joined: Sat Sep 29, 2007 5:57 pm
Location: Adelaide, Sth Australia

Post by kiwigeo » Sun Jun 28, 2009 7:16 pm

Rib number one got worked on today. Pics show bending and shaping of the central rib. Shaping of the rib was done on a Veritas Big Daddy Plane and a sanding board.Image

Image
Image
Image
Image

User avatar
Allen
Blackwood
Posts: 5252
Joined: Thu Oct 11, 2007 5:39 pm
Location: Cairns, Australia
Contact:

Post by Allen » Sun Jun 28, 2009 7:20 pm

Ooooo, bending wood. It's all starting to come together Martin. That first rib is looking like you've been building these for years. Looking forward to seeing the glue flying next.
Allen R. McFarlen
https://www.brguitars.com
Facebook
Cairns, Australia

User avatar
Dennis Leahy
Blackwood
Posts: 872
Joined: Wed Oct 10, 2007 12:32 am
Location: Duluth, MN, US
Contact:

Post by Dennis Leahy » Sun Jun 28, 2009 8:30 pm

Looks great, Martin! And, it looks really difficult to get the bend just right, but I suspect the devil's in the seams.

Thanks for documenting this - very interesting!

Dennis
Another damn Yank!

User avatar
kiwigeo
Admin
Posts: 10594
Joined: Sat Sep 29, 2007 5:57 pm
Location: Adelaide, Sth Australia

Post by kiwigeo » Sun Jun 28, 2009 8:53 pm

All going too well for my liking. I dont like instruments that go together without any problems.

User avatar
Dave White
Blackwood
Posts: 452
Joined: Mon Nov 12, 2007 3:10 am
Location: Hughenden Valley, England
Contact:

Post by Dave White » Sun Jun 28, 2009 10:33 pm

kiwigeo wrote:All going too well for my liking. I dont like instruments that go together without any problems.
Martin,

Don't worry - your wish will soon be granted, trust me I'm a luthier 8)

Great stuff - the first rib on and the form looks in great shape. Nice to see someone doing the joins the traditional way :oops: That will keep Colin happy.

Keep the pictures coming.
Dave White
[url=http://www.defaoiteguitars.com]De Faoite Stringed Instruments[/url]

User avatar
Kim
Admin
Posts: 4376
Joined: Wed Sep 26, 2007 8:32 pm
Location: South of Perth WA

Post by Kim » Sun Jun 28, 2009 10:47 pm

kiwigeo wrote:All going too well for my liking. I dont like instruments that go together without any problems.
Great work and tude Martin.

I am enjoying this as well mate, your determination is commendable but more importantly, it's clearly paying dividends. Inspiring stuff rock doc, your doing very well 8)

Cheers

Kim

Post Reply

Who is online

Users browsing this forum: No registered users and 250 guests