I'll say it again, Bob, I love watching your work.
And this guitar is particularly attractive.
Thanks for taking the trouble to post all this.
Steve
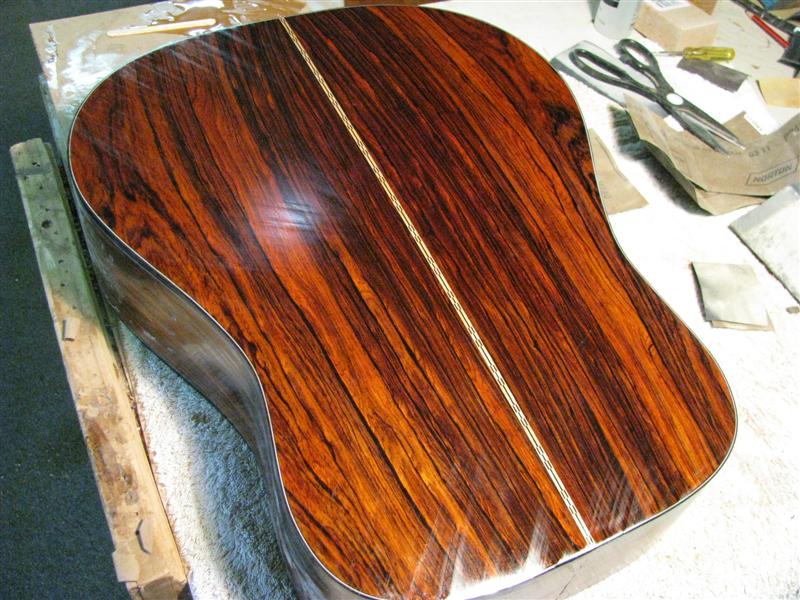
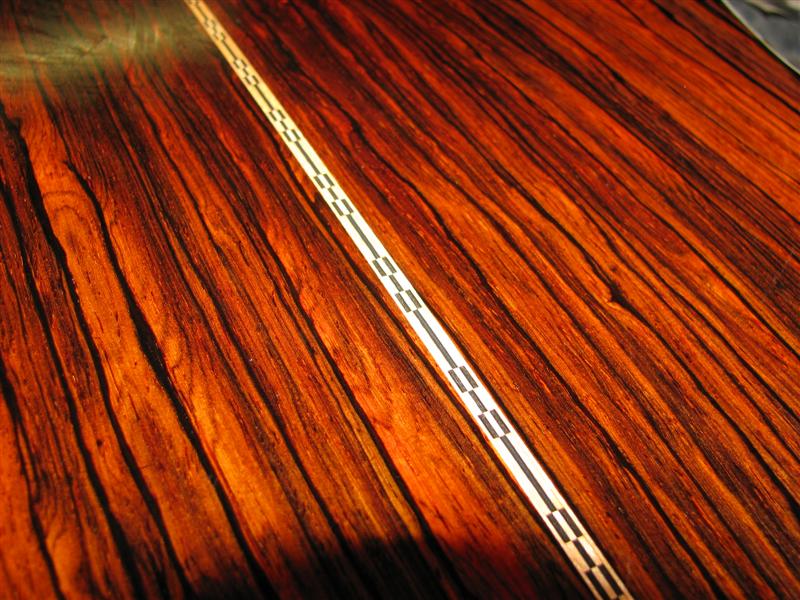
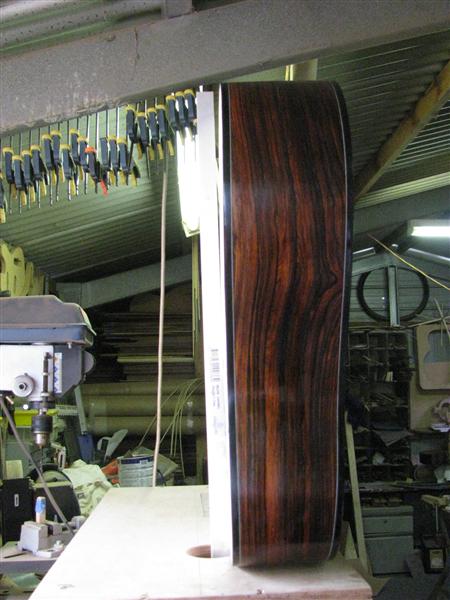
Cocobolo/Adi Dreadnought
-
Stephen Kinnaird

- Blackwood
- Posts: 287
- Joined: Sun Oct 14, 2007 1:45 pm
- Location: Texas, USA
-
Bob Connor

- Admin
- Posts: 3132
- Joined: Mon Jul 09, 2007 9:43 pm
- Location: Geelong, Australia
- Contact:
I don't think I'd trust any steel strung guitar without a truss rod regardless of the wood used. It just gives you that little bit of play if you want to dial some relief in the neck.Runn3r wrote:awesome thread bob!
i have never built an acoustic before and this well documented thread sure is inspiring
and the cocobolo looks beautiful but i had hoped it would not require some sort of finish to bring the red out the way your finised coco has
i have been contemplating a one piece no truss rod cocbolo strat neck because its stiffness is quite legendary heh
wht do you reckon bob? will the coco neck budge under typical 10's standard pitch tension? or will the lack of a trussrod be a bad move for a coco neck?
I also use carbon fibre in all my necks as well as a 2 way truss rod. There are some advantages, I believe, aside from stiffness in that it seems to even out the volume of notes all over the neck.
I do the same in electrics
-
Bob Connor
- Admin
- Posts: 3132
- Joined: Mon Jul 09, 2007 9:43 pm
- Location: Geelong, Australia
- Contact:
thanks for your input... bobbob wrote:I don't think I'd trust any steel strung guitar without a truss rod regardless of the wood used. It just gives you that little bit of play if you want to dial some relief in the neck.Runn3r wrote:awesome thread bob!
i have never built an acoustic before and this well documented thread sure is inspiring
and the cocobolo looks beautiful but i had hoped it would not require some sort of finish to bring the red out the way your finised coco has
i have been contemplating a one piece no truss rod cocbolo strat neck because its stiffness is quite legendary heh
wht do you reckon bob? will the coco neck budge under typical 10's standard pitch tension? or will the lack of a trussrod be a bad move for a coco neck?
I also use carbon fibre in all my necks as well as a 2 way truss rod. There are some advantages, I believe, aside from stiffness in that it seems to even out the volume of notes all over the neck.
I do the same in electrics
i will continue to dwell upon this personal dilemma (to truss or not to truss)
-
Dennis Leahy

- Blackwood
- Posts: 872
- Joined: Wed Oct 10, 2007 12:32 am
- Location: Duluth, MN, US
- Contact:
-
Bob Connor
- Admin
- Posts: 3132
- Joined: Mon Jul 09, 2007 9:43 pm
- Location: Geelong, Australia
- Contact:
-
Bob Connor
- Admin
- Posts: 3132
- Joined: Mon Jul 09, 2007 9:43 pm
- Location: Geelong, Australia
- Contact:
-
Taffy Evans
- Blackwood
- Posts: 997
- Joined: Wed Apr 30, 2008 6:54 pm
- Location: Charters Towers North Queensland
-
sebastiaan56

- Blackwood
- Posts: 1279
- Joined: Sun Oct 28, 2007 5:23 am
- Location: Blue Mountains

-
Bob Connor
- Admin
- Posts: 3132
- Joined: Mon Jul 09, 2007 9:43 pm
- Location: Geelong, Australia
- Contact:
I started work on the neck today.
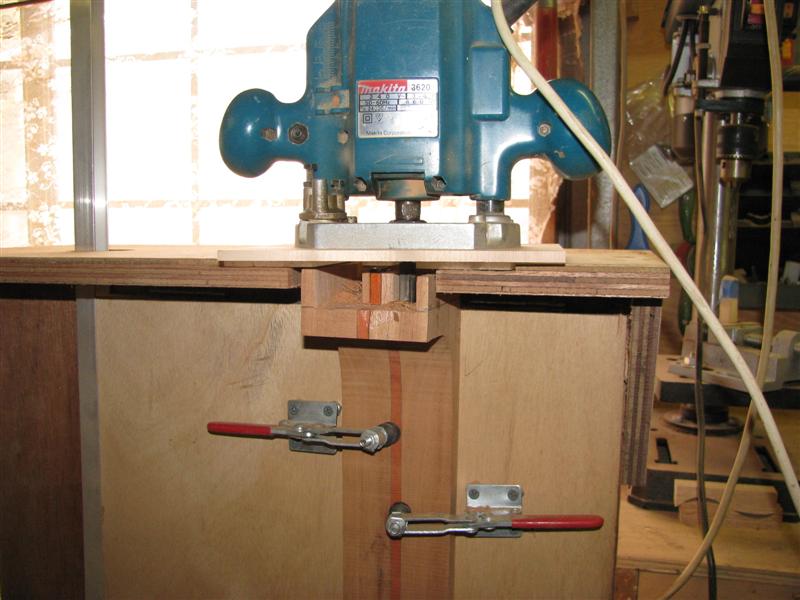
There's been one jig that I've been meaning to build for quite a while and that's to route the truss rod and CF channels in the neck. I've been doing it with a router fence up until his point but it has been fraught with danger and uncertainty.
So here's the jig. It took about 30 minutes to build.

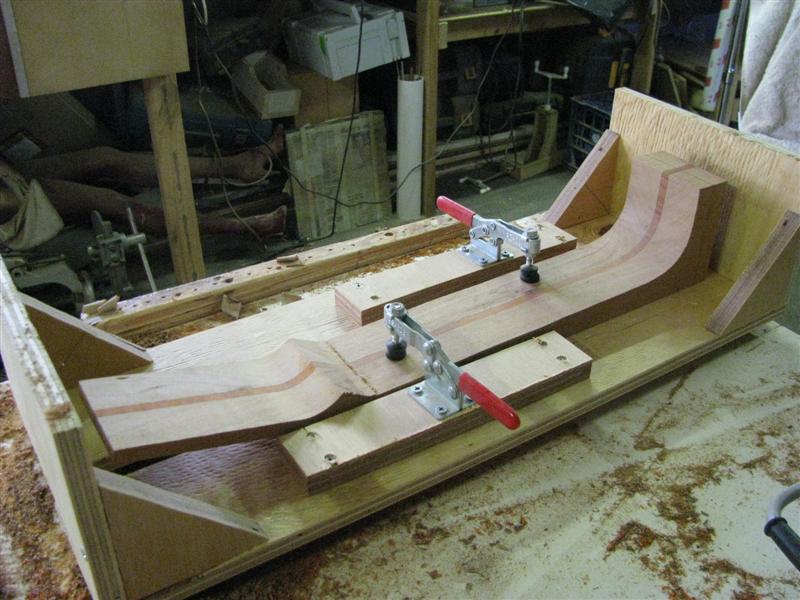
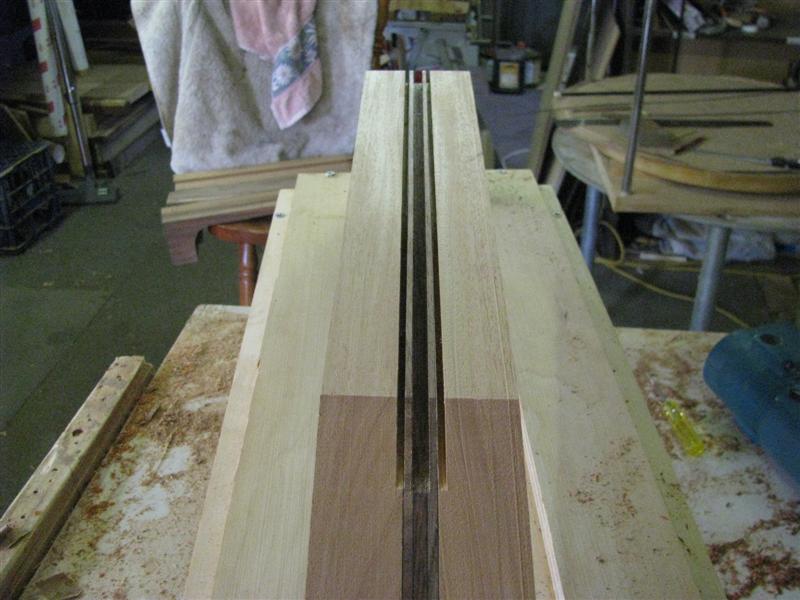
Makes the whole process idiot proof.
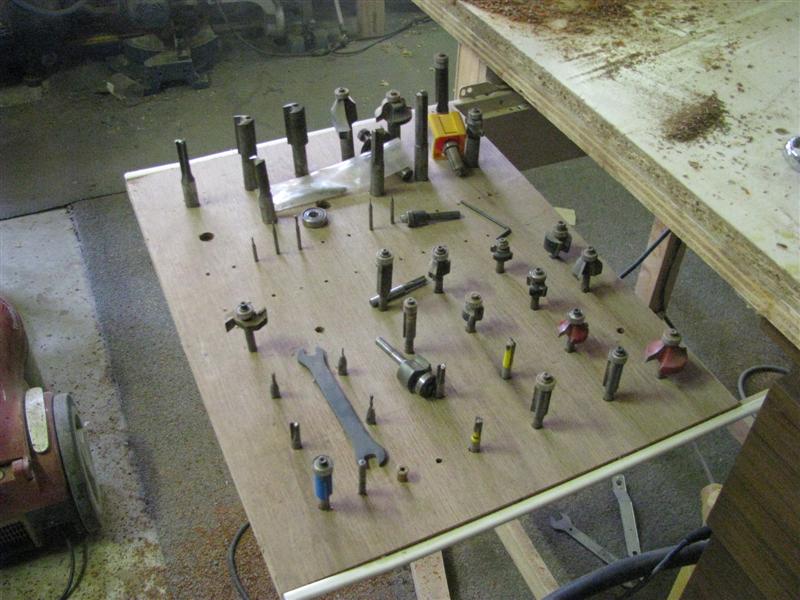
While I'm at it here's our router bit "drawer" made from a couple of drawer slides and a bit of plywood.
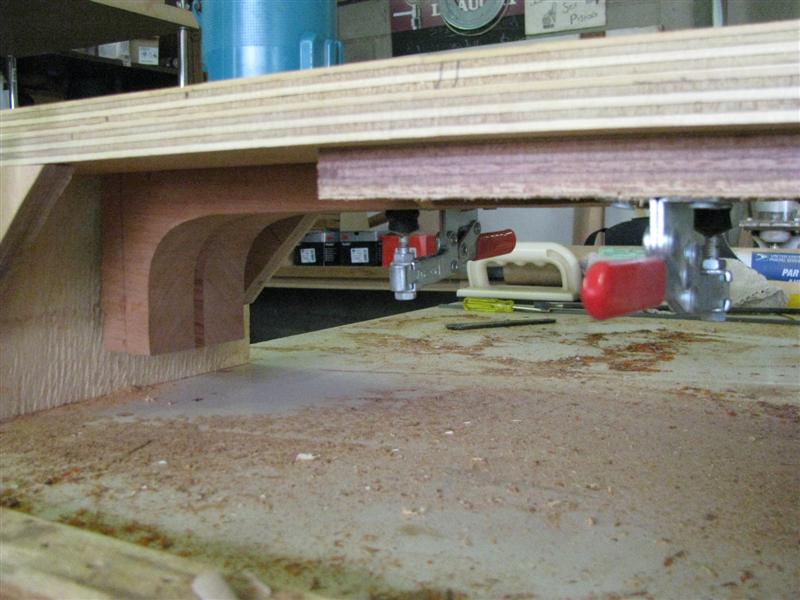
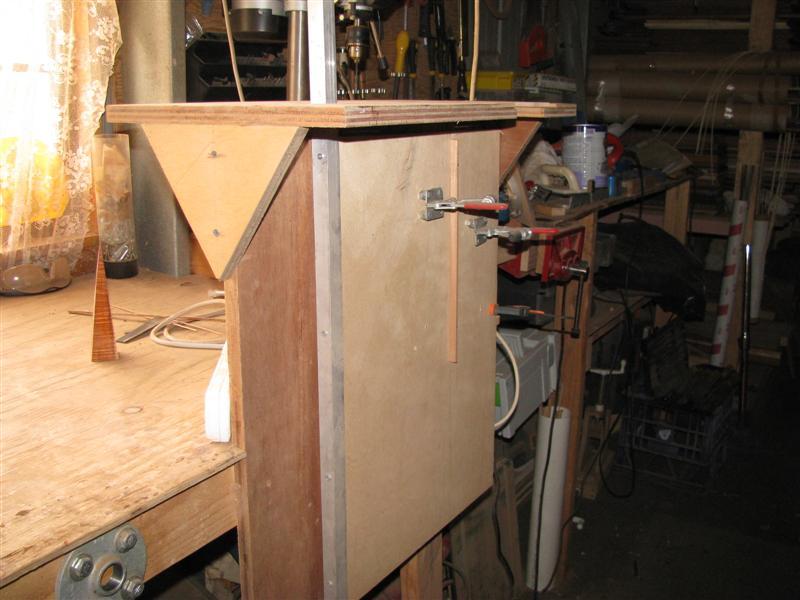
Once the truss rod slot has been cut we need to shift to the neck angle jig which is Paul Woolson's invention.
We sit the body of the guitar on top of the jig and adjust the bottom angle until the aluminium bar is around 1/16 to 1/8 of an inch above the soundboard right above where the bridge will be glued on.
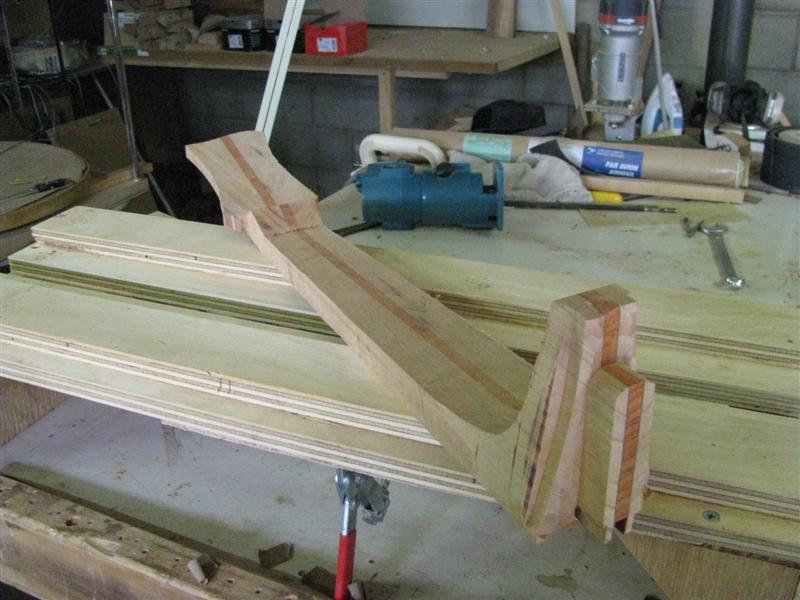
Once this angle is established I can rout out the mortise and tenon joints on the neck and the guitar body.
This is an extremely messy part of the job which generally ends up with me covered in sawdust.
So this is what the neck is looking like at this point.
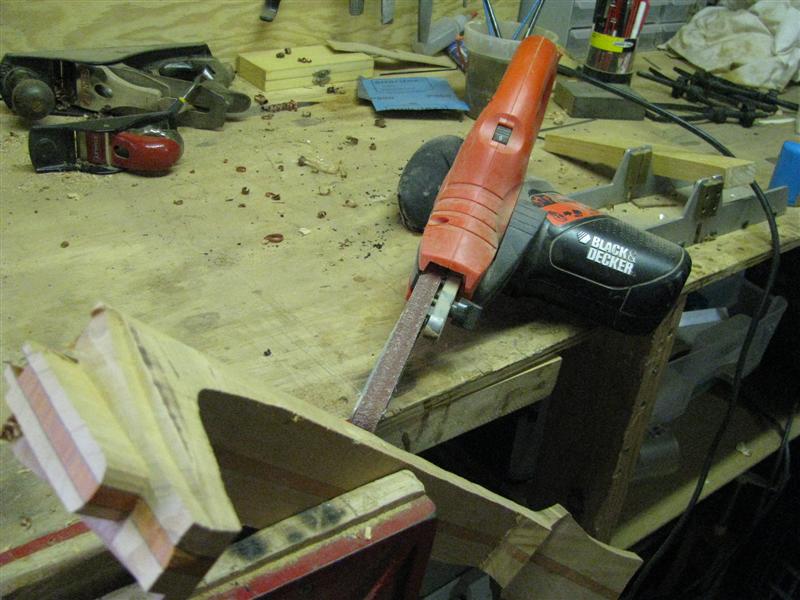
Next I'll rough carve the neck. Now anyone with romantic notions about neck carving being a relaxing part of instrument construction with the craftsman gently carving the neck with a whittling knife had better skip this step.
I use a Black and Decker power file which gives me the ability to have this sucker rough carved in about 15 minutes.
I have a template for the neck volute as well.

Once the neck is rough carved I'll throw it on this jig to get a uniform thickness up the neck.
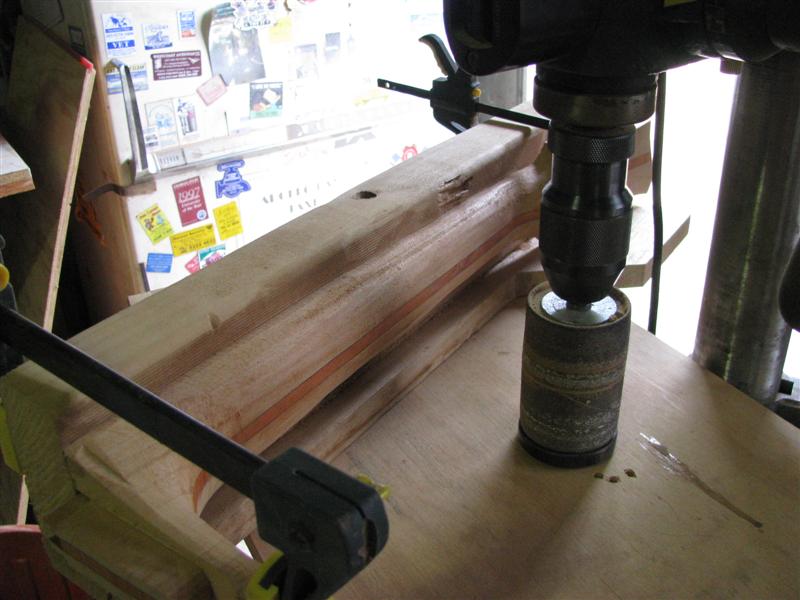
There's been one jig that I've been meaning to build for quite a while and that's to route the truss rod and CF channels in the neck. I've been doing it with a router fence up until his point but it has been fraught with danger and uncertainty.
So here's the jig. It took about 30 minutes to build.
Makes the whole process idiot proof.
While I'm at it here's our router bit "drawer" made from a couple of drawer slides and a bit of plywood.
Once the truss rod slot has been cut we need to shift to the neck angle jig which is Paul Woolson's invention.
We sit the body of the guitar on top of the jig and adjust the bottom angle until the aluminium bar is around 1/16 to 1/8 of an inch above the soundboard right above where the bridge will be glued on.
Once this angle is established I can rout out the mortise and tenon joints on the neck and the guitar body.
This is an extremely messy part of the job which generally ends up with me covered in sawdust.
So this is what the neck is looking like at this point.
Next I'll rough carve the neck. Now anyone with romantic notions about neck carving being a relaxing part of instrument construction with the craftsman gently carving the neck with a whittling knife had better skip this step.
I use a Black and Decker power file which gives me the ability to have this sucker rough carved in about 15 minutes.
I have a template for the neck volute as well.
Once the neck is rough carved I'll throw it on this jig to get a uniform thickness up the neck.

-
Bob Connor
- Admin
- Posts: 3132
- Joined: Mon Jul 09, 2007 9:43 pm
- Location: Geelong, Australia
- Contact:
Who is online
Users browsing this forum: No registered users and 260 guests