Cocobolo/Adi Dreadnought

Talk about musical instrument construction, setup and repair.

Moderators: kiwigeo, Jeremy D

User avatar
Bob Connor
Admin
Posts: 3132
Joined: Mon Jul 09, 2007 9:43 pm
Location: Geelong, Australia
Contact:

Post by Bob Connor » Wed Jan 07, 2009 5:44 pm

Time to carve the back braces.

I use a cheap Stanley block plane that I took to with the belt sander and rounded all the edges off.

Image

Tape up either side of the braces so we don't get any scratching on the back.

Image

About ten minutes later the braces are rough carved.

Image

I finish them off with a chisel and then sandpaper.

Image

Image

Next the centre re-inforcement strip goes in along with the label.

Image

Image

The back has now been glued on and it's starting to look a little like a guitar.

Image

I started on the soundboard, so the first job is to stick the rosette in. I don't get too adventurous with rosettes and the jig is simple and foolproof.
The different holes are for different sized soundholes and purflings around the main rosette. The secret of the rosette cutting jig is to have a router bit the same diameter as the thickness of your purfling.

Image

The rosette is Cocobolo. This one was warped and cracked before I routed it out so I didn't know if it was going to work but I think it'll be OK.

Image

Tomorrow I may be able to get the top braced and voiced.
Last edited by Bob Connor on Thu Jan 08, 2009 8:53 am, edited 1 time in total.
Bob, Geelong
_______________________________________

Mainwaring and Connor Guitars

User avatar
Allen
Blackwood
Posts: 5252
Joined: Thu Oct 11, 2007 5:39 pm
Location: Cairns, Australia
Contact:

Post by Allen » Wed Jan 07, 2009 6:22 pm

I'm learning a lot from your methodology Bob. So many ways to skin a cat, and it's great to see the order that you do things. One that caught my attention was adding the last of the back reinforcement after the back is glued on. Makes total sense, but I've just never done it that way. I will from now on.
Allen R. McFarlen
https://www.brguitars.com
Facebook
Cairns, Australia

User avatar
Bob Connor
Admin
Posts: 3132
Joined: Mon Jul 09, 2007 9:43 pm
Location: Geelong, Australia
Contact:

Post by Bob Connor » Thu Jan 08, 2009 8:25 am

Toejam wrote:You are prolific Bob and you manage a full time job as well, I'm surprised you even get time to drink beer. The old potters wheel is a interesting contraption, I saw the pic before I read your text and thought you'd been putting you guitars in a washing machine. I would like to know where you got those small colourful clamps as I can't find any like them and would like to add a few handfuls of them to my kit.

Jim

This forum doesn't like the way I spell colour, I refuse to comply.
I have the luxury of teaching at a TAFE college Jim, which means ten weeks holiday a year and a weekly timetable of about 20 hours a week. So I get a fair amount of time to do this luthiery stuff. :D

I think the clamps came from a Mitre 10 store. If you have trouble with supply let me know and I'll send some up. They're as cheap as - maybe 5 bucks for a bucket of 20 or so.
Bob, Geelong
_______________________________________

Mainwaring and Connor Guitars

User avatar
Bob Connor
Admin
Posts: 3132
Joined: Mon Jul 09, 2007 9:43 pm
Location: Geelong, Australia
Contact:

Post by Bob Connor » Thu Jan 08, 2009 8:31 am

Allen wrote:I'm learning a lot from your methodology Bob. So many ways to skin a cat, and it's great to see the order that you do things. One that caught my attention was adding the last of the back reinforcement after the back is glued on. Makes total sense, but I've just never done it that way. I will from now on.
I've seen some people who glue the entire strip on first, then install the braces which wouldn't suit the way I carve the braces. I do have a jig to line the strips up but rarely use it and I'll do it by eye.

I'd never consciously thought about glueing those two strips in last. I've just always done it that way.

I love watching what other people do as in Dave White's Uke build. Everyone has a different spin on certain aspects of the process that you can incorporate to simplify or idiot-proof things.
Bob, Geelong
_______________________________________

Mainwaring and Connor Guitars

User avatar
sebastiaan56
Blackwood
Posts: 1279
Joined: Sun Oct 28, 2007 5:23 am
Location: Blue Mountains

Post by sebastiaan56 » Thu Jan 08, 2009 8:48 am

bob wrote:I love watching what other people do as in Dave White's Uke build. Everyone has a different spin on certain aspects of the process that you can incorporate to simplify or idiot-proof things.
Ive learnt so much from these builds! I particularly like your rosette cutting setup (I dont see why it need to be more than that), and also your backstrip method. When I saw it all I could say was "doh", the braces are more important than the strip.....
make mine fifths........

User avatar
Bob Connor
Admin
Posts: 3132
Joined: Mon Jul 09, 2007 9:43 pm
Location: Geelong, Australia
Contact:

Post by Bob Connor » Thu Jan 08, 2009 7:16 pm

The rosette got glued in this morning with Hot Stuff cyano-acrylate.
The area routed out for the rosette was sealed with Shellac, particularly the end grain, to stop the glue from staining the spruce yellow.

Image

We now need some braces for the top so we'll start with a lump of nicely quarter-sawn Adirondack Spruce.

Image

This is a Dreadnought so the X-braces need to be 15mm x 8mm.
I'll use a router to cut the lap joint in these so I'll leave the brace stock a little thicker - around 9mm

Image

Here's the jig I made for cutting the perfect lap joint.

Image

Thats an 8mm router bit. if I'm building OOO's or smaller guitars it'll be 6mm.

Image

The braces are the two pieces of wood with the pencil mark. The outside pieces are sacrificial to stop the router bit blowing out when it exits the wood.

Image

Image

Once the braces have been routed I'll run them through the drum sander and sort of "sneak up on 'em" so I get a perfect fit.

Image

The X-braces are the only braces on the top that I radius to 25 feet. They'll also be glued using the 25' radius dish. All of the other braces are flat and are glued against a flat surface. I started doing this after talking with Jack Spira who does similar (or was last year). It helps neck geometery a lot on the upper bout and certainly hasn't hurt the sound of the instruments. In the scheme of things it probably means that I end up with a top of 30' or 35' radius. I've never bothered to measure it because it'll change with humidity and string tension etc.

Image

Image

Image

While waiting for the glue to dry I got stuck into the fingerboard, also Cocobolo.

Image

Image

Image

The fingerboard radius is 16" so I'm going to be lazy and try and get some of the sanding done on the drum sander. 8 or 9 layers of tape along one edge should do the trick.


Image

Image

Image

I lik about a 1mm drop off after the 14th fret so I thought I'd try and do this on the belt sander as well. It seemed to work OK but I had to re-radius that area manually.

Image

Image

Here we are back at the top glueing the rest of the braces on a flat surface. The bridge plate will be Brazilian Rosewood.

Image
Last edited by Bob Connor on Wed Feb 04, 2009 9:43 pm, edited 1 time in total.
Bob, Geelong
_______________________________________

Mainwaring and Connor Guitars

User avatar
DarwinStrings
Blackwood
Posts: 1877
Joined: Thu Nov 13, 2008 10:27 pm
Location: Darwin

Post by DarwinStrings » Thu Jan 08, 2009 10:26 pm

Thanks very much for the offer Bob. I tried Bunnings and Mitre-10 today while I was getting other bits but they don't have them in stock. I will try a special order at Bunnings though before I take up any of your time.

Jim

User avatar
Craig
Admin
Posts: 1090
Joined: Wed Sep 26, 2007 10:08 am
Location: N.S.W. in the bush

Post by Craig » Fri Jan 09, 2009 11:05 pm

Thanks for sharing your ( and Daves ) methodology on this build Bob . Interesting to see how you go about some operations .

I'm picking this to be a great guitar and I'm enjoying the progress . Obviously too much time building and not enough socializing with Le Fridge :lol:
Craig Lawrence

User avatar
Bob Connor
Admin
Posts: 3132
Joined: Mon Jul 09, 2007 9:43 pm
Location: Geelong, Australia
Contact:

Post by Bob Connor » Sat Jan 10, 2009 5:44 pm

The top got voiced yesterday and I have to say that I love Red Spruce. This particular lot that came from Colonial Tonewoods and RCTonewoods have exceptional sustain and you don't seem to have to work too hard at voicing these tops before they are sustaining nicely.

This top is quite heavy. With the braces on and carved it's 305 grams. As I've stated previously I've weighed all of the Adi tops in stock and there's up to 100 grams difference in an uncut top set.

But it is a dready that's being built for medium gauge (13-54) strings so it will need to be fairly beefy. The top has been thinned to 2.7mm.

This one was sounding quite nice without scalloping the X-braces and I was tempted to leave it like that but the scalloping seemd to open up the sound a little more and the sustain increased.

Image

Image

Image

I've left it fairly chunky in the "corridor of uncertainty" where most of the string tension is going to try and twist the bridge and what's under it.

Image

I'm simply looking for a sustaining note all over the top when tapped and particularly so in the lower bout and also paying attention to those areas where the braces intersect.

I'm happy with the sound of it so on goes the top with Titebond.

Image

Once it's glued I'll take it out and rout off the top waste with a mini trimmer and a guide bit and then it's side flattening time.

Just about all sides seem to cup a little when you are bending them and this seems to be exacerbated by adding too much water.

I flatten then by hand. It doesn't take too long and the result will be noticeable particularly if you are going to use a high gloss finish.

Mark the sides with a pencil so you can see when the sides are dead flat and use a flat sanding block with 80 or 120 grit sandpaper.

Image

Image


Image

Image

Image

Image

Image
Bob, Geelong
_______________________________________

Mainwaring and Connor Guitars

User avatar
Allen
Blackwood
Posts: 5252
Joined: Thu Oct 11, 2007 5:39 pm
Location: Cairns, Australia
Contact:

Post by Allen » Sat Jan 10, 2009 7:12 pm

Beautiful work Bob. And the very best part of all of this, is that I've got some of the very same wood in my stash. :D I hope that when I get around to using it, I will do as nice a job as this one is turning out
Allen R. McFarlen
https://www.brguitars.com
Facebook
Cairns, Australia

User avatar
Bob Connor
Admin
Posts: 3132
Joined: Mon Jul 09, 2007 9:43 pm
Location: Geelong, Australia
Contact:

Post by Bob Connor » Sat Jan 10, 2009 8:47 pm

I'm enjoying using it so much I think I'll have to get some more Allen.

There are so many colours in it. Vivid oranges, purples and all sorts of brown hues. It's really going to pop under finish.

It is very heavy though so it'll be interesting to see what effect it has on the instrument.

Dave dropped into the shed this morning and was surprised at the weight of it but more surprised at how lively it sounded when tapped.
Bob, Geelong
_______________________________________

Mainwaring and Connor Guitars

User avatar
kiwigeo
Admin
Posts: 10595
Joined: Sat Sep 29, 2007 5:57 pm
Location: Adelaide, Sth Australia

Post by kiwigeo » Sat Jan 10, 2009 9:00 pm

Looking good there Bob. Cant wai to tsee the finished instrument.

User avatar
Mark McLean
Blackwood
Posts: 1088
Joined: Thu Apr 10, 2008 2:03 pm
Location: Sydney

Post by Mark McLean » Sun Jan 11, 2009 7:21 am

Great work Bob. The Coco is stunning even before it has any finish. I am getting lots of tips from watching you work. Thanks so much for taking the time to share it.

Any problems from the Cocobolo dust yet - a bit of a cough, tight in the chest? I got that just from sanding bindings and a peghead veneer but I didn't recognize what was doing it to me at the time. When I used it a second time for my current build and got some in the eye I really got the message. It is surgical mask and gloves for me from now on when handling this stuff. I read on one of the forums about a guy who was sanding cocobolo and then went for a leak and managed to rub some coco-dust on his old-fella. Very nasty outcome. I assume the reaction is individual, and hopefully you are not the sensitive type (in that kind of way).

Mark

Hesh1956
Blackwood
Posts: 1420
Joined: Thu Sep 27, 2007 9:58 am

Post by Hesh1956 » Mon Jan 12, 2009 12:08 am

Bob bro the guitar is looking great!!! :cl :cl :cl :cl :cl

I learned a tip from Mario for flattening the sides that worked very well for me. After the overhang is cut off use the largest bearing in your binding router bit set and cut a shallow "pre-binding" channel.

This shallow channel takes the top and back plates out of play when leveling the sides and makes the leveling job go twice as fast. The other benefit is that when you go to cut the final binding channels you are removing less material now with less risk of something untoward.... happening.

seeaxe
Blackwood
Posts: 768
Joined: Thu Dec 18, 2008 7:20 pm
Location: Auckland NZ

Post by seeaxe » Mon Jan 12, 2009 5:50 pm

Hi Bob, this is fascinating to read.

As others have said you can pick up so much from seeing how others do things. I am in the planning stages for the next one and looknig at yours anfd others have been able to add lots of good ideas, thanks a lot for that.

Can I ask you about the jig you are holding the guitar in when you were sanding the sides level - its looks like pipe clamps but they dont apperat o be tightened?

I put the box in my ordinary woodwork vice, with packers, but was a bit nervous as the contact area was relatively small - is there a better way?

Cheers
Richard
Richard

User avatar
Allen
Blackwood
Posts: 5252
Joined: Thu Oct 11, 2007 5:39 pm
Location: Cairns, Australia
Contact:

Post by Allen » Mon Jan 12, 2009 6:42 pm

The pipe clamp vise is an idea thats been around for a while. I first saw them on Kathy Matsushita's web site.

You have a couple of pieces of ply with holes drilled for the pipe to slide through. I line the ply with some high density foam, so to make it work, you slide the guitar between the two pieces of ply and snug up the clamp. Works a treat.
Allen R. McFarlen
https://www.brguitars.com
Facebook
Cairns, Australia

seeaxe
Blackwood
Posts: 768
Joined: Thu Dec 18, 2008 7:20 pm
Location: Auckland NZ

Post by seeaxe » Mon Jan 12, 2009 7:33 pm

Thanks Allen, After I posted the question I did a search on the archive and eventaully found a picture of a clamp on an old thred, I think it might have been yours.

I guess I should done that first!! Thanks anyway

Cheers
Richard
Richard

User avatar
Kim
Admin
Posts: 4376
Joined: Wed Sep 26, 2007 8:32 pm
Location: South of Perth WA

Post by Kim » Mon Jan 12, 2009 9:07 pm

Great looking build Bob,

I think I remember that top, stiff as a sheet of glass and all that winter growth, it very nearly stayed in WA........:wink:

And, if I recall correctly, I dished another out that was very similar to Allen Mc. Is that right Al??

Good thing is I also kept one of them for me, but then I also kept some of those cleaner looking white adi tops with the really wide grain which ring like a bell, truth is all that adi from the group buy was pretty good stuff and with that, a special thanks Steve Roberson of Colonial Tonewoods 8)

Cheers

Kim

User avatar
Bob Connor
Admin
Posts: 3132
Joined: Mon Jul 09, 2007 9:43 pm
Location: Geelong, Australia
Contact:

Post by Bob Connor » Mon Jan 12, 2009 9:54 pm

That's one of Uncle Bob's tops Kim.

The one you are thinking of has gone on a Tiger Myrtle OM for Tony O'Neill.
Bob, Geelong
_______________________________________

Mainwaring and Connor Guitars

User avatar
Bob Connor
Admin
Posts: 3132
Joined: Mon Jul 09, 2007 9:43 pm
Location: Geelong, Australia
Contact:

Post by Bob Connor » Tue Feb 03, 2009 9:09 pm

Things have been on the backburner for the last couple of weeks.
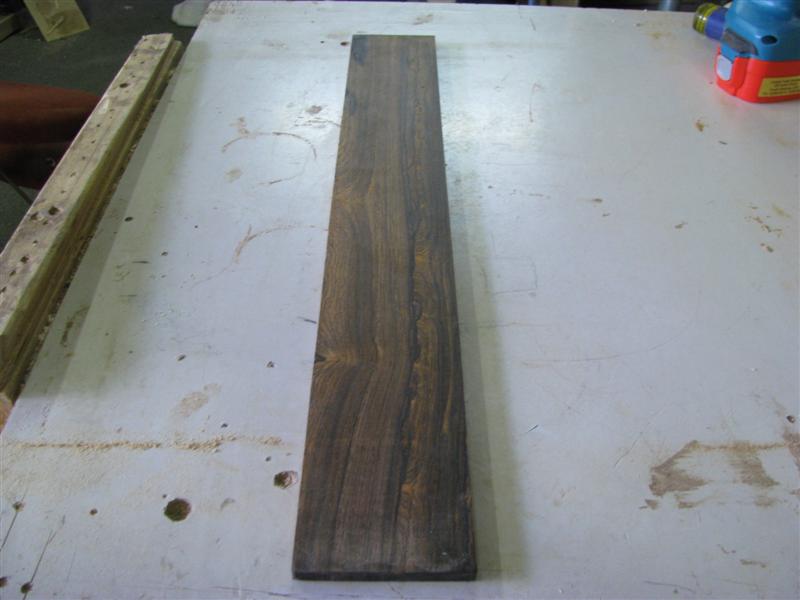
I spent a week in Tasmania getting more wood and got back into this last weekend.

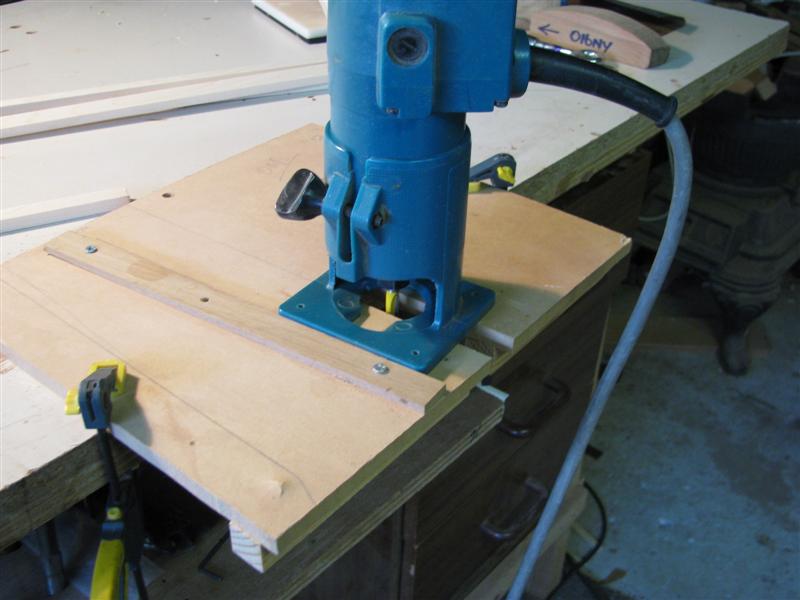
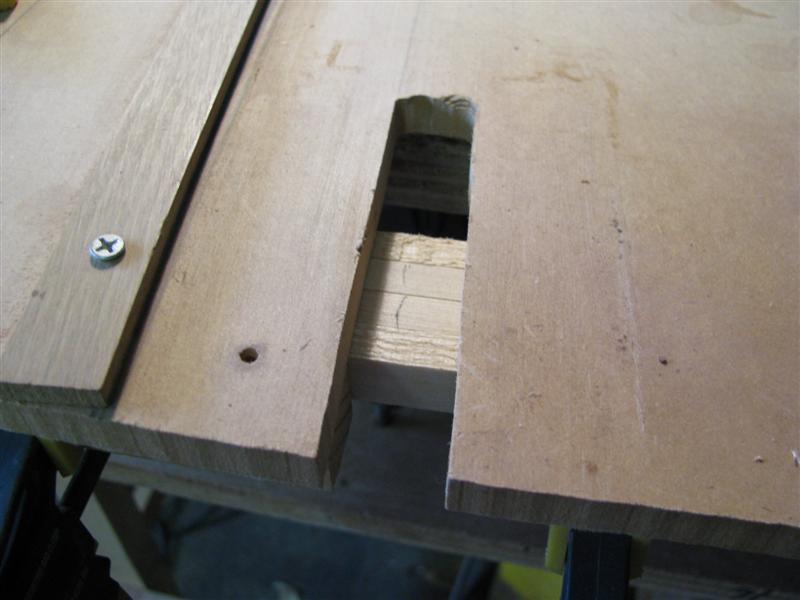
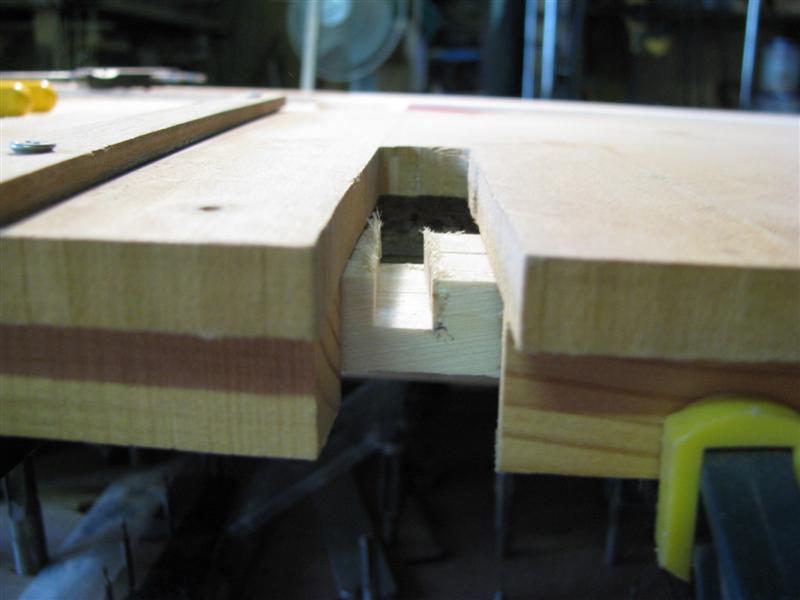
The binding channels were cut before I went to Tassie.

I use the StewMac Tru Channel binding jig with the StewMac router bit set.

Two gripes I have about this set up are:

The donut is not quite wide enough if you wantt to cut a wide purfling channel first (herringbone, for instance) and the router bit guide is not quite deep enough if you want to install reasonably deep bindings.

Other than that if you are aware of the limitations it works reasonably well.

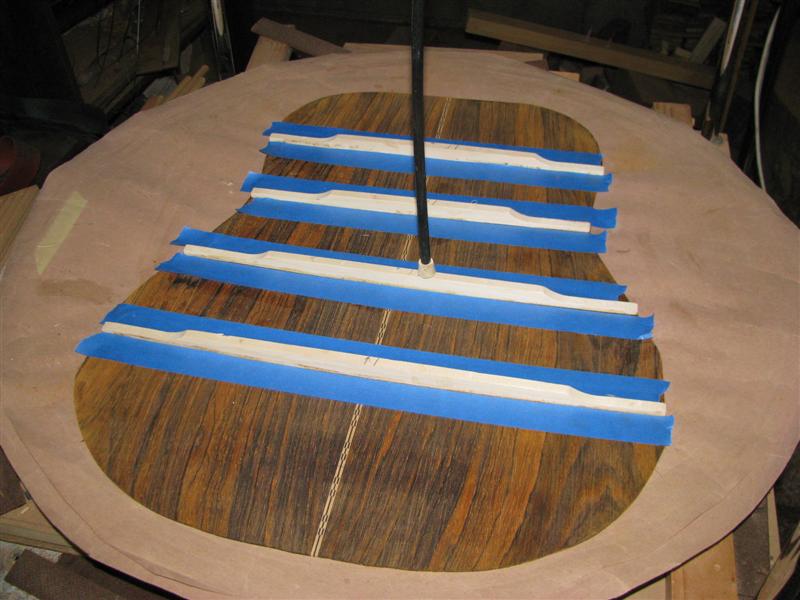
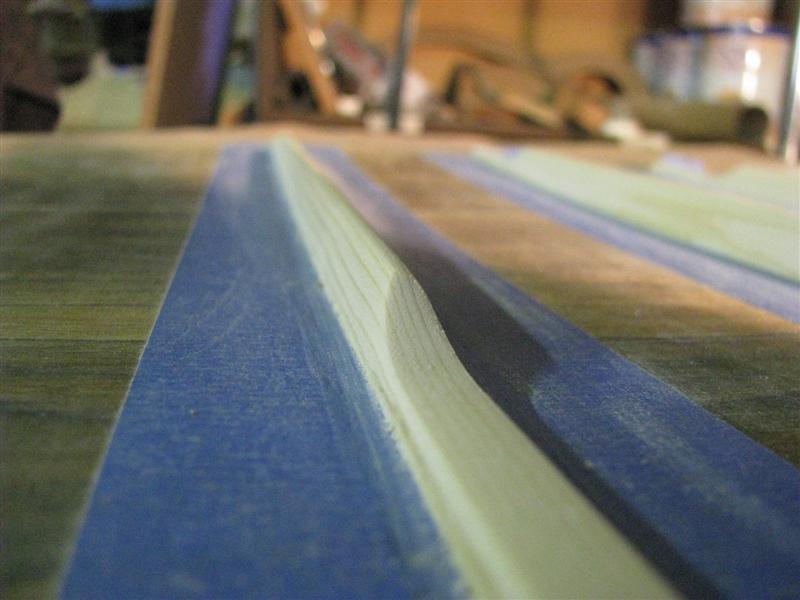
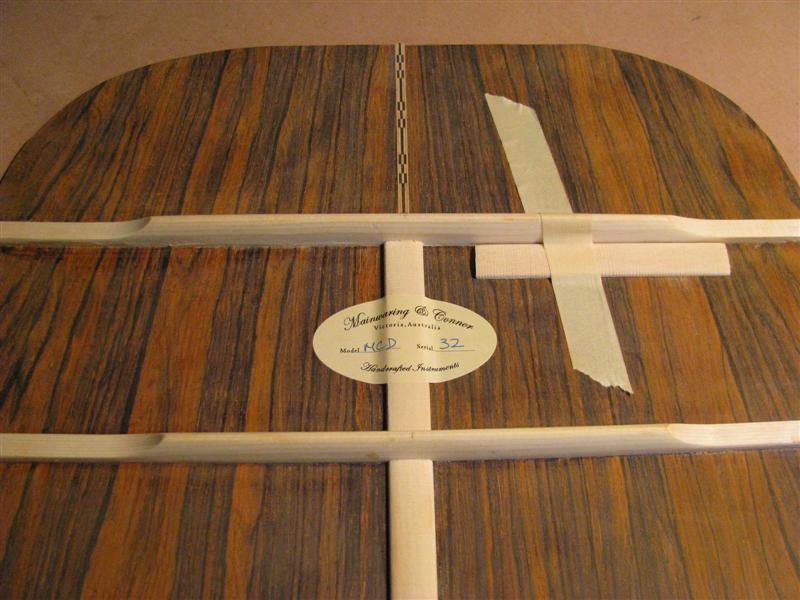
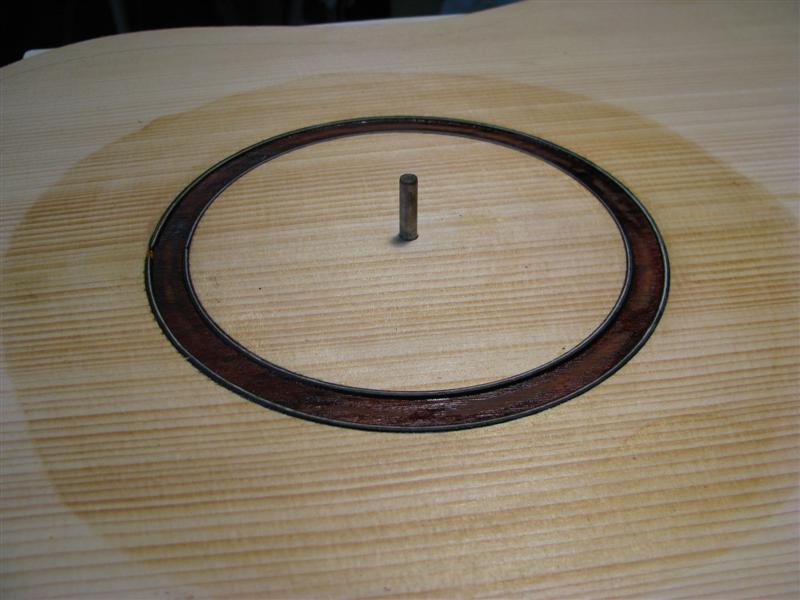
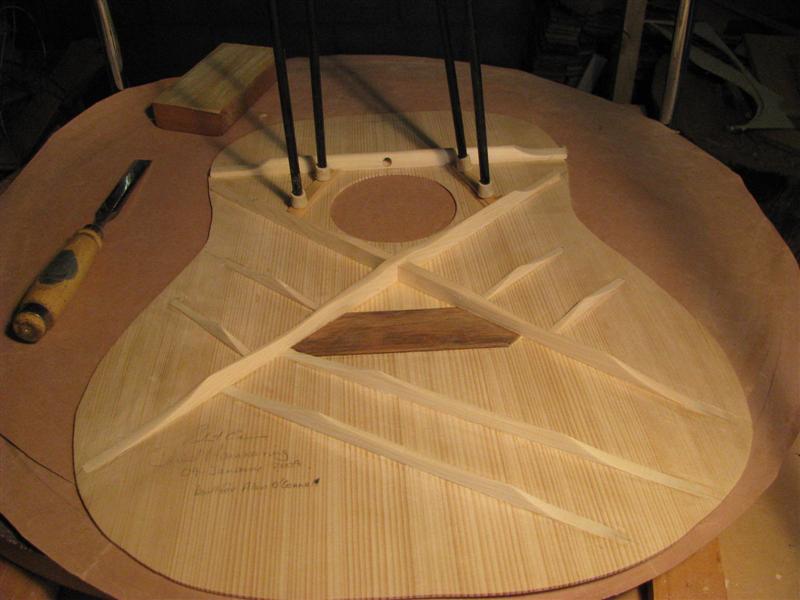
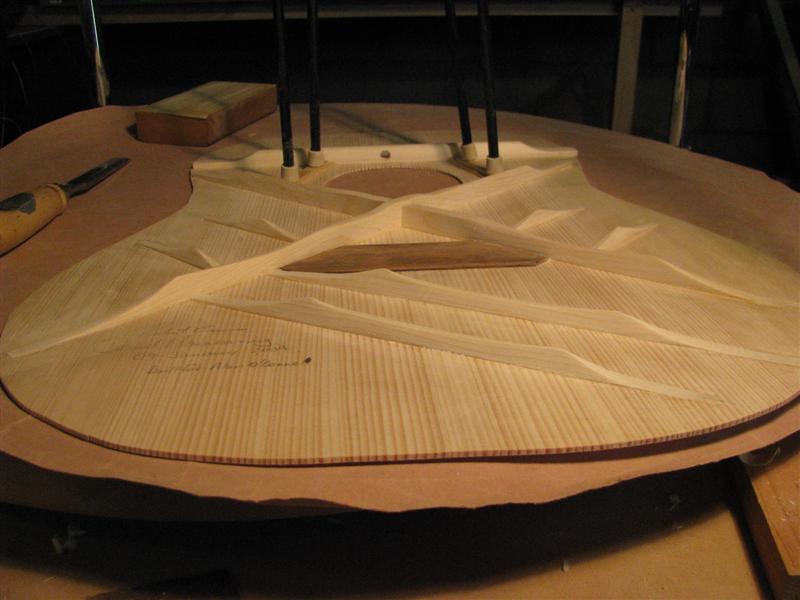
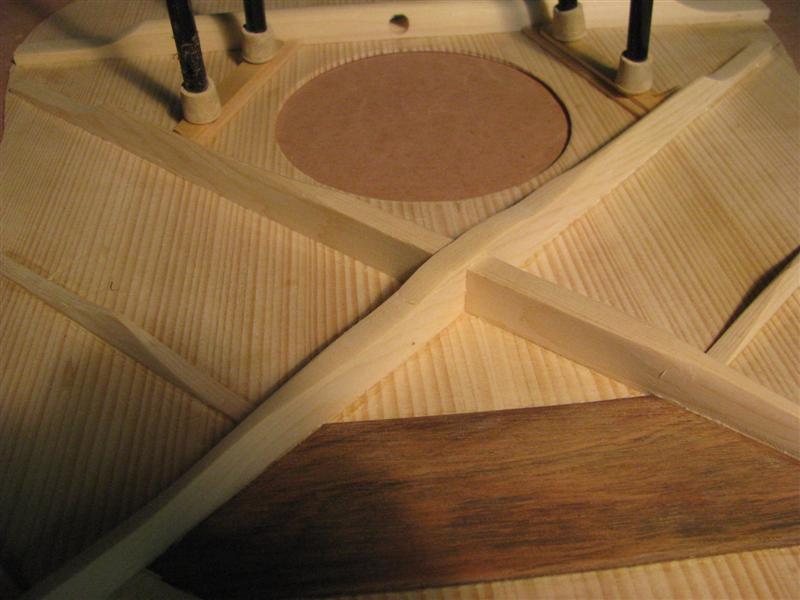
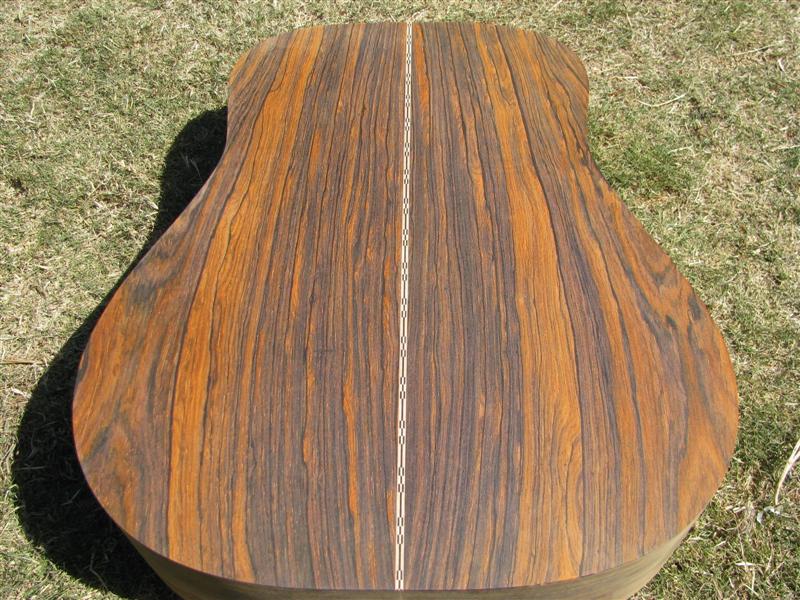
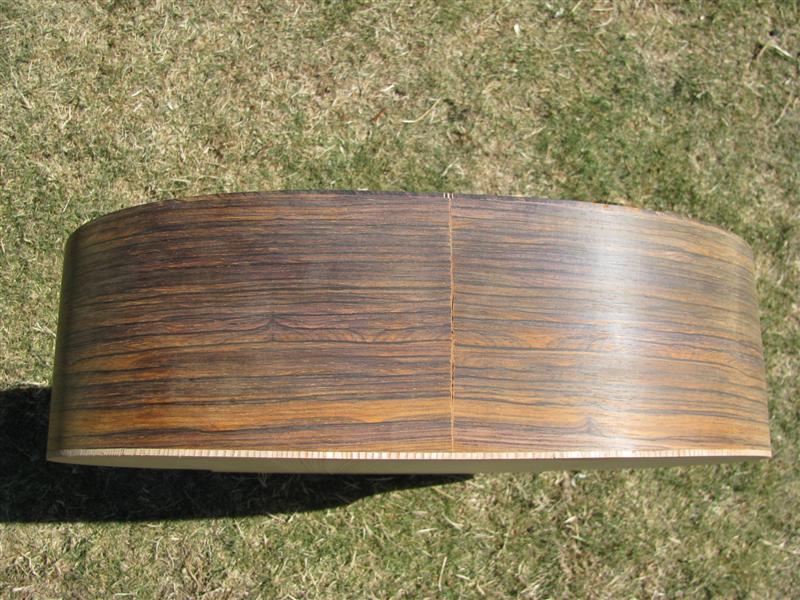
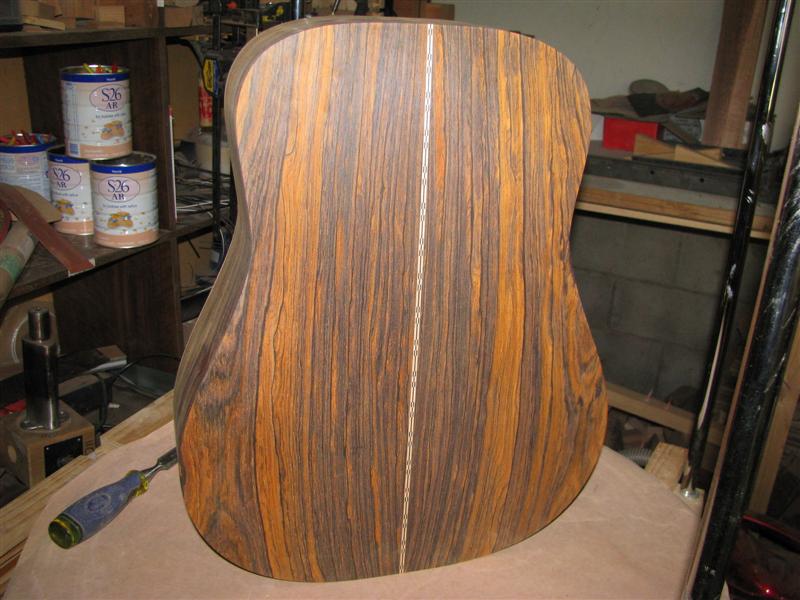
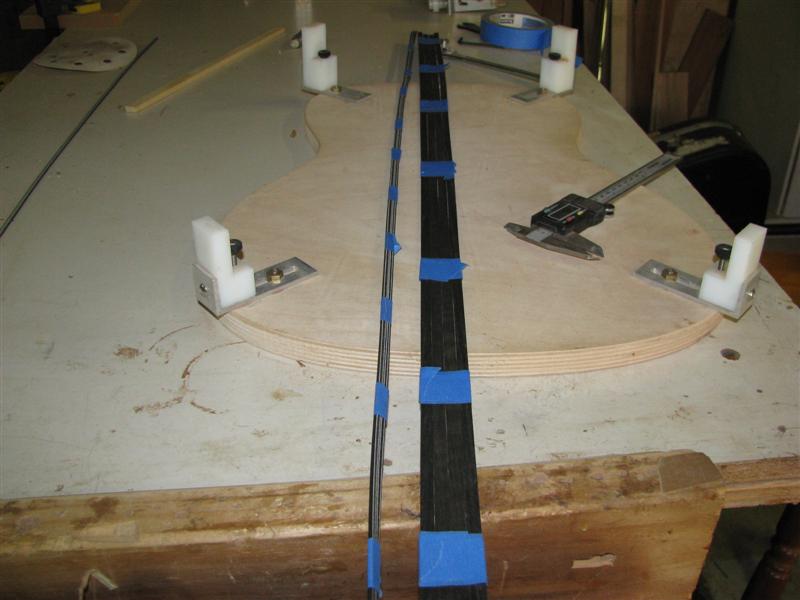
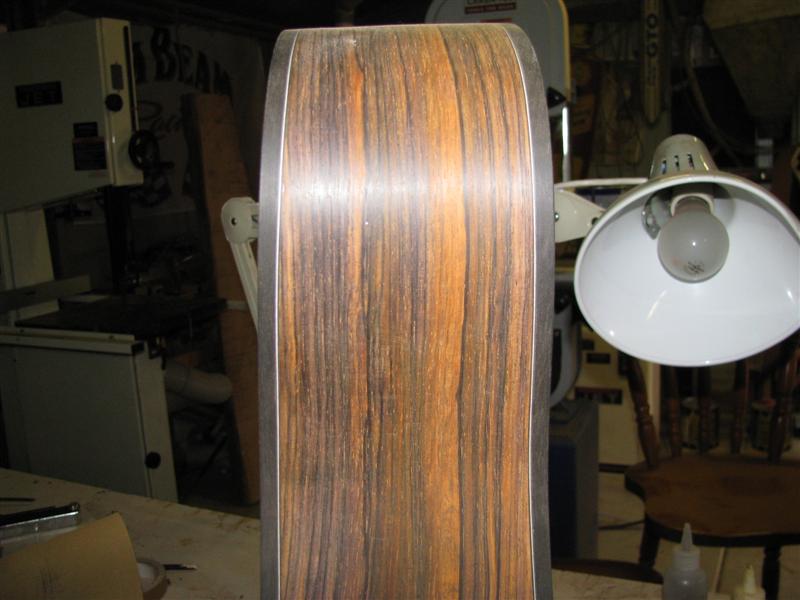
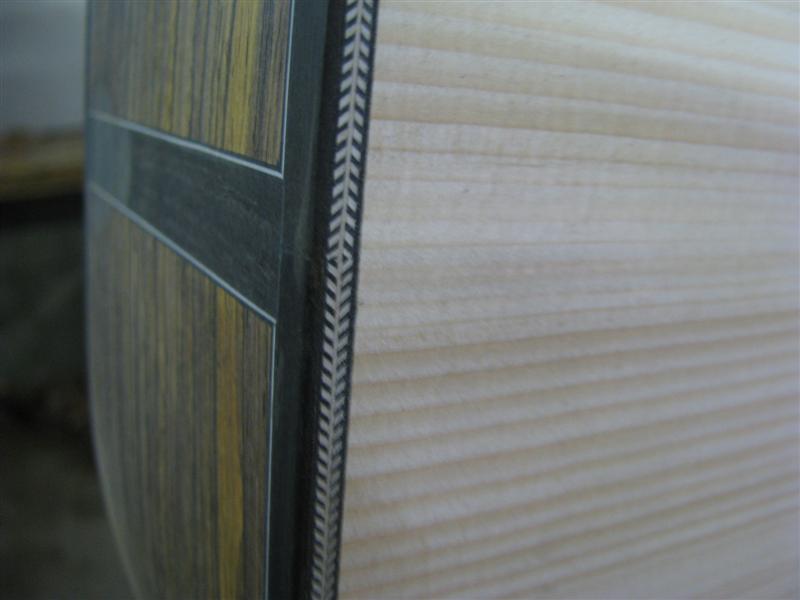
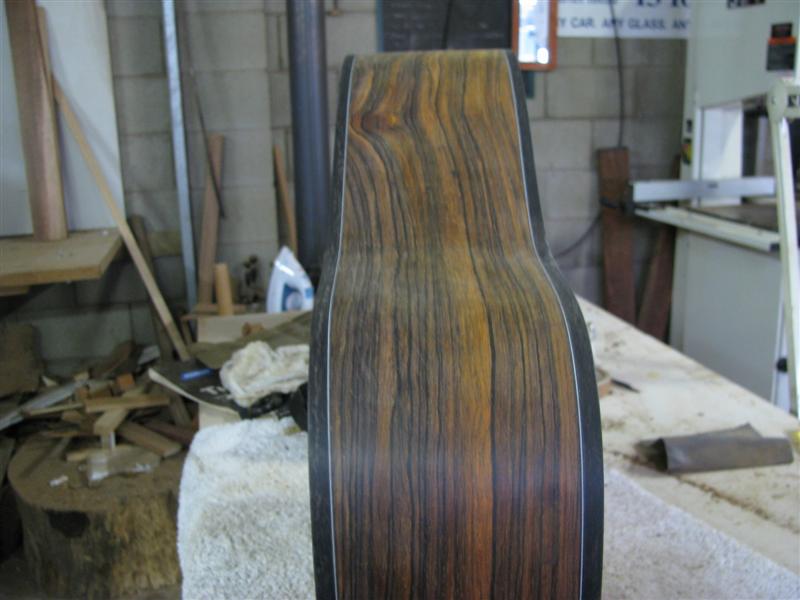
This Dread is getting Ebony bindings with a BWB purfling scheme and Herringbone on the top.

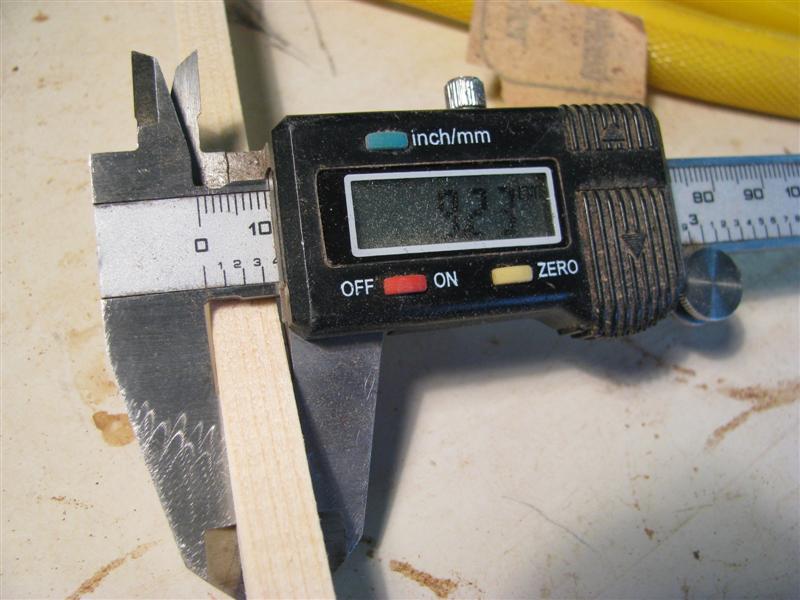
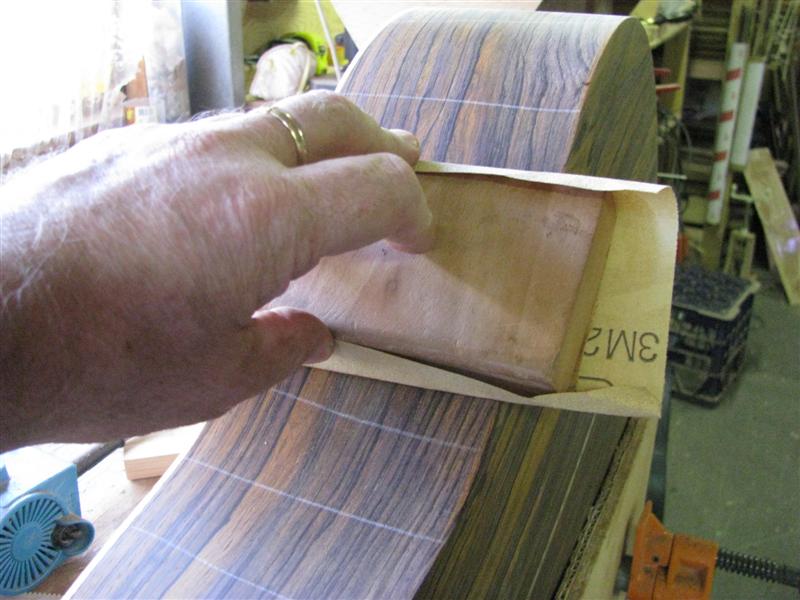
I bend the binding and the side purflings in the bender before installation.
I do the same with the Herringbone and will usually do about 6 at a time just so they will stack together and bend without twisting.

Image

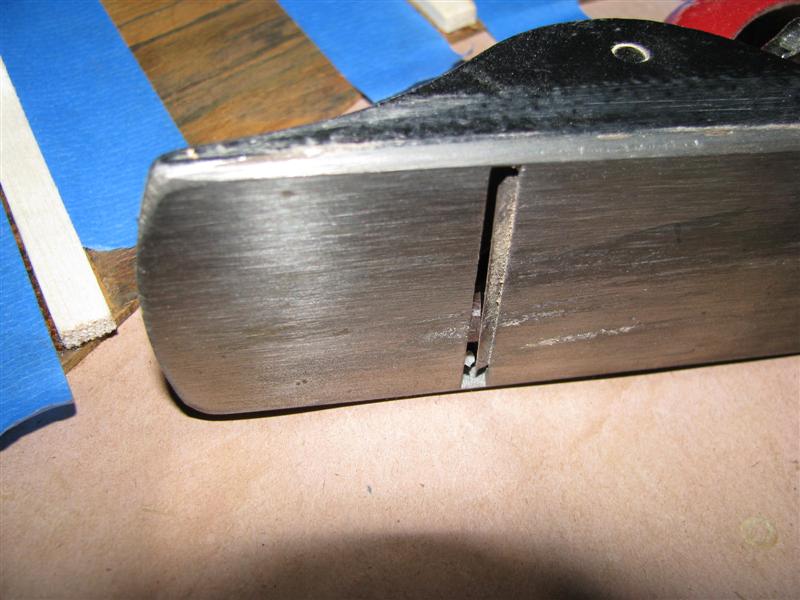
I didn't take any pics of the binding channel cutting because things usually get a bit stressful at this point and the camera is the last thing on my mind. Robbie O'Briens vids do it exactly how I do so we'll use them as a reference.

Image

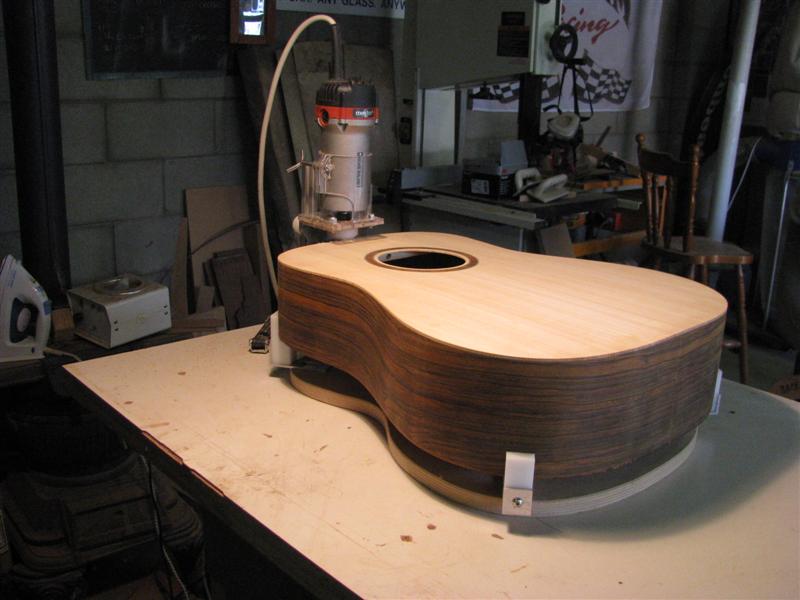
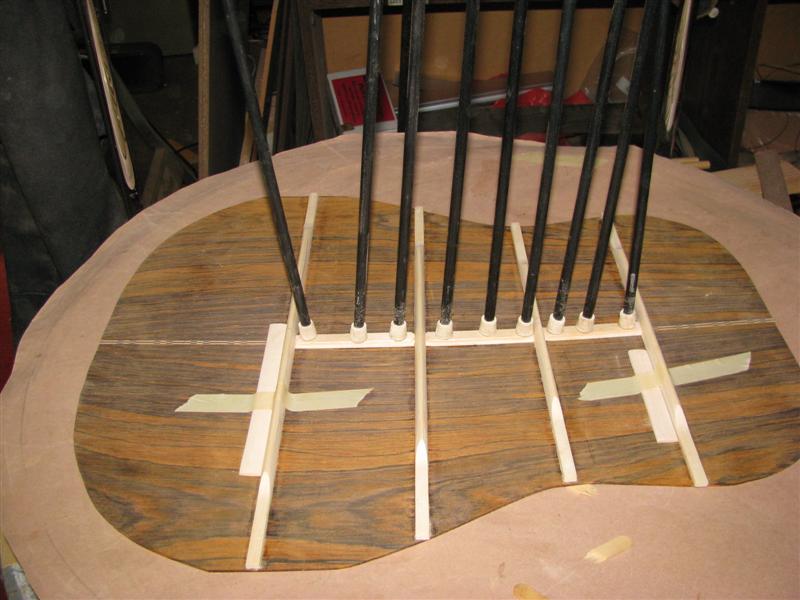
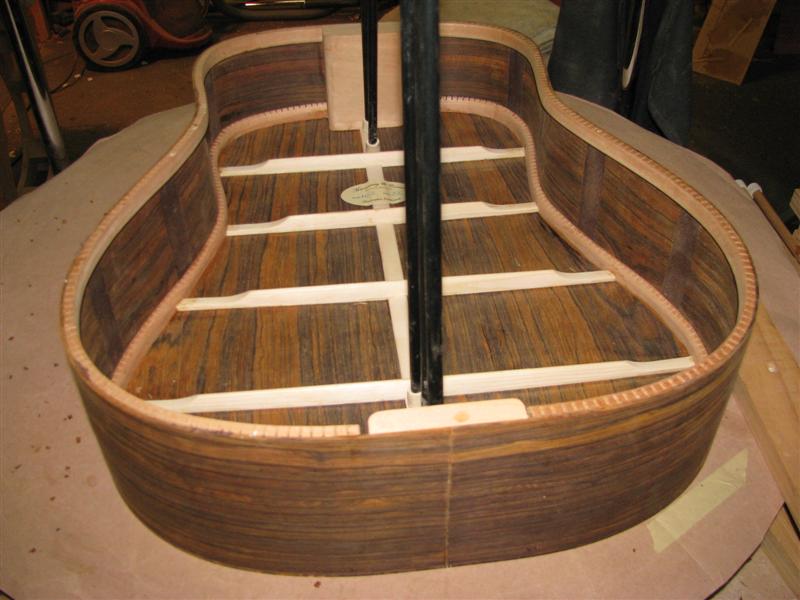
Here's a few pics of the finished product. One of my favorite parts of building is seeing the guitar in the white. It's here that you can see if your design elements are working harmoniously.

Image

Image

Image

Image

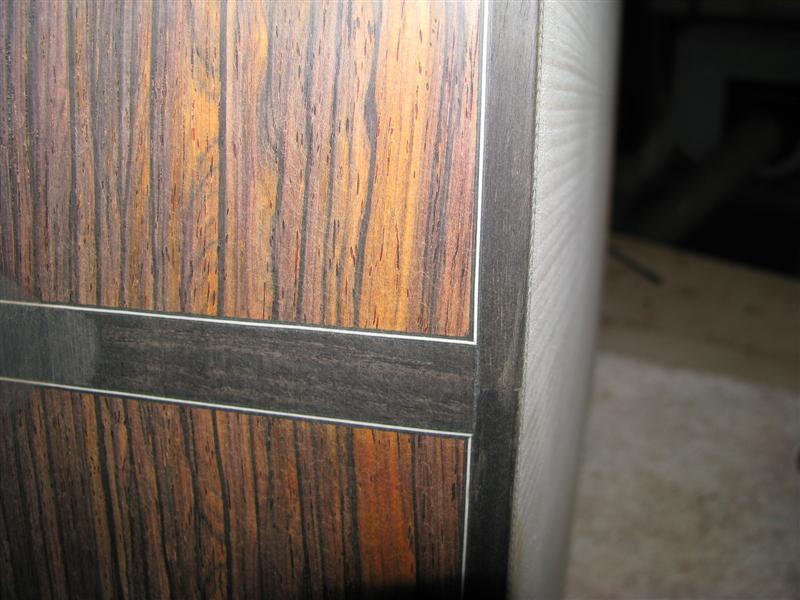
the next step is pore filling for which I use Z-Poxy. After Kim's reaction to this stuff I take a few more precautions which include respirator, gloves, and fan to blow fumes away.

I use an old credit card to mash the z-poxy into the pores on a 45 degree angle and then squeegee it of with the credit card. Then sand back with 220 grit. I'll probably re-apply it 2 or 3 times before I'm satisfied the pores are completely filled. Hesh has done a great tutorial on using Z-poxy over at the OLF. You can find it here
Hesh's Z-Poxy Tutorial

I do it exactly as he describes.

Image

Image

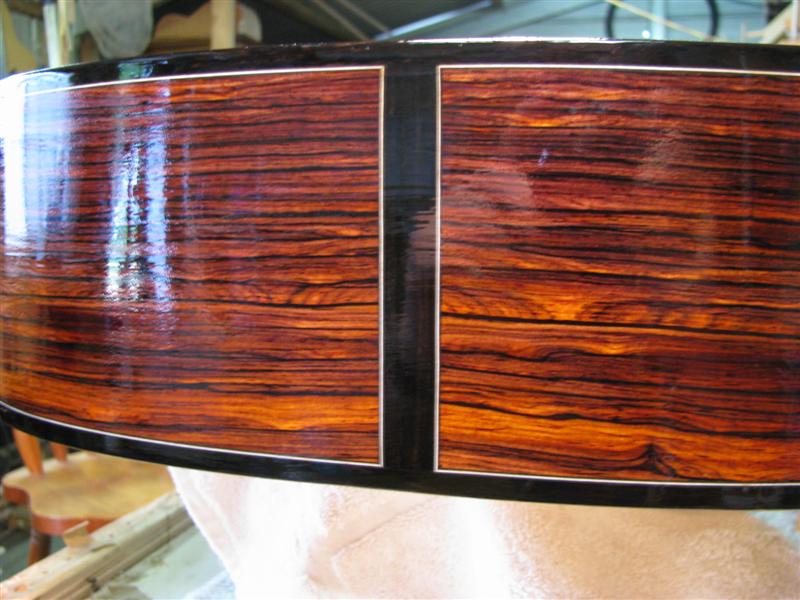
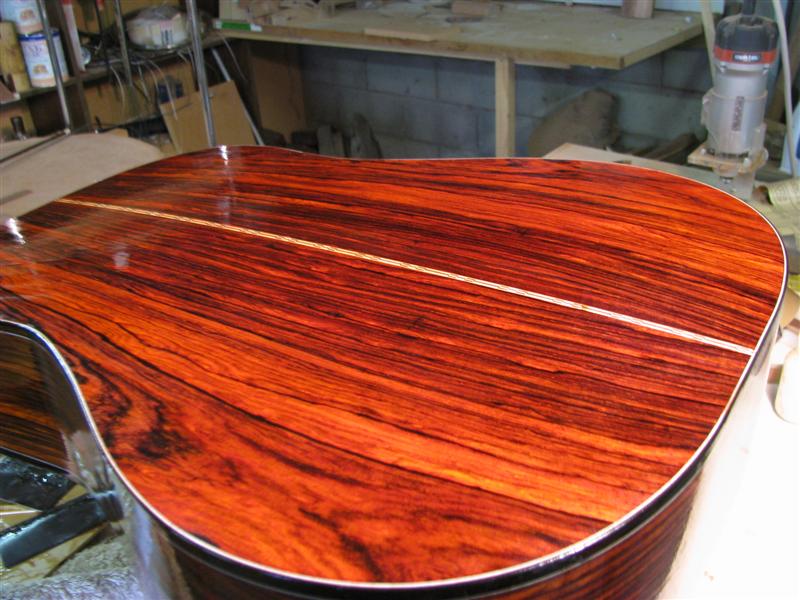
The Z-poxy really pops the grain. this Coco is going to look really nice under finish.

I know a few of you bought some of this in the group buy. You won't be disappointed working with it.
Bob, Geelong
_______________________________________

Mainwaring and Connor Guitars

Pete Brown
Blackwood
Posts: 115
Joined: Tue Dec 09, 2008 1:15 pm

Post by Pete Brown » Tue Feb 03, 2009 9:28 pm

Nice work and a great thread Bob. I look forward to seeing the end result.

There seem to be differing views as to whether it's a good idea to wipe down the oilier species like cocobolo with acetone prior to glueing. Some feel it's actually counter-productive and brings fresh oil to the surface, while others recommend it provided you glue up soon afterwards.

What's your rule-of-thumb and experience as you work on this guitar?

User avatar
Bob Connor
Admin
Posts: 3132
Joined: Mon Jul 09, 2007 9:43 pm
Location: Geelong, Australia
Contact:

Post by Bob Connor » Tue Feb 03, 2009 9:30 pm

I'm avoiding Acetone and just glueing freshly prepared surfaces.
Bob, Geelong
_______________________________________

Mainwaring and Connor Guitars

Pete Brown
Blackwood
Posts: 115
Joined: Tue Dec 09, 2008 1:15 pm

Post by Pete Brown » Tue Feb 03, 2009 9:38 pm

I'm avoiding Acetone and just glueing freshly prepared surfaces.
Bob, just to clarify, if I was gluing linings to sides which were bent and sanded some days or weeks earlier, you'd give the inner face of the sides a quick scuff sand immediately before gluing?

User avatar
Bob Connor
Admin
Posts: 3132
Joined: Mon Jul 09, 2007 9:43 pm
Location: Geelong, Australia
Contact:

Post by Bob Connor » Tue Feb 03, 2009 9:44 pm

Pete Brown wrote:
I'm avoiding Acetone and just glueing freshly prepared surfaces.
Bob, just to clarify, if I was gluing linings to sides which were bent and sanded some days or weeks earlier, you'd give the inner face of the sides a quick scuff sand immediately before gluing?
Correct.
Bob, Geelong
_______________________________________

Mainwaring and Connor Guitars

Runn3r
Myrtle
Posts: 58
Joined: Mon Jan 26, 2009 11:08 am

Post by Runn3r » Tue Feb 03, 2009 10:54 pm

awesome thread bob! :git

i have never built an acoustic before and this well documented thread sure is inspiring

and the cocobolo looks beautiful but i had hoped it would not require some sort of finish to bring the red out the way your finised coco has

i have been contemplating a one piece no truss rod cocbolo strat neck because its stiffness is quite legendary heh

wht do you reckon bob? will the coco neck budge under typical 10's standard pitch tension? or will the lack of a trussrod be a bad move for a coco neck?

Post Reply

Who is online

Users browsing this forum: No registered users and 311 guests