Project PIG the F1-11 'Matey'

Talk about musical instrument construction, setup and repair.

Moderators: kiwigeo, Jeremy D

User avatar
Kim
Admin
Posts: 4372
Joined: Wed Sep 26, 2007 8:32 pm
Location: South of Perth WA

Post by Kim » Mon Aug 31, 2009 12:44 am

Thanks John and Dennis,

John,

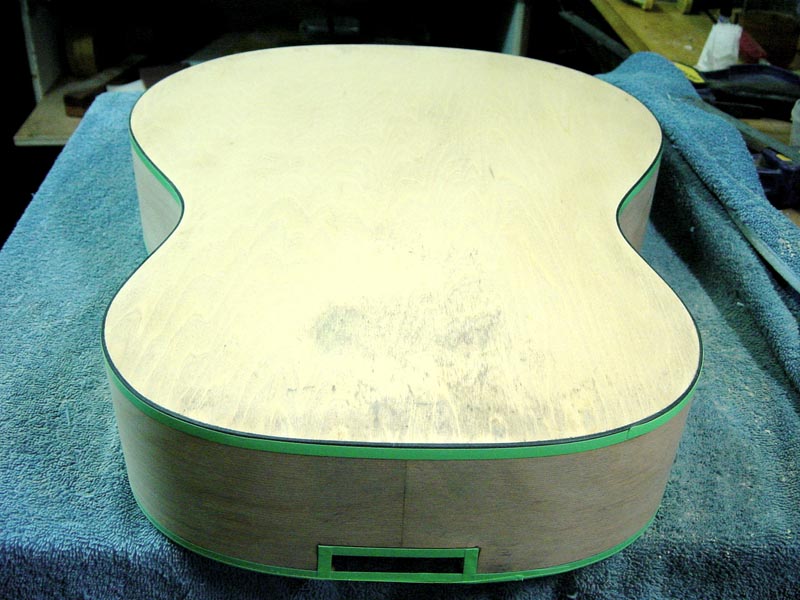
The ICUT beam would no doubt weigh a 'little' more than the Durian brace originally fitted to the guitar however its of a similar dimension so there would not be that much in it. At the end of the day this brace not only replaces a standard UTB on a traditionally braced guitar, but also a more substantial neck block, and a neck heel as well, so I don't feel that weight is really a factor here.

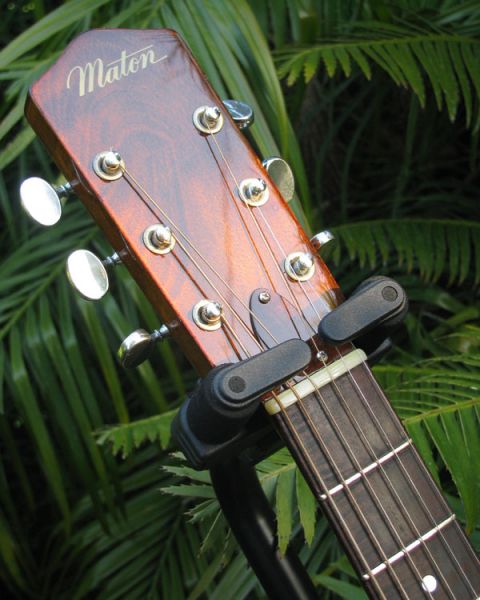
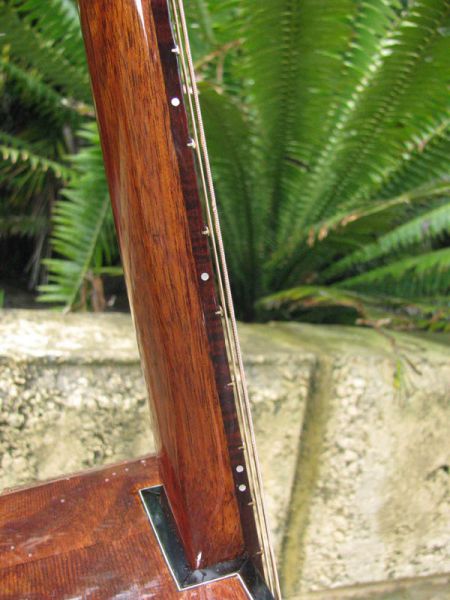
One thing I will add is that at 3/4" or 19mm, this guitar had a ridiculously thick headstock. I did shave a little over a 1/16th from the back to thin it out a little and clean it up but could not take much more because to do so would have exposed too much of the capstans on the machines. Couple that with the fact that the machines themselves are quite heavy as they are solid steel, this thing was really over balanced toward the neck so the addition of some weight in the body, especially at the tail block was most welcome.

We move on...

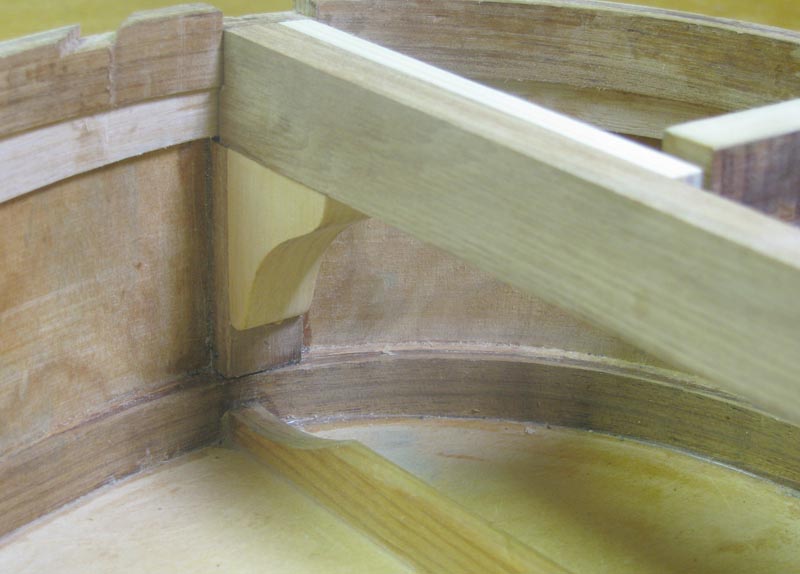
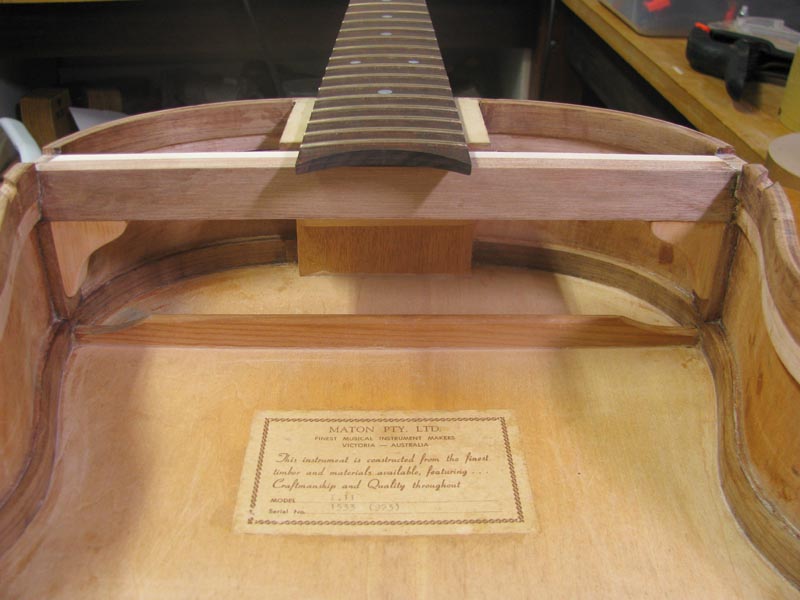
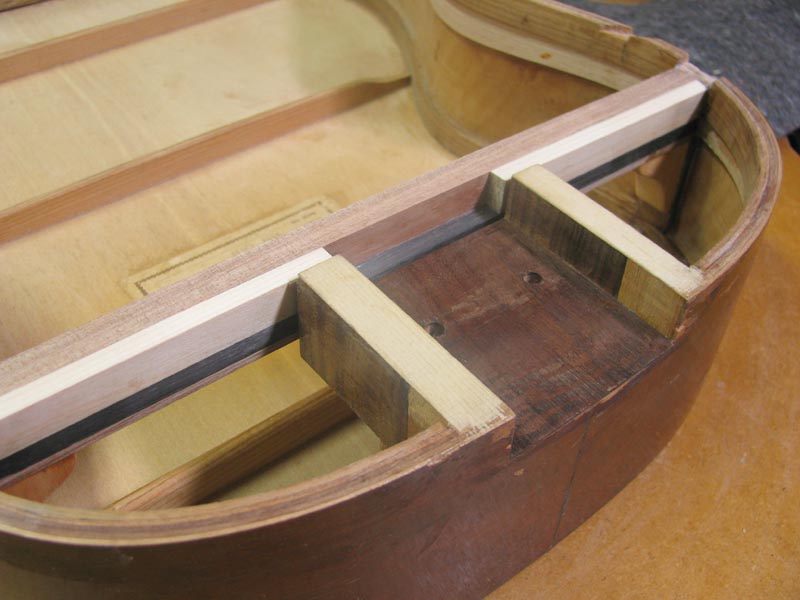
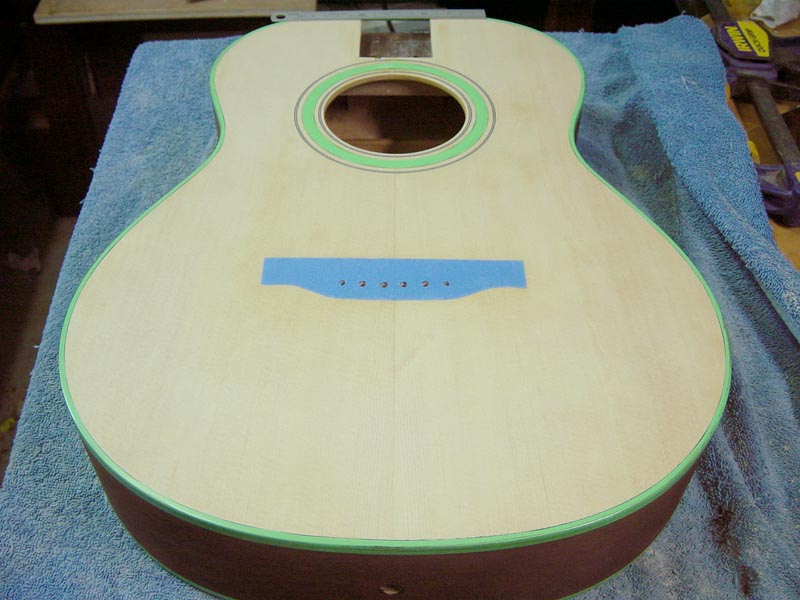
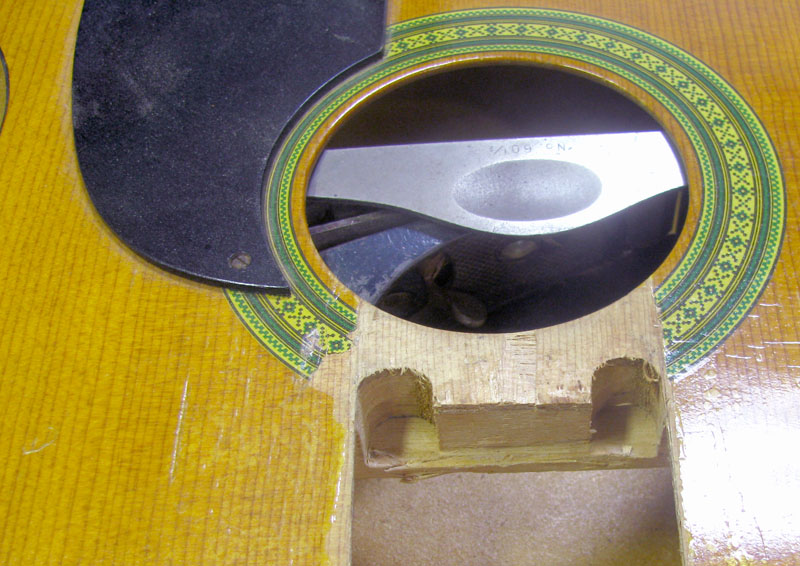
This was all going along swimmingly but before I could fix the ICUT beam permanently into place, I had to know that I had the angle at the base of the neck block extension 'fairly' close to where it need to be. This meant that the now braced top, (minus the thin spruce transverse plate which is shown in the above images but was actually fitted last) had to be let into the sides. This would allow me to clamp the top in place and run a straight-edge along the neck surface to see where it sat in relation to the bridge position and then adjust accordingly.

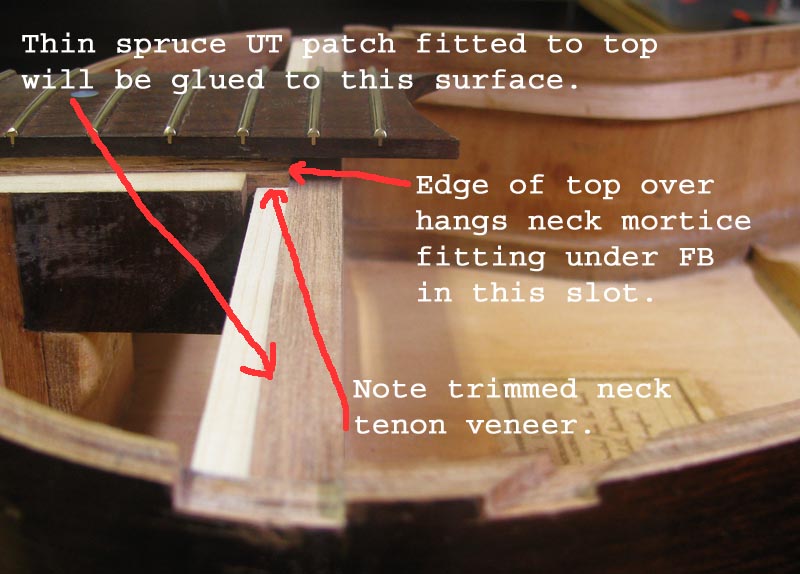
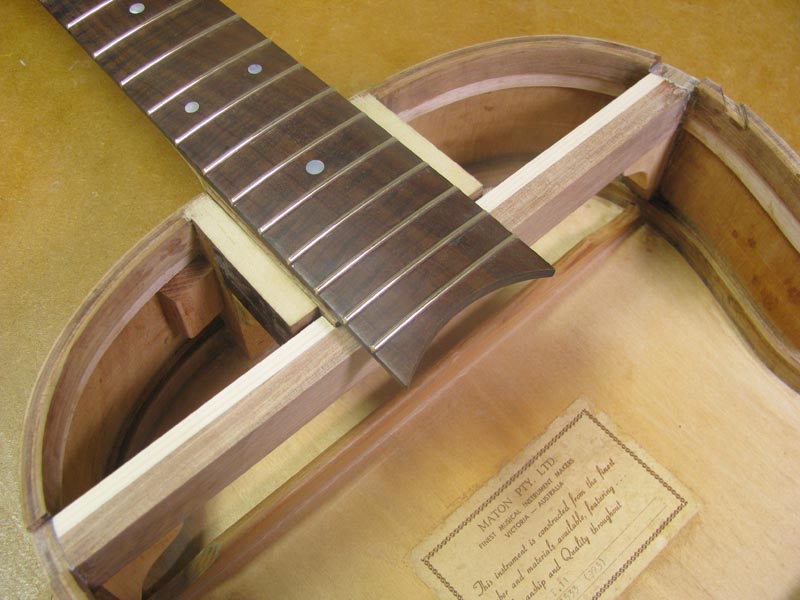
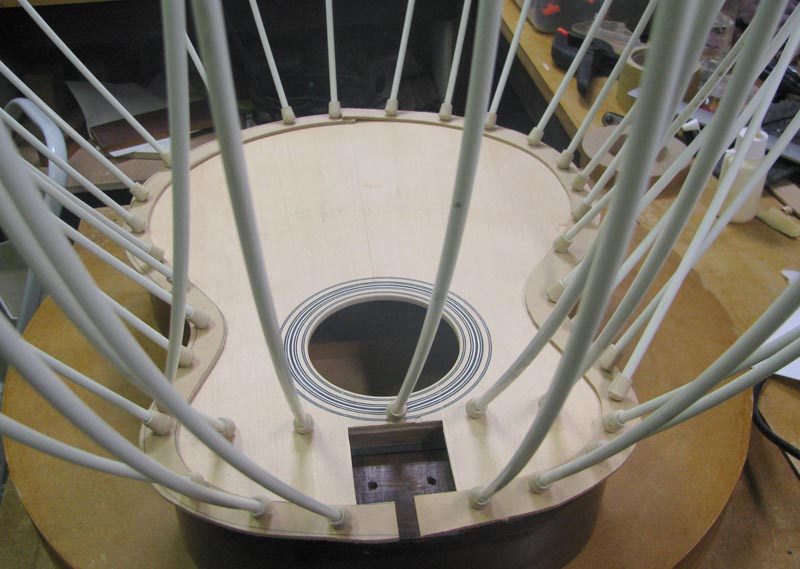
This done it was time to get serious about the set up. I had already trimmed down the height of the veneers fitted to the side of the neck tenon so they could easily slide 'under' the lower surface of the top with a good bit of clearance. Now the ready fretted fretboard had to be glued onto the neck so that I could work out the fit between the upper surface of the top and the underside of the fretboard, any gaps here would look pretty shoddy and give the game away.

Fitting a fretboard to a neck blank is normally a pretty straight forward affair, but remember, the neck shaft on the pig is already shaped as too is the fretboard so there is no room for error. The way I approach this is to make a template of the FB. I do this by simply tracing around the fretboard on to some thin ply, and then carefully cutting out the ply to the line, and then sanding just past the line so I have an exact replica and the neck face and FB face is marked.


Image


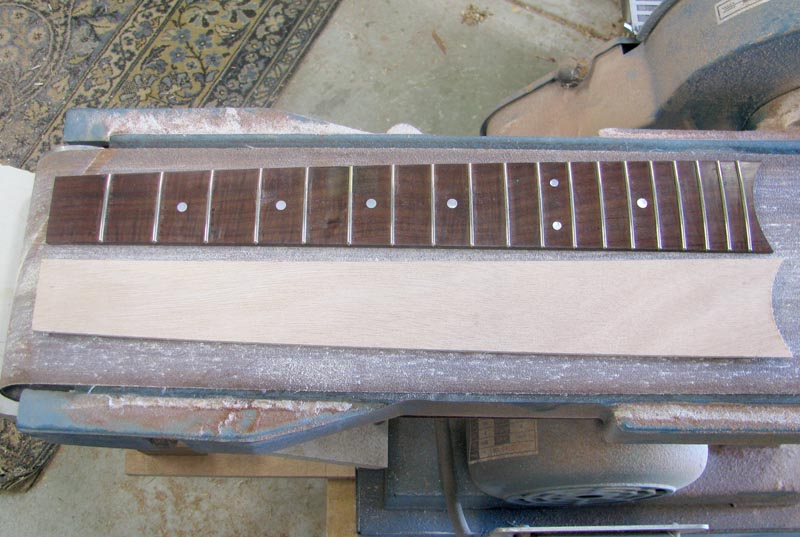
The replica is then fitted to the neck with the neck side down so it is exactly where it would need to be if it where the real FB, in this case with the nut end to a line representing the back of the nut, and the 13th fret position lining up with a corresponding mark on the neck blank. Once happy with the alignment, two shallow holes are drilled through the template and into the fretboard surface of the neck. The template is then carefully lifted from the neck surface and the FB side is then fitted to the fretboard and two more very shallow holes are drilled using the holes in the template as a guide. Dowels or pins which match the diameter of the holes are inserted into the neck, non water based glue is applied to avoid creating movement in the wood, the locator pins are aligned with their respective holes, and the joint is clamped.

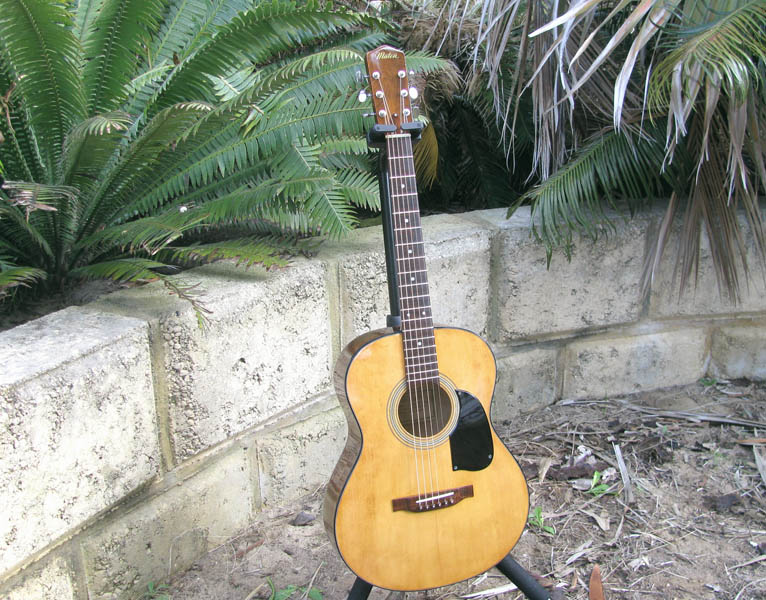
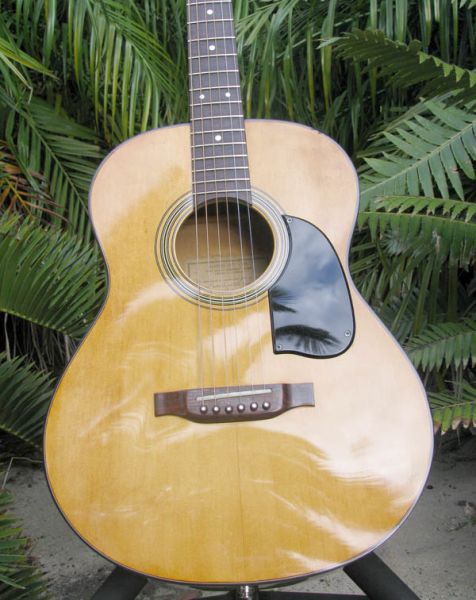
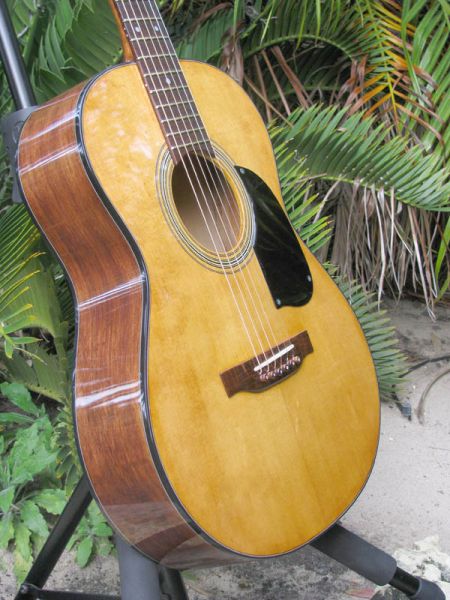
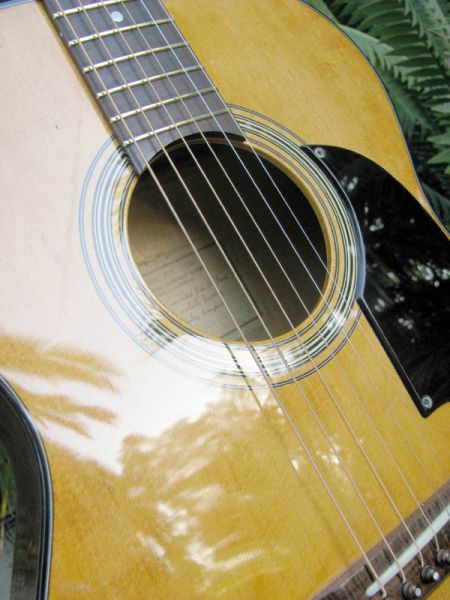
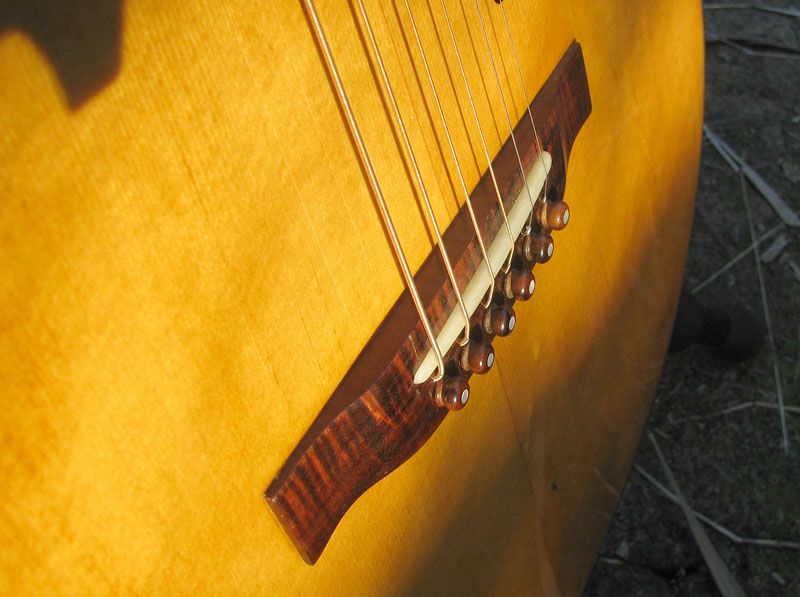
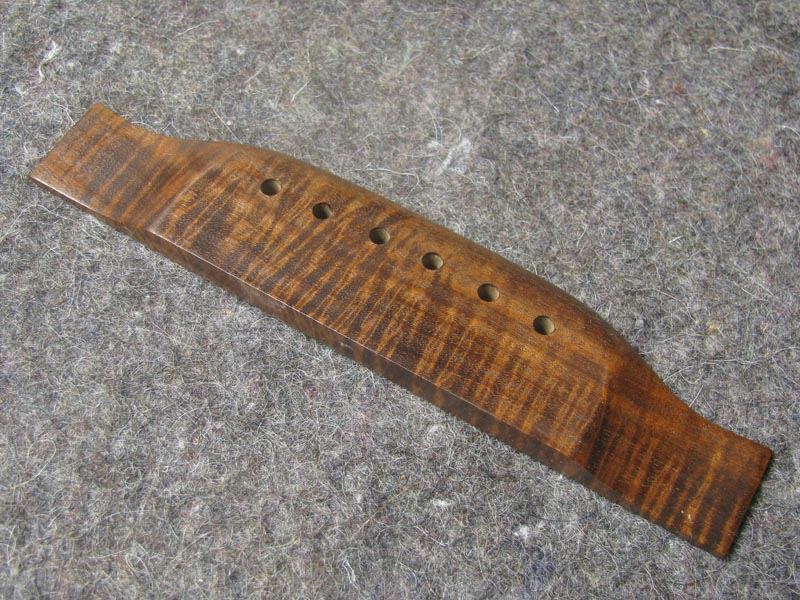
With the fretboard now done the only other thing needed to finit the neck angle is a bridge. Once again I used Western Mayall for this component and did not venture too far from a standard Martin looking belly bridge so I could keep that traditional sort of look.


Image


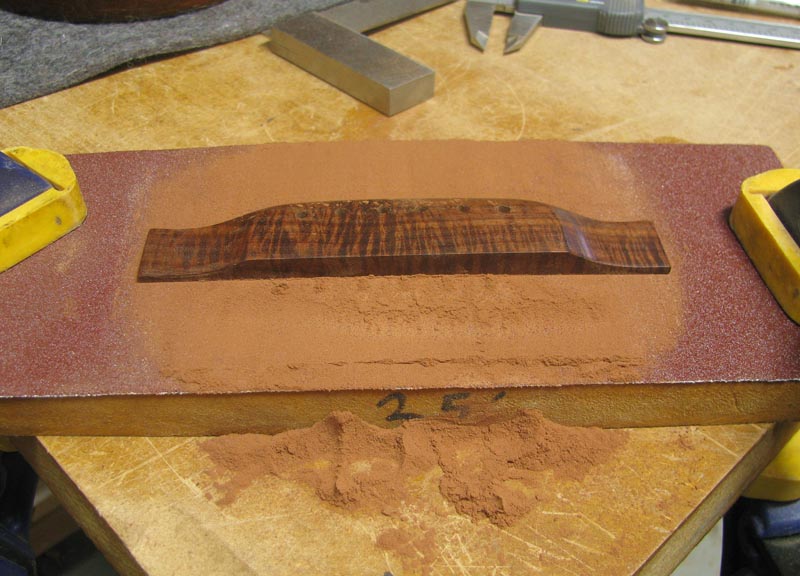
Once I had the bridge shaped and looking about right, it was then a matter of putting a radius on the bottom to match the guitar's top. The way I do this is simple. I hog off the worst of the wood with the belt sander being careful not to go too far, and then use a 25' dome sanding board to finish the job. I make the sanding dome out of MDF and shape it in the 25' radius sanding dish. I also shape the inside gluing caul for fitting the bridge using the same method. These dishes and a gobar deck are the roo's shoes and no guitar building workshop should be without them IMO.


Image


More soon...
Last edited by Kim on Sat Sep 05, 2009 10:27 am, edited 1 time in total.

User avatar
Kim
Admin
Posts: 4372
Joined: Wed Sep 26, 2007 8:32 pm
Location: South of Perth WA

Post by Kim » Mon Aug 31, 2009 4:25 pm

I won't bore you with the neck on, neck off, top on, top off detail of the trial and error process which led to the final setting of the neck angle but it was not too difficult to achieve with a straigtedge, and a wide flat sanding stick applied to the base of the neck mortice as required.

Once this was sorted, the entry for the neck tenon into the mortice had to be adjusted to ensure it did not bind yet left no gaps. This was done by trimming the tenon veneers as already explained, but also by sanding the top which had been left purposely thicker in the upper bout region to allow for this adjustment. What I was looking for was a smooth sliding fit to the sides of the tenon and, to allow for finish, a slightly loose fit between the underside of the fretboard and the guitar's top


Image


When completely confident with this arrangement it was time to glue the ICUT beam permanently in place and this was done by first shaping and gluing vertical struts to the sides of the upper bout which sat between the solid linings at the top and bottom and directly over the UTB already in position on the back of the guitar. Once again the biggest challenge was to ensure a good fit between the back of these struts and the curved sides of the instrument yet maintain a perpendicular face to the centre line of the roc brackets which would integrate the ICUT beam with the sides of the guitar. Once again epoxy was the glue of choice.


Image


Now, before too much criticism is draw toward the substantial nature of the ICUT beam, it is worth remembering that it is in fact only 19mm tall which is the same as the original UTB. I have only added .100" which is the thickness of the UT patch now glued to the top. The reason it may look taller than 19mm is because the sides of this guitar are probably a fair bit narrower than many would be use to seeing.

These next images show the body, minus a quick clean up, all ready to receive the top. All repairs have now been completed, the sides are very stiff and secure and the ICUT beam is positioned such that the neck can be quickly fitting and removed at will, and providing nothing moves around too much, the neck angle is now set just how I like, and with the help of the ICUT beam, should remain that way.

You may also notice an extra block has now been glued in place next to the neck block on the bass side. This will allow fitting of a strap button should it be required as there is no heel or other solid backing in the appropriate place on this guitar to accept a screw for that purpose.


Image


Image


Image


More later...

User avatar
Kim
Admin
Posts: 4372
Joined: Wed Sep 26, 2007 8:32 pm
Location: South of Perth WA

Post by Kim » Mon Aug 31, 2009 7:27 pm

Into the radius dish for support, out with the titebond and gobars and this top is on...


Image


And once the edge of the top had been flush trimmed, the binding ledges were cut, and then some nice green bindings were added to match the original green rosette transfer. 8)


Image


Very pretty don't you think....:D


More later......
Last edited by Kim on Tue Sep 01, 2009 12:02 am, edited 1 time in total.

User avatar
kiwigeo
Admin
Posts: 10778
Joined: Sat Sep 29, 2007 5:57 pm
Location: Adelaide, Sth Australia

Post by kiwigeo » Mon Aug 31, 2009 7:40 pm

WTF????

Oh no now youve lost the plot buddy.

Joe Sustaire
Myrtle
Posts: 92
Joined: Sun Nov 23, 2008 1:23 am
Location: Talihina Oklahoma
Contact:

Post by Joe Sustaire » Mon Aug 31, 2009 11:41 pm

Yeah buddy! It will also help you keep track of the git when the hour is late and you've had a few too many. :D

Joe
The only safe thing to do, is to take a chance! Mike Nichols

User avatar
Lillian
Blackwood
Posts: 1702
Joined: Fri Sep 28, 2007 10:31 pm
Location: New Mexico, USA
Contact:

Post by Lillian » Tue Sep 01, 2009 1:47 am

Interesting shade of green Kim. That's the same color as mr yuck. Something that they came up with years ago to warn kids to stay away from poisons.

Image


Now please tell me that you've taped off the bindings so you can finish it.

User avatar
Dennis Leahy
Blackwood
Posts: 872
Joined: Wed Oct 10, 2007 12:32 am
Location: Duluth, MN, US
Contact:

Post by Dennis Leahy » Tue Sep 01, 2009 4:13 am

Do I see a 'burst' in this bad boy's near future? Masking the bindings looks like a tedious job - any tips or tricks?

Oh, and the Maton label talking about "quality..." is becoming more believable by the day. As I said, it will end up to be the finest F-11 that Maton never made.

Dennis
Another damn Yank!

User avatar
Kim
Admin
Posts: 4372
Joined: Wed Sep 26, 2007 8:32 pm
Location: South of Perth WA

Post by Kim » Thu Sep 03, 2009 9:46 pm

Sorry Dennis,

No burst on this one however you are on the money, as disappointing as this may be for some to hear the green is indeed just green vinyl tape put in place to protect the purfling from stain....sorry folks, I know, I know, the green really is quite fetching.

As for application tips, the best I can offer is to keep in mind that this vinyl masking tape has a fair bit of stretch. Whilst it does need a 'little' tension to seal well along the edge, it is quite important the tension remain moderate and constant during the entire application process. It is no good stretching the shit out of this tape as you go around the outside curves of the upper and lower bouts and then trying to loosely push it into the inside curves of the waist. If you do so all you will achieve is to ensure the tape will break its own seal as it creeps back from the edge and also pulls away completely from the waist as it shrinks back longitudinally. So once again, the secret is to apply moderate and constant tension around the entire side and in one pass. This is really not that difficult to achieve once you get the feel and won't take too long once you make a start.

OK.... The damage to the original finish on this guitar had been quite extensive with so many areas of exposed wood now dirt stained that to patch and spot repair would have looked obvious and quite tacky. This meant the only acceptable solution would be to strip the guitar right back and do a complete refinish.

These next images show the guitar body now completely sanded back to bare wood and tapped off ready for staining. (Sorry folks, the image quality dropped off here due to rest of family pissing of to QLD for a holiday with the good camera and leaving me at home to look after the dog with the old bunky :( )


Image


Image


Image


Image


So as you can see the bindings and purfling have obviously been fitted and because I do that process just like everyone else there is no real point going through that again here. But because we are about to move on to the finish of this guitar and the images will be somewhat limited from here on in until the project is actually complete, there are a few points that I think I should mention.

The first will explain just one more reason why I took this project on. When I reached this point on my first guitar, I was not tooled up to spray a finish and a lack of experience limited my confidence in being able to successfully finish a guitar in nitro. I had instead opted to finish that instrument with TruOil. Now TruOil is a very good product and my guitar looked great when first completed, but those of you who got to see that instrument first hand at playmakers 09 about 1 month after it was first strung up will know that the finish had by that time started to develop some issues. These issues where due to what I now believe was the affect of AMINES (worth a read, especially page 2), a by-product of epoxy. Today the top of that guitar is still fine but other areas are a little disappointing in patches. Anyhow, the point here is that the F1-11 pig, being a guitar made up essentially of a train wreck, and bits and pieces from around the shed, provided the perfect canvas for me to try my hand at a full nitro finish instead of undertaking the same learning curve on a fully scratch built instrument. Not only that, but nitro would also be the historically correct finish to apply to this little classic. :P

This was all fine and dandy. I now had the canvas, a compressor, and a spray gun, but the truth was that I had only ever really done touch-up work with nitro by brush and had never finished a 'full' guitar or much else with a spray gun. I had cheated in the past when repairing beaters and finished full ‘areas’ of an instrument using urethane and then blending in where witness lines could more easily be hidden. I had also completely refinished a few lecies with stains and acrylic. But this had always been done with spray cans using the trick of first sitting the cans in a bath of very hot water for a while to thin the paint down and increase pressure and whilst very good results had been achieved using this method, nitro and spray guns really were new ground for me.

Also during this rebuild, I had been constantly wondering/worrying how I was going to completely refinish the guitar yet maintain a bit of 1973 mojo. I knew I would need to stain the top to give it some age because whilst the new lutz top was latte stained and had patches of runout, it still looked too new. Also I wanted to retain the original Maton logo, so obviously this meant I would need to clean, drop fill and level sand the headstock face being very careful not to sand through the gold logo sticker, and once it was ready to be sprayed over, stain or tint to blend the guitars body and neck to match the headstock face. Good plan but I was not sure how to proceed.

Fortunately for me along the way our good mate Joe Sustaire's posted images of a guitar he had built in THIS THREAD. (Thanks Joe 8)) Joe had applied Transtints to the top an achieved a great vintage look. The images above show the F1 ready for application of Transtints. I varied Joe’s chosen method of applying Transtins with water opting instead for one of the other suggested methods of application. This was to make a 50/50 lacquer thinners/metho mix with a dash of retarder or reducer to slow down the gas off and increase the open time during application and then dilute the Transtin dye with this solution. It was suggested that this method would avoid lifting the grain and upon application was found to work quite well.

Also I went with a stronger yellow/gold "honey amber" as a base colour for the top and then blended some well diluted reddish brown right across the top rather than working to highlight the outer edge for that burst effect Joe had achieved so well. My aim was to shoot for an ‘aged’ look rather than a true vintage look, after all PIG has only been around since 1973 not 1873, but more on that later.

Cheers

Kim

User avatar
Kim
Admin
Posts: 4372
Joined: Wed Sep 26, 2007 8:32 pm
Location: South of Perth WA

Post by Kim » Sat Sep 05, 2009 2:15 pm

I would like to share some images of the staining process but I did not take any. The process was quick and a little too messy to be handling the camera. Guess I should have taken a few once the stain was dry and the tape was off, but once again I did not think about it.

A couple of thing I will mention about the staining process before we move on is that it was quite easy to do. As explained the top was stained with a yellowish base colour and then over tones added with a well diluted darker reddish brown. The two were then blended with un-tinted application solution and left to dry. The back, sides, and neck were even easier as it was a simple matter of blending the various colours of Transtint in a jar and dilution with application solution, testing to make sure I was happy with the colour and applying the mix with a soaked rag in one hit. Total application time was about 5 minutes. Conclusion: Transtints = Grouse.

One other thing I will mention is that when I removed the masking tape it was found that the white of the purfling and the rosette looked 'stark' white and did not fit in at all well with the more aged look of the top and body. This was easily rectified by recharging the rag previously only charged with 'clean' application solution and used to blend in the top, to quickly run over the white in the purfling and rosette. This method used only the residual stain in that rag to do the job of tinting the purfling to a nice light nicotine colour and further adjustments were made with a clean rag and clean solution.

So with the Matey F1-11 now sanded and stained she was ready for finishing with nitro. Now I guess I could ‘try’ to explain that process in this thread but it would be pointless because the most practical and simple to follow online tute dealing with spraying equipment, technique and buffing that I have come across and the one which I followed to the letter is already right here at the ANZLF in the tutorial section. I am of course referring to Allen McFarlen’s two brilliant submissions on these topics. Pure gold info dealing mostly with surface preparation, spray gun set up and technique can be found in Part 1 and yet more gold dealing with the flatting back process and final buffing can be found in Part 2

A huge thanks to Allen McFarlen for breaking me free from the binds of ignorance which had so effectively prevented me from stepping up to the line and attempting to master this facet of my craft. I owe you beer :bh

So with the finish now on and curing there was time to address those other bits and pieces. For instance a truss rod cover had to be made for which I used a nice little bit of Minnerichi. A nut blank and saddle needed fitting for which I used Giraffe bone.....( don't ask where I got this, suffice to say it is beneficial to know during a midnight raid on the local zoo armed only with much rope, a tourniquet and a sharp knife that the Giraffe is in fact the only animal in the kingdom born without vocal chords :twisted:) OK....OK...The bone was actually sent to me by a friend in the USA whom whilst serving in Africa had collected it from the sun bleached skeletal remains of deceased animals which had succumbed to natural attrition on a protected nature reserve. The bone was collected with the assistance of the local game warden who was a keen guitarist and had agreed it was better used in the production of musical instruments rather than left to decompose in the sand.

There were also other jobs which needed doing, like cleaning up the original tuners so they could be reused and, to what I am sure will be howls of discontent, cleanup and modification of the original black plastic pickguard for refitting. I felt this was necessary as to my mind the pickguard was a big part of the tackiness of the original Maton F11 and was needed to maintain that ‘approachable’ look I was after.

Just to refresh the memory, here is a look at the original pickguard again, note the thick heavy square edged look…


Image


Image


It should also be noted that the original pickguard had been fitted to the guitar using 3 x self-tapping screws fixed right through the plywood top and this is also a look I wished to maintain however I was not prepared to go as far as drilling holes in the lutz top to accommodate. The solution was to first shape the inside radius to match the rosette, then thin the pickguard down using the thickness sander, re-polish with micromesh, widen and roughen the countersinks, cut the heads from 3 brass screws and glue them into place with black epoxy, then bevel or tapper the edge with sandpaper to give it some style, re-polish and apply self adhesive backing ready for fitting. This was a fair bit of work to bring this guard up to 'scratch'...........get it...GAURD up to SCRATCH....Scratch Guard.... :D Oh never mind..here is some more images..


Image


Image


I could not go any thinner with the pickguard because I needed to fit the screw heads a little 'below' the surface and I had cut them a thin as I could without making a big hole in the centre of them where the star is. I did however go back later and bevel the edge of the guard to a softer angle and that made it look much better.


Image


Anyhow.........next will be the finished product pics taken with the better of the two cameras being a Canon SX100is that Bob Connor put me onto quite cheap and very good bang for the buck thanks Bob 8) However I still need to compile a few images and put together a sound file but if you have any questions in the meantime, fire away...

Cheers

Kim
Last edited by Kim on Sat Sep 05, 2009 5:39 pm, edited 1 time in total.

User avatar
Allen
Blackwood
Posts: 5259
Joined: Thu Oct 11, 2007 5:39 pm
Location: Cairns, Australia
Contact:

Post by Allen » Sat Sep 05, 2009 5:05 pm

Very sweet Kim. I love the updated scratch guard. Looking forward to the unveiling.
Allen R. McFarlen
https://www.brguitars.com
Facebook
Cairns, Australia

Joe Sustaire
Myrtle
Posts: 92
Joined: Sun Nov 23, 2008 1:23 am
Location: Talihina Oklahoma
Contact:

Post by Joe Sustaire » Sat Sep 05, 2009 10:54 pm

Very cool trick with the pickguard Kim! I love the screwheads!

Joe
The only safe thing to do, is to take a chance! Mike Nichols

User avatar
Lillian
Blackwood
Posts: 1702
Joined: Fri Sep 28, 2007 10:31 pm
Location: New Mexico, USA
Contact:

Post by Lillian » Sun Sep 06, 2009 2:26 am

This has been such a cool thread Kim. I've really enjoyed watching you make a silk purse from bacon. I for one am glad you are keeping the pick guard with the screws. For whatever odd synapse firing, it reminds me of the Seattle Grunge scene.

User avatar
Nick
Blackwood
Posts: 3640
Joined: Thu Feb 26, 2009 11:20 am
Location: Christchurch, New Zealand
Contact:

Post by Nick » Sun Sep 06, 2009 9:10 am

It's all coming together beautifully Kim, can't wait to see your 'aged' guitar, Joe's came out so well so if you're employing the same technique then it should look great. Like the idea with the pickguard/screws...retains that original look without actually cheapening the top. Should this fall into somebody else's hands and they send it for repair, it should provide a few headscratching moments until they work out the screws don't go all the way through!
"Jesus Loves You."
Nice to hear in church but not in a Mexican prison.

User avatar
Mark McLean
Blackwood
Posts: 1161
Joined: Thu Apr 10, 2008 2:03 pm
Location: Sydney

Post by Mark McLean » Sun Sep 06, 2009 9:15 am

Thanks for this thread Kim. It has been fascinating and taught me a lot too. I have a Taylor Big Baby with a a similar neck joint - no heel and 2 screws straight through the fingerboard and into the headblock at the 16th fret. It makes the guitar a lot lighter and helps with access to the higher frets.

I love the idea of pretending to screw on the scratchplate - perverse but appealing too.

Can't wait to see the end result.
Mark

User avatar
Kim
Admin
Posts: 4372
Joined: Wed Sep 26, 2007 8:32 pm
Location: South of Perth WA

Post by Kim » Sun Sep 06, 2009 5:09 pm

Thanks folks glad some are finding it useful and other entertaining.

I have pretty much now compiled the images needed to finish this presentation and will post those shortly, but first there are a couple of things that I should cover and doing so will hopefully load a fresh page so I do not over load the current one with so many images. When I am ready to post the final pics, I will bump this page until we have a fresh one, if you wish to comment in between, feel free as it may save me a bump or two.


I had mentioned earlier that I wanted to make sure the neck remained easy to remove and replace to facilitate any future neck reset that may be required. When gluing the veneers either side of the neck tenon to centralise the neck in the body of the instrument, I could see then that the bindings either side of the neck pocket where going to be a problem as they would covered the exit path of those veneers during extraction. This meant that these two little bits of binding would need to be removed each time before attempting to remove the neck and that could prove to be a right PIA, especially if they were to get damaged in the process and need re cutting.

Whilst the rest of the bindings are plastic, the solution called for two small pieces of ebony to be cut and fitted into the binding scheme either side of the neck pocket. When I was happy with the fit, a small section of thin feeler gauge was then cut and bonded to the back of each ebony piece with epoxy.


Image


Next two very small iridium magnets were inlaid into each side of the neck pocket to sit just below the surface which supports the ebony binding piece.


Image


The idea here is that once you undo the two bolts inside the guitar and begin to extract the neck from it's pocket, the two veneers push upon the inside edge of the binding pieces and open them like a pair of bar room doors which allows you to grab them with your fingers and remove them, it works well.

After much futzing about, the pieces were made to fit with just a gentle push. Once happy, the ebony was prep sanded to sit slightly lower than the surrounding bindings and then finished with CA which once hardened in about 20 minutes, was then buffed to match the rest of the binding scheme. The above images where taken prior to final drop fill and buffing of the instrument so look a little rough.

Another post in a minute......

User avatar
Kim
Admin
Posts: 4372
Joined: Wed Sep 26, 2007 8:32 pm
Location: South of Perth WA

Post by Kim » Sun Sep 06, 2009 5:40 pm

Another thing I needed to sort out was entirely Allen McFarlen's fault because he forgot to tell me in his buffing tute I would need to be careful and hang on tight when buffing the neck. OK, he probably did mention that but he should have put it in bold red text :P


There I was happily buffing away when the foam buff on the drill press grabbed the neck out of my hands and quite literally threw the bloody thing out of the PA door of my shed which resulted in the pointy back edge of the fretboard being smashed off on the concrete and a big chip of finish being taken out of the back of the neck. The good thing was.....NOTHING! There was NOTHING at all that was good about this NOTHING!!! :x Bloody dog is lucky it's a fast runner or else I would have kicked it's arse a second time.


Image


Anyhow, after opening up the white pages choosing a name at random ringing them and telling them I was from the lottery commission and they had just one the big one and should come and pick up their cheque, I felt a little better. So I went back out the shed kicking the dog in the arse on the way, cut off the corner of the fretboard, cut a matching bit, glued it on, shaped it in, refinished the back and sides of the new bit with CA, drop filled the back of the neck with nitro and I was back where I started.....bloody dog.


Image


Those things now cleared up....I'll do some bump'in after dinner to get to a new page and post lots of images cause we all like images :D

User avatar
Allen
Blackwood
Posts: 5259
Joined: Thu Oct 11, 2007 5:39 pm
Location: Cairns, Australia
Contact:

Post by Allen » Sun Sep 06, 2009 5:44 pm

I JUST WON THE LOTTO :drink2

Got the call just a little while ago. My shout everyone.

:lmao
Allen R. McFarlen
https://www.brguitars.com
Facebook
Cairns, Australia

User avatar
Cam
Myrtle
Posts: 95
Joined: Sat Feb 28, 2009 3:37 pm
Location: Townsville

Post by Cam » Sun Sep 06, 2009 6:10 pm

:lol: How much did you win
Previously known as "guitarcam" :D

liam_fnq
Blackwood
Posts: 594
Joined: Tue Jun 02, 2009 4:54 pm

Post by liam_fnq » Sun Sep 06, 2009 6:14 pm

so the sooner we all write messages about nothing the sooner we all get to see the finished results.


hoorah!!!!! :git :git :git

User avatar
Kim
Admin
Posts: 4372
Joined: Wed Sep 26, 2007 8:32 pm
Location: South of Perth WA

Post by Kim » Sun Sep 06, 2009 6:50 pm

Phew!....

So here we are, as I said in the beginning probably more work than building a guitar from scratch. So, was it worth it??? You better believe it, cause I got the only Matey F1-11 PIG ever built and I love it :D

A sound file will need to wait cause right now I do not have a rig to record one with and the only others I have access to seem so complicated it takes the people who own them 1/2 a day just to record a 3 minute sound file and because I do not play well enough to do justice to the instrument, that time is not justifiable. But I do have a ZOOM H4n on the way so will hijack a good player and have a sound file up maybe next week.

How does it sound? Big and full 8) How does it play??? Bloody lovely 8)

Is it a great guitar? Probably not but it is a very good guitar and I am pretty happy. :D


Image


Image


Image


Image


Image


Image


Image


and more...
Last edited by Kim on Sun Sep 06, 2009 6:59 pm, edited 2 times in total.

User avatar
Kim
Admin
Posts: 4372
Joined: Wed Sep 26, 2007 8:32 pm
Location: South of Perth WA

Post by Kim » Sun Sep 06, 2009 6:53 pm

Image


Image


Image


Image


Image


Image


Image

and just a few more....

User avatar
Kim
Admin
Posts: 4372
Joined: Wed Sep 26, 2007 8:32 pm
Location: South of Perth WA

Post by Kim » Sun Sep 06, 2009 6:53 pm

The next few were taken to show a few aspects to indicate the success of the ICUT beam. The first is a close-up of the joint between the fretboard and the top.


Image


Next give an indication of the play action and neck to body joint..


Image


Oh and that pickguard...The new shiny screw heads received an ammonia treatment to age them up a bit so they fit the look.


Image


Back to eye candy:


The rose...


Image


The bridge....


Image


Image


The visitor...


Image


And last but not least, first with the first and the second with the second making it all worth while on Fathers Day :D ........


Image


Thanks for your patience everyone, if we learn one thing from the Matey F1-11 project I hope that its how much we all gain from the ANZLF because without all the people who so generously share their knowledge along the way, this old Maton F1 would have remained just another in a box of dusty bits taking up room in someone's shed.

Cheers all

Kim
Last edited by Kim on Sun Sep 06, 2009 11:24 pm, edited 2 times in total.

liam_fnq
Blackwood
Posts: 594
Joined: Tue Jun 02, 2009 4:54 pm

Post by liam_fnq » Sun Sep 06, 2009 7:13 pm

it certainly looks the part, kim. very retro. prob the flashest matey pig F1-11 in the whole land.

can you at least tell us if you are happy with the sound? is it decent?

User avatar
Kim
Admin
Posts: 4372
Joined: Wed Sep 26, 2007 8:32 pm
Location: South of Perth WA

Post by Kim » Sun Sep 06, 2009 7:30 pm

liam_fnq wrote: can you at least tell us if you are happy with the sound? is it decent?
Yes Liam, I am very happy with the sound. Like i said, big and full, much more so than you would expect from such a thin body. Very easy to pick up, and very hard to put down :D

User avatar
Allen
Blackwood
Posts: 5259
Joined: Thu Oct 11, 2007 5:39 pm
Location: Cairns, Australia
Contact:

Post by Allen » Sun Sep 06, 2009 7:34 pm

A couple of really nice guitars, and you've got to be just so pleased that the young ones can appreciate you're talents. Happy fathers day Kim. Thanks for taking the time to put this thread together.

I love the color that the top has ended up.
Allen R. McFarlen
https://www.brguitars.com
Facebook
Cairns, Australia

Post Reply

Who is online

Users browsing this forum: No registered users and 178 guests