Thanks for all the replies.
My belt sander jig is actually adjustable in pitch and yaw (the photo probably didn't show that).
The original question was more about how to plane a 5 deg back bevel on the neck cheeks after the initial pitch (~1-1.5 deg) has been shaved.
T+G seem to approach it by cutting the 5 deg back bevel on either a table saw or bandsaw and they then use chisels and shoulder plane to introduce the pitch corrections to satisfy the neck/body geometry.
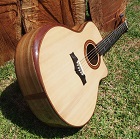
Anyway-none of that really matters now in my case as I have routed some material from the contact section of the heel (butt join) and what is left is pretty easy to floss after the excess material from the heel is removed as per pic below.
Thanks again
MK