Sorry for the lack of description earlier. I didn't want to get stuck on the computer/forums and take away from shop time. So a couple of months ago I bought a Bridge City Tools Jointmaker Pro. But the principles are the same if you make kerfing on a table saw. I started with clean "blanks" approximately 2"w x 0.25" h x 18" L. "Squiggle Wood" is essentially the same method of kerfing as A4 (Kerfs on opposing faces). If you want to be fascinated google/youtube "jointmaker pro" and watch the videos. This could be done on a table saw jig with a thin kerf blade. Make one pass and cut your desired kerf height. Flip the blank over 180 degrees and cut the kerf on that side. If you watch the squiggle wood video or have seen A4 kerfing before this will make more sense. Once all kerfs are completed on the alternating faces the entire 18" length, this is the secret, you then take that piece (18 x 2 x 0.25) over to the router with a cove bit and cut the cove on one face. Then take that now coved piece to the bandaw and pull a single 0.25" x 0.25" x 18" strip off the clean, kerfed, blank. The cut edge ends up being the surface which will mate with the soundboard or back which will be sanded in some later process (usually) anyway. Return to the cove router and cut another cove. Return to bandsaw and cut another strip. Continue until 2" width has been cut all the way through. Cutting the coves one at a time leaves enough material to cut the cove with minimal blowout. YES there was some tearout on the too many rpm spinning router. I slowed down and took less chunks of wood and this minimized it. Well worth the extra effort in my book. I believe the principles are the same as making regular kerfing on a table saw.
Summary:
1) Surface/sand/plane/clean ALL edges on your stock.
The wider the better in my book. The wider the stock = More kerfed strips with less work cutting more strips. Length is determined by the size instrument. Height = how tall (measured from soundboard to back) you want your kerf to be.
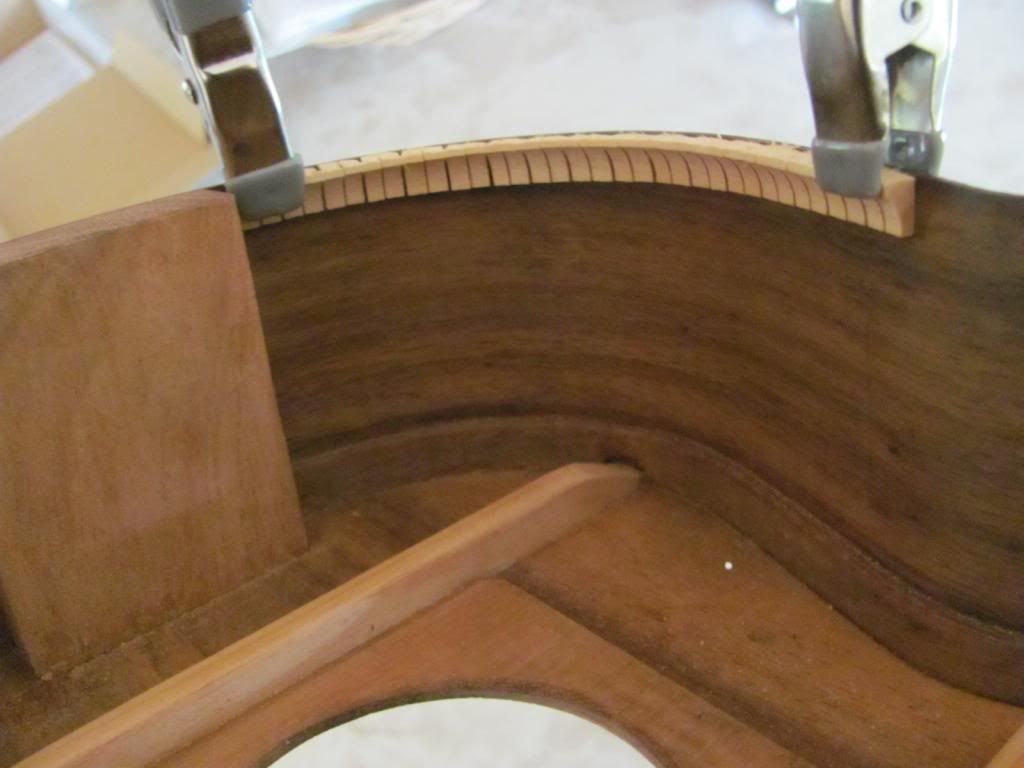
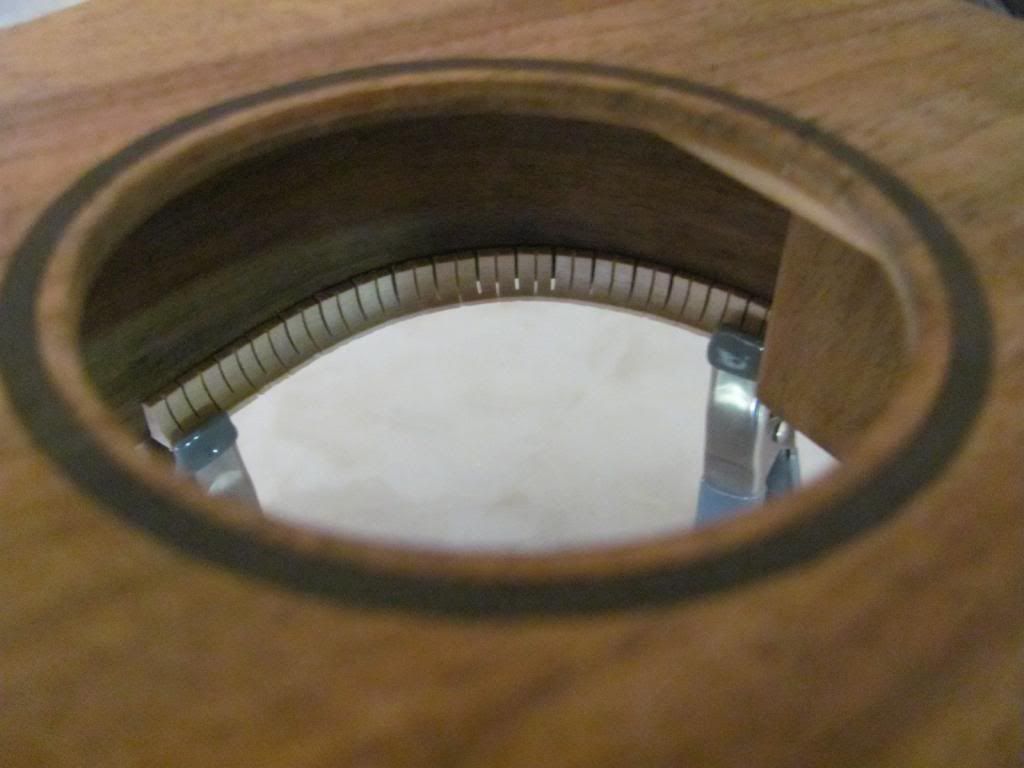
2) Cut kerfs.
Traditional single sided "rectangular" kerfs or Squiggle Wood/A4 like kerfs on alternating faces. I recommend a thin kerf (mine is .021) so maybe you could use your blade for cutting fret slots. A small blade kerf will keep the advantage of not exposing the unsightly glue and large gaps.
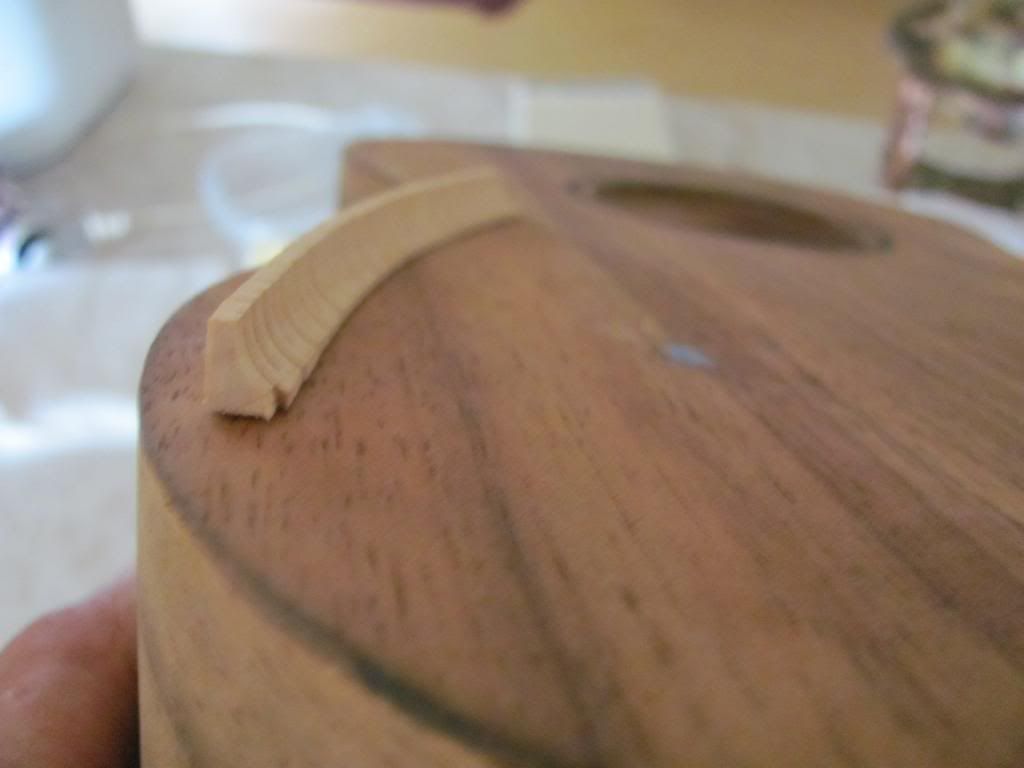
3) Cut Cove
Need to measure heights and fine tune your setup to get the "shelfs" that you desire. I think I used a 1/4" cove bit with bearing.
4) Cut Strip
I went with 1/4" width. Repeat this until you have a width of material that you feel is uncomfortably small and at that point cut rectangular strips on the bandsaw, so you get some of each type. You can use the less visible rectangular pieces on the soundboards since they are out of site (assuming you are okay with the added mass around the rim of the soundboard)
5) Repeat Steps 3 & 4 until you are done.
Advantages
1) All the advantages of A4 (quick install, flexible in all axis', minimal visibility of glue through the kerfs)
2) Cut to custom ukulele sizing
3) Added aesthetic appeal with the cove
4) Should be amenable to your current table saw cut kerfing process by just adding step #3. If cutting kerfs on the bandsaw may be possible if you are cutting wider blanks as opposed to individual strips. Key to the cove in my opinion is keeping the blank widths wider to cut the cove.
Disadvantages
1) More time (router, bandsaw, router, bandsaw)
Disclaimer
I took a hiatus from building ukuleles and returned to it in November of 2013. I use the term squiggle wood because I got the idea for this after watching one of those Bridge City tools (no affiliation other than tool owner) videos. They also sell a hand plane which has a cove bit. Those two images yielded this project. I later became aware of A4 kerfing. No disrespect is intended in avoiding the use of A4 in the name I am simply acknowledging the "genealogy" of my thought process. Furthermore none of this was processed on a laser, but I am going to try that next

More questions or clarifications? Thanks for all the positive feedback. Don't mind constructive criticism either. I want to improve the design (without adding complication)