Hi everyone,
I'm currently on my second classical build. All had been going really well. This morning I glued on the top - it didn't go on so great - a bit of a gap between the top and the linnings on both sides of the lower bout. The outside edge glued well but the inside edge did not - as I used the elastic tape method to apply pressure while gluing, and did not trim the overhang of the top, I'm pretty sure this is the reason for the poor gluing.
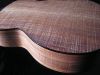
Anyway, the main problem I have that I would really appreciate some advise with is that the top that is radiused at 25' is sunken over the bridge. Will the gluing on of the radiused bridge using an appropriately radiused caul rectify this, or am I creating too many apposing forces which might end in disaster once time and tension take effect?
Thanks,
Paul.
loss of radius

Re: loss of radius
Sounds like there are two problems you have there. The first being the top glue-up not going well . Take the top back off is the answer .You don't mention what sort of glue you used , but the use of heat will usually soften up most glues .
Next time you glue it on use a better method of clamping. I think you're right about the use of elastic tapes and too much overhang being the culprit to your poor glue-up. Better to use clamps ,although there are many other methods of glueing tops and backs. Some even use go-bars and a go-bar deck .
What sort of glue did you use ? You have to work fairly swiftly with most glues to get the top and sides together before the glue gells so a dry rehearsal is always a good idea .
Your other problem of losing your radius is probably humidity related. i.e. glueing the top on under high humidity . When the humidity drops , so will the soundboard radius .
It's very important to have humidity around 40 - 50 % before doing glue-ups .
Don't try glueing on your bridge until you have the box glued up under the correct humidity conditions . . once again ,when the humidity is around 40 % - 50 %
Craig Lawrence

Re: loss of radius
If you're not going to use clamps then next best method is roping up using either dressmakers bias binding tape or macrame rope. My first two classicals were made using this method to fix the back on. Note that even with the rope up method I still use clamps over the heel block and spanish foot to ensure a good glue up.
Take the back off and check that the linings are profiled properly before regluing using clamps or above method.
Take the back off and check that the linings are profiled properly before regluing using clamps or above method.
Martin
-
J.F. Custom

- Blackwood
- Posts: 778
- Joined: Fri May 01, 2009 9:13 pm
- Location: Brisbane
- Contact:
Re: loss of radius
Humidity certainly sounds like the issue at hand.
Unless you are certain otherwise, it's probably not just the humidity in which you glued the top, but also that in which you glued the braces themselves.
Sorry to say but the grief involved in removing and redoing the top now is still likely less than that if you left it as is...
Jeremy.
Unless you are certain otherwise, it's probably not just the humidity in which you glued the top, but also that in which you glued the braces themselves.
Sorry to say but the grief involved in removing and redoing the top now is still likely less than that if you left it as is...
Jeremy.
Re: loss of radius
Good catch Jeremy !! , Something I overlooked with my above reply.J.F. Custom wrote:
Unless you are certain otherwise, it's probably not just the humidity in which you glued the top, but also that in which you glued the braces themselves.
Jeremy.
Unless the braces were glued on at 40 %- 50 % humidity they too will have to be removed .
Craig Lawrence
Re: loss of radius
Thanks for the advice guys,
Craig, the glue I used was titebond - I did start to take the top off by inserting a hot knife in the join, there was really only a small section that was not glued well. The knife method worked ok, but I still managed to f$%k it up, I cracked the back, and then the centre join seperated when I did the heel - Thinking I was going to destroy my work over something that was not so dire I decided to clean up my mess and glued it back down withe some epoxy.
What is the best method to use to remove the top?
Martin, I used bicycle innertubes cut into strips and tied together to give me a few metres to work with - I have found them pretty good in the past - I also used clamps and blocks on the foot and heel. I radiused the linnings using a large radiused sanding block - This is really the only thing in the building process that I still scratch my head at and say under my breath, " I don't know what the f$%k I'm doing" ie how do you find the level at which the lower bouts and the heel should be ?
Jeremy, Everthing was done at about 50% humidity. I only radiused the transverse braces though. When I glued on the bridge patch, I glued it on flat - Should I have glued it on the 25' radius? I didn't with my first and everthing worked out well, so I just presumed I had got it right with my first build - did I just fluke it? Another issue withe the bridge patch might have come when I first attemted to glue it on - I didn't achieve an even pressure with the caul, so I removed it quickly and cleaned all the titebond off with water and let it dry and reglued it latter in the day - It stay flat not inverted though. At the moment it is still pretty much flat ie ever so slightly inverted.
Thanks for the imput guys - its always a great help.
Paul.
Re: loss of radius
Paul,
It sounds like you're not using Spanish Method for this build...is this correct?
It sounds like you're not using Spanish Method for this build...is this correct?
Martin
Re: loss of radius
Heat is the answer Paul . Your hot knife method sounds good . Maybe some additional hot air or a cloths iron , but watch for scorching . Just take your time, go slow, and be very patient.pavliku wrote: Craig, the glue I used was titebond -
What is the best method to use to remove the top?
Paul.
Your removing the bridge patch and cleaning up with water before reglueing ( MAY ) have caused problems with the bridge area , water would swell that area . Unless it was dry thoroughly to match the surrounding soundboard it ( MAY ) cause trouble.
I'm not sure I understand your soundboard radius situation. You say you have a radius of 25 ' and then say you only radiused the transverse braces ?
I don't really like the method of elastic tape or binding to glue down the top or back plates because of the problems you have already encountered . There's also a good chance of the plates radius being altered .
You've had a few hick-ups there Paul , but don't despair . If it all seems too much at the moment , take a break and it will seem easier at a later date . These little problems will be ones you won't make in the future , so that's " All Good " !
Craig Lawrence
-
Trevor Gore

- Blackwood
- Posts: 1639
- Joined: Mon Jun 20, 2011 8:11 pm
Re: loss of radius
Paul,
It sounds like you're not following any specific build process. I would suggest that you have a think about things, all the way through, and come up with one, which is hard if you don't have a lot of experience, or find someone close who can help you out, or get a decent book and stick to its procedures. It'll save you a lot of frustration down the track.
It sounds like you're not following any specific build process. I would suggest that you have a think about things, all the way through, and come up with one, which is hard if you don't have a lot of experience, or find someone close who can help you out, or get a decent book and stick to its procedures. It'll save you a lot of frustration down the track.
Fine classical and steel string guitars
Trevor Gore, Luthier. Australian hand made acoustic guitars, classical guitars; custom guitar design and build; guitar design instruction.
Trevor Gore, Luthier. Australian hand made acoustic guitars, classical guitars; custom guitar design and build; guitar design instruction.
Re: loss of radius
The main source's of information I have been using are Jim Williams book and Erving Sloans'. Mostly I have followed Jim Williams' book, but wished to make a soundboard with a radius, so I "intermingled" a few ideas.
In Sloans book he never mentioned radiusing the bridge patch or braces (except the transverse braces). As my first guitar came out really well (curves in all the right places) I presumed I did the right things - I think now it must have been the will of the gods.
So my build deviated from Williams with regard to gluing on the top face down on the workboard with tentillones - instead I glued on the linings first (top and bottom) then the top. More or less Sloans method.
The consensus of the members was that a radiused top was the better opption (as per previous post of mine) So I deviated from the manual - no blame is intended by me saying this, just an explination of my M O.
I really don't want to take the top off - if it fails latter, then so be it, the top can be replaced with another (its only recycled wood).
But, should I advance with a flat bridge - being that it is flat over the bridge patch at the moment. Or should I try to pull it up a bit with a radiused bridge?
Your right about taking a break Craig.
Paul
Re: loss of radius
Hi Paul,pavliku wrote:The main source's of information I have been using are Jim Williams book and Erving Sloans'. Mostly I have followed Jim Williams' book, but wished to make a soundboard with a radius, so I "intermingled" a few ideas.
In Sloans book he never mentioned radiusing the bridge patch or braces (except the transverse braces). As my first guitar came out really well (curves in all the right places) I presumed I did the right things - I think now it must have been the will of the gods.
So my build deviated from Williams with regard to gluing on the top face down on the workboard with tentillones - instead I glued on the linings first (top and bottom) then the top. More or less Sloans method.
To clarify, you had the top (with neck attached to same) face down on a dished workboard with the sides in place and you then glued in the kerfed lining?
Martin
Re: loss of radius
Yes thats correct - the workboard was a flat plastic mould though.
I lined it all up via the centre line drawn on the workboard set mould, clamped, glued back lining, turned over, reset along line, clamped glued top lining. That part came out well.
Martin, can you explain to me a little of your process, and what book would be a good manual to follow? - I had Bogdanovichs (spellings not right) out from the library a couple of times - have not followed it as a complete manual. He was making laminated sides - I don't really want to go down that road - would it still be a good manual to follow? The library is about a hundred kms away so I can't really get it out conviently.
I'm gonna take a look at some bookstores online now to see if I can find something.
Re: loss of radius
Are these two any good?
Making master guitars, by Roy Courtnell
Step by step guitar making, by Alex Willis
The same shop also had Bogdanovich's book.
Making master guitars, by Roy Courtnell
Step by step guitar making, by Alex Willis
The same shop also had Bogdanovich's book.
Re: loss of radius
If you are mixing methods like that, make sure you understand the implications of the doming on the neck angle BEFORE you glue on the back.
Re: loss of radius
Courtnell's book is my favourite for making classicals.pavliku wrote:Are these two any good?
Making master guitars, by Roy Courtnell
Step by step guitar making, by Alex Willis
The same shop also had Bogdanovich's book.
Martin
Re: loss of radius
I build my classicals using the Spanish method. I use a workboard that is dished to produce doming in the bridge/Lower bout area of the top. The part of the workboard that supports the neck has a slight angle in it so the neck ends up with a slight positive rake.pavliku wrote: Martin, can you explain to me a little of your process, and what book would be a good manual to follow?
Top and neck get done first and then joined and then laid out on the workboard. Sides are hand bent and fixed to top with tantalones. I then profile the sides and kerfed linings with a sandpaper lined 15' radius dish before gluing on the back. At this stage the guitar comes off the workboard and bindings get done. French Polishing is carried out and then the bridge gets glued on.
Martin
Re: loss of radius
Thanks for that Martin,
Is this your own method, or one explained in an avaliable manual?
I bought Cumpianos book on the net last night - hope it's a good one- read a couple of good reviewes. It wasn't exspensive so I havn't much to loose if it's not.
At the moment I'm following Graigs advice, ie, I'm staying away from it to clear my head.
Re: loss of radius
Courtnall pretty much follows this method.pavliku wrote:Thanks for that Martin,
Is this your own method, or one explained in an avaliable manual?
I bought Cumpianos book on the net last night - hope it's a good one- read a couple of good reviewes. It wasn't exspensive so I havn't much to loose if it's not.
At the moment I'm following Graigs advice, ie, I'm staying away from it to clear my head.
Note that Cumpianos book is a bit dated in places and he provides updates to same on his website. The M and T neck joint he describes in his book is also obselete.
Martin
Re: loss of radius
Oh thats disapointing. I'll have to get the other sometime - havn't got the money at the moment, especially if I have to pay for that bandsaw.
Re: loss of radius
Cumpiano's book is fine as a starting point, just make sure you read the updates on his website (http://www.cumpiano.com/Home/Book/textbook.html) and don't treat Cumpiano's method as the only way of building a guitar.
My building process is influenced by numerous books and people.....including many who post in here.
My building process is influenced by numerous books and people.....including many who post in here.
Martin
-
woodrat
- Blackwood
- Posts: 1154
- Joined: Tue Nov 25, 2008 6:31 am
- Location: Hastings River, NSW.
- Contact:
Re: loss of radius
Paul, I bought Alex Willis' book and would not recommend it. I would recommend Messrs Cumpiano and Natelson's book though as a great starting place as it is pretty comprehensive. Jonathan Kinkaids book was helpful although there are somethings that I dont like about it...read dovetail Neck Joint there...I started using molds after I bought his though.
John
John
"It's never too late to be what you might have been " - George Eliot
Re: loss of radius
kiwigeo wrote:Cumpiano's book is fine as a starting point, just make sure you read the updates on his website (http://www.cumpiano.com/Home/Book/textbook.html) and don't treat Cumpiano's method as the only way of building a guitar.
My building process is influenced by numerous books and people.....including many who post in here.
+1 for Cumpiano for a rank beginner.
Speaking as one who came into this as a (reasonably) competent woodworker, and musical/guitar ignoramus, what I found was if you follow him exactly, (making allowances for some typos which are addressed on his website), it is possible to get a credible build; an instrument which will look and sound good. There is nothing missing or requiring inference in terms of dimensions or techniques to set you wrong.
If I continue building, and become more confident in the alternatives out there, I may explore other techniques, but he has served this hamfisted individual well to date.
That said, the one thing I did take on board from this board was that his guitars are conservatively overbuilt. In terms of the soundbox, I built at or slightly below his minimum specs for all plate thicknesses, and bracing. I'm told it sounds good, and the durability will have to be seen with time.
Regards
Alastair
Alastair
Re: loss of radius
I used Kinkade's book and method for making mine--well still making it, but in the final leg--I hope 
I found his technique for gluing the top and back on very easy, though I did spend quite a bit of time making sure the top and back sat very flush both inside and out on the sides and kerfing.
Using 6mm mdf for the clamping caul and about 35 roofing screws to attach it to the mold worked very nicely. All the edges fit beautifully and it's as solid as a rock, no gaps or odd spots.
Someone replies to another post of mine that they made a hash of the method, but I can't remember who, nor what the issue was.
i also made the--evidently--cardinal sin of working without a controlled environment, but have had not repercussions so far. All the domes and shapes are holdong together....
That said, I am going to buy a case with a built-in hygrometer to keep it at around 60% humidity while stored, and am not going to leave this one out, particularly when it's getting dry....NOT a problem this year.
Good luck,
Nick
I wish I was half the man my dog thinks I am....
Cheers,
Nick
https://www.facebook.com/pages/DMI-hand ... 744?ref=hl
Cheers,
Nick
https://www.facebook.com/pages/DMI-hand ... 744?ref=hl
Re: loss of radius
I had major problems with Kincaid's method of clamping up top and back:nnickusa wrote: Using 6mm mdf for the clamping caul and about 35 roofing screws to attach it to the mold worked very nicely. All the edges fit beautifully and it's as solid as a rock, no gaps or odd spots.
Someone replies to another post of mine that they made a hash of the method, but I can't remember who, nor what the issue was.
1. screwing in 35 screws takes ages even with a battery drill.
2. the 6mm MDF didnt bend exactly with the dome of the back and clamping pressure wasnt even over the caul.
3. the caul overhangs the top/back so checking for gaps and squeeze out and clean up is impossible.
I'd go as far as to say Kincaides method of clamping backs and tops sucks.....clamps are much easier and in the long run after a few builds would probably be cheaper.
Martin
Re: loss of radius
All points taken. Eventually I'll probably invest in a HUGE PILE OF CLAMPS, but it worked well for me, and a cotton bud allowed me access for glue clean up. As I was binding, I didn't thinki the small amount of squeeze-out I didn't get was an issue. I thought about using the go-bar dish for clamping, but it would have really only worked on the top, as it's not tapered.
What I really liked was that the sides were held in the mold, allowing them to be as close to the shape they were meant to be as possible. (Well as close as I could get them, anyway. I had the sides set about 50mm proud of the top of the mold on each clamp and access was a breeze.
When you glue up, do you do the top and back at the same time?
Sorry for the random questions, I'm new at this
I wish I was half the man my dog thinks I am....
Cheers,
Nick
https://www.facebook.com/pages/DMI-hand ... 744?ref=hl
Cheers,
Nick
https://www.facebook.com/pages/DMI-hand ... 744?ref=hl
Who is online
Users browsing this forum: Google and 51 guests