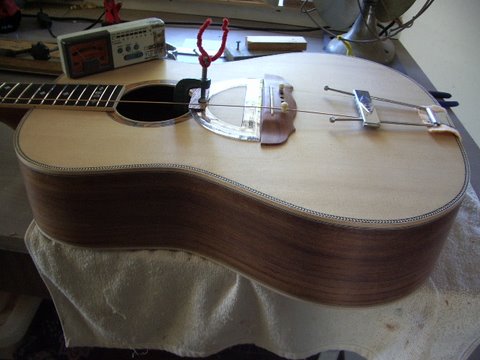
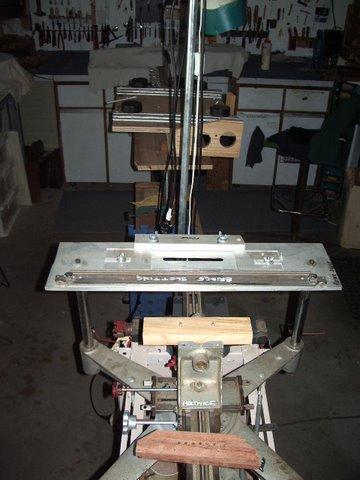
I will also show my process of making my bridges, possible nothing new here but Ill show it anyway as it leads into the role of the Multivise.
The Multivise started out life as an engraving tool. It had 100’s of brass plate with different letters on them. These were placed in a jig and a pantograph type of operation copied this on to the item being engraved. For me it will hold any instrument from a violin to a double bass, with the selection of jigs I have made. So let me start with the bridge part of its function. Let me say that if you don’t have one of these little jiggers in the back shed, then Allen’s post on bridge slotting is ideal.
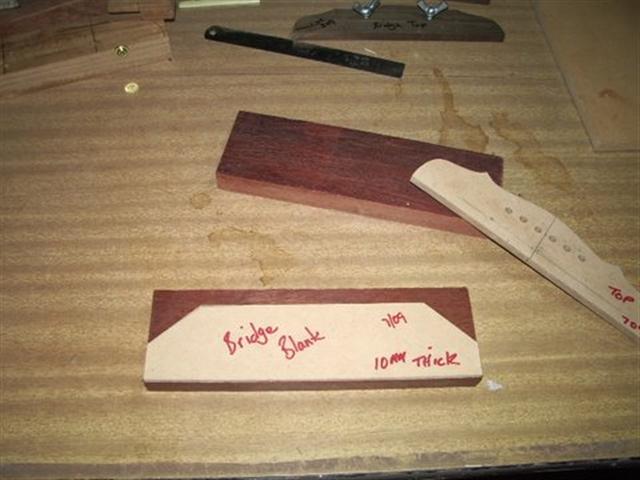
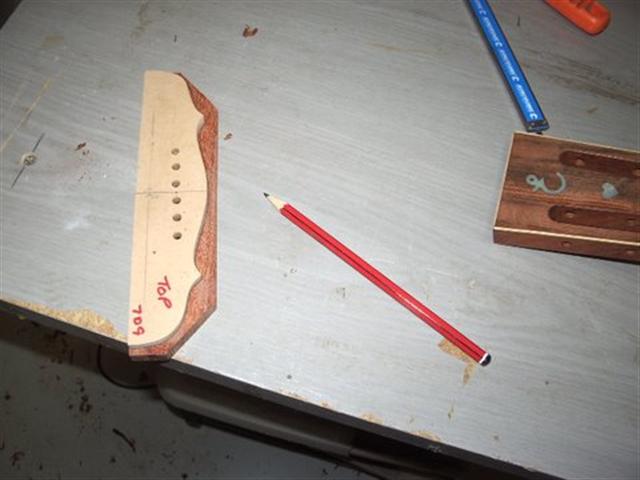
1- Shows bridge blank and template for marking.
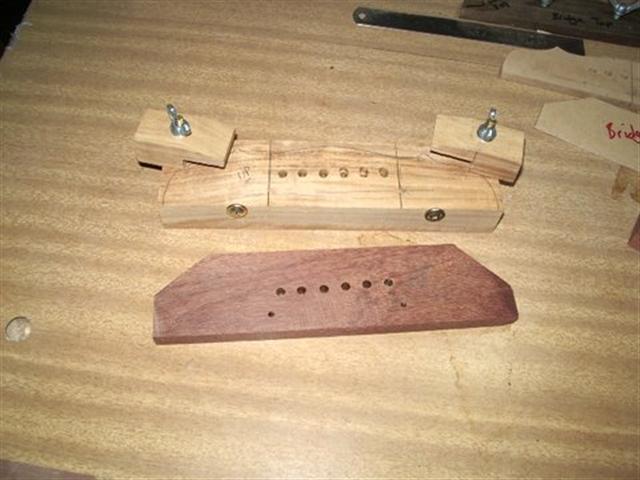
2- Blank cut to fit into drilling jig, the underside if this jig has the holes that locate into a pin in my drill presses adapter table
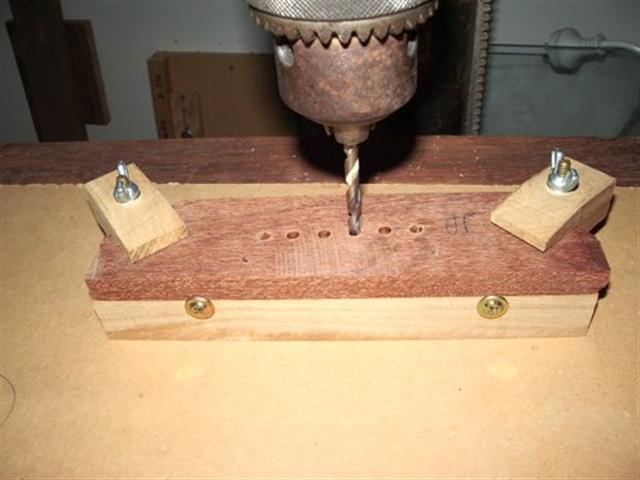
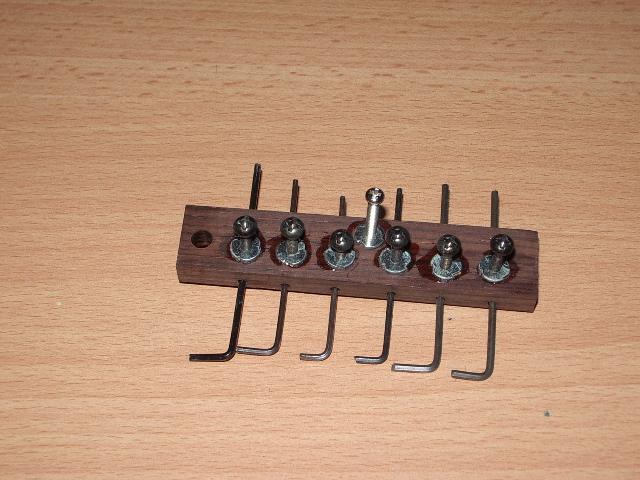
3- Assembly in drill press pin lined up with drill bit. I drill the pin holes and two holes, one each end of the saddle slot position. For different compensation I would use a different jig.
4- Show the prepared blank with bridge holder sitting in the jaws of the machine. I found that I did not need the bridge holder as I can put the blank in the jaws themselves, they have a ledge that will support the blank from underneath and then of course clamped from the sides.
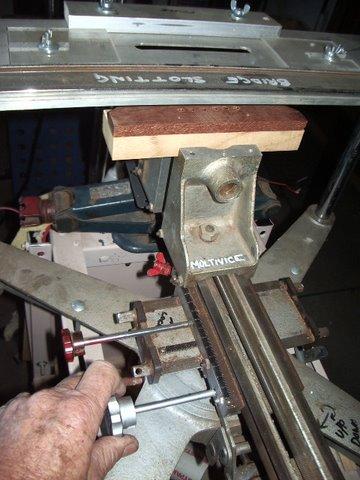
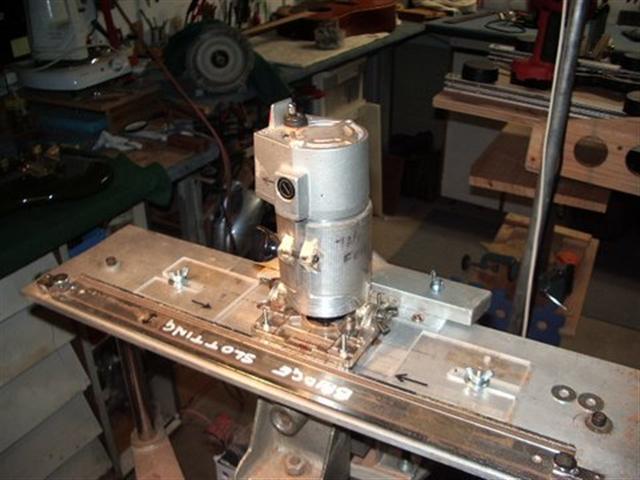
5- This the knob that winds the assembly back under the router table, the knob in front of that locks the assembly

6- This handle winds the vise with the blank up under the table, so setting the height in small increments as I router. Far quicker with finer tuning than changing the router base
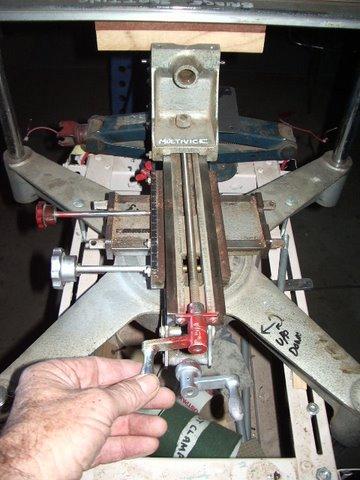
7- Shows the handle that winds the vise jaws in and out. The carriage on which the jaws travel is seen in the foreground with the threaded screw, this is the same on the other side so you can imagine how wide these jaws will open.
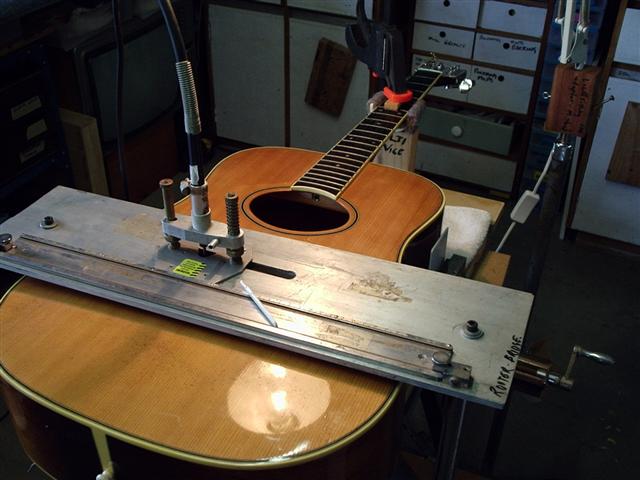
8- This shows the blank under the table, at the wrong angle of course. This is the beauty of this devise I can change the compensation angle at will. Not only can I slide the jaws from side to side under the table, the whole vise assembly can rotate a full 360 deg.
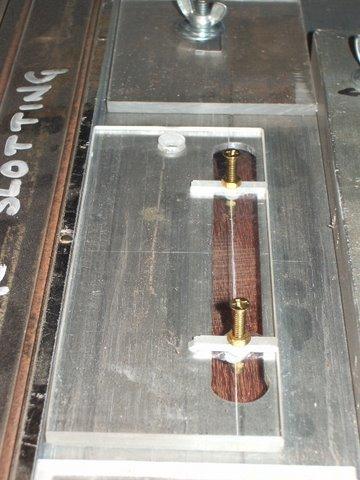
9- I then place my saddle line up jig on the table, slide the bridge into position in the jaws and swing the carriage to the compensation angle indicated by the two hole in the blank.
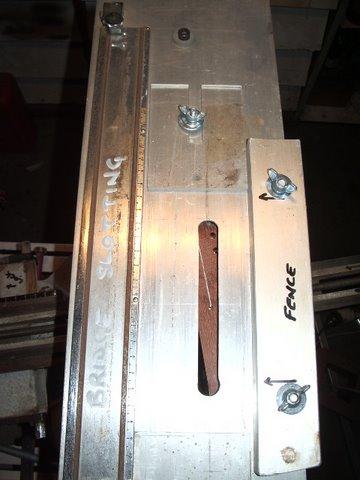
The routing process is one pass between the Perspex stops, raise vise, another pass and so on until the desired depth it reached
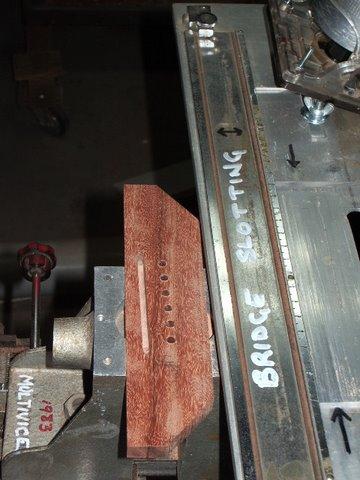
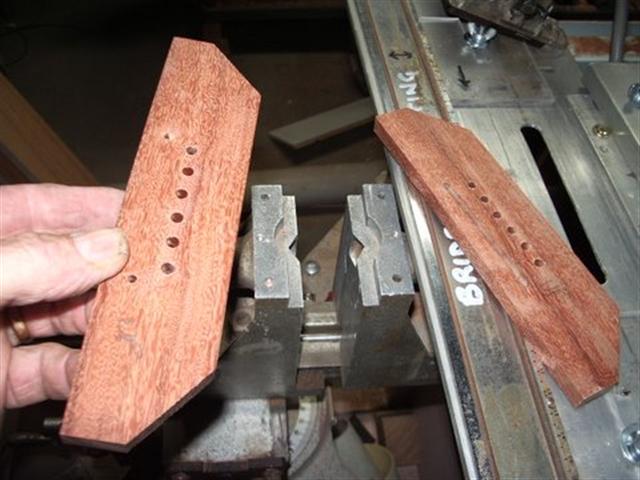
Wined down and out the slotted blank, open the jaws and in with the new one, repeat the process above.
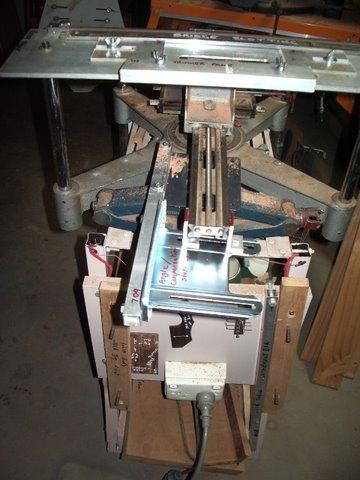
13- This shows the other side of the Multivise. I’ve fitted a devise here to hold the compensation angle when the assembly is unclamped and raised to deepen the slot cut.
Well that’s the Multivise, I love it. I might as well carry on with the bridge process; somebody new may get something out of it.
14- Marking the bridge outline
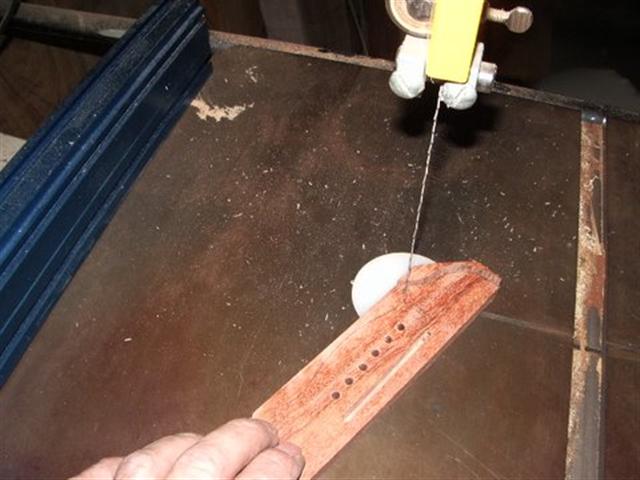
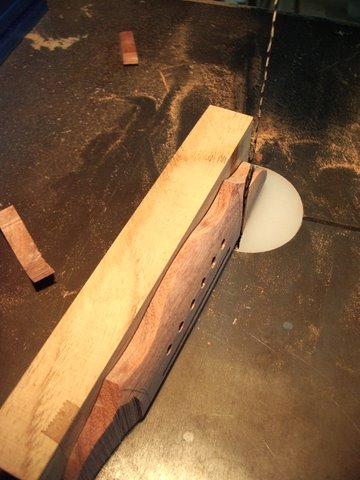
15- Bandsaw the shape

16- Sand to the line
17- Bandsaw the wings
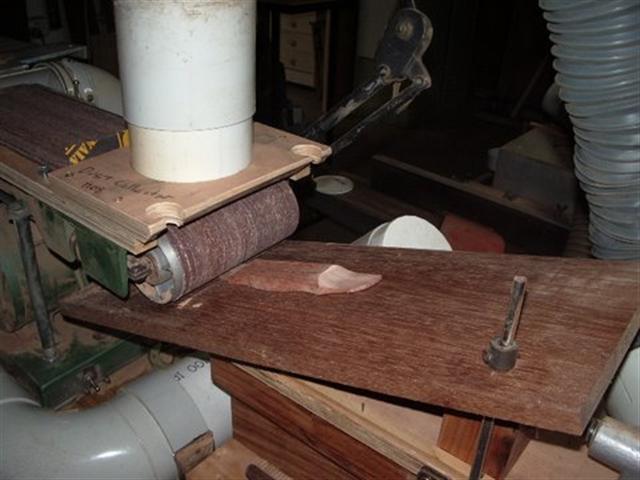
Sand the wings
From then on it’s hand carving to get the bulk off and lighten the bridge
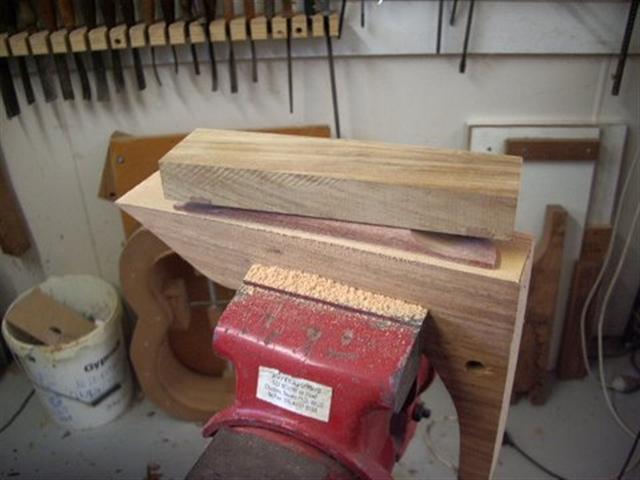
Using my radius block to get the bridge base to match the top radius. The block of wood is seen at times though out the build it has two metal pins in it that locate in the bridge pin hole for easier handling.
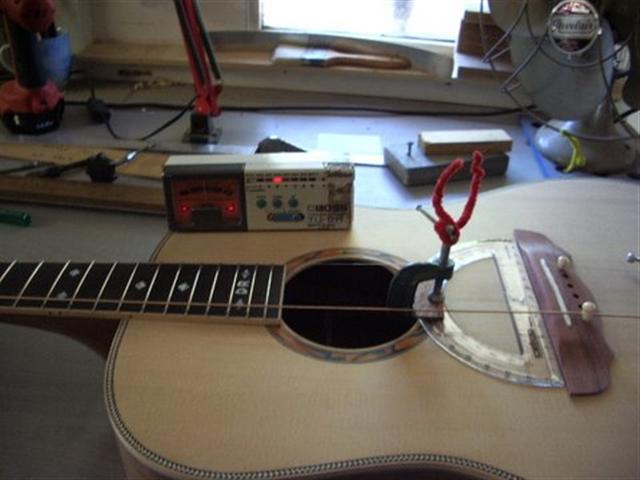
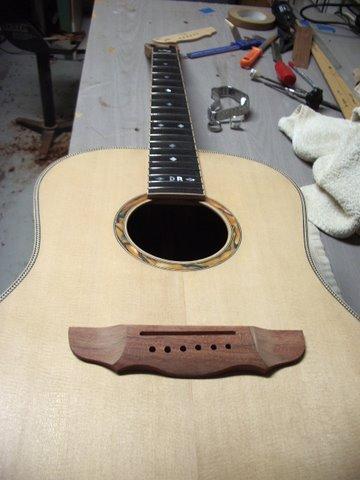
21- Checking the intonation, plotting bridge position….looks like I got it right.
Took me two cups of coffee to do this presentation, hope you enjoy.