Hi All
Another couple of quick questions
Is there any reason why kerfing/linings can’t just be steam bent instead of cutting all those little nicks out of them? (seems like a lot of work with a hand saw).
Bindings… I’m using silky oak and would like to sandwich some 1mm rosewood between the binding and the top and sides. The top seems easy enough but how the $%%^# do you guys get it around the sides??? I tried gluing it to a binding strip but when I bent it the glue gave out and the rosewood splintered.
Cheers and merry New Year
James
Help! Bindings and lining questions
-
Bob Connor

- Admin
- Posts: 3115
- Joined: Mon Jul 09, 2007 9:43 pm
- Location: Geelong, Australia
- Contact:
Re: Help! Bindings and lining questions
They sure can be steam bent. A lot of top end classicals are built like this.James Mc wrote:Hi All
Is there any reason why kerfing/linings can’t just be steam bent instead of cutting all those little nicks out of them? (seems like a lot of work with a hand saw).
Try using Titebond 3. Gives way at a much higher temperature.James Mc wrote:
Bindings… I’m using silky oak and would like to sandwich some 1mm rosewood between the binding and the top and sides. The top seems easy enough but how the $%%^# do you guys get it around the sides??? I tried gluing it to a binding strip but when I bent it the glue gave out and the rosewood splintered.


I did about 7 instruments with laminated linings. They look good, are stiff as, but a lot of work. Standard kerfed linings are the easiest to install. Reverse kerf have a tendency to want to snap in the tight bends, so I've been steam bending them to get them to relax a bit.
Steam bending the linings will be great practice for doing the bindings.
To bend bindings with a purfling on the bottom I've found going very easy on the hot pipe is the best bet. Take it real slow.
Alternately, for ones that I know are just going to be a nightmare, I glue them in prior to the binding. Ease them in place. Hold them with whatever tool will work, and give them a small wick of CA. then move on to the next inch or so. Then install the binding and top purfling. I had to do this on the guitar with the arm rest. Too many pieces and miters to contend with in one go.
Yep good old chunk of steel pipe for bending. I'm using yellow cedar for the linings so should bend easy enough.
Titebond 3 will have to wait until tomorrow... so much for the fantasy of getting to the binding stage tonight. It is amazing how much more you get done when the better half is off doing Christmas with the family. I was going great guns until I had to figure out how to get a 1mm thick strip to bend around the guitar. My next attempt was going to be to cut strips 3mm x 3mm strips bend then and then sand down to 1 mm.
Titebond 3 will have to wait until tomorrow... so much for the fantasy of getting to the binding stage tonight. It is amazing how much more you get done when the better half is off doing Christmas with the family. I was going great guns until I had to figure out how to get a 1mm thick strip to bend around the guitar. My next attempt was going to be to cut strips 3mm x 3mm strips bend then and then sand down to 1 mm.
Just a tip Allen,Allen wrote:Reverse kerf have a tendency to want to snap in the tight bends, so I've been steam bending them to get them to relax a bit.
If you soak your reverse kerfed linings for a few minutes and then clamp them in place with the unkerfed face against the 'OUTSIDE' of the side they are intended to go on with your lining clamps, you will find when they dry in an hour or so you can swing them straight over to the inside and they won't break. Just add glue, re-clamp and your done.
Cheers
Kim
-
Bob Connor
- Admin
- Posts: 3115
- Joined: Mon Jul 09, 2007 9:43 pm
- Location: Geelong, Australia
- Contact:
I just throw my reversed kerfed linings (Mahogany) in a tub of very hot water for about 60 seconds, or, if you are picky...., about one minute..... 
Then I pad them dry on some paper towels that I had laid out in advance.
If you are using the linings that are not long enough to do an entire guitar side with one piece cut them so that where they butt together is on a flat spot as opposed to the apex of a curve.
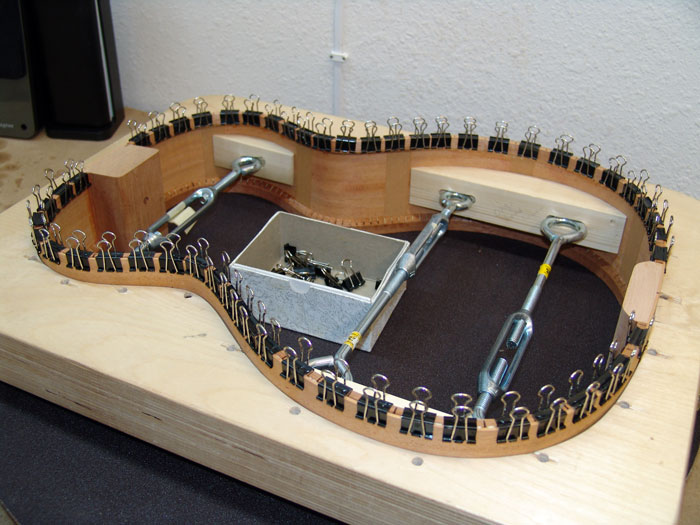
Then I butter them up with Titebond (original) and clamp them in place with binding clips from an office supply store or stolen from your employer.....
If you are really into a good fit, and I am, you may want to kiss the ends where they will butt the blocks with a sanding block so as to have a gapless butt. Gapless butt........ well never mind......
I glue them on 1/32 - 1/16" proud of the rim and this is AFTER the rim has been sanded in the radius dish. It is far quicker and easier to sand the rim in the dish pre-linings and then just hit it again after the linings are installed.
Then I pad them dry on some paper towels that I had laid out in advance.
If you are using the linings that are not long enough to do an entire guitar side with one piece cut them so that where they butt together is on a flat spot as opposed to the apex of a curve.
Then I butter them up with Titebond (original) and clamp them in place with binding clips from an office supply store or stolen from your employer.....
If you are really into a good fit, and I am, you may want to kiss the ends where they will butt the blocks with a sanding block so as to have a gapless butt. Gapless butt........ well never mind......
I glue them on 1/32 - 1/16" proud of the rim and this is AFTER the rim has been sanded in the radius dish. It is far quicker and easier to sand the rim in the dish pre-linings and then just hit it again after the linings are installed.

Who is online
Users browsing this forum: No registered users and 146 guests